Tag-Archive for ◊ working with the Veritas scraping plane series ◊

Author:
• Tuesday, July 20th, 2010

If you’ve read the two previous posts on this topic, you might think that I’ve thus settled contentedly into scraping plane heaven. Not quite, there is one more thing.

The scraping plane is generally thought of as a finishing tool, analogous to a smoothing plane, suited for difficult, figured, dense woods that are prone to dreaded tearout. However, there are times when I use the scraping plane one step prior to finishing the surface. I will explain.

Like most woodworkers, I dimension almost all my wood by machine. With figured woods, shallow tearout often remains despite using good technique and well-tuned machinery. One method to get rid of this shallow tearout would be to first use the jack plane cross grain, possibly initially with a toothed blade, then go to the scraping plane.

Now I’ve got another option that is on a finer scale. I have prepared one of my Hock scraping plane blades with what I will call “microtoothing.” This toothed blade is not quite like those that are commercially available and often used to prepare a substrate for hammer veneering. I abrade, lengthwise, the unbeveled side of a 0.094″ thick Hock blade using a coarse file and very coarse abrasive paper, then make very shallow cuts with a fine saw file, about 20 or more per inch. I then file and medium hone the 45̊ bevel and burnish as usual at 15̊.

The photo below shows the microtoothed blade below a conventionally prepared blade.
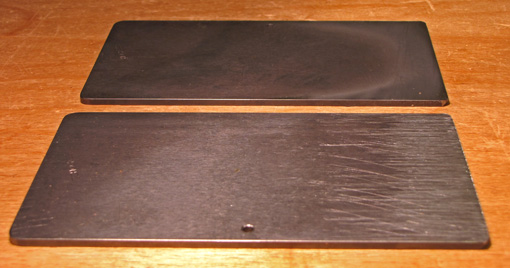
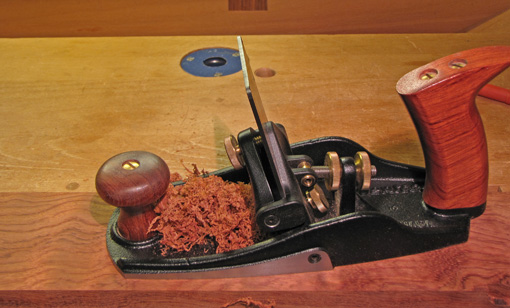
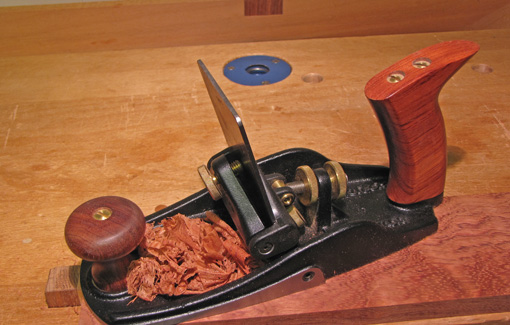
The result is not a dull scraper. It is sharp, but has “microteeth.” It does not produce dust, as would a dull scraper blade, but rather shavings that resemble ultra thin cheese shreddings. (See photo at top.) The fine or coarse serrations split the shavings at every depth of cut. The huge advantage is the extremely smooth cutting action. There’s never a hang-up, slice, or chatter. The plane can be worked back and forth on the wood with abandon. The very shallow ridges that remain on the wood are quickly dispensed with by a conventionally prepared blade in the scraping plane.

This has been a very effective way to reliably remove shallow tearout with the scraping plane in the worst of woods. I use it when the jack plane procedure would be too much, but going to a clean, conventionally sharpened scraping plane blade would take too many fastidious passes. It has even allowed me to do away with thoughts of purchasing a drum sander.

Author:
• Sunday, July 18th, 2010

Now for the blades. Veritas offers three choices: a 0.055″ thick blade that is meant to be bowed, a 0.125″ (1/8″) that is not bowed because of its thickness, and a 0.125″ (1/8″) thick toothed blade. I find that the 0.055″ blade, when sharpened with a 45̊ bevel and burnished at 15̊, as recommended, is too thin to fully avoid chatter on tough woods, even with a skewed stroke. I sharpen this blade at 90̊ and burnish at about 7-8̊, just like a card scraper. This avoids chatter and works well, but I would like the cutting action to be more aggressive. As for the 0.125″ blade, I feel it has the disadvantages of a thick, unbowed scraper blade: the tendencies to catch, dig in, and slice out of control.

Here is what I now like best in the Veritas plane: Ron Hock’s 0.094″ (3/32″) blade. I think it’s just right! It can bend in the Veritas plane just enough to take a slight bow and is thick enough to eliminate chatter. Preparing the blade with a clean edge, 45̊ bevel, 15̊ (off horizontal) burnishing, setting the angle as described in the previous post, and adjusting for a light cut, produces a nice cutting action and a beautiful surface on wildly figured, dense woods – just the kind of wood that you need this tool for.

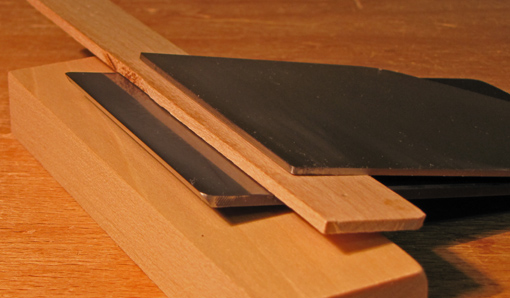
The photo below shows the Veritas 0.055″ blade on top and the Hock 0.094″ blade underneath.

I prefer to sharpen the blades with a straight, not cambered, edge because when the plane bows the blade, a sufficiently cambered blade projection is automatically produced. I’ve tried sharpening with a cambered edge and have found that it is more difficult to file and stone the edge. Furthermore, it is more difficult to initially set a cambered-edged blade into the plane with a centered, symmetrical projection because it can rock against the bench surface. A straight-edge blade produces no doubt.

In summary, I love the Veritas large scraping plane with a Hock blade. Hopefully, I will be able to upgrade the rear handle soon, though for some reason the Veritas tote doesn’t bother me as much on the scraping plane as it does on their bevel-up bench planes.

In the next post, I will describe an unconventional preparation for a second Hock blade in the arsenal which further expands the usefulness of this plane.

Author:
• Saturday, July 17th, 2010

Here are my preferences in a scraping plane, followed by the styles that are thus disqualified in parentheses:

  • a sole long enough relative to its width to register on the work and not “fall off” at the end of a stroke (not: Stanley #80 and other spokeshave-like styles)
  • an adjustable frog angle (not: #’s 80, 85, Veritas small scraping plane)
  • a mechanism to camber (bow) the blade (not: #’s 80, 85, 12, 112, 212, Veritas small)
  • a mechanism to easily and precisely fine tune the depth of cut (not: #’s 80, 85, Veritas small)

I know of only one manufactured tool that meets all these criteria: the Veritas large scraping plane. All of this is a matter of personal preference, and there are many other high quality scraping planes available, most notably from Lie-Nielsen, that you may like better. I will explain why I like the Veritas, a patented, unique tool.

The deal-sealer for me is that the blade can be bowed. This is done by simply applying pressure with a thumbscrew which meets the lower back of the blade. This does more than just avoid the corners of the blade from digging in. That effect, after all, could be accomplished on a non-bowed blade just by cambering the cutting edge (and/or rounding the corners) in the sharpening process, just as one might do with a plane blade. More important, this bowing pre-tensions the cutting edge, just as you do with your fingers when using a card scraper. This greatly helps reduce blade chatter.

The frog angle adjustment mechanism can be set just right considering the angle at which you burnished the blade, the wood, the desired aggressiveness of the cut, and the state of wear of the blade’s hook. I sharpen the blade bevel at about the standard 45̊, and take the final burnishing passes at about 15̊ off horizontal. I set the frog at the same angle that the blade lightly bites into the wood when held by hand. This is usually somewhere around 10-12̊ forward of vertical for a fresh hook.

Just as important, this mechanism acts as a very precise depth of cut adjuster. Because the pivot point of the frog is slightly behind (closer to the tote than) the point where the blade meets the wood, slightly tilting the frog further forward from vertical will deepen the blade projection (depth of cut).

The procedure to do this precisely is somewhat counterintuitive. To tilt the frog less (shallower cut), spin the front nut away from the thread housing to create clearance, put light forward pressure against the frog, and “tighten” the rear nut against the housing. Retighten the front nut. To tilt the frog more (deeper cut), spin the rear nut away from the housing, put light rearward pressure against the frog, and turn the front nut against the housing. Retighten the rear nut. This method allows you to see and feel the frog moving slowly and precisely.

Next, I will discuss blade options.