Tag-Archive for ◊ clamps and clamping ◊

Author:
• Sunday, November 30th, 2014

rack for parallel jaw clamps

(Part 4 of Clamps and clamping)

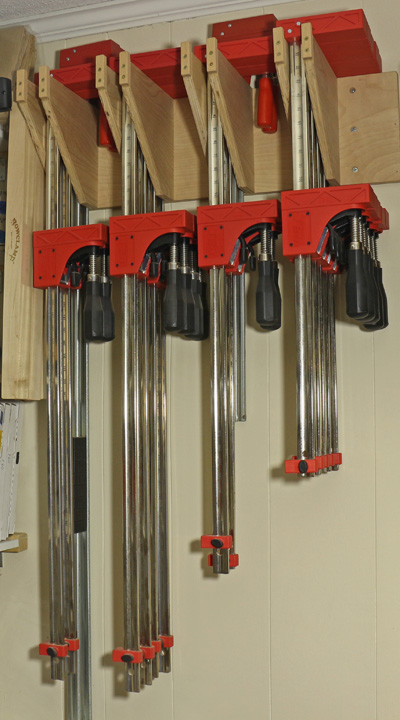
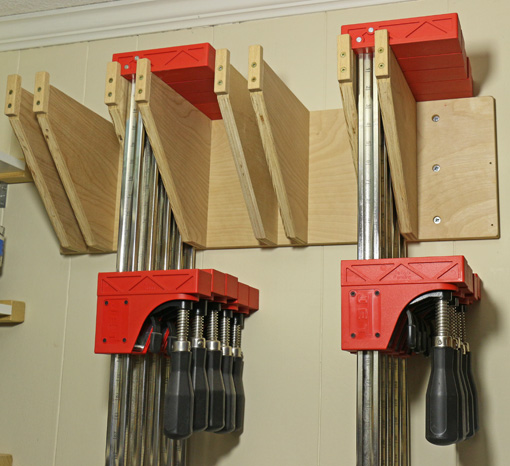
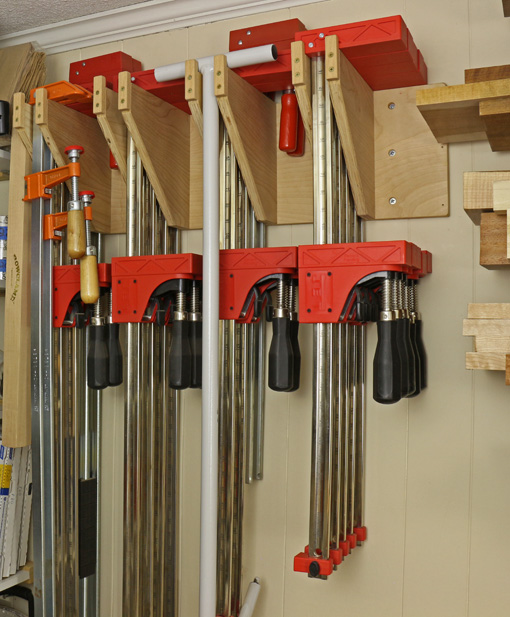
Here is a rack that is easy to build and will efficiently store parallel-jaw clamps.

Almost all of the racks for this type of clamp that I have seen, including commercial versions, store each clamp facing forward in an individual slot, a design that wastes space and is harder to build. This rack, like most shop-made woodworking fixtures, is likely the progeny of multiple sources but credit should at least be given to Andy Rae, who described such a rack in his book The Complete Illustrated Guide to Furniture and Cabinet Construction (The Taunton Press, 2001). The version that I built adds modifications, particularly some safety features.

As seen in the photos of the rack in my shop, the clamps are stored sideways. Two of the bins have been emptied to show the construction. All of the main components are good quality 3/4″ plywood. The back panel is 8 1/2″ high.

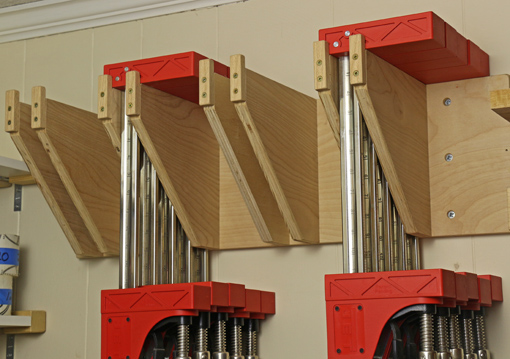
Each bin is made with two support pieces 8 1/2″ in height – same as the panel height. These are glued and screwed to the panel from the back with three or four #10 x 2 1/2″ deep-thread, square-drive, flat-head wood screws. An 8 1/2″ horizontal dimension for these pieces will accommodate five Jet clamps. The jaw of the clamp furthest to the back will actually overlap the back piece. You can work out the horizontal dimension for your brand of clamps and how many you want to store in each bin. The front of each support piece is cut at a 45° angle, 2″ from the corners, as you can see in the photos.
rack for parallel jaw clamps

The distance between the two support pieces should be 1 1/4″ for Jet clamps, which have 1 1/8″ wide bars. The Jet jaws are 1 7/16″ wide. Thus, this spacing is wide enough for easily placing clamps in the bin but narrow enough to prevent clamps from sliding about or falling through.

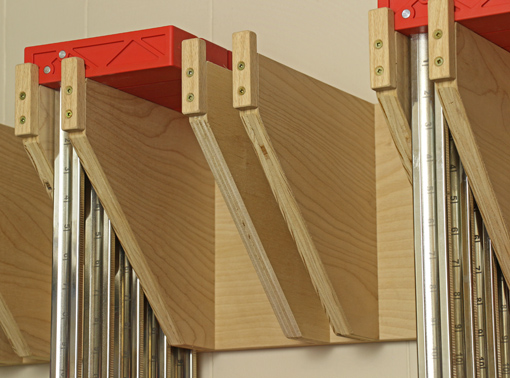
For added safety, I attached with two screws a 1/2″ thick x 2 1/2″ long hardwood stop on each support piece to extend 3/4″ above the support surface.
rack for parallel jaw clamps

4″ between bins allows plenty of room for the jaws of the Jets. Based on this, adapted for your brand of clamps and the desired number of bins, you can work out a width for the back panel, keeping in mind the extra width at the ends.

Attach the rack to studs with appropriately sized screws or with fasteners suited for the wall in your shop. Use your judgment, keeping in mind that it will bear a lot of weight.
rack for parallel jaw clamps

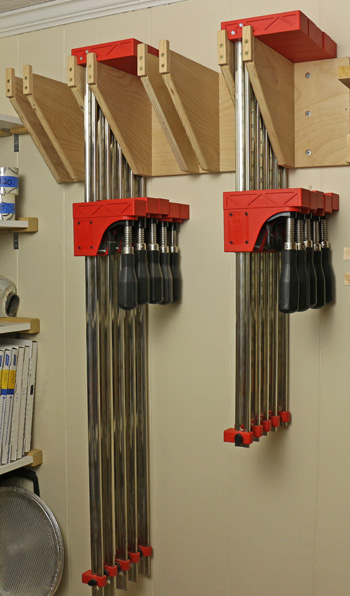
The rack works best when the clamps are hung by the upper jaw only. The moveable jaw of the Jets has a clutch so it will not move inadvertently. Bessey and others do not use a clutch but instead use a tilt-grab system, which perhaps can slip if you happen to bump the handle, causing the lower jaw to suddenly slide down. It is probably better to store those with the lower jaw all the way down.

After the posts so far on clamping, there have been more inquires regarding clamp racks than clamps. Emails are always welcome but keep in mind that I will respond to inquiries made in comments on the blog and that way more people will share and may contribute to the response. As always, thanks for reading.

Category: Tools and Shop  | Tags:  | 4 Comments
Author:
• Wednesday, November 19th, 2014

clamp rack

Whenever possible, I would much rather use parallel clamps than long F clamps for gluing up work. With parallel clamps, pressure can be applied more accurately and, if needed, readjusted more reliably. That also means faster, which is important when the “pressure is on” during glue up.

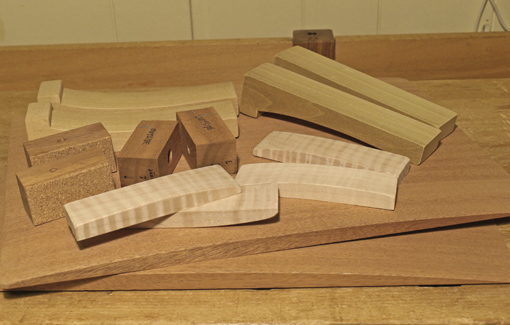
However, little of my work is fully rectilinear with nice flat contact points and with all the surfaces at 90° angles. Therefore, a key additional ingredient is usually required to use parallel clamps: glue blocks. I consider glue blocks to be a standard work component of most projects. Because almost all of my work is one-of-a-kind, the glue blocks usually get discarded when the project is done, but that’s OK, they are still well worth the effort.

clamp blocks

This approach is easier than trying to guess where the swivel-head sliding jaw and fixed jaw should contact opposing curved surfaces to properly direct pressure across the joints. Even after a dry assembly trial, there are likely to be too many uncertain adjustments to deal with during glue up crunch time when the meter is running. For similar reasons, F clamps are far inferior to parallel clamps for edge joint glue up.

The bottom line is that for table legs, curved case components, and so forth, I’ll do whatever I have to do to make the glue up a more predictable operation. Most clamp blocks are easily made from the bandsaw cutoffs produced during building the piece.

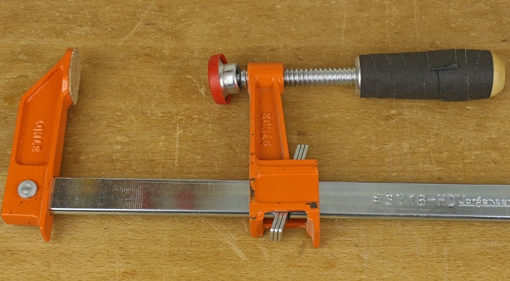
Jorgensen clamps

When a moderately long F clamp is useful, it is usually in support of parallel clamps or when the vault of the jaws is helpful to clear an element of the piece. For those occasions, the economical and widely available Jorgensen #3700 series work well enough. They also make the heavier duty but much more expensive 4500 series.

For long F clamps, I like the clutch system on the Jorgensens. When the head is set in place, it is sure to stay there throughout all the maneuvers during glue up that precede final placement of the clamp on the work.

Jorgensen clamps

I replaced the orange Jorgensen pads with red Bessey pads that fit perfectly on the swivel end of the sliding jaw. Bessey pads do not snugly fit the fixed jaw so there I attach thin cork sheet.

More to come on clamps.

Category: Tools and Shop  | Tags:  | Comments off
Author:
• Tuesday, November 18th, 2014

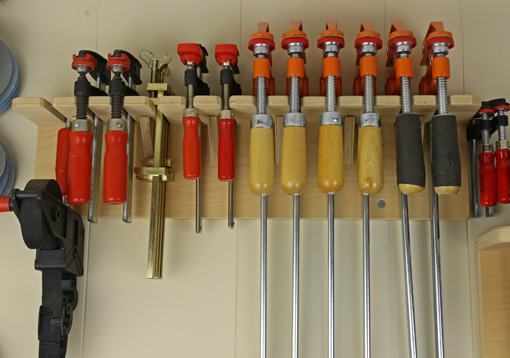
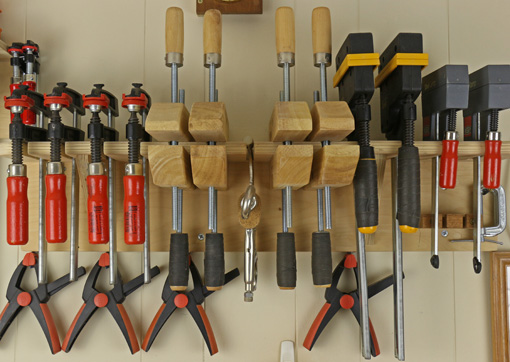
clamp rack

clamp rack

For the other clamps in my shop, I’ve taken down one of each from the racks and have offered comments on their utility. These choices are largely matters of personal preference and very dependent upon the work being done, but hopefully readers will find some useful information and ideas.

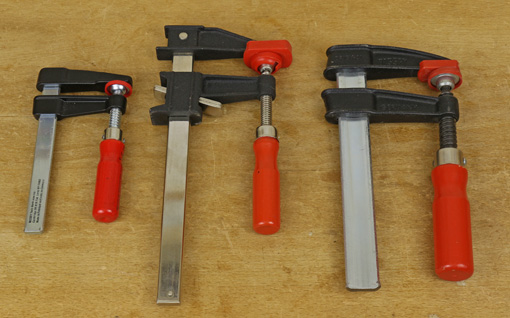
These little 2″ and 2 1/2″-deep Bessey F clamps, 4″ and 6″ length capacity, respectively, are used almost exclusively for stop blocks, fences, jig setups, and the like. Sometimes the clutch type is easier to place precisely. Almost any decently made brand will do for these tasks.

F clamps

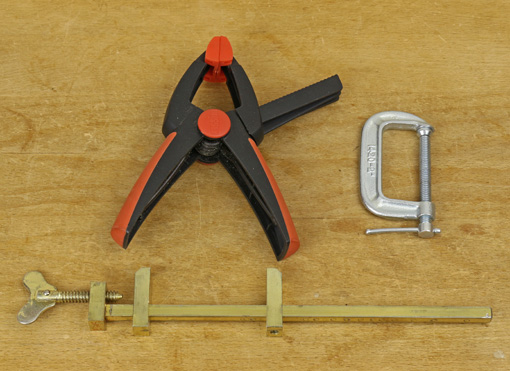
The Bessey Varioclippix 4″ spring clamp has a sliding arm that greatly expands its capacity, flat pads that make clear contact with the work, and hand-friendly grippy inserts. These features make them preferable to the original Pony steel spring clamps. I store them gripped to pieces of brass sheet screwed to the bottom of a clamp rack.

The 2″ C clamp is sometimes just the ticket for tight quarters in jig setups. The Japanese mini bar clamp is useful for very small work where a parallel clamp is needed.

clamps

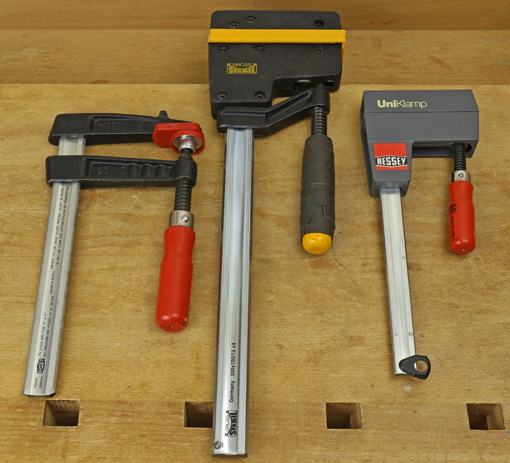
The Bessey 4″ deep x 8″ long F clamp (TG4.008 “Tradesman” 1″ x 5/16″ bar), below left, is a sturdy, reliable workhorse for a thousand tasks. The replaceable pads have never marred a work piece in my shop but they are not squishy and they stay in place. The key rigidity features are the I-beam bar and the corrugations in the malleable cast jaws. They are available in many sizes with different force ratings and handle features.

The very heavy and strong Gross-Stabil 12″ parallel clamp gives a broad, ultra-reliable hold down force. The lightweight Bessey UniKlamp is useful when the precision of a parallel clamp is needed on a small scale. The rectangular heads work well as stop blocks themselves. The balky engagement of the head is typical of Bessey parallel clamps.

clamps

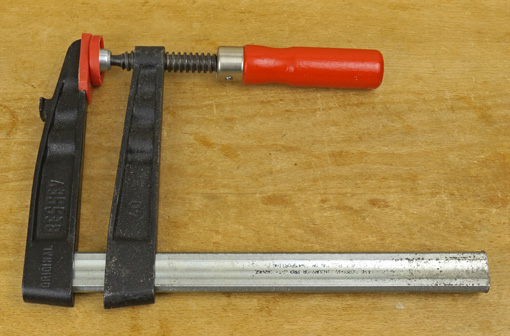
I don’t know when I’ll next need this 7″ deep, heavy F clamp but I’ll be glad I have it then.

clamp

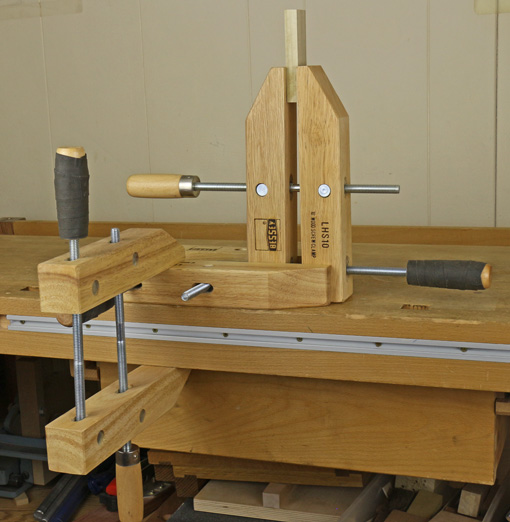
It is hard to overstate the versatility of the venerable wooden handscrew. Much of the magic of this tool derives from the ability of the rectangular wooden jaws to clamp as well as to be clamped. This allows creative arrangements that can solve lots of work holding problems. Final tightening is done with the outer handle, so the cloth friction tape is a big help there.

Excellent quality handscrews sold under many different brand names are made by the Dubuque Clamp Works in Iowa. Maybe I am the only person who finds the non-drying oil “finish” on their clamps annoying. It can transfer to some woods when the clamp is tightened hard, and in any case, seems unnecessary. I like the Besseys, which don’t have this issue and seem to work as smoothly as the ones from Iowa, though the latter are available in a larger range of sizes.

wooden handscrews

More clamps coming up.

Category: Tools and Shop  | Tags:  | 4 Comments
Author:
• Wednesday, November 05th, 2014

Jet clamps

What task produces some of the tensest moments in woodworking? Gluing up, right? And what are the main tools we use for that task? Clamps. Yet there usually is not much discussion about them, many woodworkers skimp on them thinking they’re not real tools, and they generally just don’t get much respect.

Let’s start with long clamps – bar clamps, carcass clamps, whatever you want to call them – that are mostly used to edge glue boards, clamp post and rail assemblies such as for a table, and glue up carcasses. This discussion refers to clamps where the contact part of the head starts right at the bar; not F style clamps.

I used 3/4″ pipe clamps for this for a long time – too long. They have the advantage of economy, especially because longer clamps are made by simply swapping the heads onto longer pipes. However, even with special supports and pads, they just cannot be used with the same reliable precision as parallel-head bar clamps.

Precision? For clamps? Yes. At crunch time, clamping precision matters. We use precision tools like squares, pinch rods, and straightedges to accurately assess a case or leg-and-apron assembly, looking for tiny gaps and misalignments. Doesn’t it make sense to invest in accurate tools to adjust and hold those parameters at the moment when it really counts and when there’s no going back?

As with most topics on this blog, I will tell you what I use and why, hoping this will be helpful to readers making choices and solving problems in their shops. I cannot offer comprehensive comparative reviews like in the magazines, just real stuff from years in my shop.

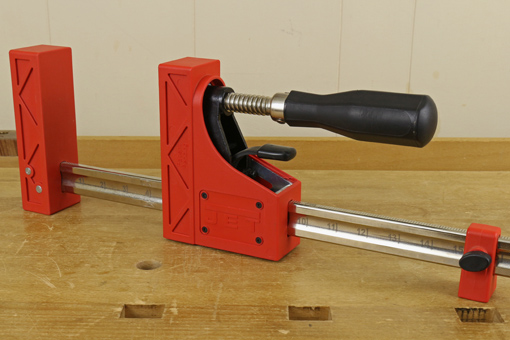
My favorite parallel clamp is the Jet. Bessey also make excellent clamps – I have some of their older model – and there are others including Jorgensen and Irwin. An alternative is the aluminum bar clamp by Universal Clamp Company, which is a precise clamp with the advantage of much lighter weight. Though a good choice for lighter work, these eventually lost out in my shop to the more versatile Jets, which are more rigid and deeper.

Jet clamp

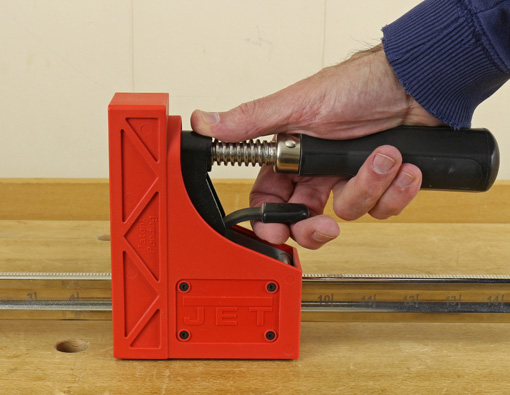
To open the Jet clamp, the head is released to slide freely without catching by lightly pulling up on a lever under the handle. The head can be advanced to close the clamp without using the lever. I really like how the thread action engages immediately when the head is set into position. There is no lag or confusing need to lift or lower the handle for any of this.

opening the Jet clamp

The long side of the firm, glue-resistant head extends more than four inches. In some situations, the work piece can also be placed on the side of the bar or under the short side of the head where there is about ⅝” extension. I like the large diameter handles that give good moment when tightening. To really sock down, use grippy gloves.

The inch scale on the bar is handy when readying a bunch of clamps, such as in edge joint glue ups. There is also a simple moveable support for the bar.

More to come on clamps and clamping.

Category: Tools and Shop  | Tags:  | 2 Comments