Author:
• Friday, November 28th, 2008

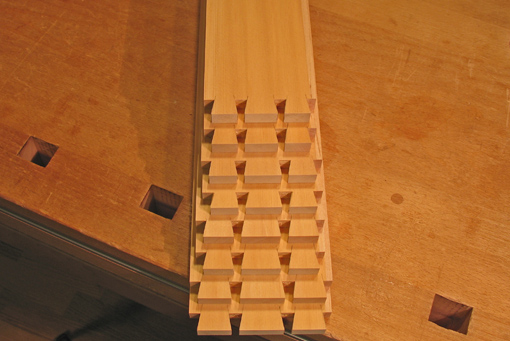
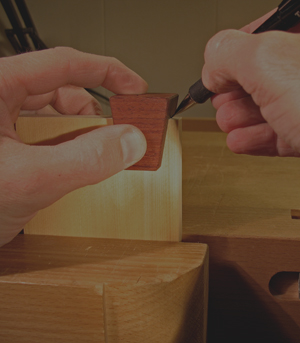
Marking out dovetails goes much easier with these handy helpers. Held in place hooked over the end of the board, they allow penciling a squared line across the end grain and the tail slope line down the side grain with one setting. By contrast, it is tedious and less accurate to mark the tail slopes by setting a sliding bevel and aligning it with lines that you’ve squared across the end grain with a square. If you do pins first, a similar dilemma arises.

There are commercially available versions of these markers. Lie-Nielsen sells an excellent one with 6:1 and 7:1 slopes on opposite sides of a single tool. This may lead to errors. Lee Valley sells separate aluminum gauges with 8:1, 6:1, and 14 degree slopes. The problem with the Lee Valley gauges, in my opinion, is the relief machined in the inside corner of the tool which is supposed to allow clearance for saw whiskers on the corner of the board. This feature causes an annoying discontinuity in the penciled line, right where you need a clean line to start the saw cut. Furthermore, it is unnecessary since boards that are being prepared for dovetail joinery have ends that are sawed or shot clean and square.
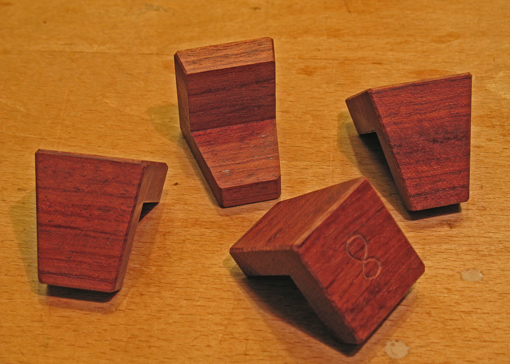
I made these markers from riftsawn bubinga. Outside dimensions are 1 ½” tall, 1 3/8″ deep, and 1 1/4″ wide. The rabbet inside extends 1″ from the inside corner in each direction allowing use on boards up to 1″ thick. These dimensions are really larger than necessary but I was thinking that I wanted to make them only once and cover every conceivable use.

Here is a suggested construction method. This will yield markers with a 3/4″ capacity. Please use your judgement as to what you feel is safe for you. On the side edge of a dry, stable, dressed board without internal stresses, at least 18″ long, about 1 1/8″ thick, and at least several inches wide, make a 3/4″ x 3/4″ rabbet on the router table with a 1″ straight bit, proceeding incrementally since the rabbet is too large to make in one pass. At the table saw, rip away a 1 1/4″ strip containing the rabbet.

Now use the miter gauge to create the angled edges by holding the long length of the piece against the miter fence and crosscutting away a short length, about 1 1/2″, which will become the dovetail marker. (Please do not risk your fingers by holding a short piece against the miter fence and crosscutting it. Work by cutting short pieces off a long piece.) The angles could be created with one miter gauge setting, say 8.1 degrees for a 1:7 slope, by rotating the workpiece after each miter cut. Alternatively, the miter gauge could be reset after each cut to the same angle on the opposite side of 90 degrees. Test the accuracy of your creation with a square and sliding bevel.

Simple, works beautifully. (Yes, that is getting to be a theme here.)

Author:
• Friday, November 28th, 2008

Coming up next week: the Lie-Nielsen Hand Tool Event, December 5&6, 2008 (Friday and Saturday) at the Sturbridge Host Hotel, Sturbridge, Massachusetts. John Economaki, Chris Becksvoort, Bob Van Dyke, and I will be among the demonstrators showing techniques and talking tools and woodworking. Here is a fun and informative opportunity to try out top quality hand tools and pick up skills and tips at the many workstations. I hope to meet some readers of this blog there. This is a relaxed, hands-on event. Admission is free.

Category: Resources  | 4 Comments
Author:
• Tuesday, November 18th, 2008

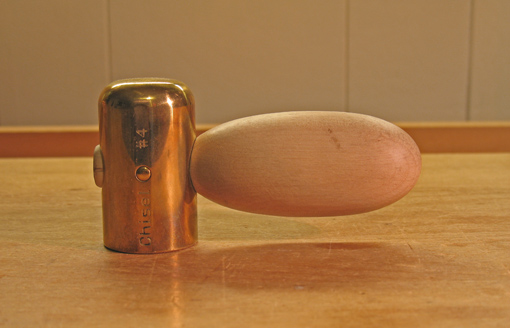
I was long accustomed to using a classic joiner’s mallet to strike my chisels when I started using this brass mallet last year. It is a “Tite-Hammer” made by Glen-Drake Tools with a 14 ounce brass head and an ergonomic handle that must be held to be appreciated.

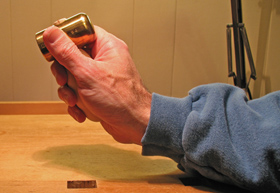
The wooden joiner’s mallet requires a large commitment of forearm movement and significant shoulder muscle involvement. This delivers the necessary punch when chopping a mortise with a heavy duty mortise chisel. However, for chopping dovetail waste and similar joinery tasks, a modest wrist movement with the Glen-Drake hammer easily supplies enough power. It’s somewhat like deftly tossing a crumpled ball of paper into a waste basket a few feet away, keeping the elbow low. This motion is less tiring and more efficient, especially when working in a seated position, which is generally how I like to chop dovetails. The mostly wrist action is also a better way to produce controlled, delicate tapping on a chisel without tensing the shoulders. This all makes a valuable contribution to my ease and endurance in the shop.

There are additional features of this tool. Since it occupies a only a small space on the bench, it is easily placed down and retrieved close to the work. The brass head is relatively kind to edge tools. I like the flat face of the head for chopping, while the rounded face comes in handy for other tasks such as tapping together joints.

When I pick up this unassuming tool, it feels like it is just growing out of my hand. The contours of this tool must have been designed, not at a drafting table, but with trial and error, a rasp, and learned hands. It is assembled with a nifty wedged through-tenon and a brass pin through the head. It’s simple and works beautifully, so, yeah, it’s my kinda tool.

I find the 14 ounce, the largest of four available sizes, packs a good wallop but is easily maneuverable with a light touch and does not tire me at all. I do not have a personal or financial interest in the company; my recommendation is based on personal experience and presented for the benefit of my fellow woodworkers.

I will continue to laud some of my favorite tools on this blog, particularly if I think they are not well known or are underappreciated.

Category: Tools and Shop  | 6 Comments
Author:
• Wednesday, November 12th, 2008

There are so many excellent sources to read for woodworking skills that it is difficult to sort through what is available to come up with recommendations. So I will start here with three selections that are easy choices, clear gems, first ballot hall-of-famers.  

Understanding Wood, by R. Bruce Hoadley, may be the one book that I would say every woodworker should have. One cannot go very far in improving woodworking skills without understanding the material and no source is better for this fundamental knowledge. Dr. Hoadley, professor emeritus in the Department of Building Materials and Wood Technology at the University of Massachusetts, Amherst, shows how the biological structure of wood determines its physical and working properties. This is not disconnected science but rather is practical knowledge that will make you a better woodworker. First published in 1980, it was revised in 2000. (The free Forest Products Laboratory Wood Handbook is a good backup to Understanding Wood.)

Illustrated Cabinetmaking, by Bill Hylton, is a wonderful go-to book when you’re contemplating a project and need to study the options for how to put something together. What are the choices for constructing drawer runners? How much elbow room is needed for a person at a dining table? What are different ways to design a chest of drawers? If a martian landed on earth and wanted to learn as quickly as possible how humans build furniture, I’d hand him this book.

Understanding Wood Finishing, by Bob Flexner, doesn’t just show you how to finish wood, it brings you to an understanding of the subject so that soon you’ll be answering your own finishing questions. I think Bob Flexner’s book and his articles in Popular Woodworking magazine  (and a nice collection of many of his articles ) are not only some of the best explanatory writings in the field of woodworking, but some of the best I’ve read on any topic! (I’m not worthy…)

Being always a student of this craft, I will in this blog continue to revisit the topic of learning resources.

Category: Resources  | Comments off
Author:
• Friday, November 07th, 2008

If I have a nice board and want a successful resaw I need all my ducks in a row: a good bandsaw with sufficient power, an appropriate blade that is sharp, clean, and properly tensioned, an adequately high fence corrected for blade drift if necessary, good dust collection, and a safe plan to feed and support the board all the way through the cut. The board needs at least one flat face and a straight edge square to the face.

Even with all the mechanical preparations it’s necessary to consider the properties of the wood to avoid disappointment. When I bring new wood into the shop I check its moisture content with a pinless meter and write the date and MC% on the board. I stack and sticker the boards and monitor the MC over the next few days to few months, noting when it seems to level off, accounting for the humidity in the shop. For thick stock, if I can crosscut away from the ends of the board, I like to check for any moisture gradient across the thickness of the board. Ideally, I want a board that has equilibrated to the shop air with uniform MC through the full thickness.

There is one more very important issue. Dried wood can have internal stresses that manifest immediately after resawing. Very often, in resawing a board down the middle the two pieces produced promptly cup toward each other; the sawn faces both become concave across their widths. This immediate change is not due to drying or moisture issues, although those still might later create gradual movement of the boards.

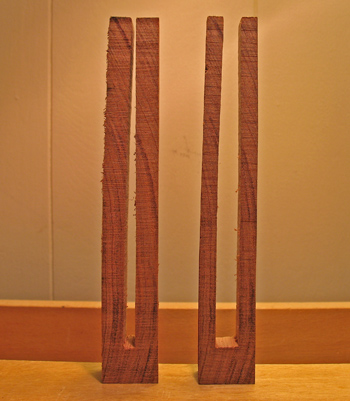
To detect stresses in a board I take a short end cut, preferably away from either original end of the board where end checks may be present, saw out a center section and observe the remaining prongs of wood. In the sample above, the inward bow, especially of the left prong, shows just a slight casehardening effect. The sample on the right, with more of the core removed, shows a bit less bowing. (The moisture content is a uniform 6%.) Resawing this board would probably give good results.

Severe bowing of the prongs would predict markedly cupped boards from the resaw. Such boards would lose much of their thickness after flattening. I would use a fence with no outfeed length (beyond the blade) since the cupped surface coming off the blade would not register properly. Better to find another board to resaw.

A thought on design: in general, I’m not fond of perfectly bookmatched pieces juxtaposed in furniture. There’s something too contrived about that, to my eye. I like harmonious unity with a dose of organic variety better than mirror repetition.

As always, happy woodworking.

Category: Techniques  | 2 Comments
Author:
• Wednesday, November 05th, 2008

Resawing is certainly one of those gateway skills that allows the woodworker to utilize wood more artfully and efficiently. It’s not hard to do. Well, let me qualify that.

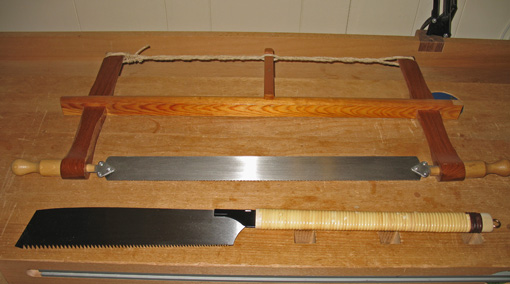
I acquired my Tage Frid style Danish bow saw over 25 years ago and I’ve jointed, set, and filed the teeth over the years so the saw cuts to my liking. Though it is a versatile tool, I currently do not use it very much. It performs well for resawing smaller boards as long as I’m patient and don’t mind some sweat. The 12 inch Japanese rip saw, with fearsome looking teeth, especially at the toe end, also does a nice job on smaller boards. My previous small Inca bandsaw also served well but was limited by its 6 inch cutting height and lightweight power. None of these tools made me eager to resaw.

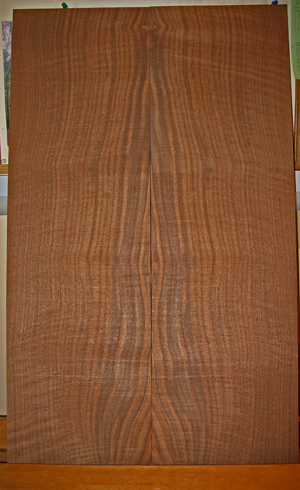
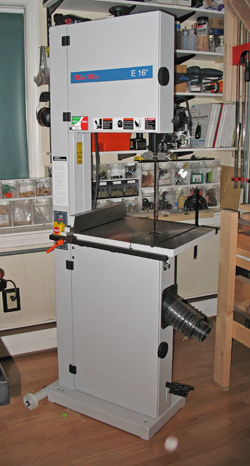
Since I upgraded to the Minimax E16 with a 12″ cutting height and 2.4 HP in the tank, it is so easy to resaw that I find excuses to do it. The 10″ wide (each piece, 20″ total), 34″ long curly western walnut in the photo is straight from the saw and will require little surface clean up. I use a 3/4″ x 0.25″ VPC silicon steel Timberwolf blade from Suffolk Machinery. VPC means “variable positive claw” which is their term for modified hook teeth in a variable pitch pattern, 2-3 teeth/inch. The kerf is about 3/64″. A carbide tip blade is on my wish list but the VPC is darn good at a small fraction of the cost. The E16, lighter and less expensive than the MM16, works into my small shop nicely and so far I have not had any problems with its power.

So there’s my resawing history and current set up. More to come on this topic.

Category: Techniques  | 2 Comments
Author:
• Sunday, November 02nd, 2008

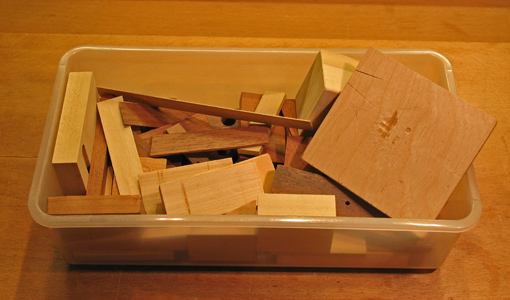
This is one my essential habits of work that I think, while decidedly unspectacular, warrants sharing with my fellow woodworkers. When I’m in the shop it’s usually only a short time before I need a small piece of scrap wood for something. It may be for a stop block on my router table fence, a clamp pad, a spacer for clamping stock in the tail vise between dogs, a thin shim to set a door gap, a square block to guide freehand drilling, or for countless other uses.

Candidates for the box o’ blocks usually are produced as squared, uniform offcuts from the table saw or bandsaw. That little box almost always seems to have what I need, from a shim that’s, oh, just a bit under 1/32″ to a stout block to hammer against to reset a tool handle.

The box contains reminiscences of distantly completed projects such as old tenon cheek cutoffs. I’ve been using this box long enough that I can fondly remember when my then very young daughter and I would play in the shop gluing together little scraps. For her, the main purpose of the box was to save nifty pieces of wood to play with. So the box has served more than one purpose, and, come to think of it, so does the shop. Furniture and memories are built there.

I’m pretty sure this tip is not in any woodworking textbook but that box o’ blocks has served well.

Category: Tools and Shop  | 2 Comments
Author:
• Tuesday, October 28th, 2008

For an enjoyable woodworking experience visit the Lie-Nielsen Hand Tool Event, December 5&6, 2008 (Friday and Saturday) at the Sturbridge Host Hotel, Sturbridge, Massachusetts. Chris Becksvoort, Bob Van Dyke, and I will be among the demonstrators showing techniques and talking tools and woodworking. This is a fun and informative opportunity to try out top quality hand tools and pick up skills and tips at the many workstations. This is a relaxed, hands-on event. Admission is free.

Category: Resources  | Comments off