Author:
• Sunday, November 08th, 2009

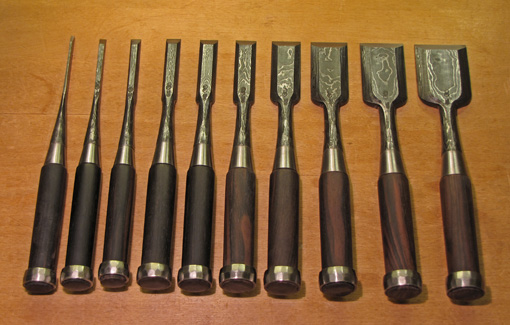
I have been using this set of chisels for two years now as the primary chisels in my shop, mostly for chopping joinery but also for many general chiseling and paring tasks. They are beautiful. “Blue paper” steel has been laminated to the soft steel body which has been repeatedly folded to produce a wood grain pattern (mokume). While it was not easy to part with the money to buy them, they have been well worth it.

These chisels, with the exception of the handles, were made in the hands of one man, Teiichirou Ohkubo, who uses the market name “Daitei,” in his very small shop in Yoita, Niigata, Japan. (Spellings of his name vary among Western sources.) He works at a forge established about 100 years ago by his grandfather. I am inspired working with these chisels because, though I will likely never meet Mr. Ohkubo, I sense a personal connection with a craftsman putting some of his spirit into his product which, in turn, assists me in doing the same. That’s a good feeling.

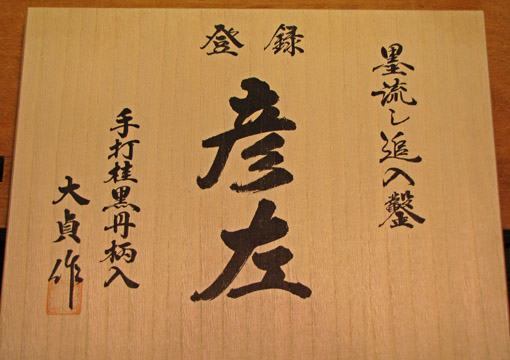
The handmade inscription on the box in the photo below reads, I am told, “made by Dai Tei,” in the lower left corner, above the red personal mark (chop).
Now for the best part. They have been easy to sharpen on Shapton stones and hold an edge magnificently. I use a primary bevel of 27.5 degrees and a secondary bevel of 32.5 degrees. This gives excellent penetration and completely avoids chipping of the edges. Sometimes, just for curiosity, I’ll pause fairly well along in chopping some joints and am amazed to see the chisels can still shave hair on my arm.

They have an authoritative weight and balance in the hand. I have long enjoyed the ergonomics of Japanese chisels though I recognize this is a matter of personal preference. I believe the handles are Macassar ebony, contrary to the vendor’s description. Initially, I had some concerns regarding the handle wood being perhaps too brittle and prone to splitting. I properly set the hoops (I like Joel Moskowitz’ excellent step by step method), and, despite some serious working action with a mallet, have had no problems.

Any imperfections? Yes, of course, but not enough to cause practical problems. The handle on one of the smaller chisels is undersized and there is slight inconsistency in the angles of the side bevels among some of the smaller chisels.

It is exciting and motivating to work with personally made woodworking tools. Woodworkers now are fortunate to have this kind of tool available from not only Japanese makers, but, more than ever in my lifetime, from many outstanding Western toolmakers. By all means, seek out and use some of these personal tools for personal woodworking.

Category: Tools and Shop  | 11 Comments
Author:
• Saturday, October 31st, 2009

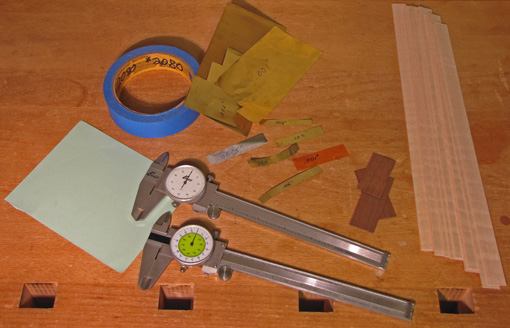
What if there was a way to adjust your work setups in controlled increments of a few thousandths of a inch? And what if this technology would cost next to nothing? Consider the underappreciated shim.

There has been a proliferation of adjusting gadgetry in the woodworking market over the past decade or so. Rip fences, miter gauges, router lifts, thickness planers, and so forth, can be souped up with micrometer adjusters and digital readouts that seem to promise precision in the end product. These devices might add convenience and accuracy to woodworking but only if they are used thoughtfully. The craftsman must be cognizant of the different levels of accuracy required for various tasks and, just as important, of the consequences of inaccuracy on each side of a target. If used mindlessly, these gadgets can easily make a woodworker lose sight of the logic of the construction process.

I usually prefer simpler, more intuitive methods that often involve using shims. For example, if a groove cut on the router table needs to be bit wider, a strip of tape applied to the edge of the workpiece or the fence will widen the groove on a second pass by .004″. When I made the fence for the router table, despite doing “everything right,” it required a piece of .002″ plastic shim at each end to make it straight against the Starrett, and some blue tape on the bottom to make it square to the table. It’s just as good as if it came out perfect on the first try.

This is not cheating! This is “microadjusting”.

Shims can also be used to “measure” intentional gaps, such as in fitting a door or drawer. Wood shims are non-marring and can be made to whatever thicknesses you want, which allows you to make and confirm these small measurements according to your artful eye’s desire.

So maybe you made the hinge mortise a bit too deep; you know what to do. Sure, we try to be accurate but we work in the real world and it helps to have a Plan B.

I keep on hand in the shop all sorts of shims, including brass sheets, a book of plastic shim stock, a leaf gauge set, blue tape, paper, and, of course, slices of wood. When, by chance, some good candidates for shims come off the table saw or bandsaw, I toss them in my box o’ blocks. Sometimes I take out dial calipers and measure and mark them.

Remember: it’s OK, it’s microadjusting.

Author:
• Saturday, October 17th, 2009

You know how it is. You are committed to a project, sweating the details, maybe doubting some design features, maybe doubting the entire aesthetic or structural concept of the project, and wondering whether anyone will ever care about the joint you are fitting or the curve you are shaping. You may wonder if you will later care, or even remember, about a design decision or construction detail that now seems so vexing.

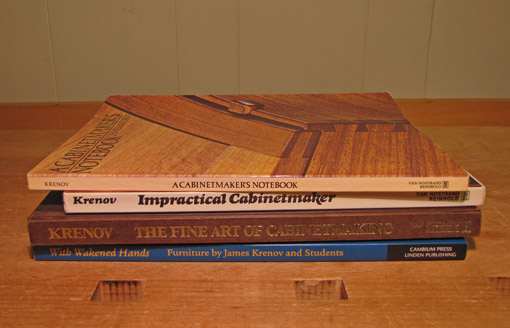
Don’t worry, you care and so do many others who will appreciate your work. This is an important part of Krenov’s message, that your work matters, that it matters to do it well, and that it will be appreciated by not everyone, but enough people to make the effort worthwhile. People can and will discover that “quiet joy.”

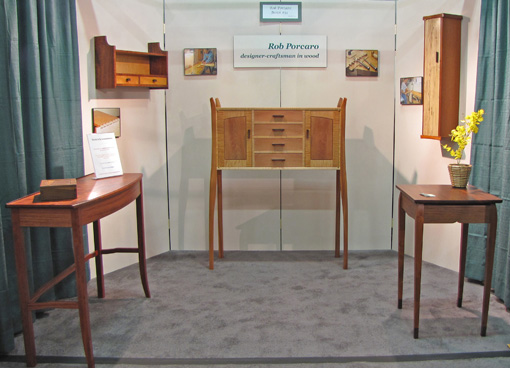
Last week I had the privilege and pleasure to display my work at the Paradise City Arts Festival in Northampton, Massachusetts, a high quality juried show with 260 booths in a variety of craft media including glass, ceramics, jewelry, painting, fiber, wood, and furniture. The three-day show was very well attended, attracting lots of folks with a well-nurtured appreciation of fine craft.

Yes, people notice; they get it. It was exciting to see people running their hands along a curved table leg, inspecting exposed joinery, asking about matching figures in the wood, feeling the gentle action of drawers and door catches, taking in subtle design elements, and so forth. The pieces on which I had lavished mental and physical efforts were now able to stand on their own, to just be what they are with no required annotation or message while people discovered them. In this way, these objects support a meeting of aesthetic minds between maker and appreciator which is gratifying for both.

It is worth staying with it on that project because you and others will share that quiet joy. That is a path to happy woodworking.

Category: Ideas  | 17 Comments
Author:
• Friday, October 09th, 2009

This coming Columbus Day holiday weekend I will be exhibiting my work at the Paradise City Arts Festival show in Northampton, MA. This is a high quality, juried show in which I am proud and excited to participate. There will be fine crafts in many media including wood, glass, fiber, ceramics, photography, and painting.

Northampton is in western Massachusetts. If you are in the area, the show is a great way to get some craft inspiration as well as run up the balance on your credit card. There will be a ton of beautiful work at this show.

Readers, I invite you to stop by booth #632 and we can talk woodworking.

Category: Resources  | 2 Comments
Author:
• Friday, October 09th, 2009

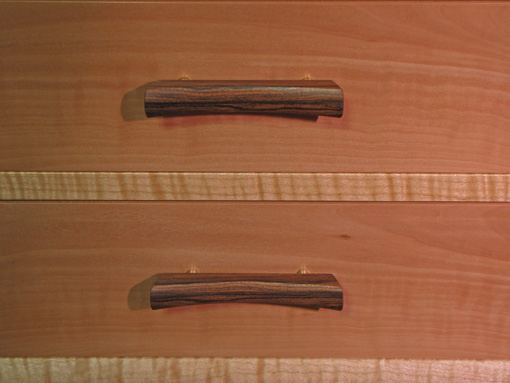
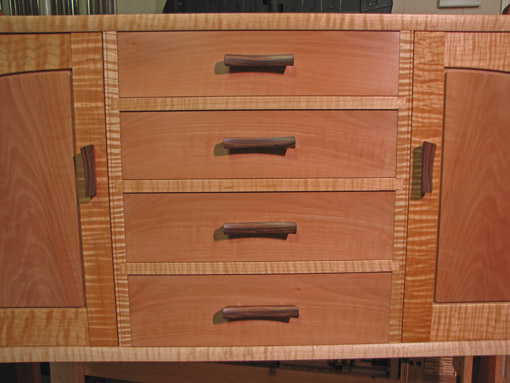
Making a drawer handle is a fun opportunity for creativity, but it ought not make a dissociated statement of its own. The handle should be consistent with the design of the whole piece while providing an interesting accent. I like a pull that is inviting to gently grab, yet is sturdy. For contemporary work with graduated-size drawers, commensurately graduated handle sizes may be a nice touch. I usually choose dark, dense, exotic woods for handles.

As I stated in the first installment of this series: “This is not the only way to make fancy drawers, nor do I propose it as the “best” way because that judgement depends on function and aesthetics which are ultimately the provinces of each craftsman for each project.”

I think the mystique surrounding drawer making is exceeded in woodworking only by finishing and chair making. I suggest forget that cloud of doubt. Crafting a nice drawer shares principles common to all woodworking:

  • understand the logic of the process
  • be exact, or perhaps more realistically, stay on the correct side of tolerance in the critical parts
  • try to be at ease in your work.

Believe me, these drawers are not perfect; no one’s are! I do, however, try to work at a level where I can enjoy the process and the product, and forgive little imperfections.

I wish you enjoyment and success in your woodworking.

Category: Techniques  | Tags:  | 6 Comments
Author:
• Tuesday, September 15th, 2009

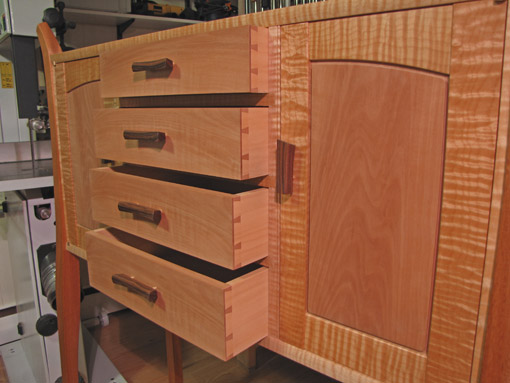
Hopefully, the drawer will close with the front even all around with the edge of the opening. If not, now is the time to correct this by planing. Soften corners to your preference. Cut a substantial chamfer on the top of the entering edges of the sides.

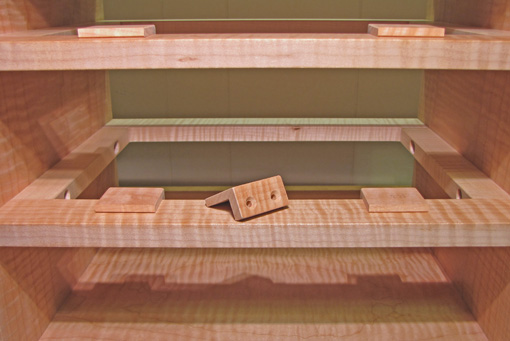
Closing stops can be installed at the front of the frame to contact the back surface of the drawer front below the drawer bottom. The strongest designs are those mortised into the frame. This generally requires the foresight to make the mortises before assembling the frame. (No comment.) They can also be glued, screwed, or even mortised to the frame near the end of construction, though less conveniently. To ease installation, it is helpful to design the stop with an abutting placement, such as against the back edge of the divider. The photo above shows a simple drawer stop design that hooks over the divider and is screwed to the back of it. The small undercut chamfer, visible at the front of the stop, facilitates fine trimming with a shoulder plane after assembly.

For all but the smallest drawers, two stops are best to create an unambiguous closure across the full width of the drawer. Since the drawer is then in a good, neutral position, it will be easy to open without jamming. I prefer the front face to be a hair inside the edge of the housing.

Alternatively, closing stops can be placed at the back of the case on the runners.

Outgoing stops are optional. A simple, effective design is a small piece of wood, screwed to the back of the drawer divider, which contacts the back of the drawer on its way out, yet can be rotated 90 degrees to let the back pass by to remove the drawer. (You know, to show your woodworking friends.)

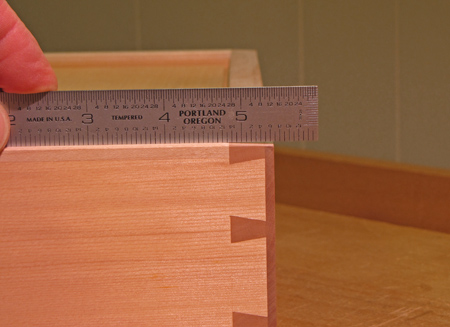
I like to bevel the bottom edge of the front of a flush fit drawer to prevent it from rubbing the bottom of the drawer frame. (The drawer is upside down in the photo below.) This way the drawer will run only on its sides. On very small drawers, it may look good to match this gap to the one at the top of the front.

The front is finished to match the outside of the piece. For the sides and back and bottom, think “less is more.” Personal preferences aside, there are a few points to keep in mind: avoid perpetually smelly oil finishes on the inside of the drawers or case, finish the bottoms before assembly, and avoid any film finish on the outside of the side pieces. A light coat of wax on the sides’ outer surfaces and bottom edges will help produce pleasant drawer action.

Next: getting a handle on it and closing thoughts for the series

Author:
• Thursday, September 10th, 2009

It is difficult to gather my thoughts and feelings on the occasion of James Krenov’s passing away yesterday. His teachings mean so much to me as they do to so many woodworkers.

James Krenov was pivotal in my coming to embrace the understanding that making fine things from wood, imbued with a personal touch, mattered in this world. I have liked making things in wood since youth, knowing that this was part of me, but beset with the refrain that it might be little more than self-indulgent puttering. Jim Krenov’s clear and independent spirit, beautifully communicated through his writings and his work, gave me the support to see the value in what I was trying to do.

So many times I go into the shop accompanied by Krenov’s voice, reminding me that the work is worth doing well because it can have meaning to me and to others, and creates a quiet joy that enriches our lives. It is about connecting with one’s soul and seeing the real value in the process and the product. I think that is truly happy woodworking.

There is a beautiful and profound life that harbors in the wood we love. There is also a special life in the little objects we make. For me, as for so many woodworkers, an important part of that vitality comes from the enduring spiritual contribution of James Krenov. I am very grateful. Farewell JK, long live your spirit.

Category: Ideas  | 8 Comments
Author:
• Tuesday, September 08th, 2009

Solid wood drawer bottoms are the primary topic of this discussion and are used in this project. However, plywood also deserves consideration as a good quality option. Stable, strong, and easy to prepare, thin hardwood plywood is readily available in many species and thicknesses with flatsawn and quartersawn face veneers. The laminate edges will not be visible except at the back. I do not think plywood bottoms, skillfully and tastefully employed, diminish the quality of a “high-end drawer” in modern furniture.

The thickness of a solid wood bottom should be commensurate with the overall size of the drawer, the load it is expected to bear, and the strength of the chosen species. The Port Orford cedar bottoms of these fairly small drawers are slightly over 5/16″ thick, while those for a chest of drawers might be ½” thick. Gluing up thin stock presents special issues which have been discussed in two earlier posts. Quartersawn wood is preferable because of its resistance to cupping.

The grain runs along the width so this dimension will be stable through the seasons, preserving the critical fit of the drawer width in its housing. The panel is raised on the outside (underneath) face, here with a simple square-edged field, to create 1/4″ thick tongues to fit in the grooves, keeping a small border of consistent width along the two sides and the front. Many woodworkers prefer a flat-beveled or coved panel. The bottom can be sized to leave a very tiny gap at the base of the grooves in the sides to avoid distorting the drawer when sliding the bottom in place.

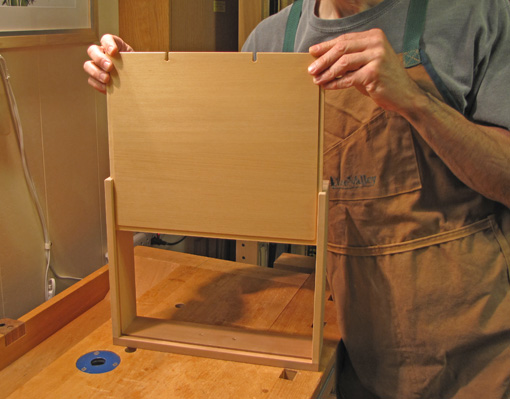
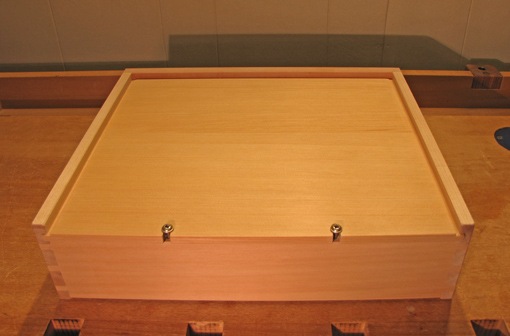
Now we must deal with seasonal changes in the front-to-back dimension (across the grain) of the drawer bottom. Calculate rather than guess the amounts. Unless you are working on the driest day of the year, the bottom must extend beyond the back of the drawer. To accommodate seasonal movement, screws pass through open-end slots in the bottom and thread into the back. Make the slots long enough and locate the screws to allow for the largest dimension on the most humid day, but don’t make the slots so long that they will be visible from the inside of the drawer on the driest day. It usually helps to have a thick drawer back and to locate the screws toward the outer surface of the drawer back. (Since I have experience messing up this last detail because I didn’t think it through, I feel compelled to warn you.) Here I used practical washer head screws, but you may prefer the look of a flat head screw in a tapered-rim slot.

I think it is best to lightly glue the front edge of the bottom into the groove in the drawer front (only!) so all of the movement “collects” at the rear of the drawer. I use hide glue for this since its reversibility will come in handy if a damaged bottom ever needs repair or replacement.

For drawers that are very shallow (front to back), it is often possible to simply cut the bottom flush, screw it to the back without slots, and make the groove in the front deep enough to accommodate all the movement that will collect at the front end.

Next: final trimming, drawer stops, finishing.

Category: Techniques  | Tags:  | Comments off