Author:
• Tuesday, December 28th, 2010

Well, a bad day in the shop sure beats a good day doing a lot of other things! Seriously though, I want to explore the unnerving phenomenon of why sometimes working wood I feel like I can do no wrong, everything just flows, and yet at other times I feel like a neophyte who needs all the good luck in the world for things to go right. Can you relate to this?

I am not referring to obvious interference from things such as fatigue, worries, tool failure, wood disappointments, struggles with a new technique, and so forth. Rather, the mystery is why, absent apparent hindrances, some woodworking sessions are strained, poorly productive, lacking in confidence, or simply a struggle without ease.

Here is the best I’ve been able to discern. At least, I’m convinced that what follows is the key for me.

I believe that to be simultaneously effective and at ease in woodworking requires heightened awareness of how the process at hand, each moment of it, fits into the larger picture of the piece being made. In other words, one does not just execute isolated procedures, such as sawing to a line, but maintains a background cognizance of the larger role of the task at hand in what is being created.

Working with this sense of direction produces focus and concentration. It also extends beyond the piece in process to a larger commitment of purpose about one’s woodworking in general. Everyone has his own view in this regard, of course, but it should be carried into the shop and kept alive in the background.

Work flow in my shop deteriorates and mistakes creep in when tasks are abstracted from their larger purpose. The right approach is, for example, to plane a board flat, not as an isolated goal, but to work it flat enough, appropriately nuanced, so the board will fulfill its role in the piece. Yes, this is a simple notion, but it is easy to get carried astray in the course of all the steps in building a piece.

I find that a quick mental warmup to attend to these matters greatly helps my focus when starting work in the shop. In short, a clear sense of purpose, at all levels, is the key to a good day in the shop!

Does working wood thus imitate life in general?

Category: Ideas  | 5 Comments
Author:
• Monday, December 27th, 2010

Here are more second thoughts regarding previous posts. The updates are based on additional experience, news, modifications, and ideas relating to these tools.

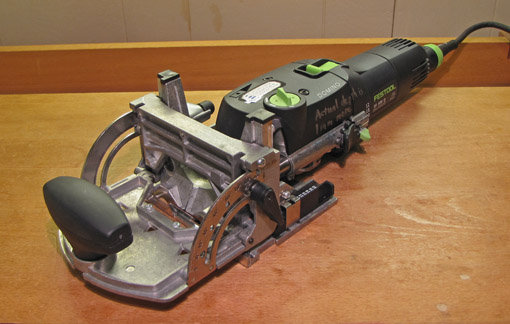
The Domino Effect, June 12, 2009. It takes time for woodworkers to develop faith in new forms of joinery, as in new glues and finishes. We would like to have a crystal ball to see how they perform a few generations into the life of a piece. To ease my lingering doubts, I assembled a few test joints with the Domino and annihilated them with a 3-pound drill hammer. The wood failed before the joints. A very light sanding of the surface of the domino tenons to improve wetting seems like good insurance.

I’ve used Domino joints in high-end pieces but still don’t think they will ever replace traditional mortise and tenon joinery. It would be helpful if the system could make the mortises at least 1/4 inch deeper than the current maximum of 28 mm (nominal; actual is 29 mm) and use accordingly longer tenons. The machine can also be used as a handy small mortiser even without using dominos.

It would be interesting to hear of readers’ experiences with Domino joints.

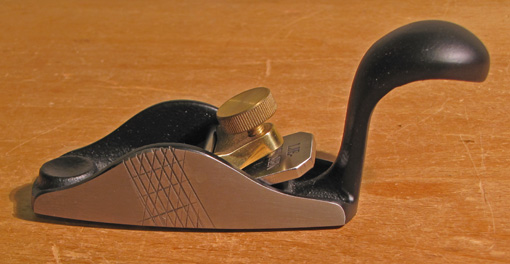
Lie-Nielsen Convex Sole Plane, September 11, 2010. Finger grips filed into the sides of the plane have proven helpful. In general, I almost feel that a tool isn’t really part of my repertoire until I’ve done something to personalize it.

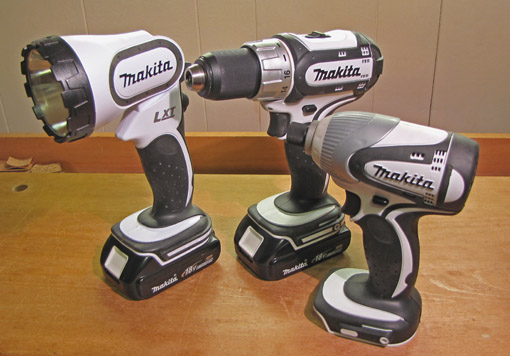
8 Simple Shop Tips and Conveniences, February 15, 2010. The Ni-MH batteries in the Panasonic drill-light set have finally died after a long, productive life. I replaced the set with the Makita LCT 300W 18-volt drill-impact driver-light set which uses Li-ion batteries. Wow – lots lighter, faster and longer-lasting charge, and what a buy. The impact driver is more for DIY than furniture making but it’s a serious bad boy with 1280 inch-pounds of torque.

Minimax E-16 Bandsaw, May 18, 2009. It appears from the Minimax website that this model is no longer available from them. The E-16 remains a good fit for my shop because it covers just about all my needs while being lighter and more maneuverable than the more popular MM-16. Nevertheless, I feel as strongly as ever that a quality bandsaw will expand most woodworkers’ range of work as few other tools can and more than any other machine. Bandsaws do not take up much space and can be made mobile. I suggest a steel frame saw with at least 12 inches of resaw height.

How Much Camber Should Be in Plane Irons?, May 21, 2009. Having received a few questions on this, nope, I still won’t say how much. IT DEPENDS. And don’t bother measuring it. In addition to the plane’s function (smoothing, jack, etc.) and the bevel up or down factors, other issues include: is the plane skewed in use (which makes the camber’s “sag” have a shorter span), how sharp is the blade, how hard is the wood, and how is the cap iron adjusted? Also, the amount of downward deflection of the blade’s edge will be altered by most of these factors which will, in turn, affect the functional effect of the camber.

The key is to monitor the feedback from the blade’s performance and make adjustments at the next sharpening session. Usually, camber is overdone. Fortunately, this is easy to correct, since most of the dullness is at the crown of the camber where it is readily honed away.

An Inexpensive Saw that Does Its Job Well, May 30, 2010. This has been a great workhorse in the shop. I wonder if it could be manufactured with a taper-ground plate for a little higher price. That, and a little better handle geometry would make it even better.

There’s always more to learn!

Category: Tools and Shop  | 4 Comments
Author:
• Saturday, December 11th, 2010

This is about a way of working that is a mentality more than a specific technique. Above all, it is about awareness.

Accuracy is essential in woodworking – layout, cutting, surfacing, fitting, and so forth. We strive for this, perhaps even aiming for unattainable perfection, like a shooting at a bull’s-eye.

Consider William Tell, who, legend holds, was forced by a tyrant to take one attempt to shoot an arrow through an apple sitting on the head of the archer’s son. If he missed, the tyrant’s soldiers would kill the boy. Though he courageously took careful aim at the apple, surely Tell shot with the awareness that to miss low would kill his own son. If he missed high, at least there might be a Plan B to save his son. Fortunately he did not need to use the extra arrow under his coat, but one wonders what might have ensued if the first shot missed.

In woodworking, all inaccuracies are not equal. It is not like aiming at a concentric circle target. To do good work, one must be not only intent on hitting the mark but also cognizant of the consequences of the different directions of missing the mark. This awareness comes from understanding the significance of the task at hand and where it fits into the project as a whole.

This does not mean one should saw everything fat, nor does it excuse being timid about working to the line. It does mean that the concept of a one-sided tolerance can be applied to most woodworking tasks. Here it is: try to hit it right with an accuracy appropriate to the function of that part of the project, with an awareness that errors in some directions are less consequential (and perhaps fully tolerable) than errors in other directions which can seriously compromise the work.

As an example, in sawing a tenon, strive (courageously) to saw to the layout line but be aware that sawing it too thin is a considerably bigger nuisance to correct than sawing a bit too fat, which can be quickly remedied by paring or planing. In the bigger picture, you are aware that a loose tenon will compromise the strength of the structure. The same general idea can be applied to cutting dovetails, fitting drawers and doors, even flattening a board.

By contrast, you broaden your tolerances planing a chamfer with a block plane. If it looks about right, fine.

This is a much more effective approach than pursuing the illusion that you must or might get it “perfect.” Don’t believe the “perfect every time” promise in some woodworking ads and literature. It is neither necessary nor real.

Be always aware of: How does this process that I’m doing at the moment, fit in and affect the whole of the piece? (In this way, does art imitate life?)

With this approach, the craftsman works with ease and confidence. He does not pursue, nor is intimidated by, perfection. Rather he knows what he is after in reality and how to work effectively toward it. Put another way, the craftsman accepts his humanity, and does not fight it but rather works with it to function effectively. In this work of creativity, the craftsman is superior to any machine.

Category: Ideas  | 2 Comments
Author:
• Tuesday, November 30th, 2010

Here are some updates to previous posts, mostly regarding tools.

Since the original posts appeared, I’ve had the time to accumulate experience with additional tools, incorporate modifications to tools, or have additional ideas about their function.

Rust Busters, January 15, 2009, discussed helpful rust prevention products. Shortly thereafter, I installed Zerust drawer liners in my tool cabinet drawers. These look and feel like non-slip router mats but contain corrosion inhibitors which work invisibly and odorlessly. The gripping effect of the mat prevents tools from sliding, bumping, and rattling when the drawer is opened and closed. A 1 x 6-foot sheet costs $8.95 and protects up to 5 years according to the package label, 2 years according to the website. A definite winner.

Dovetail Chisels, September 28, 2008. Opinions vary because there is more than one good way to do almost everything in woodworking, but I still find it helpful to have a set of narrow chisels with side relief to clear the waste between tails. My Japanese chisels for this purpose are more than 20 years old. Bob Zajicek of Czeck Edge Tools has addressed this issue by producing a chisel design with side bevels that directly meet the back at a 70̊ angle, and have a one degree taper along the length to further reduce binding. I have not tried these but it looks like an excellent design and they are doubtless as meticulously crafted as the other products by Bob that I have tried.

Other options to consider are the Ashley Isles round back dovetail chisels sold by Tools for Working Wood.

More Workbench Upgrades – Pups, Anchors, and Stops, December 2 and 6, 2009. The longer I used these helpful additions to my workbench, the more it became apparent that the Veritas Wonder Pups would provide even greater versatility to the wood-holding repertoire. I put thin PSA cork on the clamping faces. They are now part of the team and are clear winners. 

Ditto for the Gramercy holdfast, and the bench already has several of the required 3/4″ holes. This tool is as good as it gets in combining simplicity and effectiveness. I think a piece of modern abstract sculpture can now be held securely on my workbench.

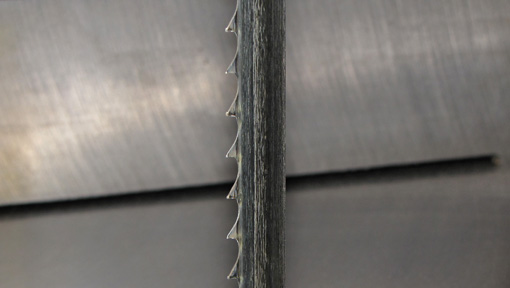
Bandsaw, Hand Tool With a Motor, June 15, 2010. In response to a reader’s question, I noted that I do my bandsaw work with just two blades by Suffolk Machinery, a 3/4″ wide, 2/3 tpi variable pitch blade for resawing and other straight cuts, and a 3/8″ wide, 6 tpi blade (see the Comments section of the post for more details.) I still think they are superb blades. Lately, I have been using the SuperCut’s Premium Gold ½” wide, 3 tpi blade which has bone-chillingly sharp carbide-impregnated teeth. I was skeptical that the ½” width would be sufficiently stiff for resawing. I still need more experience with the blade, but so far, so good.

The handy benefit is that I can also cut my usual shallow, sweeping curves with this ½” blade which comes with the back smoothly rounded. This usually saves me from one of the most unpleasant jobs in the shop: changing bandsaw blades.

More “second thoughts” to come in a future post. I’m always learning more about this craft and enjoy doing so. I hope this information is helpful to you for your woodworking.

Category: Tools and Shop  | 2 Comments
Author:
• Friday, November 26th, 2010

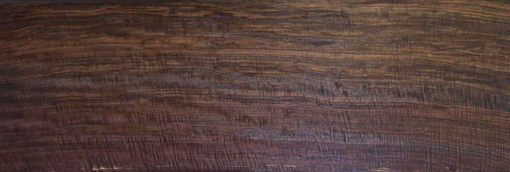
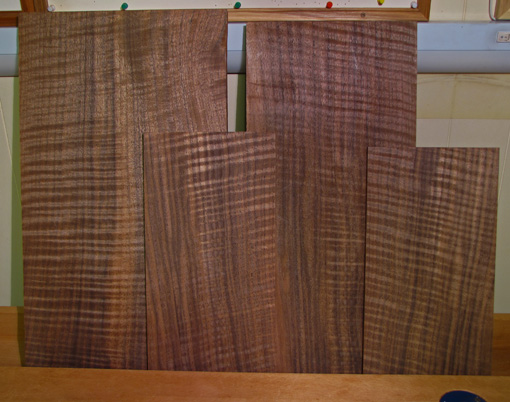
This wood is so beautiful, varied, and agreeable to work with, that I imagine if I could have only one species of wood to use for everything, it might well be Claro walnut. It is so captivating that there is a real temptation to just join a few pieces corner to corner without any thought to a real design, state that “Woodwork is made by fools like me but only God can make a tree” (apologies to Joyce Kilmer), and leave it at that.

If there are doubts about this wood, it is only in being sure of its proper scientific label. Perhaps oversimplifying, Claro walnut is Juglans hindsii, native to northern California. The well-known Eastern (U.S.) black walnut, a great wood in its own right, is Juglans nigra. As best I understand, “Claro walnut” lumber may come from trees that are J. hindsii or a hindsii x nigra hybrid, or from the hindsii root stock upon which Juglans regia, English walnut, has been grafted. Botanical technicalities aside, it’s just gorgeous wood.

Claro’s strongest appeal to me is in the variety of rich colors that can be found mingled in a single board, most compellingly on a marbled quartered or rift surface. Even more spectacular, curly figure, delicate or ropy, may be superimposed on the marbled color array. Flatsawn boards are very often too gnarly for my taste, but certainly have their own appeal. Crotch figure is also available.

The working properties of Claro are much like black walnut: excellent. It is a medium-hard wood, pleasant to work but with enough surface hardness for any furniture item. Sawing, joinery, and gluing are almost always without problems. Layout lines can be difficult to see but angling a light source can pick up the glistening of a graphite line fairly well. White art pencils blunt quickly but can be helpful for less critically precise layout.

The wood responds well to hand planing which gives an exciting clarity to vertical grain (quartered) and most rift surfaces. It can sometimes be a bit brittle under the plane. If you like swirly boards, scraping works better. For finishing, varnish and oil-varnish mixes have worked well. Shellac is another good option; water base is not, in my opinion.

The stability figures for Claro are very favorable and this is my shop sense as well. According to The Wood Database, Claro shrinkage is 4.3% radial, 6.4% tangential, 10.7% volumetric, and T/R is 1.5. Quartered boards, as expected, are very stable.

Here on the East coast U.S., I purchase Claro from across the continent so it is particularly important to buy from a dealer on whom I can rely. As for big-leaf maple, Northwest Timber in Oregon is my first choice for Claro walnut.

Category: Wood  | Tags:  | 4 Comments
Author:
• Wednesday, November 17th, 2010

In nearly all of my woodworking projects, there are curves that can make or break the design. These are almost always curves without a constant radius, so I am relying on what looks “right” to my eye. I really sweat this aspect of the design process.

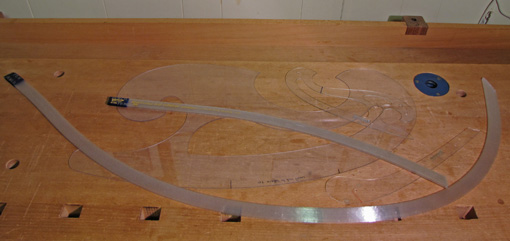
Acu Arc flexible curves are my favorite tools for laying out curves. French curves in regular and Woodhaven’s giant sizes are also helpful for sections of curves.

I do not like flexible rules or laths for laying out curves because it is awkward or impossible to control the contour in mid-curve. The curve is determined by the endpoints and at least one intermediary point and is then subject to the material properties of the layout device which may not produce the desired contour. I rarely use trammel points or a compass.

To design curves in a project, I start by gathering ideas and drawing in my sketchbook. I refine the promising sketches with scale drawings, repeatedly erasing and redrawing. To produce a full size mock-up, the results get transferred onto wood by measuring the key points and laying out a smooth curve using the Acu Arc. Sometimes I go from sketches to drawing directly on the wood. The mock-up is refined with spokeshaves, planes, and especially rasps.

I spend a lot of time looking at the mock up, leaving it, and returning to see how it strikes me at repeat visits. The bottom line: when it looks right and feels right, it is right, and that is a happy woodworking moment!

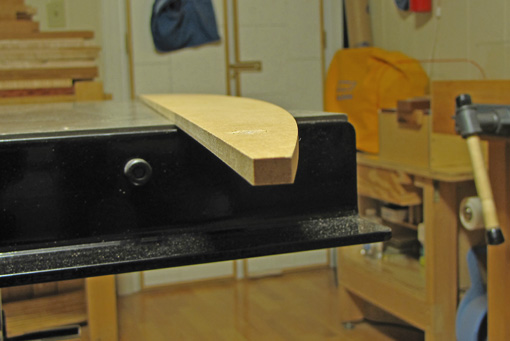
I transfer the key dimensions of the mock-up and drawing to make a template in quarter-inch MDF, using the Acu Arc again to refine the final layout. MDF works better than plywood, solid wood, or cardboard since it holds a clean edge and there is no grain to distract my eye or tools. The edges of the template should be square if it will be used on both faces for legs or as a template for router work.

Looking down the curve, as shown in the photo below, is a remarkably sensitive way to see bumps and lumps that must be eliminated to “fair the curve.” Running one’s hand along the curve, like a sleigh ride over the hills, is also a very good way to sense smooth transitions and detect lumps and bumps which must be removed.

The Acu Arc has a natural tendency to produce a curve without bumps as you shape it to your wishes. Then you can hold it on the wood, and trace only a nearby section of the curve with a pencil, hold it further along, trace more, and so forth, proceeding incrementally. It is stiff enough to hold its shape when it is carefully lifted and turned over to form the mirror image curve on the adjacent face, as is usually done for making legs. It is made of translucent colorless plastic but I would prefer opaque plastic that would show the curve better against the background of the wood.

The AcuArc is available from Highland Hardware in 24″, 48″, and 72″ lengths, and from Lee Valley in 18″ and 36″ lengths. (The top picture in the online LV catalog shows the pencil too far from the hold-down hand – the Acu Arc will move.)

I label the templates, save them, and sometimes reuse parts of them in other projects. In due time, a style develops, and, who knows, maybe someone will notice.

Category: Techniques  | Tags:  | 3 Comments
Author:
• Tuesday, November 09th, 2010

First, the bad news. Pearwood (genus Pyrus) is difficult to dry without distortion and the lumber often contains large splits, knots, and other defects. It is expensive and hard to find, especially in large pieces that are not loaded with defects.

But oh, the good news! Pear has a dreamy fine-grained, silky-looking texture with understated but exciting color. The best I can do in words is to call the color a muted pink/salmon, sometimes a pinkish brown. Almost all commercially available pearwood that I have come across has been steamed during processing to enhance the color and reduce stresses in drying.

The domestic pear that I have bought locally has tended to be fairly uniform in color with little or no curl figure, and a density not much greater than cherry or walnut. The top photo below shows a pair of pink-salmon boards from the same tree. Note the subtle shimmer curl in the front board. The lower photo shows a board from another tree which has interesting purplish red streaks.

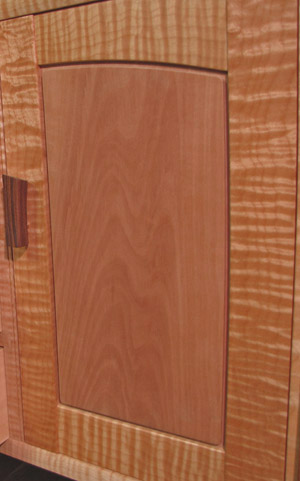
All of the wood shown in this post is from my shop. It has been surfaced only by the thickness planer with the exception of the door panel in the photo at the end of the post. The photo color is very close to real and close as I can get. Some pieces are portions of boards purchased over 15 years ago. Please keep in mind that I am writing these posts based on my personal experience with the wood, and, since pear is particularly variable, others woodworkers will surely have different experiences. Pear is one of those woods that, if I see some excellent stock in person, I’ll buy it even if I do not have any immediate plans to use it. I know its time will come.

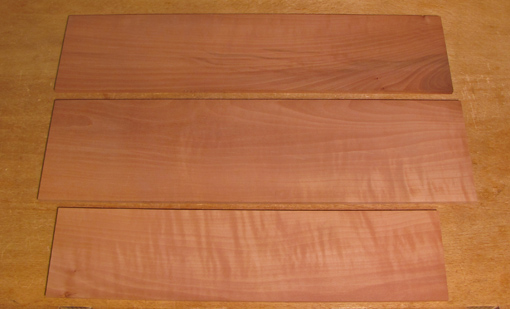
I have a pile of German pear that is much denser, has deeper color, and more streaks and figure than the boards above. I resawed all of it and it took a long time, at least several weeks as I recall, to settle out of its tendency to distort. Three examples from that lot, pictured below, show a range of color, streaks, and curl. Beautiful! Once at peace, all the pear that I have used has been well-behaved and quite stable. I have not been able to find shrinkage data.

Pear is not problematic to saw or glue. Its beautiful fine texture demands a hand-planed finish. The blade must be at peak sharpness with a carefully cambered edge because any blade defect will show up prominently on the wood surface. I needed a bevel-up smoother with a high attack angle for the German pear. Likewise, in cutting joints, pear reveals any and all boo-boos.

Finishing pear is a study in “less-is-more.” Oil or varnish, in my opinion, kills the wood giving it a greasy look. No finish or just some wax would work. To get more protection, I prefer a water-base poly-acrylic which imparts as little change in color as possible and preserves the lively look of the wood.

Enjoy and good luck with pearwood if you decide to use it in your work.

Category: Wood  | Tags:  | 2 Comments
Author:
• Sunday, October 31st, 2010

Over the coming weeks and months I would like to write some posts about my favorite woods from a personal, hands-on perspective. The internet woodworking world has an abundance of discussion about tools, ironically to the relative neglect of the magnificent gifts of nature on which we use them.

First up is big-leaf maple, Acer macrophyllum. The natural range of this species is the North American west coast from California to British Columbia. Synonyms include Oregon maple, Californian maple, and Pacific maple. To distinguish, “hard maple” is usually Acer saccharum (sugar maple) and “soft maple” is usually A. rubrum (red maple) or A. saccharinum (silver maple).

For this East coast woodworker, the magic of the internet is the source for big-leaf maple. The first place I turn to is Northwest Timber, run by Lewis Judy, the source for the wood pictured in this post. Their wood is properly processed and cared for, and I can confidently expect that what I see is what I will get.

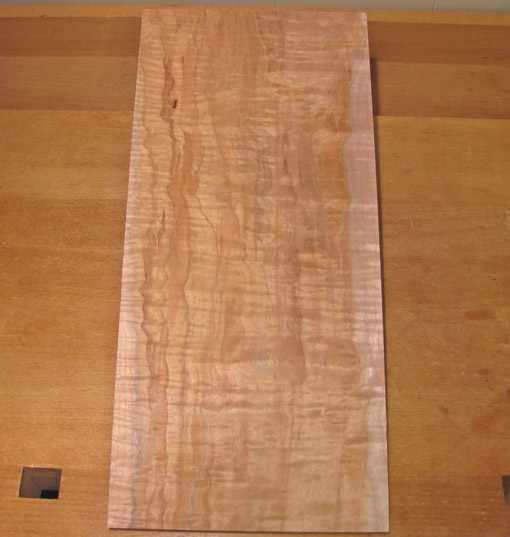
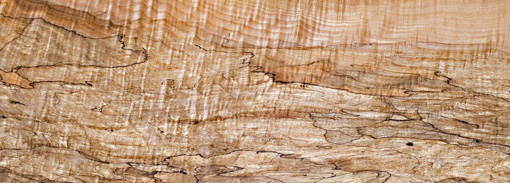
I can’t wait to get this panel into a project:

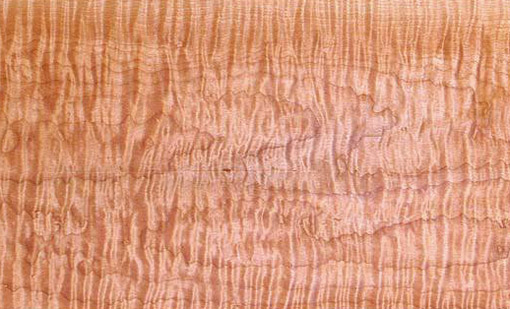
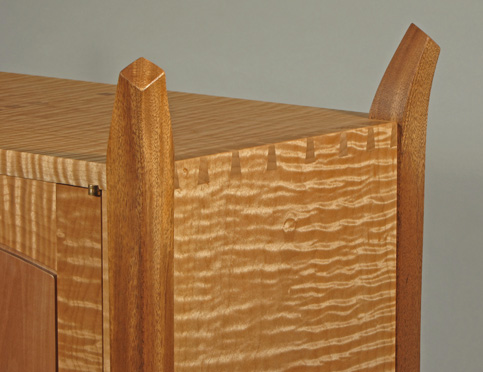
Why source big-leaf from 3000 miles away when I can easily find hard and soft maple locally? Well, for starters, I like its looks – and it has lots of different looks. Curly big-leaf is my favorite. I prefer it with an inviting soft, ropy curl, with wavy annual ring lines, as distinct from the tight, regimented fiddleback curl seen in the “best” hard maple boards, which seem somewhat aloof to me. I also like the warm golden-tan color of big-leaf which is enhanced with a wiping varnish finish – I usually prefer gel varnish. It also never seems to have the gray tinge that often plagues soft maples.

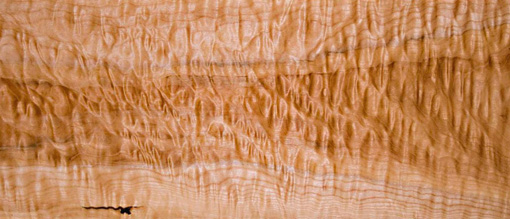
Oh, but there are so many more faces to big leaf! Unfigured, it still looks good, often with just a little wiggle to the annual ring lines to give it subtle character. Quilted figure can be mild to knockout, and some may like the extreme bubbly-looking “popcorn” figure. Big-leaf heartwood, “redheart,” can have a beautiful variety of subtle colorations. Like other maples, it produces a variety of interesting spalted appearances.

Big-leaf maple is softer and easier to work than sugar maple, about the same as soft maple in that regard. Still, it is plenty strong and dense enough for tables or any other furniture. It saws easily by hand and generally without burning on the table saw. Planing, not withstanding heavily figured boards, and gluing are not problematic. Heavily curly boards can be properly sanded to produce a final surface which, under wiping varnish, is indistinguishable from hand-planed. (Really, it’s OK, I tested.)

Forest Products Laboratory data show the density and hardness of big-leaf are similar to those of soft maple and significantly less than hard maple. Its volumetric shrinkage and tangential/radial ratio are more favorable than those of soft and hard maples. This is definitely appreciable and significant in the shop in comparison to hard maple. All in all, big-leaf maple is a friendly wood to work.

And a lot of fun to choose!

[My endorsement of NW Timber is unsolicited and unpaid. I just like their wood.]

Category: Wood  | Tags:  | 6 Comments