Author:
• Wednesday, July 04th, 2012

I have had many conversations over the years with woodworkers who were building or upgrading their shops and facing the question of where to place the higher priority, on the table saw or the bandsaw. Sure, with enough money and shop space, as well as time to set up, learn, and fuss with these tools, the most versatility is gained by having both machines. However, since we all deal with practical limitations, and shops are usually built incrementally, it is worthwhile to compare their merits. You might be able to buy only one of these two machines, or there might be a long wait before buying the second. If you are buying both, you might be wondering which one warrants a bigger share of your money.

More fundamentally, we tend to think through the building process, and even the design options, with our tools in mind. We steer our work toward the tools with which we are most comfortable – our “go-to” tools and skills. So this discussion is more significantly about which of these two machines do you mentally reach for first.

Let the sawdust fly.

The table saw excels at accurate ripping parallel to an existing straight edge. It can also very accurately crosscut at a chosen angle, usually 90º, to a straightedge. Some joinery can be accomplished, such at making tenons, slip joints, and dovetail work. Grooves and dadoes can be cut with the addition of a dado set.

The bandsaw can also rip and crosscut, but the sawn surface is generally not as exquisitely accurate nor as clean as that produced by the table saw. Truing and smoothing, sometimes tedious, are required. Using the bandsaw may seem like more work and even feel crude compared to the table saw.

I suspect this imagery is what causes some woodworkers to view the bandsaw as the second-banana sawing machine in the shop. They may figure that it is nice to have for cutting curves, but since they mostly make Arts and Crafts and Shaker style furniture, it gets dropped down on the priority list.

As you might guess, I strongly disagree with this “table saw-centric” view. Further, to those woodworkers who are making a priority decision as discussed above, I contend that placing the bandsaw first will, in most cases, make you a better craftsman.

Too often with issues like this, there is the tendency to think of the tool’s functions in isolation. It is more useful to think through the design and building processes, and how the tool can change what you can accomplish. So instead of listing what each machine can do, salesman-style, let’s look at real project scenarios using these machines.

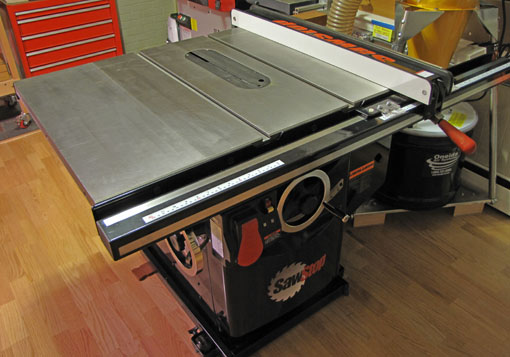
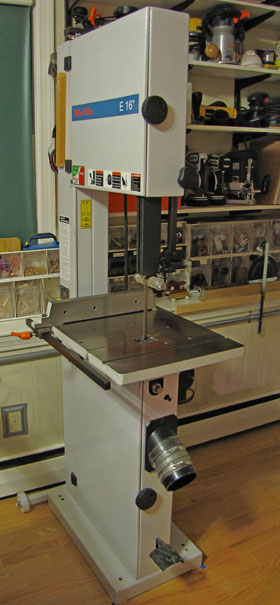
For the record, I own and happily use a Saw Stop 10″ cabinet saw and a Minimax 16″ bandsaw. This is not a question of one machine to the exclusion of the other but a matter of prioritizing which machine tends to guide your woodworking.

Next: Round 2, the real action starts. We’ll consider these projects: a wall cabinet with frame and panel doors, and a table with straight-tapered or curved legs.

Author:
• Friday, June 29th, 2012

It is handy to have an arsenal to scrape contours and details. This is mostly clean-up work done after routing or planing.

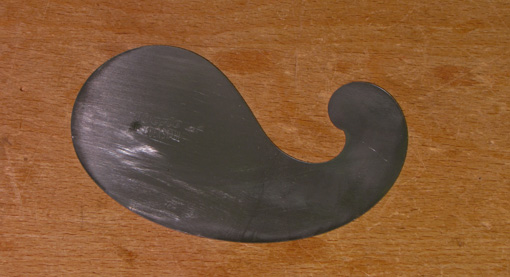
The “gooseneck” scraper, above, handles a lot of concave contours. This Eberle model is about 0.028 inches thick. I do not know the Rc hardness but it seems softer than the Rc 48-52 of my other scrapers. Lee Valley has nice choices.

Cleaning up a cove, on a raised panel, for example, can be done by setting this scraper into the cove and then angling it to make the edge match the contour. To understand this, hold a coin in front of you and observe how the visible curve at the bottom changes as you turn the coin on the vertical axis. Angling the scraper also facilitates a smooth cut, though too great an angle will cause the edge to slice the wood and create tracks.

By the way, does that scraper look like a goose neck to you? To me it looks more like a whale or maybe a goose body without its legs and head.

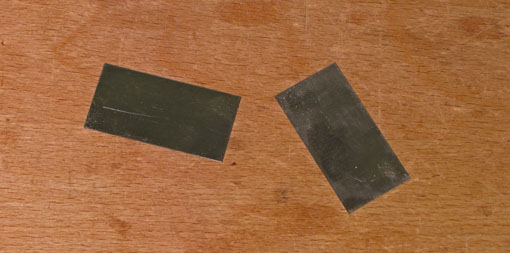
The two little guys below are handy for all sorts of clean ups such as scraping glue out of a corner. They are 1″ x 2″, 0.020″ thick, Rc 48-52, and available from Lee Valley. Because their small size makes them hard to bend, you might want to file a slight camber in one or two of the edges to avoid gouging by the corners when doing work on an open surface.

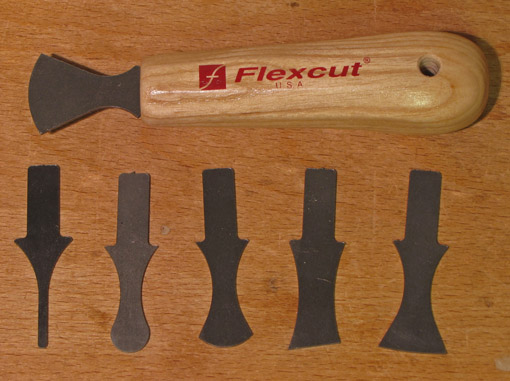
The set of Flexcut scrapers, below, are earning their place in the shop. The scrapers are inserted into the handle and secured without screws or hassle. At 0.050″ thick, they are quite stiff. The handle can be held in various ways – like a pencil, in a fist-grip, or a fist-grip with the thumb behind the scraper. Both the ends and the long side edges are useful. I don’t use this tool frequently but its versatility sure is handy when the need arises.

Lynx makes a set of contour-edged scrapers that looks like a good option, but I have not tried them. 

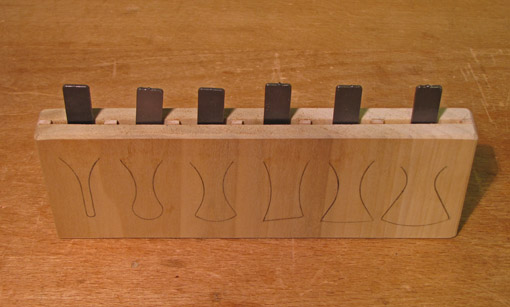
Here are the Flexcuts tucked away in the little holder I made for them.

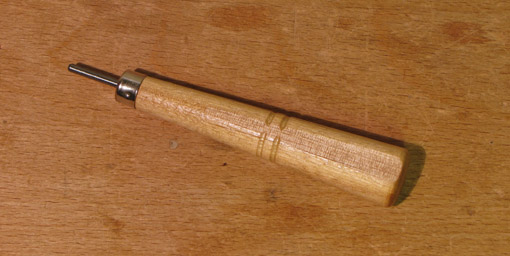
Sharpening these small and curved scrapers can be awkward. The small scrapers do not necessarily need a burr but I find they work better with it. The short carbide burnisher, available from Lee Valley, is convenient for preparing these scrapers.

Once again, my purpose here is to present a range of options and discuss what has worked for me, with the hope that this will help you sort out what is useful in your shop where you are the supreme commander, king, lord, and unquestioned deity, unless of course, your spouse or pet happens by.

Category: Tools and Shop  | 2 Comments
Author:
• Tuesday, June 26th, 2012

The outward simplicity of the hand scraper belies the many options available for this wonderful tool. For a card scraper, several parameters influence its utility. These are: thickness, width, steel hardness, and, to a lesser degree, height. In this post, I will discuss the card scrapers that I find useful in my shop.

The 0.032-inch thick (usually listed as 0.80mm) scraper is the one most commonly referred to in discussion, instructional materials, and in catalogs, but is the one I use least. This is a thick scraper suited, in my view, primarily for heavy use on bare wood or for removing finishes. I have Bahco and Lee Valley versions, both Rc 48-52, 6″ wide, and 2 3/8 – 2 1/2″ high. One of them is filed to a slightly concave edge along its length for use in creating subtle convexity on the surfaces of legs.

For general use, this relatively stiff scraper does not afford the sensitivity of the thinner models. For my work, hand scraping is usually done near the end of the surfacing sequence when a delicate touch is desirable.

The 0.024-inch thick (0.60mm) scrapers are the most used in my shop. They are from Lee Valley. I like the 6″ width which makes it easy to camber sensitively for long work sessions. The same thickness available from Bahco is only 5″ wide which reduces some of that sensitivity, and just seems too narrow for my hands. I wish Lee Valley would make them taller than 2″. I own two and always sharpen them at the same time, giving eight edges ready to work. They are Rc 48-52 as are all of Lee Valley’s card scrapers. By the way, Lee Valley’s scrapers come with the edges ready for burnishing.

For especially delicate work, including touch-ups and error correction, Lie-Nielsen’s 0.020-inch thick (0.50mm), 6-inch wide, 2 1/2-inches high, Rc 49-51, is just right. It bends easily, allowing light shavings in a small area. This flexibility, however, makes it hard to avoid unevenness in larger areas of work. Lie-Nielsen also makes a 0.032″ model.

I also keep an 0.020-inch thick Bracht scraper as stock to cut and shape for special applications. Thin and soft at Rc 38-42, it is easy to cut and modify for dedicated use in a project.

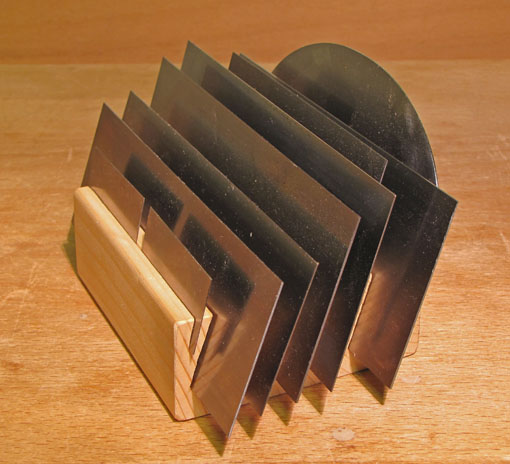
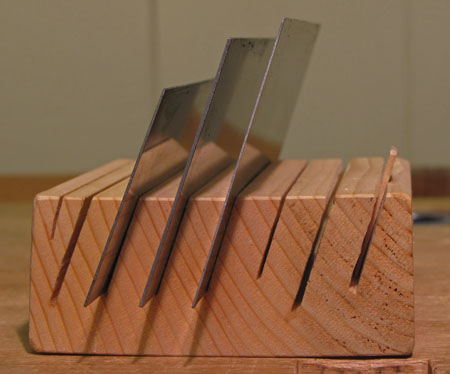
In the photo below, from left to right, are 0.024″, 0.032″, and 0.020″ scrapers. The holder is a hunk of 2×4 with some slots bandsawn at an angle.

In summary, my go-to scraper is 0.024″ thick, but the other options are still very useful. Most important, I want to call attention to the available options and encourage readers to try them and find what works best for them. These are just my preferences. Scrapers are inexpensive tools so I suggest get a bunch. Having one scraper is like owning one pair of socks.

Next: more sizes and shapes.

Category: Tools and Shop  | 3 Comments
Author:
• Monday, June 18th, 2012

It is not easy to make fine things from wood. Woodworking is a succession of mostly subtractive steps which requires careful planning. The critical differences between success and failure in most woodworking processes are subtle, often difficult to reliably articulate, and regrettably seem to require a bit of failure prior to the success.

Human nature creates a tendency to imagine an easy path to success, and, further, to seek this illusory path against all odds. Now certainly, woodworking can be taught and learned with reasonable diligence and, along the way, plenty of fun. Today, there is an abundance of excellent learning tools which admirably remove the unnecessary mystery from woodworking. Unfortunately, the woodworking student – and that means all of us – can be easily distracted by the allure of magic.

Magic is everywhere in the world of woodworking. Catalogs tout machine jigs, especially for the router, that guarantee “perfect” results “every time”, hinting that no real skill is required. Sharpening and finishing, perhaps because they harbor perceived mysteries, are particularly prone to the din of hype. Gurus demonstrate astonishingly fast technique making parts that are conveniently abstracted from the constraints of a real project.

Sure, there are places for time-savers, innovative devices, and instructive demonstrations. The point here is that the hype can lure you to squander your efforts seeking answers in the wrong places while neglecting the acquisition of true craftsmanship. Though the noble task is slower than we might like, and sometimes disappointing, it is ultimately joyful.

Consider this: the only magic tools are the ones attached to the ends of your arms, and they only do what your brain tells them to do. I suggest being cautious about where you invest your time and energy in developing your woodworking craftsmanship. You very likely have an intuitive sense of true skill and quality, especially if you have developed it in other fields. Follow that, not the hype.

That’s the way to happy woodworking.

Category: Ideas  | 3 Comments
Author:
• Monday, May 28th, 2012

With over a half million apps available for the iPhone, surely there must be plenty of value to woodworkers. So I had hoped, but my search, while not exhaustive, has been generally disappointing. There are lots of apps for DIYers and contractors, but few of real value to small shop furniture makers. Some of the woodworking apps aren’t worth even their small cost, some are mostly designed to market in-app purchases, some directed at novice woodworkers give little truly useful information, and some just do not work well.

Here are some notable exceptions that I recommend.

The Woodshop Widget lists movement and hardness values for 288 wood species using data mostly from the US Forest Products Laboratory. You can easily calculate the change in width of flatsawn, rift, and quartered boards over a range of humidity that you specify. Also included are a board-feet calculator and several other handy functions. Its $3.99 price is about the most I can bring myself to spend on an app but this one is worth it.

Board Feet Easy Calculator does one job, does it well, and is free.

WoodworkerCalc, $0.99, is primarily a very handy fractional calculator designed for the fractions woodworkers use. I find it is faster, easier, and less mistake-prone in use than my old dedicated fractional calculator. It allows you to set the precision of fractions (e.g., to 1/32 or 1/64) and decimals. It contains a few other functions including, of course, a board-feet calculator.

Woodworking with the Wood Whisperer is a free companion app to Marc Spagnuolo’s website. The app gives you access to hundreds of videos, audio podcasts, the WoodTalk online forum, articles, and much more. The well-produced videos are not only informative, but also enjoyable because Marc is a gifted communicator with an engaging, likeable style.

Readers, if you’ve found other worthwhile apps to add to this list, please feel free to comment.

Category: Resources  | 4 Comments
Author:
• Saturday, May 19th, 2012

The manufacture of Bartley gel finishes had been discontinued for some time. Reader Mike Dedon gave me the heads up a few days ago that they are now available.

I missed the clear satin gel varnish, having been a fan for many years. Some old stash is pictured above. I called Bartley and they confirmed that the formula for this is unchanged with the exception of a new dryer because the original dryer is no longer made. The new dryer, I am told, imparts a purplish tint to the product but only when it is in the can. The clear varnish is available in satin only.

Seagrave Coatings, the new manufacturer, has been reported for a while now to have acquired the formulas from the former manufacturer and would be producing the finishes. There are several other brands of gel finishes but it is good to have Bartley’s available once again.

Mike tells me he tried one of the gel stains, and though the color was slightly different from his old stock, the application and results were just as good.

Two sources are Bartley and Woodworker’s Supply.

Category: Resources  | Comments off
Author:
• Sunday, May 13th, 2012

Tip #5: Be assertive “to the line.” Timid does not work.

To determine if your saw strokes are following the line, you have to observe sufficient incremental progress to close the loop of intent and result. In other words, you have to see how it’s going.

An ineffective strategy is to go very slow, with the supposition that although such extreme care is time consuming, at least things won’t go wrong. Yet if each stroke is barely consequential, such as when using a saw with too many teeth per inch for the job, it is difficult to know how it’s going and how to adjust. Much like learning to ride a bicycle, being overcautious will prevent you from ever learning. At some point, you have to let it flow, even if sometimes you will fall.

The answer is not a dovetail saw with 32 tpi. This is not to suggest being reckless or careless, but appropriately confident.

A similar problem is taking too much clearance from the line. This leads to excessive clean up maneuvers, creating more opportunities for things to go wrong and to lose direction. One-sided tolerance, an awareness of directional errors (discussed in another post), is one of the key concepts in craftsmanship, but it should not be misconstrued as an excuse for timidly missing by a mile.

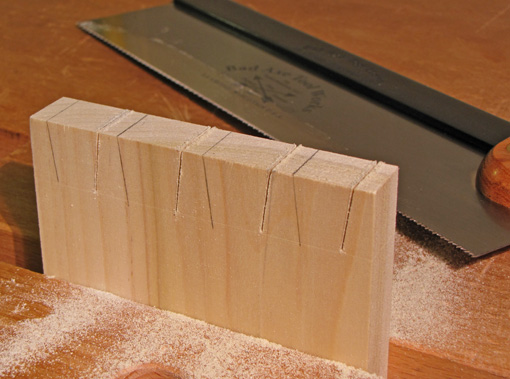
When sawing, the visual and physical senses continually inform each other. As you see success developing, your movements gain assurance. The physical sense takes precedence as the cut proceeds, and as assurance builds, speed can increase as an easy flow develops[In the cuts above, I did the one on the right first, not quite fully assertive, then went at it and split the line nicely on the other three, picking up speed.]

There is a solution to all of this: practice! And if you miss, get another piece of wood. I’ve had a lot of practice at that! Truly, we’re all students.

Happy sawing!

Category: Techniques  | Tags:  | 7 Comments
Author:
• Friday, May 11th, 2012

Tip #4: Since you can only watch one line at a time, see one line while you feel the other.

For most sawing, you are viewing a single line while using a physical registration for the other axis of the saw. I will explain.

In ripping with a handsaw, you follow the line with your eyes and the saw after establishing and then maintaining the saw at 90 degrees to the wood surface. When sawing a dovetail tail, most woodworkers start the saw along the end-grain line, establish that 90 degree relationship, and then view and follow the line down the wood.

In both cases your eyes track one line as you feel the angle you initially established with the saw by using an estimate of position (ripping with the handsaw) or another line (dovetailing). In dovetailing, you can use both lines to position the saw before you start. You can also use peripheral vision to sense the saw’s squareness to the length of the bench or a wall behind it. Yet when you are actually sawing, that initial line on the end grain is really only there to start you out. It is not necessary to continue to watch the remnant of it as you cut down the face-grain line, as long as you maintain a true stroke in one plane.

In any moment, the eyes can only watch one detail. Yes, there is peripheral vision, but even a small distance away from the spot you are “looking at” (technically, on which you are aligning the very tiny center of your retina, the foveal center), the vision is not very clear – not clear enough to follow a fine line. So if you attempt to follow two lines at once, the best you can do is to quickly jump your eyes back and forth from one line to another, and this must be done in the rhythm of your sawing stroke. The feeling one might have of actually accurately viewing two lines at the same time is an illusion.

Now, consider sawing a tenon. For some reason, it is often recommended to follow the end-grain line on top of the wood at the same time as you follow the line down the side of the wood. In other words, to saw a triangle into the wood in one motion.

In this method, the two contact points of the teeth biting into the wood grow further apart from each other as the cut proceeds. Yes, by aligning your eye, the two lines could be viewed as one, but the saw teeth are biting at two ends. Again, the best you can do is actually jump the eyes from one spot to the other.

The better way, in my opinion, is to cut the single end grain line first. The eyes follow one line and the saw is held vertical by feel. I like to establish the cut first at the near end, then the far end, work each cut toward the middle, then cut the full width as the saw is established in a kerf. I advance just until the teeth are buried, as seen in the top photo.

[By the way, if the saw blade is shiny, the vertical orientation of the saw can be checked before starting by observing the continuous straight line created by the top corner edge of the wood and its reflection in the blade. See the photos. I don’t find this necessary, but it is a neat trick to know.]

Then I saw the line down the side of the wood, only watching that line. The saw does not bite further in at the far end of the wood, only on the near side, going down the line. The initial kerf established on the end grain is the “line” I feel, as I watch the line down the side. See the photo below:

I proceed similarly on the opposite side. Next, the final remaining internal triangle of wood gets cut almost entirely by feel since there are kerfs all around it. At this point, I do not want to redirect the saw; I’m just going with the flow, by feel, with what has already been accurately established.

A similar sequence is useful in accurately crosscutting beams by hand, such as a 4×4.

Seeing and feeling work together to make accurate sawing.

Next: attitude matters.

Category: Techniques  | Tags:  | 2 Comments