Author:
• Saturday, November 10th, 2012

My recent hike in New Hampshire’s White Mountains prompted this thought.

As we attempt in our woodworking shops to make objects of some small beauty, I believe we are merely borrowing from the ultimate source of beauty, the Creator, to bring joy to us and to those who appreciate our work. That is truly happy woodworking, for which I am grateful.

Happy woodworking to you, dear readers.

Category: Ideas  | 4 Comments
Author:
• Wednesday, October 31st, 2012

Fresh designs are exciting to conceive and build. The effort and risk involved in developing a new design concept lead to a feeling of accomplishment when the work is done. By virtue of their novelty alone, such pieces draw attention, and tend to be called creative, imaginative, clever, or even brilliant. New interest is created, boredom is avoided, and challenges are met. Creativity expands.

Yet, if every project is fresh and different, when will you have a chance to refine your work? Most truly excellent work is a result of refinements of previous attempts at the same or similar idea. Such work builds upon a previous design concept by refining elements such as proportions, materials, textures, workmanship, and meaningful embellishments. The integration of the elements is also refined.

That’s how the best work comes about. It’s true of furniture, jokes, recipes, tools, music, and on and on. You have to work on something to make it better! Your work does not always have to be new and different. And as for “original,” I’m not sure there truly is such a thing. On the other hand, appreciating the value of refinement does not excuse working an idea to death, getting stale and unimaginative, complacency, or creative laziness.

As an example, look at the work of the late Sam Maloof. His iconic rocking chairs are the products of years of refinement of a core style concept, but his work is never boring. Still, early Maloof is not as good as later Maloof.

Another good study in refinement is Albert Sack’s Fine Points of Furniture books in which his keen eye identified the “good, better, best” of early American furniture and its features.

Now, here are some related bite-sized opinions for thought. The “arteests” and the arbiters of cool in some parts of the high-end craft world seem to reflexively give extra credit to work which is new and different, but often lack the attention span to extol work which is less flashy but has undergone sustained refinement. New is not automatically better. On the other hand, the approach from some corners (Architectural Digest?) seems to take it as axiomatic that the refined work of modern masters such as Maloof, Jere Osgood, and Silas Kopf cannot be as good as that of the 18th century masters. Oh, how I disagree with that!

In summary, while there is much value to fresh ideas, we should not forget the role of refinement in producing the best work.

Category: Ideas  | Comments off
Author:
• Sunday, October 28th, 2012

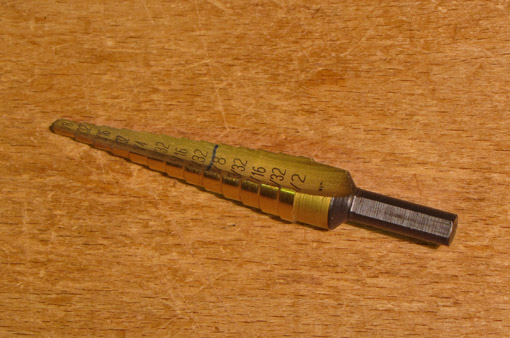
It is usually difficult to accurately concentrically enlarge a hole, especially when working with unpowered or electric hand-held drills instead of a drill press. Furthermore, the sides of the previously drilled hole tend to grab the larger bit and pull it in faster and deeper than desired, sometimes creating a ragged rim at the top of the enlarged hole. A simple tool that has saved the day for me a number of times over the years is the step drill bit.

The one I use, pictured above, has 13 steps, each 1/32″, from 1/8″ to 1/2″. Simply seat the appropriate diameter step in the original hole and drill down to the step of the desired size. It may be helpful to mark the desired step. The resulting shallow hole at the top can now concentrically register a regular bit for the new hole size. Of course, this won’t manage every situation, but it is a helpful option to have in the shop. I have never found a bit with 1/64″ steps.

These bits, sometimes called “drill tree” bits, are designed for drilling in thin metal and plastic, and for that I have found nothing better. They advance smoothly and produce a very clean hole with none of the grabbing or tearing common with regular twist bits.

They are available at home centers and hardware stores. It pays to keep an eye out for tools that are not intended for woodworking but which can nonetheless be useful in the wood shop. “Step drill” can also refer to concentrically ground twist bits, similar to those used for drilling pocket holes. W.L. Fuller in Rhode Island makes an incredible selection of step twist bits, including custom tooling.

Correcting one’s mistakes and finding a way out of jams are like every other skill: with enough practice, you get good at it. I’ve given myself plenty of practice, so I hope passing on these little tips will be helpful to you.

Category: Tools and Shop  | 3 Comments
Author:
• Monday, October 08th, 2012

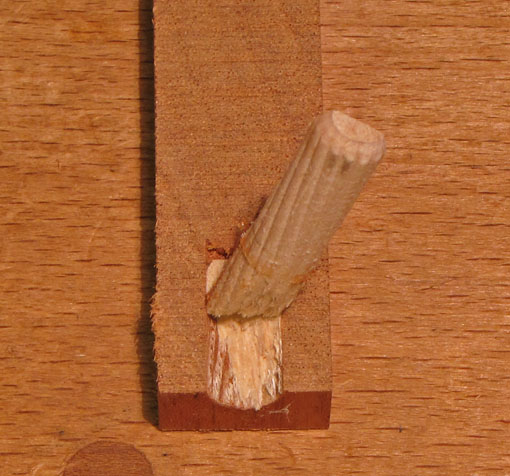
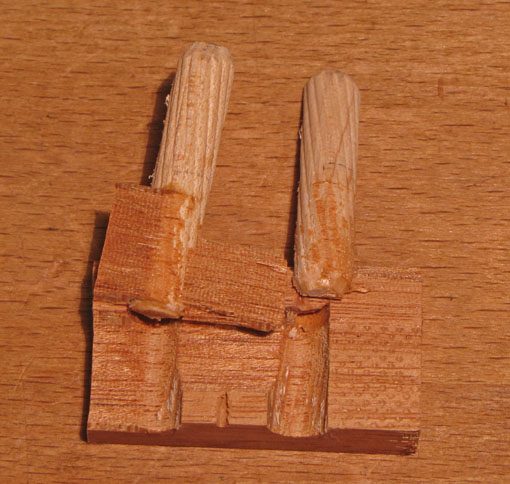
Finally, let’s look at the most doubtful part of the joint which is the adherence of the round dowel surface to the end grain portion of the hole.

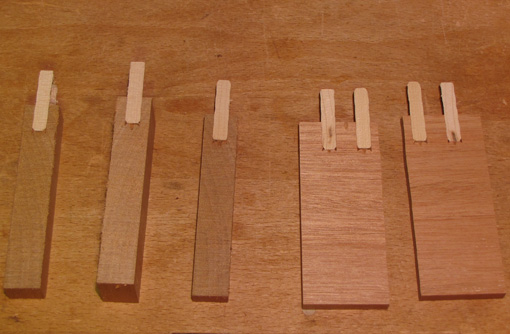
This time, 5/16″ diameter Laurier dowels were inserted 3/4″ into holes drilled with a brad point bit in mahogany to again mimic the face grain side of the dowel joint. After drying, some of the samples were cut with an orientation to to primarily examine adhesion to the end grain portion of the hole – see the three pieces on the left in the photo below. The two pieces on the right are oriented to primarily examine adhesion to the side grain portion of the hole.

The dowels were smacked as described in the first post. The results shown are typical of several trials and they look good – the dowels adhere well to the end grain part of the hole, as seen in the first two photos below. For comparison, the next two photos show side grain and, from a separate trial, long grain adhesion.

This methodology is far from perfect. What is really demonstrated in many of the samples, essentially, is that the half joints are stronger than the half dowels. It does, nonetheless, give some sense of what is going on inside those holes with dowels glued into them. While not a joint strength test and certainly not scientific, this gives some insight into the behavior of the components of dowel joinery.

All in all, I am not surprised that in the test of the real world, the dowel joinery in my cabinets has held up well. Furthermore, these little experiments will help me proceed more knowledgeably building future projects, and I hope they will help you with your work.

Author:
• Monday, October 08th, 2012

Now let’s turn our attention to the face grain side of the joint where the grain of the dowels is perpendicular to that of the board. This is similar to a multiple mortise and tenon joint but among the important differences is that, because the dowel is round, there is limited side-grain-to-side-grain glue surface. So, it is reasonable to question the glue adherence of the dowel in its hole.

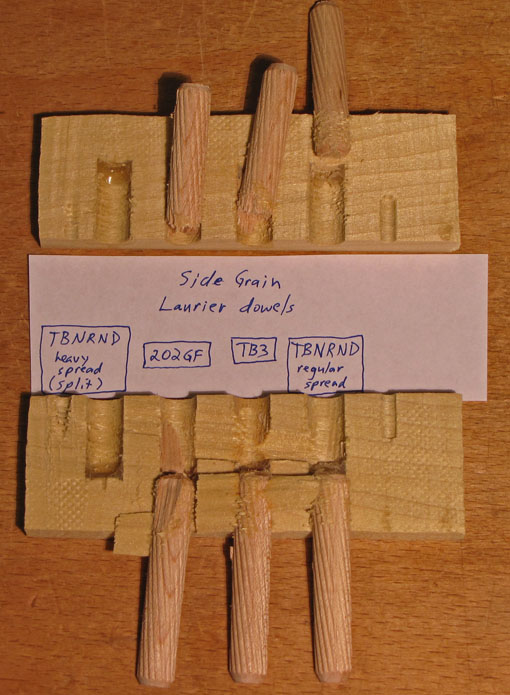
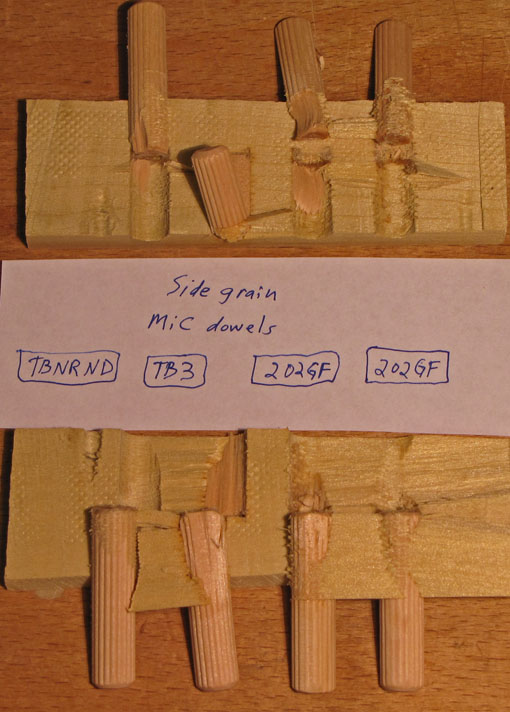
To mimic and investigate this part of the joint, 3/8″ diameter Laurier and Made-in-China dowels were glued 3/4″ deep into holes drilled with a brad point bit. The next day, the wood was resawn through the middle of the dowels. The dowels were then smacked to failure as described in the previous post. The orientation of this procedure primarily examines the adhesion of the dowel to the side grain portion of the hole.

As seen in the photos above, both the Laurier and the made-in-China (MiC) dowels performed well with both Titebond III and 202GF glues. The Laurier dowels were preferable in the long grain side of the joint, so they are my choice for dowel joinery, along with TB3 or 202GF glue.

Titebond No Run No Drip (TBNRND) glue did not create good adherence, and a heavy spread of it in one of the holes caused enough resistance to inserting the dowel that the wood split. It is an excellent glue for some jobs but I don’t think the best choice for this one.

Dowel joints have the same sort of cross grain dimensional change conflict as, for example, a multiple mortise and tenon. Nonetheless, I find these tests reassuring regarding the quality of the glue line in dowel joints.

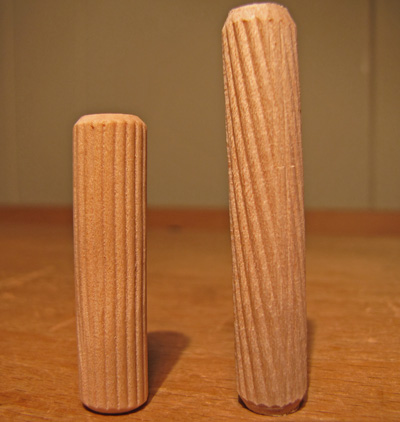
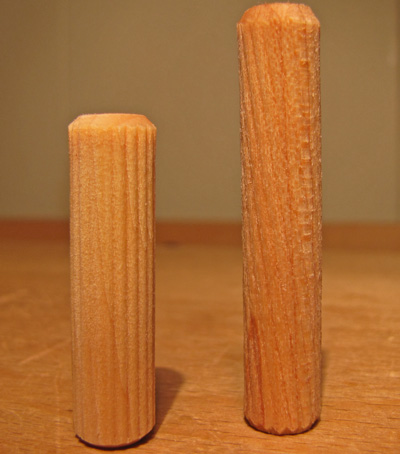
Here is another reason I prefer Laurier dowels. Their spiral grooves are shallower than the straight grooves of the made-in-China (and similar) dowels, as seen in the photo below. After a 15 minute soak in water (the second photo below), which mimics the response to water based glues, the Laurier grooves expand more to take up the space in the joint. The Laurier grooves are formed by compression, and therefore will retain their expanded profile.

But wait, there’s more! The most suspect issue with a dowel is how it adheres to the end grain glue surface in its hole. That will be addressed in the next post.

Category: Techniques  | Tags:  | Comments off
Author:
• Monday, September 24th, 2012

In casework, doweling can be a good choice to join the end grain of one board to the face grain of another across their widths. This method for making cabinets was described and popularized by the late James Krenov in The Fine Art of Cabinetmaking. While noting that dowel joinery opens up many design options where the sides meet the top and bottom of a cabinet, Krenov warns us to use good judgement in selecting it for a piece; though durable, it is not for heavy-duty work.

The joinery in the pieces I have made with this method has remained tight for many years without a hint of problem. Nevertheless, some doubts have lingered in my mind about a joint that involves relatively little side grain gluing surface compared to the gold standards of mortise-and-tenon and dovetail joints. I wanted to see what was really going on inside dowel joints.

To do that, I had to make ’em and break ’em. My qualitative observations, combined with some intuition and educated guessing, are informative enough for my purposes. This is not a joint strength test, nor is it scientific. The photos show typical results.

First, let’s look at the “end-grain side” of the joint where the long grain of the dowel is parallel to the long grain of the board.

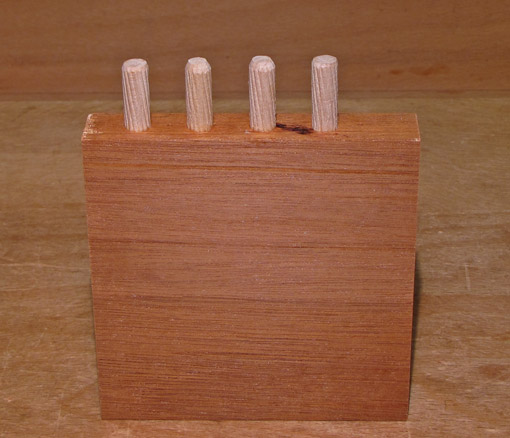
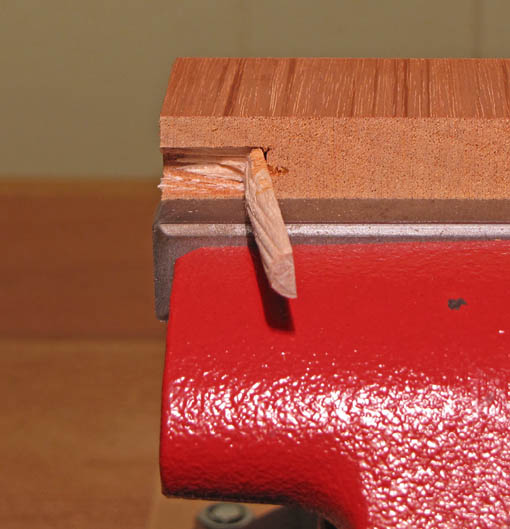
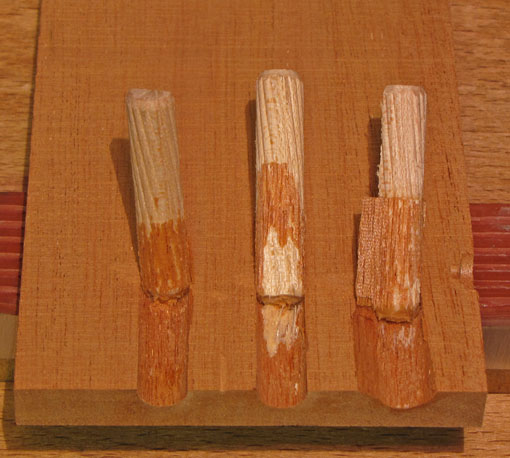
Using a DeWalt Pilot Point bit and a Krenov-style jig, 3/8″ holes were bored in poplar in the long-grain direction, deep enough to allow 3/4 inch of dowel insertion plus room for excess glue. Glue was spread only in the holes. After 24 hours, the wood was sawn through the middle of its thickness. Each half was secured in a vise, and each dowel was then hit with a hammer toward the open face to make the connection fail. The photos show the dowels snapped backwards, exposing the half hole.
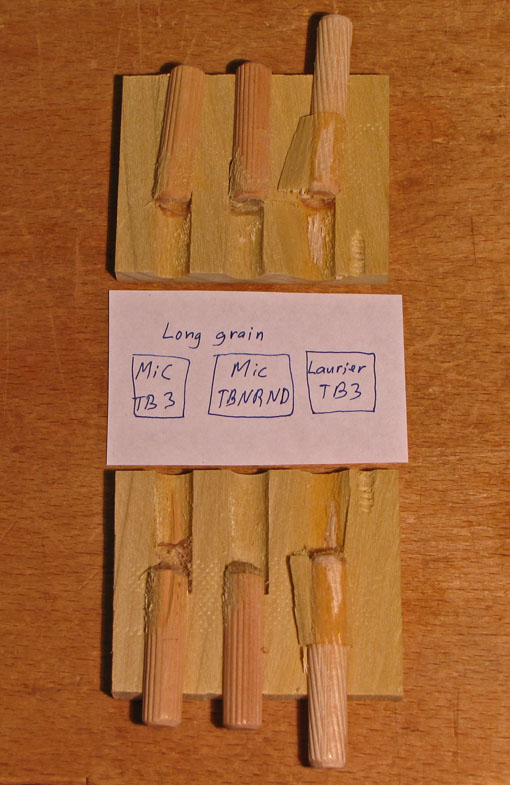
From left to right,above:

1. A made-in-China (MiC) dowel glued with Titebond III. Fair adhesion – some wood is torn away.

2. A MiC dowel glued with Titebond No-Run No-Drip glue. The bond largely failed as evidenced by the relatively clean surfaces.

3. A Laurier brand dowel, made in Canada, glued with Titebond III. Plenty of wood failure, indicating a good joint. That’s what I’m looking for.

Update Aug 29, 2017: A reader has informed me, based on information directly from Laurier, that Laurier dowels are no longer being manufactured. The owner has retired, and the machinery that makes the dowels is for sale.  A few sizes remain available at justjoinery.ca

The TB No-Run No-Drip glue is very viscous, and handy in that it doesn’t run down and collect at the bottom of the hole. However, in other tests I found it did not spread well over the Laurier dowels which have less space for the glue in their spiral flutes. There was too much resistance to inserting the dowels, the glue got pushed down, and too much pressure was created. I thought it might work well with the more deeply fluted Chinese-made dowels, and they did go in easier, but TB III still made a better joint with them.

So, for long grain dowel insertion, I’ll go with Laurier dowels and Titebond III. (In other trials, Lee Valley’s 202GF performed similarly to TB III.)

Lee Valley sells the Laurier dowels. Grizzly sells the Chinese-made dowels. To keep myself out of trouble, I emphasize that these are not scientific tests, and my conclusions that I am sharing with you are for my purposes in my shop. These should be regarded as anecdotal findings. Please refer to the manufacturers’ and vendors’ literature and make your own choices.

Of course, there is the other half of the joint to consider – the face grain board. Obviously, the same dowel must be used but it does not have to be the same glue in each half. So, in the next post, we’ll look at side grain insertion of the dowels with various options. This is the part of the joint that creates more doubt for me since much of the dowel surface is bonded to end grain surfaces inside the hole. The results of my tests surprised me.

Author:
• Tuesday, September 18th, 2012

Ulmia used to make a small vise that could, among other uses, be held in the workbench tail vise to hold small or thin work pieces. It is Ulmia model #1812 “Hilfs-Spannstock” (auxiliary vise). [Note: one of the vise jaws is stamped “LSP-2816-4” and the other “LSP-2817-4” but I don’t think those are model numbers.] It can be seen in The Fine Art of Cabinetmaking, section 3, where the author, James Krenov, discusses Japanese saws (page 145 in my copy, the 1977 Van Nostrand Reinhold hardcover edition). I use two alternatives, neither quite as elegant as the Ulmia, but handy nonetheless since they hold small pieces of wood that would otherwise be problematic to work on.

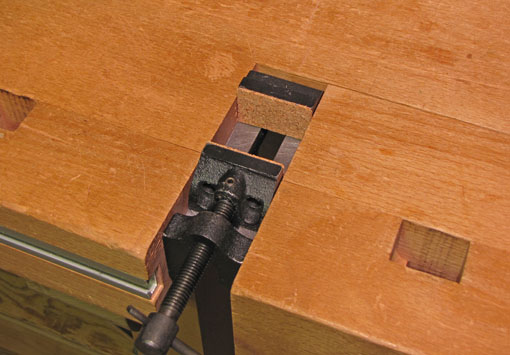
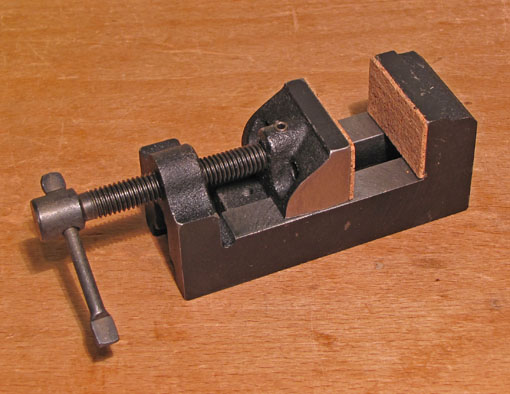
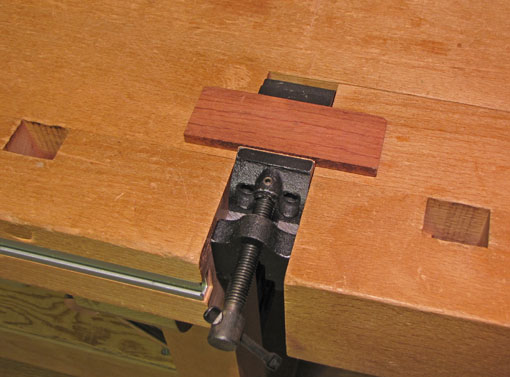
The first option is strorebought, quick, easy, and cheap. (How do like it so far?) Pictured above, it is a drill press vise (MSC #56451263, $21.32), 5″ long, with 1 1/2″ wide jaws. I filed the sides of the moveable jaw so it would move freely when clamped in the tail vise, and replaced the steel jaw faces with very thin corkIt is clamped in the tail vise with the jaws projecting enough above the level of the bench top to securely hold the work piece but below the level of the top surface of the work, so as not to interfere with a plane, chisel, scraper, or other tool.

Unlike the Ulmia, the screw feeds through a threaded portion of the base structure, and thus it projects outward as the vise is opened. This is why I chose the 5″ model over the 7 1/2″ model which, though it has a larger capacity, would tend to get in my way. The Ulmia’s moveable jaw is itself threaded underneath, so the knob remains stationary as the jaw is moved in either direction. There are more expensive precision-made drill press vises available but this one does the job just fine.

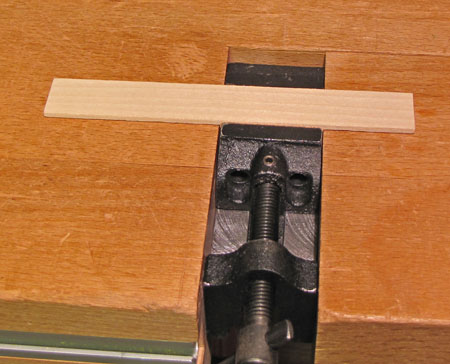
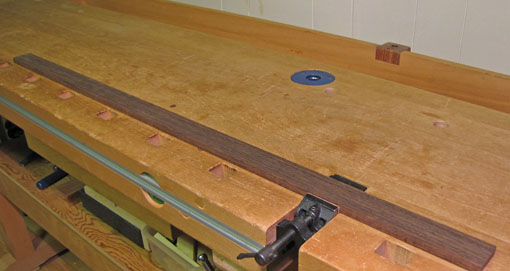
Below are some examples of what it can hold. The piece of maple in the second photo is less than 1/8″ thick.


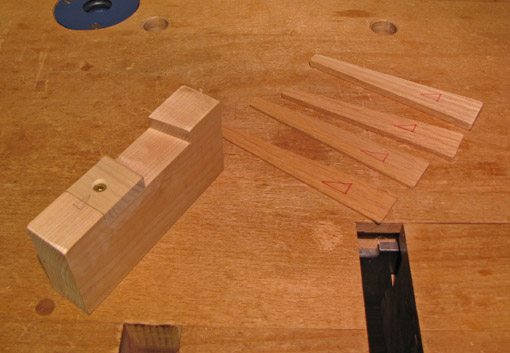
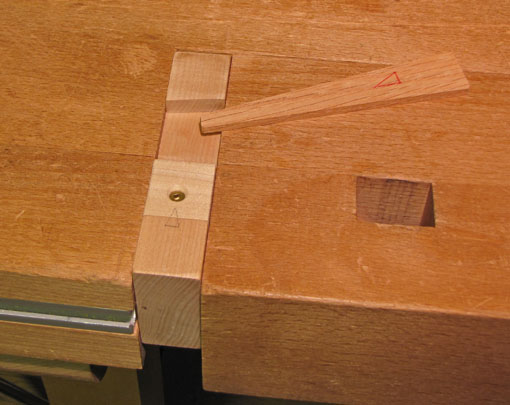
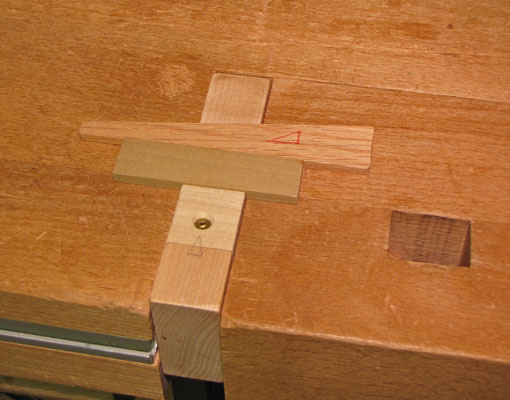
The second option is shop-made, fairly quick and easy, but costs next-to-nothing. (How’s that?) It is simply a 4 1/2″ x 2 1/4″ x 1″ block of hardwood with a 3/8″-deep recess with a 1:7 angled border. It is held in the tail vise with some of the recess projecting above the level of the bench top. A tap on a wedge of the appropriate thickness holds the work piece, tightening further as you push a plane on the work piece. Note the removable spacer, held by a screw, which can expand the width capacity of the vise. [My article in the November 2007 Popular Woodworking shows this and many other shop-made workbench accessories.]

 Here it is, set up:

And, in use:

As always, I hope these tips will help you build things in your shop, and have a great time doing it!

Author:
• Saturday, September 15th, 2012

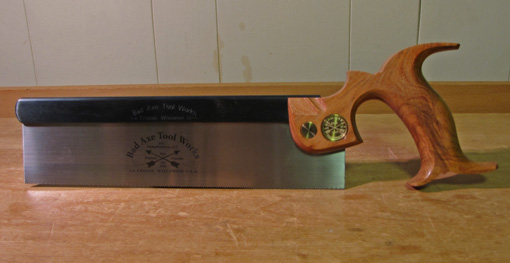
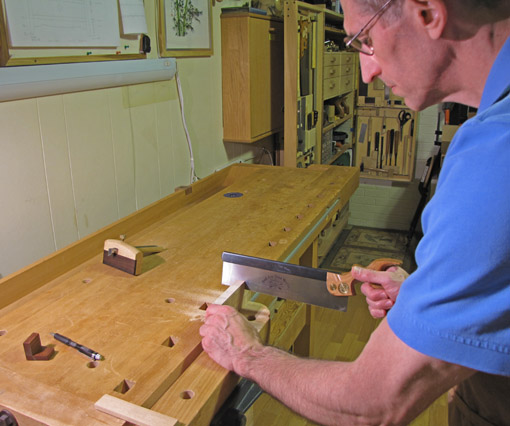
It is tempting to judge this saw on its looks, and there it is certainly a winner. Moreover, the range of choices available in the handle wood, saw nuts, and back allow the customized aesthetics of this tool to be especially pleasing. More substantively, the fit and finish are magnificent; there isn’t a hair out of place. My Bad Axe 10″ dovetail saw has a .018″ plate, 16 tpi rip teeth, set about .002 each side, with a mesquite tote, blued steel back, and brass saw nuts.

However, a tool must be ultimately judged by its performance, which simply means how it can help you make things out of wood. I’ve used this saw for about nine months now, and, despite some excellent Western and Japanese alternatives to which I had become accustomed, the Bad Axe has become my clear favorite.

When I pick up this saw and approach the wood, it feels just right in my hand. Though relatively beefy for a dovetail saw, the handle contour, low hang angle, and especially the balance work together to impart eagerness to go at the layout lines. When the saw does bite into the wood, the truly superlative sharpening completes the functional integration. In many side-by-side tests with my other saws, I  have gotten the most consistent accuracy and feel the most confident with the Bad Axe. It is now the saw I reach for.

A bit of relaxed tooth rake toward the toe of the saw helps start the cut. The tooth line is canted about 1/8 from toe to heel. These are both helpful features, though, to find quibbles with the design, my preference would probably be an increase in both of these.

The Bad Axe Tools Works website gives detailed technical information on the saws, and, ultimately, you will have to get one of these saws in your hand to appreciate how well it works.

There is something more important that I want to tell you about this tool. I think of it similarly as my Japanese Daitei chisels and French Auriou rasps. The Bad Axe saw is a tool with a soul, but in this case it is a characteristically American one. This is born of the personal commitment of its maker, Mark Harrell, a man who has spent much of his life serving America. Mark understands saw making history, listens to the input of many woodworkers (disclosure: including me), and is passionate about innovation, refinement, and excellence in producing a saw that you will not mistake for any other. Further, he allows for a range of your choices in saw plate, filing, handle size, and materials.

Yes, the soul of the tool is meaningful and I sense it when I bring the Bad Axe saw to the wood.