Author:
• Sunday, May 25th, 2014

DWP611

Just a few woodworking machines have the adaptability and almost the friendliness of hand tools. Chief among them is the bandsaw, but the compact router, especially the DeWalt DWP611, also earns a place in that category.

In the stage of building where the big machines have been unplugged, the radio is on, and the hand tool work is proceeding, it still is handy to call on a controllable, precisely adjusted tool that has more power than a horse.

For example, in mortising for hardware, I will clear the bulk of the waste and produce an accurate final depth with freehand routing. Rather than set up a jig or fence for the router, I simply chisel to the side layout lines, though this has been made much easier by the router.

On the other hand, for the socket part of a short sliding dovetail, I make a dedicated jig and use a bushing. The only chisel work is to square the end.

My general approach is to use the power of the compact router and, when convenient, its precision, especially in depth. I take advantage of its maneuverability for freehand work and use jigs and fences when necessary or when there is a clear advantage in overall time spent.

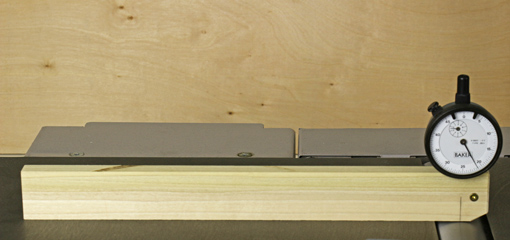
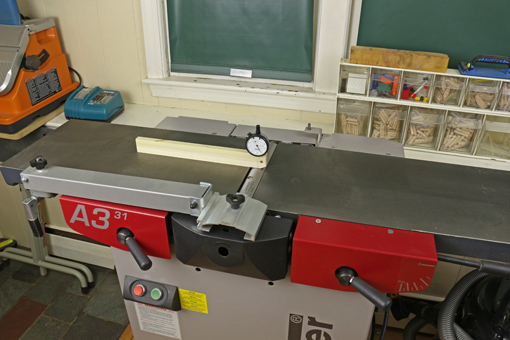
The best feature of the DWP611 is the precision cutting depth adjustment. The indicator on the large black adjustment ring moves more than 1/4″ along the adjacent yellow scale ring for each 1/64″ of depth change. When adjusted in the upright position, backlash is minimal but even that amount can be easily cancelled by resetting the zero mark on the scale ring, which is movable. After the depth is dialed in, the cam clamp holds it reliably. In this way, cutting depth adjustments rival the precision of a paring chisel or router plane.

DWP611 adjustment

This is a larger and heavier tool than the Bosch Colt and the Ridgid model but I found neither could be adjusted in cutting depth with the precision of the DeWalt, which is still easy to maneuver with one hand. I’ve used the DWP611 for about three years now and it is my clear favorite.

The 1/4″ collet is a two-piece self-releasing type, a must for any router. Unfortunately, bit changing involves one wrench and a shaft lock, a sadistic system, though I suppose DeWalt can be forgiven considering the tight quarters of a tool this size. The clear plastic sub-base has an extension on one side that improves stability for edge routing. The base can be repositioned for an optimal configuration of hand grip and sight line. I also bought the accessory base for standard bushing inserts.

The two LED lights that straddle the collet are invaluable for freehand work. The soft-start, 7 amp motor gives surprising power for a small tool.

This tool feels so friendly in hand that it might cause you to let your power-tool guard down. When routing, I remind myself that this little guy really does have more kick than a horse. Also, there is a tendency with this type of tool to get in close to the spinning bit and flying chips, so safety goggles are a minimum must.

A set of 1/4″-shank carbide straight bits down to 1/8″ cutting diameter is helpful for freehand work. Use good judgment and very conservative depths of cut for narrow bits. I also have a 1/16″ bit but I avoid using it.

So, hand tools and power tools can play together. I like to use the advantages of each to find simple and reliable ways to get the work done.

Category: Product reviews, Tools and Shop  | Comments off
Author:
• Sunday, May 11th, 2014

shooting glove

Shooting is a gateway technique that produces reliable accuracy and control unattainable with machines. Here are three simple tips to improve your results with shooting.

1- Put a grippy glove on your left (non-dominant) hand

An inexpensive, widely available glove with a rubbery grippy palm adds remarkable strength to your hand. The work piece must be controlled with the left hand in two respects. First, it must not slide or pivot during the cutting stroke of the plane. The torque can be considerable with a wide work piece of dense wood. The glove gives you control with much less effort than a bare hand.

Second, in preparation for the cut when shooting end grain, the work must be advanced a tiny amount along the fence toward the plane. Without this, the blade edge will simply clear the work piece because it has already cut away the previously projecting thickness.

Practically, the work piece is advanced just to meet the toe of the plane sole, as in the photo below. This is done almost without thinking but it is a precise move made more controllable by the gloved hand.

registering the board

2- Simple microadjustability

Everything is not square in woodworking, even when we intend it to be so. For example, when fitting a drawer front to its opening, the sides of the front piece should be made to match the opening, even if it is a bit out of perfectly square.

To minutely adjust the shooting angle away from 90°, just place a piece of blue tape at the appropriate end of the shooting board fence. Realize too, that the angle can be adjusted with phenomenal precision by slightly altering the position of the tape.

microadjustability

Of course, this is done empirically, but for some mathematical fun, note that a .003″ thick tape placed at the end of a 7″ fence will change the angle .025° from 90°, and moving it to the 6″ position will adjust that new angle, in turn, by .004°. Using a .001″ plane shaving would create an initial adjustment of .008° from 90°. Shims are magic!

3- Hold the plane like you mean it

Whether you have a dedicated shooting plane like the #9 I use, or use a nice heavy bevel-up bench plane, or, yes, a bevel-down bench plane, grip that righteous beast over the blade. Get the big muscles at the base of your thumb firmly down on the sidewall of the plane, wrap your fingers around into the throat of the plane, and plant the ends of the fingers on the lower part of the lever cap. That way, you can control the ride of the plane on the horizontal track while keeping the sole tight sideways against the vertical runner.

grip the plane for shooting

Furthermore, you get a good tactile sense of the blade’s cutting action. In concert, all of this promotes accuracy by preventing the plane from tipping in any direction as it takes a firm, uninterrupted stroke.

I like the “hot dog” attachment from Lie-Nielsen on the #9. This is something I imagine could also be readily made by the user.

hot dog attachment

Category: Jigs and Fixtures, Techniques  | Tags:  | 5 Comments
Author:
• Friday, April 25th, 2014

IMG_1218_edited-2

This unpretentious tool, for about six bucks, is surprisingly useful to modify concave curves on fairly narrow work such as table legs. I use it for fast, corrective takedown if my bandsawing has wandered off the layout line, or if I’ve changed my mind about the curve after having sawn it.

Its molded plastic handle and snap-in cutter certainly do not exude cool-tool cachet, but the varying curve of its sole, flatter toward the toe, steeper toward the handle, is quite effective. It cuts on the pull stroke. However, it tends to tear the wood and leave a surface too ripped up for efficiently transitioning to refinement with finer tools.

To remedy this problem, I hone the cutting face with a fine diamond stone. While this sharpens the cutting teeth, it has the more significant effect of limiting their depth of cut. This does make it a somewhat slower tool, but the resulting surface is considerably improved, so the whole process of refining the curve is actually faster.

The macro photo below shows the honed teeth, which have been lowered relative to the peaks of the “waves” on the cutting surface. (The cutting edges are facing upward. The honed area is the silvery line visible on each of the two teeth near the center of the photo.) This is similar to the working of an “anti-kickback” router bit, in that it limits the depth of bite of the cutter. If you go too far with the honing, the teeth will have too little bite or won’t work at all, so proceed gradually with the modification and test the tool as you go.

IMG_1216_edited-3

The tooth lines are angled to the length of the tool, pre-skewed, in effect, so I find it works best after this modification by pulling it with little or no additional skew.

IMG_1219_edited-2

A great tool it is not, but it does the job decently well. I wish Stanley (or Microplane) would make a longer version, say four or five inches, retaining the varying-radius curve, with room to place a second hand on the front of the tool. Not currently made, but perhaps a Shinto rasp in such a profile would be useful, or larger rasps in the style of curved ironing rasps, both with a knob at the toe for greater control and power.

Other options for a tool that is curved along its length and flat across its width include: metal and wooden compass planes, Auriou and Liogier curved ironing rasps, shop-made curved sanding blocks, and a new flexible rasp by Liogier that they call “The Bastard,” which I have not tried.

The Stanley Surform Shaver now comes with a bright yellow handle. Nuance that.

Category: Tools and Shop  | Tags:  | 3 Comments
Author:
• Tuesday, April 22nd, 2014

IMG_1234_edited-2

As I said, I’ll use whatever tool it takes to get the desired result for a particular curve in a particular wood. So let’s take a look at the available players and which make the cut (pun intended). Most of the game is won or lost on concave (inside) curves; the outside curves are easy.

Spokeshaves perform well on relatively narrow work with cooperative grain, but they can disappoint on highly figured woods, even using a skewed attack. The round shave sees almost all of the action, while the flat shave spends most of the time on the bench because I generally don’t find it has much advantage over a block plane or other flat tools on gradual outside (convex) curves. It’s all in the wrists.

The convex side of a half-round rasp is a good workhorse but has some weaknesses. If it is held at an acute skew, such as for steep inside curves, the teeth start to function ineffectively as tiny knives slitting along the grain, but if the tool is pushed more across the work, tearout results at the far side. Also, the tool is really working the curve at different points, and thus possibly different radii, at once.

So, for more control on gradual curves, I call up the Auriou curved ironing rasps (fourth and fifth from the left in the photo). They have an excellent reliable feel on the curve but lack speed, so they are not for hogging off a lot of wood.

The compass plane, which is a shaping plane in my view, was covered in two earlier posts, but a different twist on curved soled planes deserves mention. As discussed in the previous post, the sole must be set to accommodate the steepest portion of a chosen length of inside curve, so a given setting is approximate at best. Thus, a reasonable alternative to an adjustable compass plane is a set of a two or three wooden fixed curve sole planes, vintage or shop-made.

Hunting on vintage tool sites will turn up a few wooden curved sole planes with an adjustable toe piece to accommodate different inside curves. I have not tried one but I wonder if any readers have.

The little Lie-Nielsen spoon bottom plane is a different type of player but performs well despite its lack of size.

A card scraper is a good player if used in the proper role – great for smoothing curves but poor for shaping them because it simply rides whatever curve it encounters.

Underestimated but well within anyone’s salary cap is the curved sanding block. Customized in length, width, and curve, they can smooth curves but also can be designed as pretty fair shaping tools using coarse grit paper.

Speaking of sanding, the Ridgid oscillating spindle sander is very handy because it can be set up as a sideways belt sander or as a simple spindle sander in a range of sleeve sizes.

IMG_1235_edited-2

Back to the opening photo, the humble Stanley Surform shaver, a product of a program whose glory days are past, is an effective rough hogger. Surprisingly, it can be tuned to perform with a bit more finesse, as will be discussed in a future post.

The Allongee style gouge, #5 sweep, 38 mm, is a good reserve player for cross grain hogging in wide curved work, much like a freehand scrub plane for curves.

A couple of other tools are not in the TFC Team photo because, though they arrived with promise, were cut after tryouts. I found the flexible curved float file to be slow and awkward, and did not live up to the reputation of its flat cousins. The same was so for the Microplane flexible insert for a hacksaw frame. These are just this coach’s calls; you might like them.

When there is a simple curve in one plane, as shown below, to be made in multiples, I go to the pattern routing game plan, as represented by the pattern/flush cut bits on the right in the top photo.

IMG_1236_edited-2

Of course, just about all curves start with good, accurate sawing, which usually means a well-tuned bandsaw. That’s the fan base behind the whole team.

Next: nuancing the Surform Shaver.

Category: Tools and Shop  | Tags:  | 2 Comments
Author:
• Saturday, April 12th, 2014

IMG_1210_edited-2

The compass plane is an effective tool when thought of as a jack plane for curves. It is mostly a shaping plane, where the shape is a curve, not a flat surface as for a regular jack plane. It is mostly fantasy to think of the compass plane sleigh riding over varying-radius curves spilling out long silky shavings.

The most important step in efficiently forming true curves in solid wood is to saw consistently to a good layout line. However, there will inevitably be some lumps and bumps in the sawn surface, so the curve must be “faired” to make it pleasing.

Key to using the compass plane is that the sole must be set a bit steeper than the work piece for concave (inside) curves (see photos above and below), and a bit shallower than the work piece for convex (outside) curves. Furthermore, the planing should proceed into downhill grain, that is, with the grain, which means you may have to turn around often. Outside curves are generally easier to negotiate, and shallow ones can often be worked well with a flat-sole plane such as a block plane.

IMG_1210_edited-3

This all sounds good except that most of the interesting curves in woodwork have a varying radius (i.e. are not circular) and some reverse from inside to outside. So that means a single sole setting is ideal for only a relatively short length of curve. As a practical matter therefore, for inside curves, the sole is set to accommodate the steepest portion of a length of curve that you choose to work in which the radius does not vary too much. It is a matter of feel and judgment. Which is to say that these planes are not very practical for abruptly changing curves.

Because we want the plane to remove lumps and bumps, the shavings, especially early on, will mostly be short, and the cutting edge will engage and disengage the wood as you take fairly short strokes. Then as the fairing proceeds, the shavings will lengthen; that is, if the planets are aligned.

IMG_1202_edited-2

The compass plane is capable of fairing a nice gradual curve in the right circumstances and wood. Remember too, it can handle wide surfaces that are difficult to manage with spokeshaves and rasps.

Also, it is often helpful to initially remove some of the roughness of the sawn surface with a rasp (not a sanding block) to avoid a very rocky ride in the early stages of planing.

The anatomy of the compass plane does not permit it to transmit the wood-hugging stability that we expect from a good bench plane. I like to make the ride firmer and improve my feel of the plane’s interaction with the wood by placing my right hand as low as possible at the heel, sometimes with my fingers touching the top of the sole plate. Meanwhile, the palm of my left hand hugs down on the nose as my thumb reaches down onto the sole plate.

IMG_1205_edited-2

Ultimately, it’s not about the tool, it’s making the product come out the way you want it that counts. I’ll use whatever tool it takes to produce the desired curve in a particular wood. Sometimes, that’s the compass plane.

Next: scouting reports on each player on the tools for curves team.

Category: Tools and Shop  | Tags:  | Comments off
Author:
• Friday, April 11th, 2014

IMG_1202_edited-2

I enjoy incorporating curves in my work and so have explored lots of different tools and methods for shaping, refining, and smoothing them. Years ago I used a new Record #20 compass plane but then got rid of it. The problem, however, was mostly in my approach to the tool. I’ve harbored mixed feelings about the metal compass plane since, but have finally come to peace with the beast since owning this vintage Stanley #20 for the past year.

I’ll get into the function and handling of the tool in the next post, but here I will detail its tuning and modification.

This #20 was manufactured sometime in the years 1933-1941, as best I can tell. It arrived from the seller fundamentally sound – no cracks in the main casting, working sole adjustment, and japanning in excellent shape.

These planes need all the help they can get with chatter dampening so I replaced the thin Stanley blade and chipbreaker with a hefty Hock A2 cryo blade (#BPA175) and chipbreaker (#BK175), 1 3/4″ wide. I prefer the durability of A2 for the way I employ the #20, which I’ll discuss in the next post.

Patrick Leach notes that the #20 (and #113) have unique chipbreakers so I carefully checked the diagram on Ron Hock’s site. The critical parameters are the chipbreaker’s slot-to-edge distance and the length (the short dimension) of the slot. These worked out beautifully. The #20’s advancing fork engaged the chipbreaker slot very well despite the increased thickness of the blade-breaker set. Also, the disc in the lateral adjusting mechanism nicely engaged the blade slot.

Unfortunately, the thicker blade-breaker set caused severe pleating of shavings, and bad clogging. To remedy this, I disassembled the sole by knocking out the pin at each end of the sole and freeing the dovetailed connection between the sole and the body, then filed the forward side of the mouth to widen it (barely advancing into the row of pins that bind the flexible portion to the dovetail block), and added a slight forward angle to the throat, all to make more room for shavings to escape. It also proved necessary to round over the crisp bevel on the back of the chipbreaker.

This solved the clogging problem very nicely, and the beefy A2 Hock set outperforms the Stanley set! Suprisingly, I have not found the wider mouth to be a problem for planing curves. 

IMG_1211_edited-2

The frog needed minor truing. I reattached it as deep as it would go, then, after reassembling the sole, filed the landing below the frog to be mostly level with the frog to increase support for the blade.

I flattened the sole around the mouth with a diamond stone. There is no point in flattening beyond the vicinity of the mouth in a compass plane with its flexible sole. A general clean and lube, and touch ups with a file here and there, finished the job.

IMG_1212_edited-2

Consistent with the purpose that I assign to this plane, I sharpened the blade with a medium camber and made sure the corners would not catch the work piece.

There are other options in metal compass planes including a Record #20, Stanley #113, other variants of the #113 style, and current versions of the #113 by Kunz and Anant.

The metal compass plane is a bit of an odd animal and one must come to terms with it, as will be discussed in the next post.

Category: Tools and Shop  | Tags:  | 5 Comments
Author:
• Wednesday, April 02nd, 2014

IMG_1194_edited-2

This is so easy. Shooting is a fast and accurate method for making a straight and square long grain edge on small boards, generally less than about two feet in length. This is far easier, especially for thin stock, than planing the edge while the board is held vertically in a vise.

Though shooting is mostly associated with truing end grain, I really don’t know why long grain shooting is not commonly discussed in instructional materials. True, it’s not absent but I think it should be included among routine methods.

A long shooting board is helpful for this work. The long grain edge of the work piece should overhang the edge of the platform by a half-inch or so (see below), while the end is butted against the fence. For narrow pieces, especially a series of them such as drawer parts, I clamp an auxiliary bracing piece of plywood or MDF onto the shooting board platform, as in the top photo, to help my left hand steady the work piece.

The plane does not contact the vertical running edge of the shooting board platform that is used for end grain shooting. You simply control the plane to produce a straight edge much as you would when planing with the sole down – initially emphasize pressure on the toe of the plane, transition to balanced pressure, and finish with pressure on the rear portion of the plane.

IMG_0189_edited-3

I like my Lie-Nielsen #9 for most of this work, but really any bench plane, bevel-up or bevel-down, with a length appropriate for the work, will do. The “hot dog” handle on the #9 is very helpful to control the plane in all directions. Placing my fingers on the lever cap gives a good feel of the blade’s cutting action. When using a regular bench plane, I like to grip the arch in the sidewall of the plane and place my fingers over the lever cap. The contour of the Veritas bevel-up jack plane makes it especially effective to place the heel of the hand on the rear of the sidewall arch.

Medium to larger work is more easily and accurately managed by clamping it to the work surface. This prevents the work piece from yawing as you push the plane, which would make it difficult to produce a straight edge.

It is also possible to accurately set the auxiliary bracing piece, referred to above, to produce a parallel-sided work piece. This can also be accomplished by planing to a gauged line. No table saw is needed here.

A nice way to combine machine and hand work to make small to medium pieces with accurate and smooth edges, such as drawer parts, is to refine and smooth the machine-jointed edge by shooting. Then rip to width on the table saw with the planed edge against the fence. The ripped edge can be smoothed with one or two passes of a hand plane, usually later in the building process.

You can even eliminate the shooting board and still do this work. Just take a piece of 3/4″ MDF, clamp the work piece on top with its edge overhanging the MDF, and run the plane on the workbench top. If you don’t trust the trueness of your workbench, temporarily cover it with another piece of 3/4″ MDF.

This is also an easy, effective method to edge joint a pair of thin or small boards, such as drawer bottom stock (see below). Decide on the mating edges, “close the book” on the joint, clamp the pieces to the platform, and shoot both edges at once. It’s hard to miss.

IMG_1196_edited-2

Shooting is also a sensible way to work with very small pieces (see below).

IMG_1199_edited-2

These are effective methods that require minimal infrastructure and can be used regularly on a wide range of projects.

Category: Jigs and Fixtures, Techniques  | Tags:  | One Comment
Author:
• Thursday, March 27th, 2014

IMG_1079_edited-3

Finer pitch saws generally produce more precise cuts than coarser pitch saws. Well, of course they do. The finer teeth make a cleaner kerf with which to track a line. They also advance the kerf more slowly and thus presumably more controllably since each stroke is a relatively smaller commitment that can be adjusted as needed.

The finer pitch, all else being equal, also produces a smoother sawn surface. Also, the thickness of the wood must be taken into account. At least several teeth should ride in the kerf to maintain control and prevent the saw from grabbing and tearing.

So, OK, we don’t use a 5 1/2 ppi rip saw to cut dovetails in 1/2″ stock, obviously.

But what may not be so obvious are the practical limits to fine pitch saws. In other words, finer and finer is not more and more accurate.

If each commitment – each stroke of the saw – is too small to judge whether accuracy is being maintained, then you have to wait for a few of them to really make a judgment. In other words, the feedback is delayed and you can be going off course without knowing it for a while. Similarly, the corrective action is harder to judge.

The object is to use a tool that is palpably controllable, not too coarse, of course, but also not too fine. Among novice woodworkers there is a tendency to think that using the finest saw available will be the most accurate way as long as one is patient enough, but for a saw, and probably for just about any tool, it might be too fine to function accurately. Note also that the stroke speed of a coarser pitch saw can be slowed to some extent.

As an analogy, a good car steering wheel should be responsive, not mushy. The result of an input action – such as a saw stroke – should give a sufficiently sensible and prompt result so that the feedback loop is closed clearly and quickly. This is much of what hand tool woodworking is about. In other words, if you go too slowly, you can’t tell what you’re really doing!

In summary, consider balancing factors when choosing the pitch of a saw. And don’t be charmed by superfine saws (e.g. superfine dozuki saws) or see them as a substitute for skill; they may be too fine.

Category: Techniques  | Comments off