Author:
• Sunday, July 31st, 2022
Daitei chisels

What are the best hand tool and the best power tool in your shop? Just considering this question will give you pause to ponder what really makes a tool great. The answers will help guide you in what tools to buy and what tools to employ in a project. 

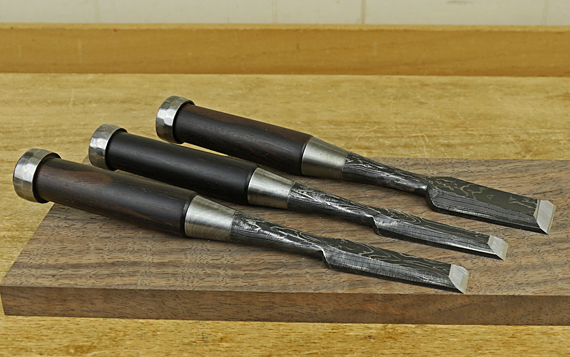
For me, the best hand tools in my shop are my full set of blue steel “suminagashi” (or “mokume”) Japanese bench chisels made by Teiichirou (Teijiro) Okukbo in Yoita, Niigata, Japan under the brand name Daitei. A few are pictured above. 

I suppose it is possible (e.g. Tasai) but it is hard to imagine a better chisel than these. They can be made hair-popping sharp, they are the easiest tools to sharpen that I own, and the durability of the edges is astounding. The ergonomics are just right for me, and their beauty is inspiring. “Eleven” stars.

Other candidates were: my Bad Axe backsaws and Lie-Nielsen #4 and #7 planes. These are full of intelligent, functional features and the accuracy parameters are excellent. Honorable mentions: Starrett straightedges because of their core accuracy that forms the basis for accuracy in the whole shop.

A sports team coach knows that when a job needs to get done in crunch time, he’ll go to his best athlete. That player has the composition, inherent abilities, and playing smarts to find a way to get the job done, often in a manner no one expects.

Similarly, a good woodworking tool must start with a great design, usually time-proven but allowing for smart innovation. Then, the execution must be top quality. You do not want a tool that contains frustrating design or construction flaws for which you must constantly compensate.

With that great tool in hand, your confidence is uplifted. You find ways to get things done well that you maybe did not even expect. The bottom line: that tool helps you become a better craftsman. When at all possible, those are the tools to buy and put to work.

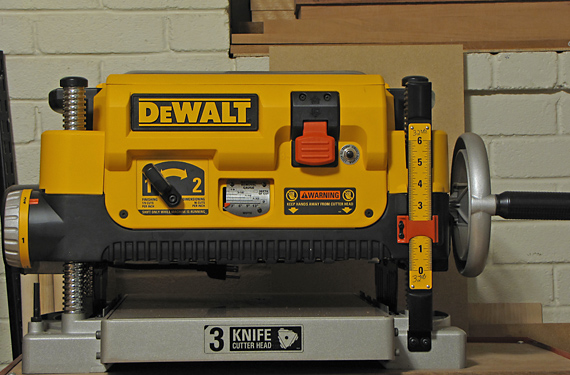
So, the best power tool in my shop is the Byrd Shelix carbide spiral cutterhead that I installed in my DW735 thickness planer. The design is about perfect. The rows of cutters are in a true spiral (helix) pattern, and each cutting edge is cambered. Each cutter can be reset or replaced to make use of its four edges. Along with the outstanding qualities of the DW735, the Shelix allows me options in stock preparation that no conventional cutterhead comes close to matching. 
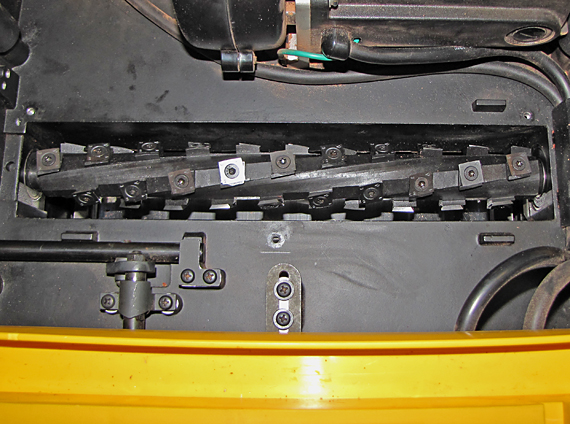
Shelix cutterhead
DW735

Just like a coach, these great tools allow me to form a better game plan, execute it well, and very often go beyond what I could otherwise do. These tools do not drag me down, and do not need to be questioned and compensated for. I become a better craftsman and I do better work

That is the test of a great tool. I suggest keep this in mind the next time you open a tool catalog or visit your favorite drool tool store. 

Category: Tools and Shop  | Comments off
Author:
• Thursday, June 30th, 2022
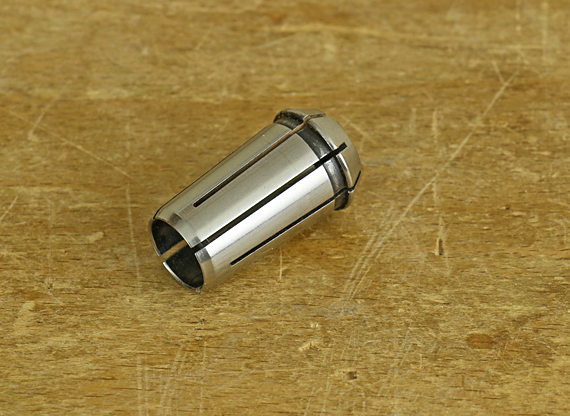
Elu collet

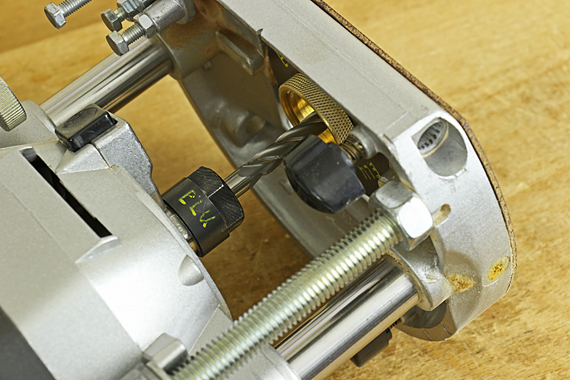
I often prefer solid carbide center-cutting upcut spiral end mills for router mortising, especially for 5/16″ mortise widths. They come in longer cutting lengths and longer overall lengths than comparable diameter spiral router bits, and they cut smoothly and cleanly. 

The cutting and shank diameters are the same for end mills. This is especially an issue for 5/16″ bits. I do not like to use router collet bushings to reduce the collet diameter. The inserts are not as flexible as a high quality collet itself and so I think they do not grip the bit as reliably as the regular collet alone. A slipping bit is a bad day, so I do not want to place my trust in the bushing set up if I don’t have to. 

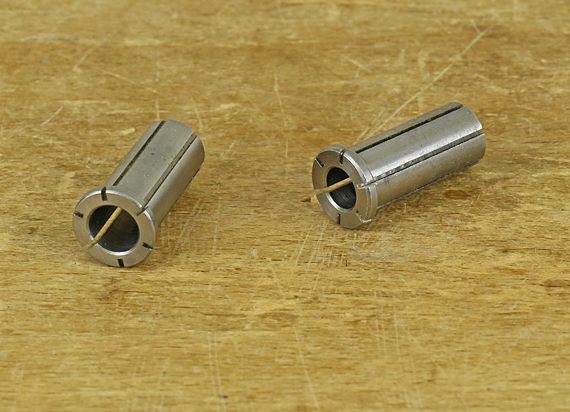
That said, for what it’s worth, I think the best bushings, if that’s what you want to use, are from Infinity Tools, pictured below. I do not like versions with fewer slots because they do not seem to be as flexible. 

collet bushings

DeWalt (for my old Elu, which is essentially the same as the current DW625) and Bosch (for my 1617EVS) do not make dedicated 5/16″ collets, as far as I know. 

There is, however, an ideal solution available! Elaire Corporation makes a wide range of router collets diameters for many routers, including DeWalt and Bosch. These are made in Ohio, and the specs and quality meet or exceed the OEM parts, in my experience. 

Check out their selection here. Prices are reasonable. 

Problem solved. Go mortise.

end mill ready to mortise

[Usual disclaimer: This review is unsolicited and uncompensated. I have no proprietary interest in Elaire.] 

Category: Tools and Shop  | Comments off
Author:
• Sunday, May 29th, 2022

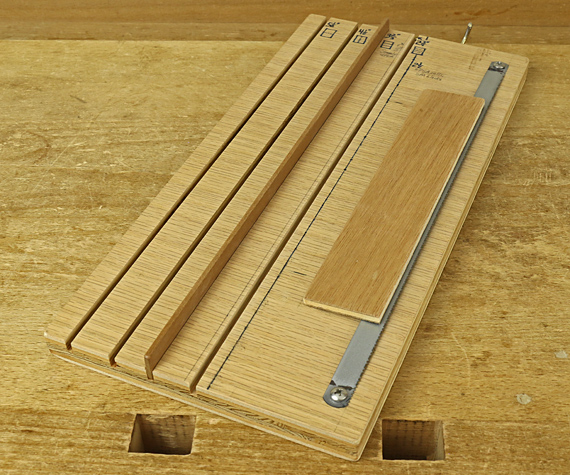
sandpaper cutter

I made this handy sandpaper cutter many years ago but have not until now fully described it here. This post lays out the details if you would like to build your own. I make no claims to originality for this but I have not seen one incorporating all of these features.

By the way, cutting sandpaper with a scissors will quickly destroy the blades, and creasing and tearing sandpaper is slow and awkward especially in coarse grits.

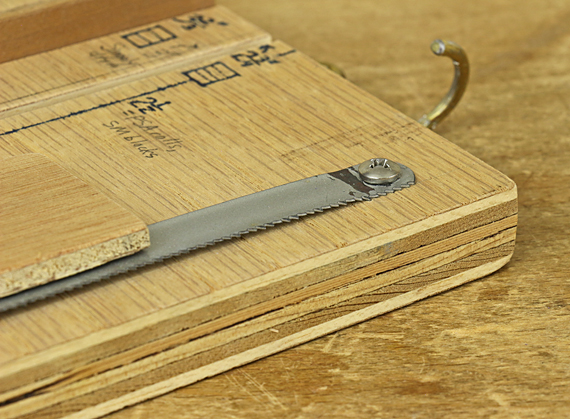
The base is 3/4″ plywood, 13 1/2″ x 6 5/8″. The cutter is a 12″ 14-tpi hacksaw blade. Use a pliers and metal vise to make a small L-shaped kink along the length just inside each end hole to give the blade a slight lift that will make it easier to slip the sandpaper underneath.

Secure it with pan head screws parallel to the edge of the base, then carefully make marks to indicate the location of the teeth. Remove the blade. Draw a line at the marks. It too should be parallel to the edge of the base. 

sandpaper cutter detail

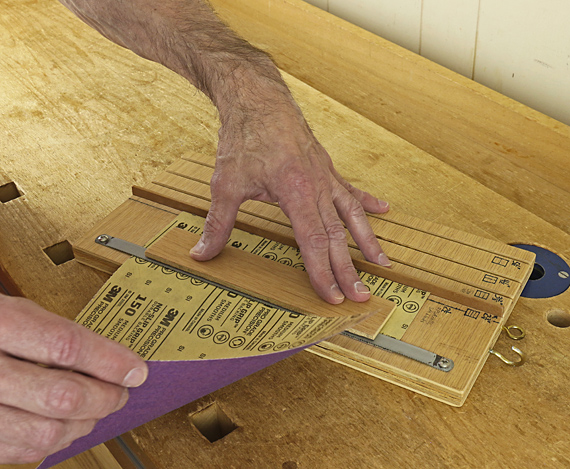
Use cyanoacrylate glue to attach a 1/4″ plywood handle to the hacksaw blade. This makes it much easier to give the blade teeth good purchase on the sandpaper, which gives a straighter, faster, and cleaner cut. 

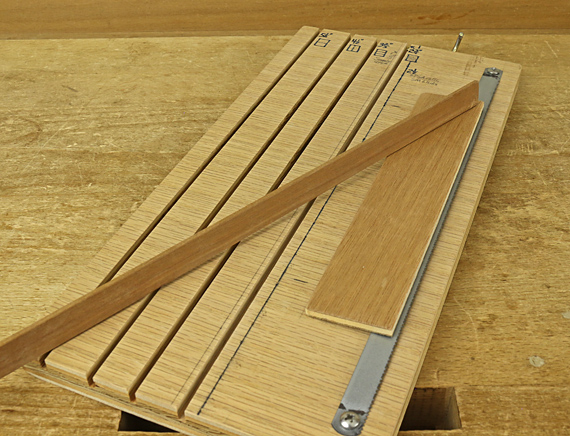
sandpaper cutter measurer

Use the table saw (alternatively, a router or hand tools) to make 1/8″ grooves, 5/16″ deep, at strategic locations, to house a snug fitting 11/16″-wide slat. [Tip: rip the slat from the edge of a board. On most boards, this will produce a slight bow in the cutoff, which will help it stay in the grooves without being an overly tight fit in thickness.] 

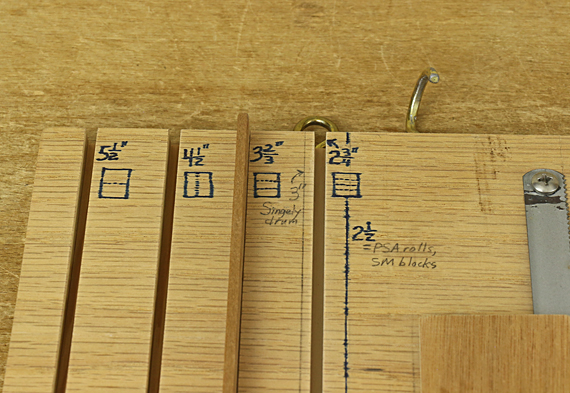
The key measurements are from the teeth of the cutter to the near edge of the grooves/wall of the slat. Below are the dimensions I use, based on standard 11″ x 9″ sandpaper sheets. I drew little visual aids on the base. 

5 1/2″ = half of the length

4 1/2″ = half of the width

3 2/3″ = 1/3 of the length – This produces strips for the cork blocks that I use. 

2 3/4″ = 1/4 of the length – This produces strips for Preppin’ Weapon sanding blocks. 

The line (no groove because there is no room) at 3″ is for my Singely sanding drum. The line for 2 1/2″ strips is for some of my shopmade cork sanding blocks and is the same as PSA sandpaper rolls.  

sandpaper sizing

Reattach the cutter. I added an eye hook for hanging and a larger hook to easily grab the jig from its storage location low down on the wall near my bench. 

To use this nifty jig, slide the sanding sheet, grit side down, under the cutter and against the slat, which is placed in the desired groove. [For the infrequently used dimensions marked with a line only, just bring the edge of the sheet to the line.] Hold the blade down using the handle as shown, and tear. The job goes very quickly.

sandpaper cutter in use

This is an easy jig to make and I think you’ll enjoy the ease with which it handles an otherwise annoying job.

Category: Jigs and Fixtures  | Comments off
Author:
• Saturday, May 28th, 2022
David Charlesworth's books

David Charlesworth passed away on May 22. There is an announcement on his website.

Though I never met David, I learned a great deal from his three books and many videos. The books, now out of print, are compilations of wonderful articles that he wrote for Furniture and Cabinetmaking magazine. 

To honor the memory of this great teacher, I want to tell you the main thing, so valuable, that I learned from him, which goes beyond the many specific skills he presented. It was his acutely thoughtful, insightful approach to woodworking. He showed how things could be done with direction and precision. 

David stopped the brain clutter and calmly focused on what was really going on with a plane blade, a joint, or a construction process. With his friendly, humble bearing, evident in writing and videos, he inspired us to do the same. 

Focus, think it through, and try – you can do it. Plan. Create with calm energy and at the same time, stay open to new skills and methods.  

For me, and for so many others, these were his gifts. Thank you, David Charlesworth. Rest in peace.

Category: Ideas  | Comments off
Author:
• Saturday, April 30th, 2022
Record holdfast

The Record #146 holdfast has generated some inquiries over the years, so I’ll address the topic in this post. I bought mine nearly 40 years ago, and while still a good tool, I would not recommend it now because there are better choices. 

I like the Gramercy holdfasts, which I have been using more than the Record for more than 10 years now. They fit in simple 3/4″ holes that you drill directly into the bench top. They cost only $39.95 per pair. I suggest buying the pair because it is helpful to use them together when you want a very secure hold to resist lateral force on the work piece. And you will certainly want more than one of these holes in your bench top because they can be used for many other holding tools, most notably Veritas products including Bench Pups, Wonder Pups, planing stops (I made my own out of wood), and their own holdfast.

If you do want to use the Record, you have to decide where to place the metal collar that it requires. This collar allows you to place lots of pressure on the work if you need it, making this the strongest holdfast I’ve seen. The collar is not really too obtrusive (I don’t recall having rammed a cutting edge into it) but it would not be there if I was setting up a bench now. Happily, I installed only one, those many years ago, and the location has worked out well. 

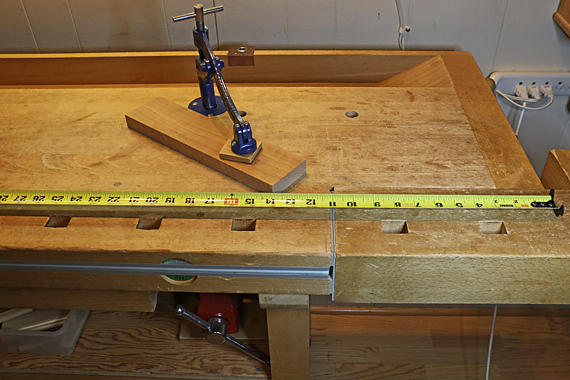
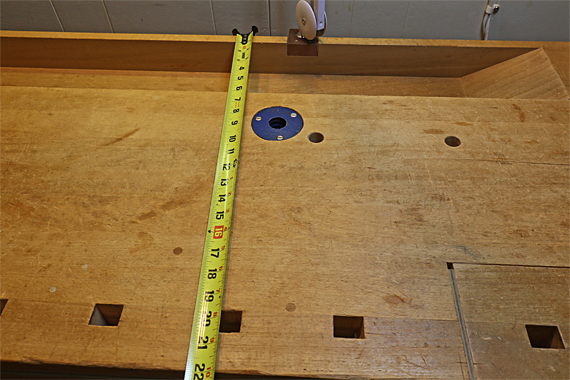
This collar placement allows a work piece to be held where I can chop dovetails over the right leg structure of the bench. It also can work in conjunction with the tail vise and dog system on the right side of the bench. The pad of the holdfast reaches close enough to the front and to the right side of the bench for practical purposes, and still extends about two feet from the right edge of the bench.

Record holdfast placement
Category: Tools and Shop  | Comments off
Author:
• Saturday, April 30th, 2022
Hammer A3-31 infeed adjustment bolts

Lots of information can be found on this website about jointer-planer combination machines and the Hammer A3-31 in particular. I have received many inquiries, especially regarding setup and adjustment of the Hammer. One thing that I have not covered in detail is how to make the infeed and outfeed tables parallel to each other along their lengths. This is quite doable but not simple. 

Let us first set the context. As described in detail here, there are several logical steps to adjusting the jointer. In summary:

1. Start by verifying the flatness of the tables.

2. The width of the outfeed table is then made parallel to the cutterblock

3. The arc of the cutting blades must be consistently adjusted relative to the outfeed table. Here is a practical and accurate method applicable to most machines.

And here are the nuts and bolts on the A3-31.

4. The infeed table and outfeed table are then made parallel across their widths by adjusting the infeed table. Step 4 here describes the details, including for the Hammer. 

5. And now for the tricky part. The infeed and outfeed tables must be made parallel along their lengths.

For reasons similar to wanting a hand jointer plane to have a flat sole, so should the machine tables be adjusted. In my opinion, this adjustment should be done with a one-sided tolerance. Aim for the tables to be parallel, but a trace of convexity, like the letter “A,” is OK, but there should be no valley, like the letter “V.”

So, how is this done on the A3-31? In those earlier posts, I referred to “geometry” without presenting the details. You could work hit-or-miss to make the adjustment, but with four points of adjustment involved, it would probably be unnerving and cause you to give up, and then tolerate using a poorly adjusted jointer, which will in turn wreak all sorts of ugly havoc on your ensuing work. So, really, it is worth deciphering my geometric method. It works. 

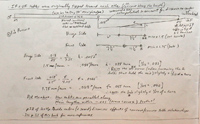
I attached my handwritten notes, made years ago. Click on the little picture below for a full-size version. 

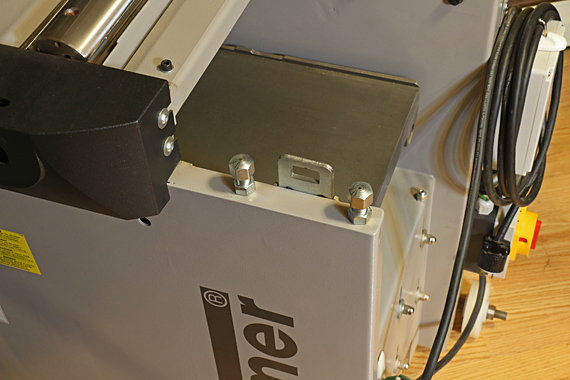
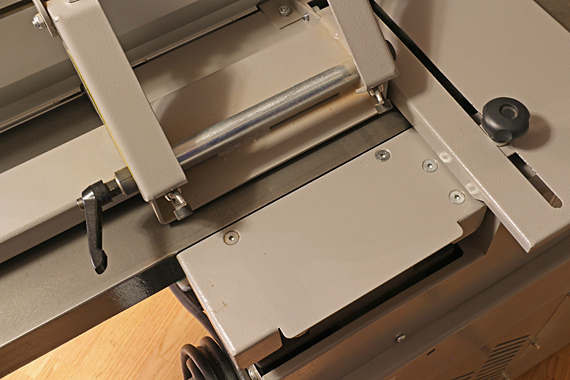
The front-side adjustment bolts are shown in the photo at the top of this post. 

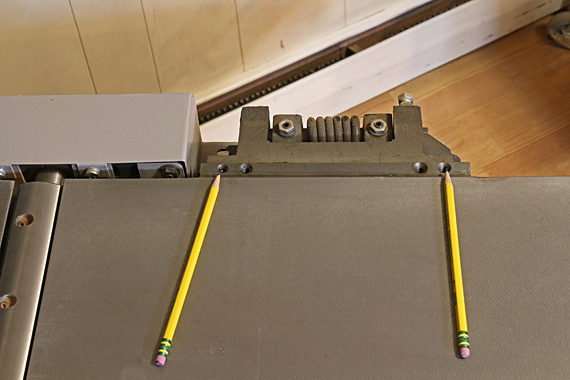
The hinge-side adjustment screws are found under this plate:

Hammer A3-31 back plate

The pencils are pointing to them: 

Hammer A3-31 hinge-side set screws

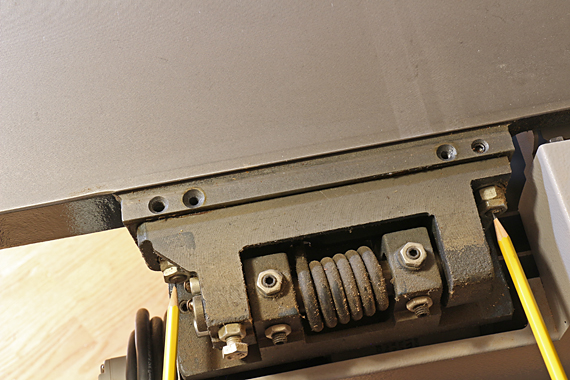
These bolts must be both be loosened to allow the set screws to move: 

Hammer A3-31 hinge-side bolts

The method starts with placing a straightedge to extend the full length of the infeed table with a sufficient amount to also have a good register on the outfeed table. The infeed table starts low and then is adjusted upward to the first touch on the straight edge. If you have done all the previous work as described above, the place of the touch will tell you how the tables are aligned. In my machine, the tables were delivered tilted toward each other, like a “V,” so the first touch of the straightedge was at the outer end of the infeed table.  

Measure the gap as shown in my notes. Note then that I have simply diagrammed similar triangles among the straightedge-table and the pairs of adjustment screws, and calculated the amount of adjustment to be made at the appropriate screws. I then converted that into how much to turn each screw based on the thread pitch. 

OK, I think you can see why I did not include this in my original set of posts! It is a bit painful. I like math so I admit to a bit of joy in working this out, but for those A3-31 owners not so disposed, contact me and I’ll try to help. 

Thankfully, the machine holds its adjustments very well. 

Author:
• Thursday, March 31st, 2022
glue squeeze-out

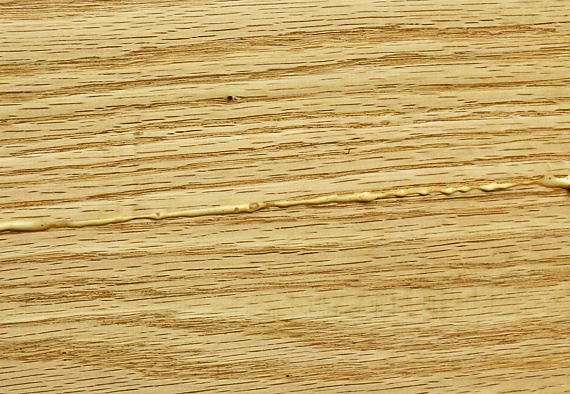
The real problem with glue squeeze-out is not taking the matter seriously. If you pretend that when it appears, squeeze-out is really a surprise, you are likely to waste time and get poor results. It is more efficient to anticipate and manage it as a legitimate part of your joinery and glue up plan.

In many cases, such as edge-to-edge joinery (above), squeeze-out is functional. Consider that too little glue and just the right amount of glue look about the same when the joint is assembled. A modest squeeze-out ensures that you have not used too little glue. (It’s that one-sided tolerance thing again.)

Edge joints are easy to manage. I wait until the squeeze-out is rubbery, and then gently scrape away most of it. The remainder is removed when surfacing the panel after the glue is cured. I never use a wet cloth to wipe away excess glue in careful work. That spreads the glue and helps it soak into the wood. Unless the glue is very diluted by this process, it can interfere with finishing.

It is important to think through how and where the glue will be pushed as the joint goes together, and then how you will deal with the excess. Each situation is different. Where there is good access on the outside surfaces of a joint, such as carcase dovetails, I let the glue go where it wants, knowing that I will later scrape away the glue and create a wood surface that is unadulterated by the glue.  

The inside surfaces are a different matter. Removing glue from the inside corners could be a pain, or a big pain if there is excessive glue that has soaked down into the wood fibers, and maybe even a royal pain if the wood is cherry, for example, and will be getting an oil finish. 

My favorite solution is to simply line the inside surfaces adjacent to the joint with 3M #2080EL blue tape. This takes little time. I set the tape very close to the joint line but make sure to avoid putting the tape where it would prevent the joint from fully closing – it only takes a bit to mess up the glue up. 

What about the outside of a dovetailed drawer joint? If you plan to plane or scrape away a substantial amount of excess glue, especially if it has seeped into the end grain or the side grain of a coarsely textured wood, that may change the fit of the drawer, depending on your drawer fitting technique. Consider that clamps may thwart access to the squeeze-out when it is in its rubbery stage and easy to remove. 

I do not have a universal approach to this, but it usually is fine to gauge the glue to minimize squeeze-out, plane down the sides, and just barely touch the end-grain of the pins. I find Lee Valley 2002GF glue to be a big help here because it does not seep into the grain if it is not pressed upon. And, all of this depends on the wood species and finish. 

For mortise-and-tenon work, I try to avoid external squeeze-out all together. I am generous with the glue in the mortise. I do think the best practice is to put glue on the tenons, just enough to ensure the glue wets the surface. I use a very thin coat, but because this can quickly skin over, I work fast and it is the last step before bringing the joints together. I usually leave about 1/8 inch extra at the bottom of the mortise for the excess glue inside the joint. 

In frame and panel work, I pay attention to the corners to anticipate where the glue might squeeze out. This is part of planning the joinery. I don’t want to make a mess there and inadvertently seize the panel at the corners in its groove. Sometimes I wax the corners of the panel if there is little room for error.

Another approach to squeeze-out in general is described in detail by Michael Fortune in Fine Woodworking, issue #232, April 2013. He uses a non-silicone wax applied sparingly around the joint where squeeze-out is anticipated. Glue will not stick to it and so is easily removed. Later, the wax is removed with alcohol. This works for sure but it does take work. I think it is best for awkward areas and especially with shellac or oil finishes for which a little remaining wax will not interfere with adhesion. 

The point is to think it through – squeeze-out is part of woodworking. 

Category: Techniques  | Comments off
Author:
• Sunday, February 27th, 2022
marking gauge

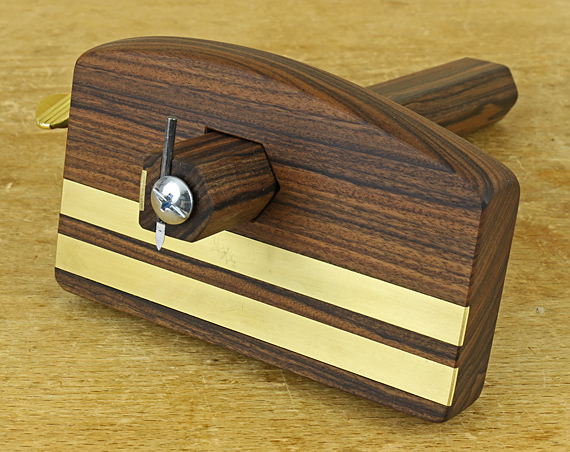
I built this gauge to incorporate specific features that I like and could not find in combination in commercially available models. 

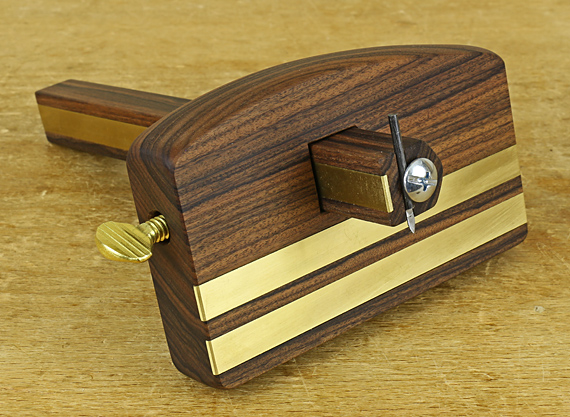
This is a hefty tool with a Honduras rosewood (old stock) fence 4 1/2″ x 2 3/4″ x 7/8″. The contoured top edge is similar to my Japanese cutting gauge that has always felt comfortable in my hand. The lower part of the fence gives plenty of area to register on even thick stock, and is protected from wear by two 3/8″ x 1/16″ inlaid brass strips.

In use, my thumb is on top of the fence, with the muscle at the base of the thumb on the lower part of the contour, while the other fingers are below the stem where they can exert pressure on the fence where it meets the workpiece. I like they way the tool handles.  

The stem is about 11/16″ thick and 7″ long. It is shaped to go through a matching mortise in the fence that has three sides of a rectangle and a point on the fourth side – like a house. This wedge action makes the stem lock very securely with only modest pressure from the locking screw. Note that the peak on the length of the stem is cut back a bit to prevent it from bottoming out in the mortise. 

A feature that I strongly prefer in any gauge (with the exception of a mortise gauge) is the scribing point at the very end of the stem where I can see what it is doing. Here I used a simple half-point scriber from an old gauge. It is secured in a groove with a pan-head screw threaded into the wood.

marking gauge

The other end of the stem is set up with a groove and a tiny bolt that threads into an embedded nut. It holds the excellent Hamilton fingernail shaped knife, which works nicely as a cutting gauge. It also works well along the grain but there I more often like the heavier mark of the half-point scriber. This is two gauges in one. 

The locking screw is a 1/4-20 brass thumbscrew that travels through a bronze bushing and threads through an embedded cylindrical nut that is placed about 3/4 of the way along the route of the screw. I like the thumbscrew at the front of the gauge where it is fully out of the way when marking. The locking screw meets a 5/16″ x 1/16″ brass wear strip embedded into the stem. There is no loose metal button pad to get lost.

On the back of the fence, I sealed the hole for the cylindrical nut with a wooden plug. The locking system works very well but in retrospect I think it would have been easier to make or find a brass cylindrical nut, and simply leave one or both ends of it showing.

Overall, I’m pleased with the function, accuracy, and appearance of the result. As usual with any tool making, I suppose I could make another one in a third of the time and with no regrets, but I only need one. 

Category: Tools and Shop  | Comments off