Archive for the Category ◊ Wood ◊

Author:
• Friday, July 15th, 2011

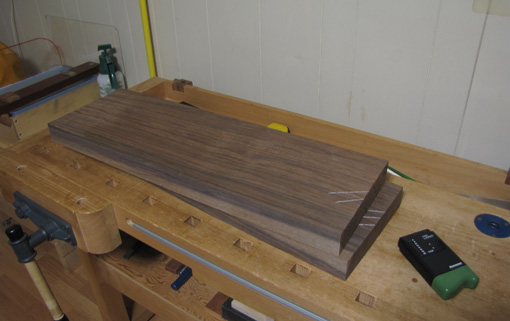
Yes, humble poplar. OK, this is not a species that is likely to evoke lust, but it is a good wood to love. It should not be overlooked for a supporting or occasionally major role in high-end work, as well as duty in utilitarian work.

To be clear, the species under discussion is Liriodendron tulipifera,whose common names include yellow poplar, and, with a bit more cachet, tulipwood and tulip poplar. This is distinct from similar woods: aspen and cottonwood (Populus spp.), willow (Salix spp.), and basswood/lime (Tilia spp.).

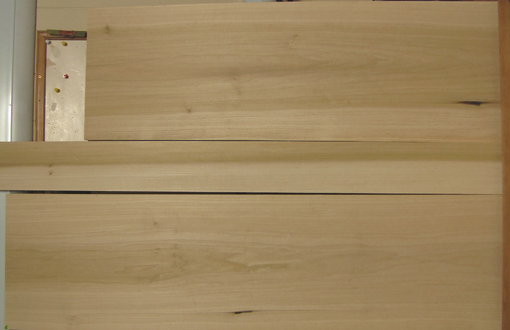
Friendly, inexpensive poplar is readily available. My local orange-themed home center carries plenty of dry, dressed 3/4″ thick boards, as wide as the 1 x 12’s pictured below, and sometimes thicker stock. At my local hardwood dealer, sound stock up to 16/4 is available because poplar dries easily and with minimal degradation.

Poplar heartwood is usually pale yellowish green after milling but eventually changes to light brown after exposure. Some boards have deep purplish, green, or other color mineral stain streaks in the heartwood. The sapwood is creamy whitish which tends to develop a tinge of tan. I’ve never seen figured poplar but maybe it’s out there somewhere. It is a modest wood that, in my opinion, is best appreciated for what it is. Attempts to stain it to imitate another wood, such as cherry, end up looking lame to my eye. An exception may be when it is dyed black (ebonized) for use as an accent wood.

Below, left to right: aged poplar, fresher heartwood and sapwood.
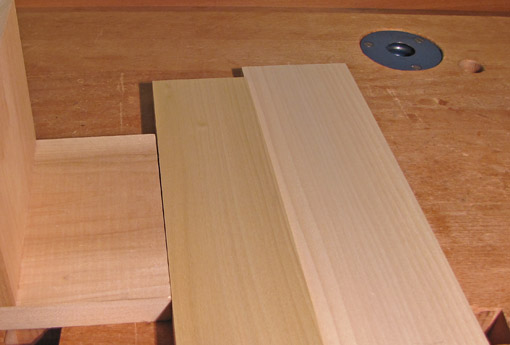
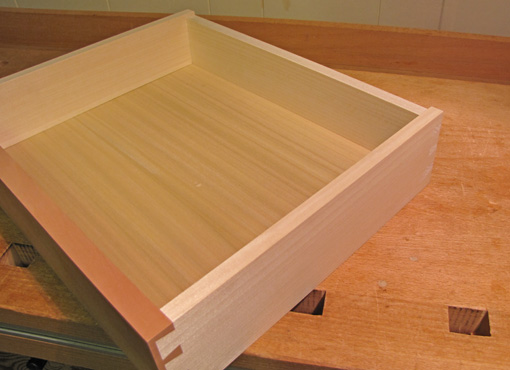
Poplar, oh, yea, I mean tulipwood, makes a great secondary wood in fine work. It is hard to find quartersawn, but rift grain for drawer parts and panels can be salvaged from wide flatsawn boards, as seen in the photos below. For novice woodworkers – and we’re all beginners to the extent that we explore and learn new skills – poplar is an easygoing wood that can still yield very nice results. It saws, planes, and glues easily. Its fine texture takes paint well.
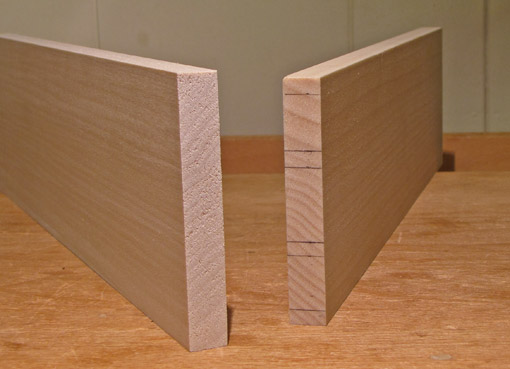
 

For utility work, such as storage units, and for many shop fixtures and jigs, poplar is usually my first choice. I also use it very often for mock-ups.

Poplar is a fairly stable wood with tangential and radial shrinkage values of 8.2% and 4.6%, respectively, T/R is 1.8, and volumetric shrinkage is 12.7%, making it certainly more stable than sugar maple and the oaks. It is a light wood, having an average density of 0.42, and surface hardness less than walnut and cherry but greater than white pine. It would suffer as a heavy-use table top.

Surprisingly, though, its stiffness (modulus of elasticity) exceeds that of cherry and big-leaf maple, though it is no match for sugar maple or the oaks. In this respect, it is a better choice for bookshelves than pine, which is considerably less stiff. For its density, poplar has good strength in tension perpendicular to the grain, which produces resistance to splitting, about the same as cherry and big-leaf maple, and much better than pine.

For lots of woodworking jobs, poplar deserves consideration. And some love.

Category: Wood  | Tags:  | 2 Comments
Author:
• Monday, June 13th, 2011

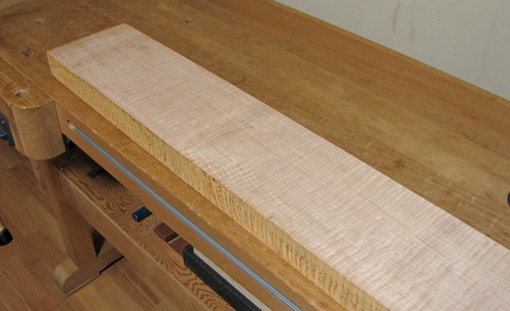
Look at the lovely curly maple above. #%$@! sticker stains – the shadowy bands of discoloration across the width of the board. They are seen at the regular spacing where stickers are placed in a stack of boards prepared for drying.

Whatever their cause, perhaps wet stickers and/or slow drying, they are common only in light species, especially soft maples, in my experience. The stains are not usually visible on the rough-sawn surface, but only after planing, and even then they may go unnoticed until the board is viewed from several feet away. The discoloration can penetrate surprisingly deep. Fortunately, in this board the discoloration is shallow and there is thickness to spare.

As evil as it gets, is honeycomb. I do not have a photo to share because I cannot stand keeping such wood in the shop. These are splits oriented along the rays in the core of the wood that reveal their hideous grin on the end grain after a board is crosscut. Honeycomb is basically an extreme form of case hardening caused by poor drying, usually in thick wood. I once brought a gorgeous 8/4 curly koa billet into the shop only to have my thrill doused to disappointment after crosscuting revealed extensive honeycomb.

Even common end checks can be tricky. Sometimes these can partly close, hiding the compromised wood that extends further than the open check into the length of the board. To be assured of using only sound wood, mark the location of a sizeable end check, then saw 1/4″ slices from the end of the board and observe where they break. When the slices are taken in sound wood, they can be snapped to break randomly, not at the location of the end check.

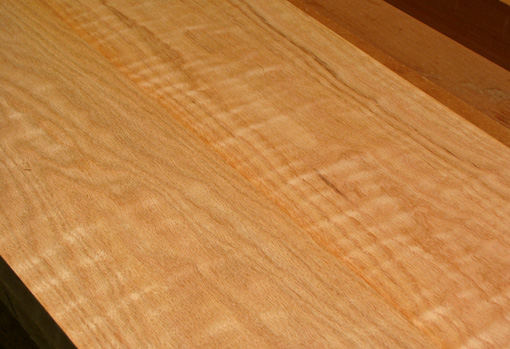
The two boards of curly red oak, below, are parts of batches that I bought at different times. They are both nice but the colors do not match. I will have to use them in different pieces or at least for different categories of parts in one piece.

In a perfect world, we could obtain all the wood of a species in a project at the same time from a single tree. The boards would be hit-or-miss planed to preserve thickness, reveal most defects, and allow for good color and figure matching. Skim planing and keeping boards organized by flitch are more work for wood dealers and add to cost, so, while available, they are not usual practices.

When new wood comes into the shop, I give it another once-over and then write on each board the date and moisture content as measured with a Wagner pinless meter. The boards get stored so air can circulate all around them. If the wood has particularly high moisture, is very thick, or is otherwise prone to end checking, I coat the ends with a wax emulsion such as Anchorseal 2. I then observe the wood for a few days to a few weeks, depending on the species, thickness, and initial MC, rechecking until the MC levels off.

When planning the parts for a project I think carefully before major crosscuts because those are usually big commitments. For thick stock, such as 8/4, I use a pin meter to check for any moisture gradient across the fresh crosscut.

So, while wood disappointments do come along, wood elations are much more frequent and they last a lot longer!

Category: Wood  | 4 Comments
Author:
• Friday, June 10th, 2011

When I design a piece, thoughts of the wood come early in the process. Sometimes, the inspiration from very special wood creates the energy to initiate a project. The form and the wood work hand-in-hand as nature’s gift of wood animates the design.

Yet nature can be cruel. Over the years, despite my continuous effort to learn more about and experience more wood, I have run into disappointments. Sure, I am careful picking boards at the local yard or consulting on purchases from afar, but sometimes the eye, judgement, or just plain luck fails in the quest for wood. It is wood, after all, and we have to take the good with the bad. Here is some of the bad.

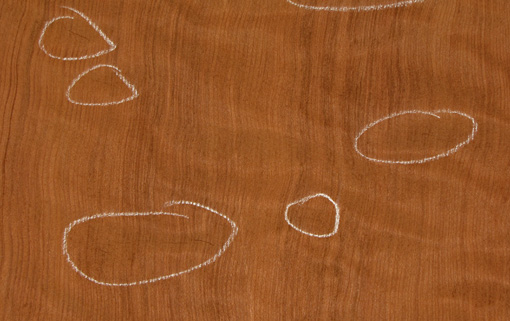
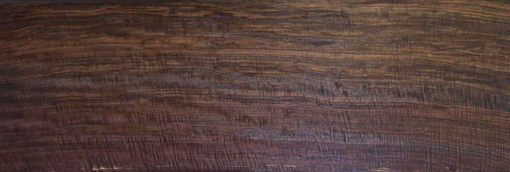
The top photo shows compression failures in an otherwise great slab of figured redwood. These are thin, irregular fatal compromises in the cell structure of the wood across the grain. They lurk invisibly on the rough-sawn surface only to reveal themselves after planing. They may occur when the tree is felled or from severe weather stress. I have also seen them in bubinga and mahogany, both large trees.

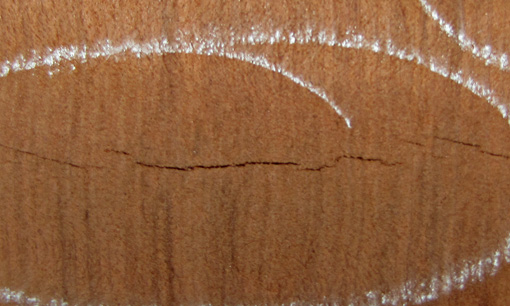
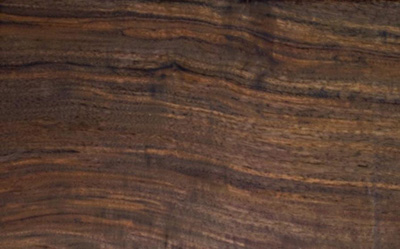
Below is a close-up photo of another compression failure in the same board, showing a characteristic wrinkly cross-grain split.

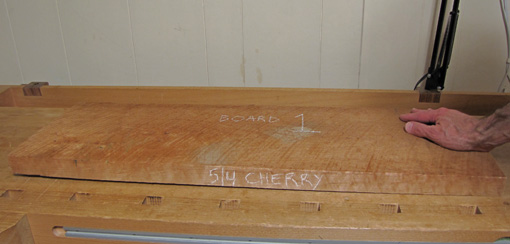
Notice the raised left side of the 5/4 cherry, above. It is easy for twist to go unnoticed in the commotion of the lumber yard. The full width of this board would probably be less than 3/4″ thick after dressing because the twist must be removed from both faces. To retain more thickness, this piece can be ripped into narrower sections – safely on the bandsaw not the table saw.

Similarly, thickness can disappear in surprising amounts when flattening a long bowed board or a wide cupped board. More commonly than any other problem, failure to retain the desired thickness, width, and length while removing distortion has destroyed my plans for wood parts.

A distortion that I stay away from is crook, which is fortunately easy to see – the board looks like a level road with a curve. Crook is a tip-off to the presence of reaction wood which is produced by tree trunks that lean. The pith is typically decentered which makes the widths of the growth rings markedly different on each side of a flatsawn board. These boards can unpredictably shrink along the grain and distort oddly. They are incorrigible miscreants that belong in wood hell, also known as the fireplace. Severely twisted boards should also be rejected because they certainly harbor some weirdness, with which you do not want to deal, that made them twist in the first place.

Sometimes, the wood and the woodworker just don’t get along. With great anticipation, I once started working with some beautiful curly makore. Within hours my nose and throat were scratchy and I felt strangely unsettled. Assuming that I was allergic or otherwise sensitive to this species, I decided to avoid unnecessary risk and get this wood out of the shop.

I’m afraid there’s more disappointments coming up in the next post.

Category: Wood  | 8 Comments
Author:
• Tuesday, January 04th, 2011

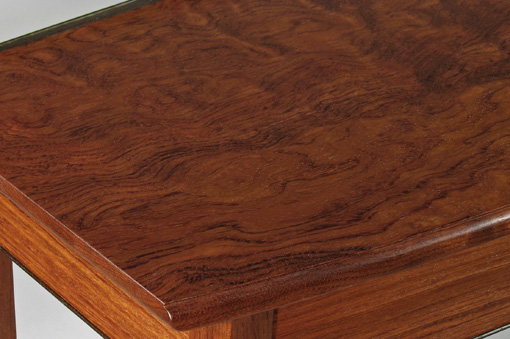
This wood has beauty, strength and variety. Its deep color, density, and figure impart a certain gravitas to a piece. In no sense is this wood a lightweight.

Plain (non-figured) bubinga’s brick red color is accented with darker annual ring lines. These are thinner and more subdued on the rift surface and more variable and bold on the flatsawn surface. Figured bubinga, well, wow! My favorite is the swirly “waterfall” figure, a variant of quilt, which is showiest on the flatsawn surface, becoming a slightly more modest ripple on the rift surface. This species can also produce fantastic broad, ropy curly patterns and pommele figures.

Bubinga (Guibourtia spp.) is available in clear, wide, long lumber. I suggest inspecting the boards for compression failures which seem more common in this species, perhaps occurring when these big trees are felled. These appear as jagged cracks running across the grain and are often very difficult to see on the roughsawn surface.

Giant highly-figured slabs, if you can pay for and haul them, can make fabulous table tops. An internet search will reveal some monster chunks of wood. Veneers are available, with the rotary-cut variety being known as kevazinga (variable spelling).

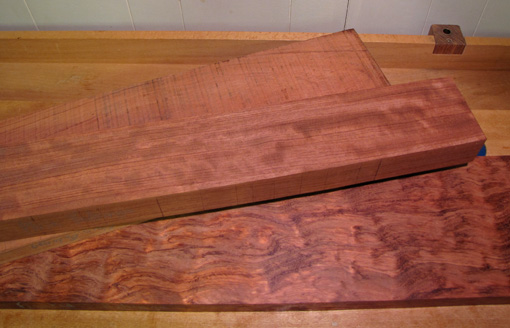
Below is a sampling from the shop. From top to bottom: rough flatsawn, machined-planed 8/4 rift leg stock, machine-planed rift waterfall with a coat of lacquer.

Bubinga works reasonably well, at least the non-figured boards, despite its high density, listed variably in the 0.75+ range (sugar maple is about 0.63). It can be hand planed and sawn well, although more muscle is required than for domestic hardwoods. Likewise, take only small bites when chiseling. Cutting on the table saw requires plenty of horsepower and a good sharp blade to move the stock with enough pace to avoid burning. To prepare leg blanks from 8/4 or thicker stock, I prefer using my bandsaw in conjunction with the jointer and planer instead of my 3HP cabinet saw.

Surprisingly, figured bubinga can often be hand planed reasonably well using a 55-60̊ cutting angle. If that doesn’t work, no worries, because the wood scrapes exceptionally well with card scrapers and scraper planes, even wildly figured stock. It responds well to using a scratch stock to create beading and other profiles. It sands to a high polish. The wood holds edges very well and end grain cuts particularly cleanly.

For finishing bubinga, I like wiping varnish, not too thick, as always. In some cases, preceding with an oil-varnish mix can enhance the look of highly figured pieces, but experiment because sometimes that can result in a muddy look.

I’ve read that bubinga can sometimes be troublesome to glue but I have not had any problems using PVA glues in edge-to-edge and other joinery. Two-part urea formaldehyde glue has worked well for laminations – URAC 185 dries to a dark maroon which blends with bubinga’s color.

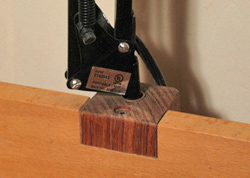
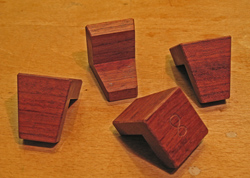
Shrinkage is listed by the Forest Products Laboratory as a decent 8.4 tangential, 5.8 radial, 14.2 volumetric with a very good T/R of 1.45. Most of its strength properties, including its freakish shear strength, are about 50% higher than domestic tough guys white oak and hard maple, while its side hardness is about double of those. It is an excellent choice for shop tools and fixtures such as the dovetail markers and lamp mount pictured below.

If there is a downside to bubinga, it is that it can be tiring to work with, sometimes producing a bit of a love-hate feeling on my part. This is a heavy, dense, and unyielding wood. Parts must mate well – there’s no helpful mush factor in fitting joints. After completing a project in bubinga, you might feel a longing for some friendly walnut, but after admiring the finished piece in bubinga, you’ll soon have ideas to use this wood again.

Category: Wood  | Tags:  | 4 Comments
Author:
• Friday, November 26th, 2010

This wood is so beautiful, varied, and agreeable to work with, that I imagine if I could have only one species of wood to use for everything, it might well be Claro walnut. It is so captivating that there is a real temptation to just join a few pieces corner to corner without any thought to a real design, state that “Woodwork is made by fools like me but only God can make a tree” (apologies to Joyce Kilmer), and leave it at that.

If there are doubts about this wood, it is only in being sure of its proper scientific label. Perhaps oversimplifying, Claro walnut is Juglans hindsii, native to northern California. The well-known Eastern (U.S.) black walnut, a great wood in its own right, is Juglans nigra. As best I understand, “Claro walnut” lumber may come from trees that are J. hindsii or a hindsii x nigra hybrid, or from the hindsii root stock upon which Juglans regia, English walnut, has been grafted. Botanical technicalities aside, it’s just gorgeous wood.

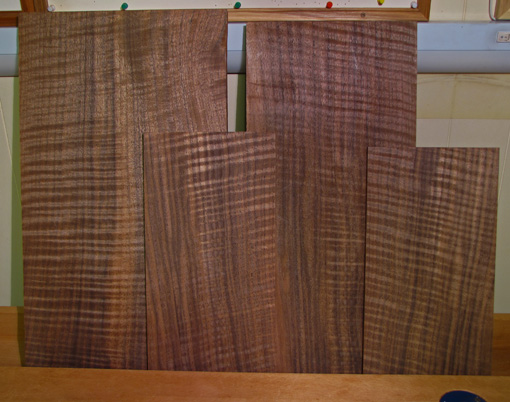
Claro’s strongest appeal to me is in the variety of rich colors that can be found mingled in a single board, most compellingly on a marbled quartered or rift surface. Even more spectacular, curly figure, delicate or ropy, may be superimposed on the marbled color array. Flatsawn boards are very often too gnarly for my taste, but certainly have their own appeal. Crotch figure is also available.

The working properties of Claro are much like black walnut: excellent. It is a medium-hard wood, pleasant to work but with enough surface hardness for any furniture item. Sawing, joinery, and gluing are almost always without problems. Layout lines can be difficult to see but angling a light source can pick up the glistening of a graphite line fairly well. White art pencils blunt quickly but can be helpful for less critically precise layout.

The wood responds well to hand planing which gives an exciting clarity to vertical grain (quartered) and most rift surfaces. It can sometimes be a bit brittle under the plane. If you like swirly boards, scraping works better. For finishing, varnish and oil-varnish mixes have worked well. Shellac is another good option; water base is not, in my opinion.

The stability figures for Claro are very favorable and this is my shop sense as well. According to The Wood Database, Claro shrinkage is 4.3% radial, 6.4% tangential, 10.7% volumetric, and T/R is 1.5. Quartered boards, as expected, are very stable.

Here on the East coast U.S., I purchase Claro from across the continent so it is particularly important to buy from a dealer on whom I can rely. As for big-leaf maple, Northwest Timber in Oregon is my first choice for Claro walnut.

Category: Wood  | Tags:  | 4 Comments
Author:
• Tuesday, November 09th, 2010

First, the bad news. Pearwood (genus Pyrus) is difficult to dry without distortion and the lumber often contains large splits, knots, and other defects. It is expensive and hard to find, especially in large pieces that are not loaded with defects.

But oh, the good news! Pear has a dreamy fine-grained, silky-looking texture with understated but exciting color. The best I can do in words is to call the color a muted pink/salmon, sometimes a pinkish brown. Almost all commercially available pearwood that I have come across has been steamed during processing to enhance the color and reduce stresses in drying.

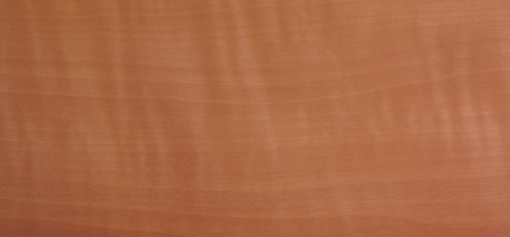
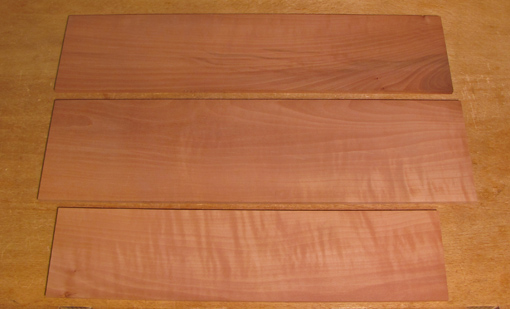
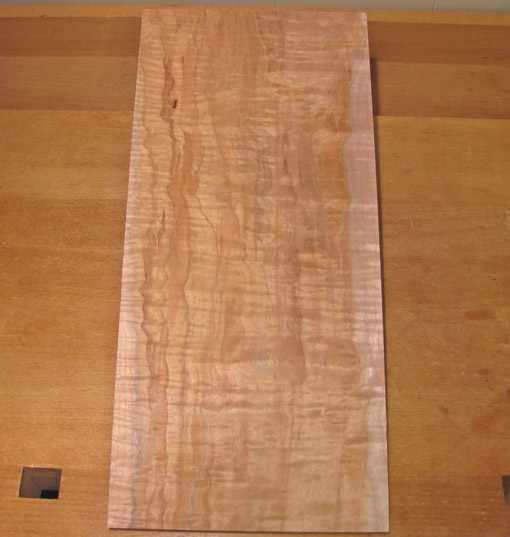
The domestic pear that I have bought locally has tended to be fairly uniform in color with little or no curl figure, and a density not much greater than cherry or walnut. The top photo below shows a pair of pink-salmon boards from the same tree. Note the subtle shimmer curl in the front board. The lower photo shows a board from another tree which has interesting purplish red streaks.

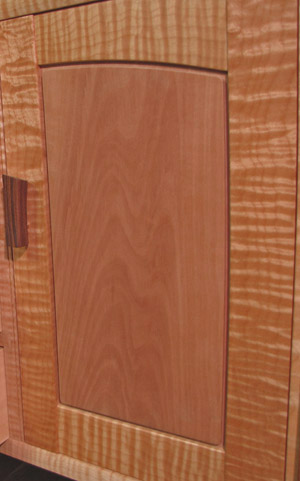
All of the wood shown in this post is from my shop. It has been surfaced only by the thickness planer with the exception of the door panel in the photo at the end of the post. The photo color is very close to real and close as I can get. Some pieces are portions of boards purchased over 15 years ago. Please keep in mind that I am writing these posts based on my personal experience with the wood, and, since pear is particularly variable, others woodworkers will surely have different experiences. Pear is one of those woods that, if I see some excellent stock in person, I’ll buy it even if I do not have any immediate plans to use it. I know its time will come.

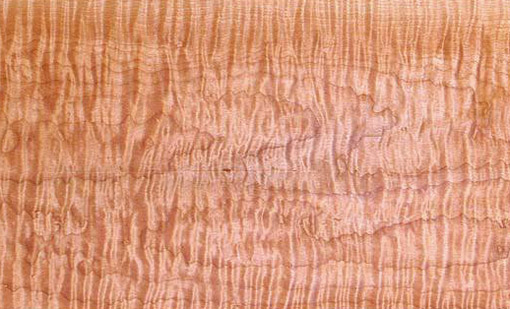
I have a pile of German pear that is much denser, has deeper color, and more streaks and figure than the boards above. I resawed all of it and it took a long time, at least several weeks as I recall, to settle out of its tendency to distort. Three examples from that lot, pictured below, show a range of color, streaks, and curl. Beautiful! Once at peace, all the pear that I have used has been well-behaved and quite stable. I have not been able to find shrinkage data.

Pear is not problematic to saw or glue. Its beautiful fine texture demands a hand-planed finish. The blade must be at peak sharpness with a carefully cambered edge because any blade defect will show up prominently on the wood surface. I needed a bevel-up smoother with a high attack angle for the German pear. Likewise, in cutting joints, pear reveals any and all boo-boos.

Finishing pear is a study in “less-is-more.” Oil or varnish, in my opinion, kills the wood giving it a greasy look. No finish or just some wax would work. To get more protection, I prefer a water-base poly-acrylic which imparts as little change in color as possible and preserves the lively look of the wood.

Enjoy and good luck with pearwood if you decide to use it in your work.

Category: Wood  | Tags:  | 2 Comments
Author:
• Sunday, October 31st, 2010

Over the coming weeks and months I would like to write some posts about my favorite woods from a personal, hands-on perspective. The internet woodworking world has an abundance of discussion about tools, ironically to the relative neglect of the magnificent gifts of nature on which we use them.

First up is big-leaf maple, Acer macrophyllum. The natural range of this species is the North American west coast from California to British Columbia. Synonyms include Oregon maple, Californian maple, and Pacific maple. To distinguish, “hard maple” is usually Acer saccharum (sugar maple) and “soft maple” is usually A. rubrum (red maple) or A. saccharinum (silver maple).

For this East coast woodworker, the magic of the internet is the source for big-leaf maple. The first place I turn to is Northwest Timber, run by Lewis Judy, the source for the wood pictured in this post. Their wood is properly processed and cared for, and I can confidently expect that what I see is what I will get.

I can’t wait to get this panel into a project:

Why source big-leaf from 3000 miles away when I can easily find hard and soft maple locally? Well, for starters, I like its looks – and it has lots of different looks. Curly big-leaf is my favorite. I prefer it with an inviting soft, ropy curl, with wavy annual ring lines, as distinct from the tight, regimented fiddleback curl seen in the “best” hard maple boards, which seem somewhat aloof to me. I also like the warm golden-tan color of big-leaf which is enhanced with a wiping varnish finish – I usually prefer gel varnish. It also never seems to have the gray tinge that often plagues soft maples.

Oh, but there are so many more faces to big leaf! Unfigured, it still looks good, often with just a little wiggle to the annual ring lines to give it subtle character. Quilted figure can be mild to knockout, and some may like the extreme bubbly-looking “popcorn” figure. Big-leaf heartwood, “redheart,” can have a beautiful variety of subtle colorations. Like other maples, it produces a variety of interesting spalted appearances.

Big-leaf maple is softer and easier to work than sugar maple, about the same as soft maple in that regard. Still, it is plenty strong and dense enough for tables or any other furniture. It saws easily by hand and generally without burning on the table saw. Planing, not withstanding heavily figured boards, and gluing are not problematic. Heavily curly boards can be properly sanded to produce a final surface which, under wiping varnish, is indistinguishable from hand-planed. (Really, it’s OK, I tested.)

Forest Products Laboratory data show the density and hardness of big-leaf are similar to those of soft maple and significantly less than hard maple. Its volumetric shrinkage and tangential/radial ratio are more favorable than those of soft and hard maples. This is definitely appreciable and significant in the shop in comparison to hard maple. All in all, big-leaf maple is a friendly wood to work.

And a lot of fun to choose!

[My endorsement of NW Timber is unsolicited and unpaid. I just like their wood.]

Category: Wood  | Tags:  | 6 Comments
Author:
• Tuesday, October 12th, 2010

Following up on the problem posed in the previous post, here is how I managed this board. Most important, I proceeded step by step, watching the wood. The procedure below may seem complicated, but it really is simply a matter of understanding wood and using good sense.

Before doing anything else, it pays to perform the casehardening test. This will require cutting an inch of length off the end of the board and sawing out the core of the offcut to create a long “U” shape. Please refer to the method described in an earlier post. This board, like most thick stock, had some casehardening stress in it.

Starting with rough stock nearly 1 ½” thick and about 9″ wide, the final thickness at the center of the 25″ length will be just under 11/16″ and, at the outer ends, just under 1 3/16″, for a curve depth of ½”.

The diagram is only roughly to scale. It really is intended to give a qualitative sense of how the board was managed. The numbers in the diagram refer to the steps discussed below.

1. I investigated the board by skimming the faces on the jointer just enough to decide if the board will look nice and to choose the show face which will be the curved face on the outside of the cabinet.

2. The opposite (inside) face was hit-or-miss jointed enough to establish flatness. This leaves some rough areas remaining, but enough of the face is smooth and flat to serve as a reference for marking out the curve. At this point, there is less than 1 3/8″ of thickness remaining. I also did a light pass through the thickness planer (with the flat side down, of course) to get a better look at the show side and to estimate how much thickness would be surviving.

3. I sawed the curve with the bandsaw. The layout line was drawn almost up to the surface of the board at the ends. (I had left an inch or so of extra length at each end.) I sawed away from the line, guided by a second line drawn less than 1/16″ away from the original line. This allows for clean up later.

Because substantial thickness was now removed from one side of the board, it promptly distorted so the flat side wasn’t flat anymore.

4. I then removed wood from the inside face which neutralized some of the distortion and re-established the flatness of this face. I did this mostly by hand planing which gave me a chance to keep an eye on things as I went along.

I then cleaned up and refined the curved face, rechecking the flat face as I went along and making minor corrections as needed. At this stage only small quantities of wood were being removed so only minimal correction was required.

The board now sits on stickers as it awaits its role in the construction of the cabinet.

Despite all of this forethought and care, it still helps to have some luck with wood, but it’s not so wicked after all.

Category: Wood  | 2 Comments