Archive for the Category ◊ Tools and Shop ◊

Author:
• Friday, August 08th, 2014

Hammer A#-31

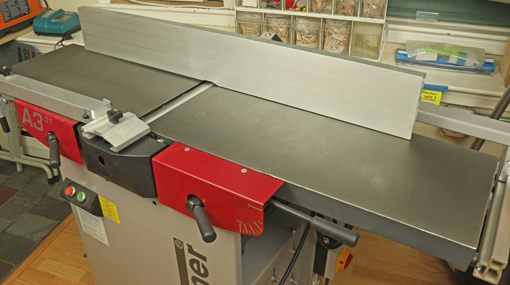
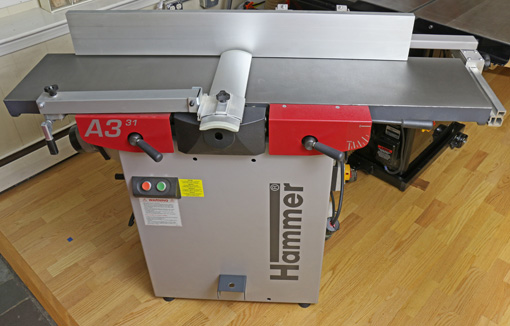
Let’s take a detailed look at the Hammer A3-31.

When considering a new machine or any tool, I first assess the quality of the key parts that cannot be altered by the user but are accessible to direct evaluation. Here’s how the A3-31 stacks up in this regard.

1. Bed flatness is excellent. Against a Starrett straightedge, the jointer infeed table is within .001″ along its length and .002″-.003″ on the diagonals. The outfeed table is just a hair concave along its length, .003″-.004″, and the diagonals are off by only .002″-.005″. The planer table is within .002″ along its length and .003″ on the diagonals.

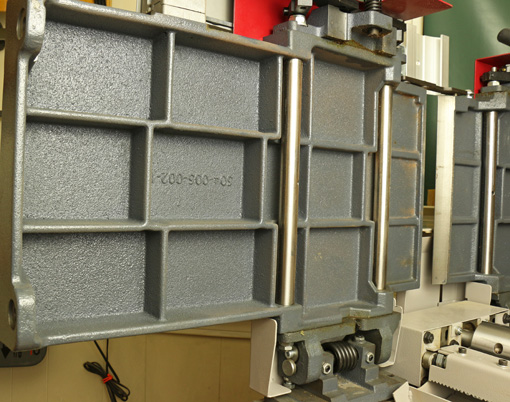
This all is excellent, well within Hammer’s spec of .006″, and is an important factor in how accurately the machine can be tuned. Furthermore, the beds are heavy and constructed with thick ribbing, as seen above.

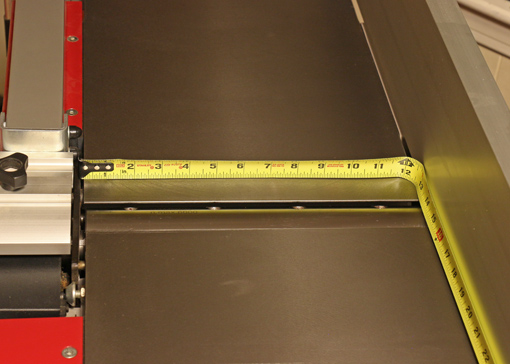
2. The planer feed mechanism does not balk with 12″ wide boards. The steel drive rollers control the board unyieldingly, yet the indentations made by the infeed roller are shallow enough to disappear when the final pass is very light. With good technique, snipe is about as minimal as it gets.

The feed speed is 6.5 meters/minute (21.3 feet/minute), which makes the three-knife cutterhead at 6000RPM produce 70 cuts per inch, typical for jointer-planers in this class. Compared to the DeWalt 735 (with a stock cutterhead) at 96 cpi in “dimensioning” mode and a phenomenal 179 cpi at the slower “finishing” feed speed, the A3-31’s 70 cpi may seem a bit rough but in fact it seems to strike a good balance between producing an excellent surface and working at a good pace.
Hammer A3-31

3. I like the Euro-style safety guard better than the spring-loaded “pork chop” style. I always use paddles for face jointing and it is easy to pass the board under the narrow guard, which is height-adjustable using the knob at the far left in the photo below.
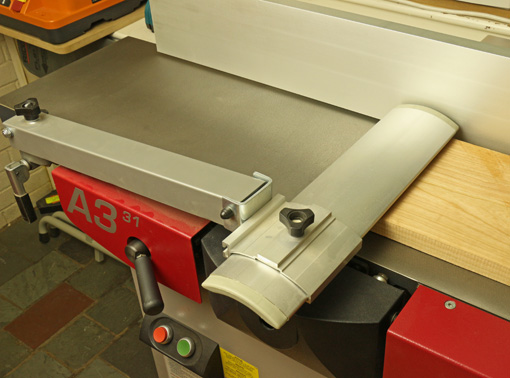
Hammer A3-31

For edge jointing the guard can be adjusted laterally to expose the minimum width of cutterhead. It would be better if the guard was hinged so half of it would hang down when it is adjusted very far toward the user side of the machine – but it’s not in that position too often so it hasn’t been a problem. The hinge feature is present on the company’s higher priced models.
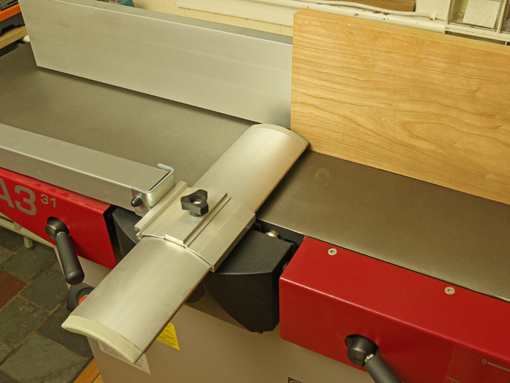
Hammer A3-31

4. Dust collection, as I mentioned earlier, is just wonderful, for jointing and planing. This helps a lot in my small shop.

5. The construction of the aluminum fence makes it very stiff. It is flat within .001″ in all directions and I cannot detect any twist. It is adjusted back and forth by using the knob (to the right in the photo below) and sliding the bracket on the extrusion track.

A slight complaint is that the squareness of the fence to the table cannot be made exactly consistent throughout its full adjustment range and most of its length, probably due to minute errors stacking up. However, the discrepancies are quite small, and by finding favorite locations for the fence, I have had no problem getting nice square edges on long boards.
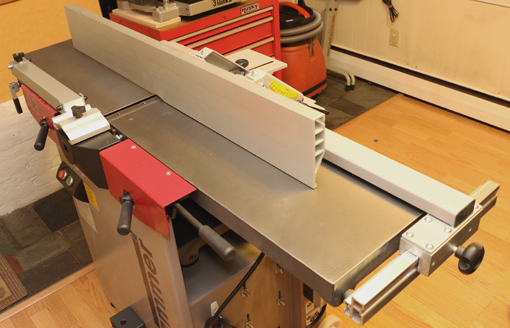
Hammer A3-31

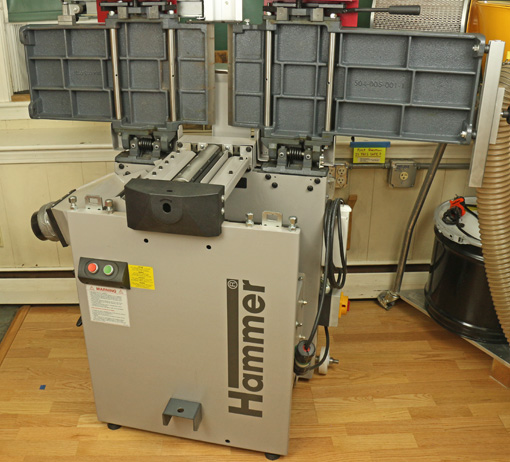
From the back view, you can see that not much sticks out – only the rear cutterblock cover. For most fence positions, the net depth of the unit is about the same with the jointer beds down or raised.
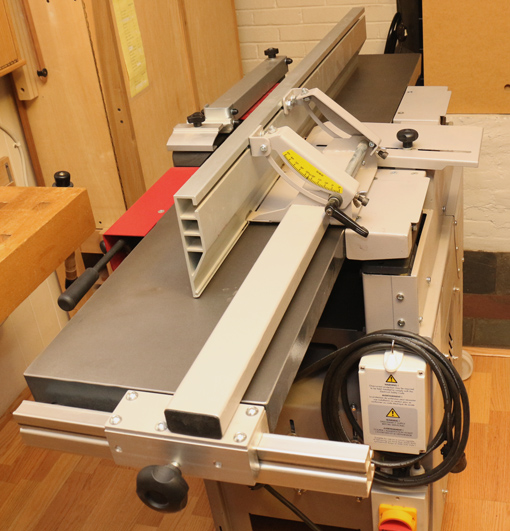
Hammer A3-31

Other key components that I cannot directly assess seem very good based on indirect observations and working with the machine. Machining and part formation looks neat throughout, with no ill-fitting components. The motor has excellent power and does not get overheated. Hand adjusted parts, such as the planer bed adjustment are very smooth, and the machine runs with that nice low hum suggestive of quality.

The same outfit that makes Hammer machines also makes the much more expensive Felder line. A Felder 12″ jointer-planer lists at over $7000 (ouch, my hand just cramped up at the keyboard), which is more than twice the price of the Hammer A3-31. I figure that the expertise and institutional experience applied to the Felder line must bleed over into the Hammer line. I’d bet it’s more than half the machine for half the price.

Next: The final next installment in the series will cover tuning and results.

Category: Tools and Shop  | Tags:  | Comments off
Author:
• Thursday, July 31st, 2014

Hammer A3-31

Having established in the previous post a rationale for this type of machine in a small woodshop, let’s take a look at the Hammer A3-31, which I’ve been using for the past two and a half years.

Getting it into the shop

I’m afraid I must start with one of the few problems I have experienced with the A3-31: getting it into my shop. The mobility kit uses a single axle that attaches to the base parallel to the 55″ jointer bed, along with 4″ wheels that simply turn in one plane – they do not swivel. A lifting bar is inserted into a cleat near the bottom of the base of the machine to roll it in a straight line and make partial J turns.

The top photo shows the lifting bar in place. One wheel is visible at the lower right of the machine base.

The system works well in the shop but it will not get the machine through the 32″ doorways in my house or the 36″ doorway of my shop. To make matters worse, the A3-31 was shipped on a pallet built for a special narrow-fork pallet jack. I ended up having to transfer the machine from the pallet onto a dolly that I built and use plywood sheets to get it over doorway bumps – a big hassle. If you have a garage shop or other wide doorway, all of this is not a problem.

To solve this problem, I wonder if Hammer could include a short axle to attach to the base perpendicular to the jointer bed to be used with a matching cleat. It might work only with the jointer beds raised but that would be good enough to just get the machine through narrow doors. Hey, Hammer: this would help many small shop woodworkers.

Now on to happy issues.

In order of frequency, here are the most common concerns among woodworkers that I’ve heard and read about j-p combo machines:

1. Changing between jointing and planing modes.

Fuhgeddaboudit. To go from jointing to planing, the fence stays in place. You lift the jointer beds as a unit, then flip the dust hood and reattach the hose. The tables remain parallel when raised so the effective width of the machine is approximately unchanged. The planer bed is cranked into position with an extremely smooth and fast mechanism. The jointer beds return to position precisely. Really, it’s all fast and easy.

Here are the beds lifted:

Hammer A#-31

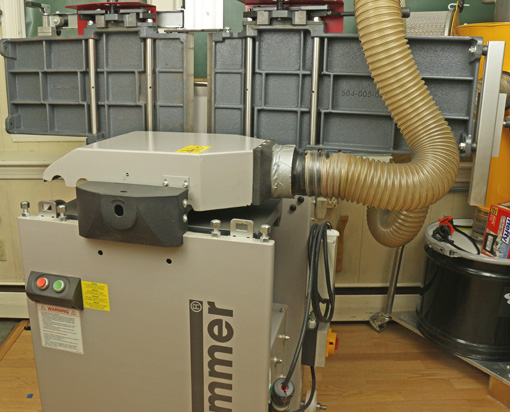
And here the dust hood is in place for planing with the hose attached:

Hammer A3-31

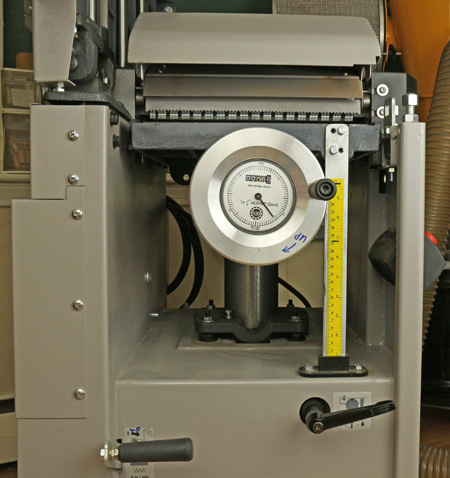
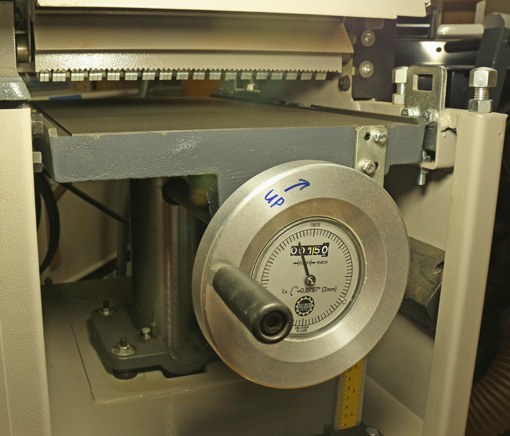
This is the planer infeed with the bed raised into place. The adjustment mechanism has the helpful, optional “digital handwheel.”

Hammer A3-31

2. Jointer bed length

Is a 55″ jointer bed long enough? It sure is for anything I do. I have no problem routinely accurately jointing rough boards 6′ long. In my opinion, there is no need to have the entire board length supported on either the infeed or outfeed table to do accurate jointing.

If you want more length, Hammer offers optional extensions for jointing and planing that look like they attach very easily.

Hammer A3-31

3. Dust collection

Can the dust hood contraption really work in both jointer and planer modes? Yes! The A3-31 is nearly perfect when used with my Oneida Mini Gorilla cyclone collector. It is the tidiest machine I’ve ever used.

4. Accuracy

Can a combination machine be as accurate as single function machines? This was my number one concern when contemplating the purchase.

For a given quality level, having used the Inca for many years, and now the Hammer, I say the answer is yes. I did have to do considerable work tuning the A3-31 to my liking but I’m a rather fastidious worker. (“Really, Rob? You? Get outta here, I wouldn’t have imagined . . .”) The key is that this machine can be tuned and it holds the settings. More on this in a future post.

5. Power and mass

Are these machines, in this size range, just toys for dilettantes? OK, now I’m getting a little annoyed. Just fuhgeddaboudit, OK? The motor is listed at 14 amps/220V and does not balk at planing full width boards. The mass of the beds, the quiet operation, and the results it produces are real deal.

[This extended review of the A3-31 and the general topic of j-p combo machines are unsolicited and uncompensated.]

Next: getting inside the machine.

Author:
• Sunday, July 13th, 2014

hand jointing

In the previous post in this series, I recounted my stock preparation history culminating with the Hammer A3-31. Prior to discussing the ins and outs of the Hammer machine, let’s look at the rationale for a combination jointer-planer in the small shop.

I’m guessing most of us share the following woodworking profile. We have:

  • A strong desire to build things from wood that exceeds the desire to dawdle with woodworking tools.
  • Less time than we want for making things.
  • Less shop space than we’d like.
  • Less money than we want.

To get a pile of wood transformed into a finished project, the stuff needs to be taken to the desired thicknesses, with flat parallel surfaces and a straight, square edge before being ripped to width and crosscut.

Here are some options:

1. Handwork/hybrid

Doing it all by hand is just too slow and tedious for most of us, but a hybrid approach employing a portable thickness planer is very practical. One face is made flat but very rough using scrub and jack planes, just enough so it does not rock or distort on the planer bed, and there is no bow (lengthwise curve on the face). The planer flattens the opposite face, the board is then flipped and the planer makes the first face flat and parallel. Then hand plane a straight edge.

Don’t forget too that a well-tuned bandsaw with adequate blade height can do a pretty good job as a jointer and thicknesser followed by clean up with hand planes.

2. Exceptions

It does pay to be able to fully prepare a board entirely by hand just as a baseball player must be able to bunt – it isn’t used often but a complete player artfully brings up the skill when needed.

Some boards are too short to safely feed to a thickness planer and hand work is a must.

Also, there is an occasional board in which I want to preserve every hair’s breadth of thickness, and conservatively flattening one face by hand is a less risky method.

For very wide slabs, elaborate router jigs can be set up but finding a local commercial shop with a megabeast thickness sander makes more sense to me.

3. Separate jointer and planer machines

The big problem here is that jointers with widths that approach even inexpensive portable thickness planers are big and expensive. To me, it makes little sense in terms of expense, space, and work efficiency for most small shop furniture makers to have a $2000, 600-pound, 8″ jointer with a 7 foot bed paired with a 13″ thickness planer. Or how about 5 or 6 thou for a 900 pound 12″ jointer?

One interesting exception to this mismatch situation is Grizzly’s G0706 12″ jointer that has a 60″ bed.

4. Combination jointer-planer

In a single machine with a fairly small footprint, you get an excellent 12″ of planing and matching jointing capacity. This opens up a world of managing wide boards with ease. This is value.

There is a range of prices starting at about $1800 up to twice that, among options that include Rikon, Grizzly, Jet, Rojek, Minimax and Hammer. Pair one of these bad boys with a steel frame bandsaw with a matching 12″ capacity and life is very good.

Lower budget 10″ models are available, including Rikon, Jet, and Grizzly. I will say that I really appreciate the extra two inches and extra beefiness of my current Hammer over the 10″ Inca I had. Hey, how about 16″? Sure, if you’ve got the space and money, but for most of us it’s not necessary for most furniture making.

In the next post in this series, I’ll go into some detail about my Hammer A3-31. Previewing, here are two non-issues: bed length and change over between functions.

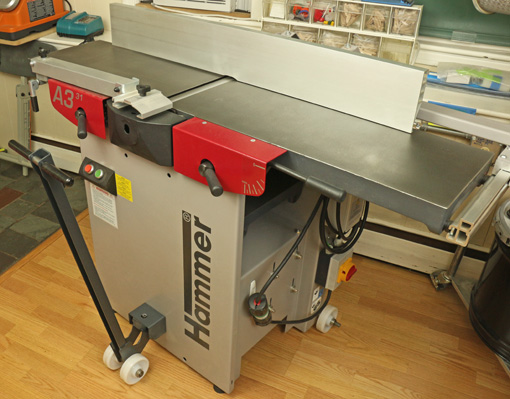
Hammer A#-31

Author:
• Monday, June 23rd, 2014

bed width

Stock preparation is the essential foundation for any woodworking project, and there are three keys to doing it well: accuracy, efficiency, and knowledge. A jointer-planer combo machine can be a big help.

There are countless pitfalls in stock preparation that can haunt even the most skillful woodworking that may follow. Twist, convex edges, and bowed surfaces are common inaccuracies that create problems. As for efficiency, well, I like making things and I do not want to spend forever grunting out stock, so the noise emanating from well-tuned machinery is music to my ears at the start of a project. Still, none of this works if a woodworker fails to appreciate wood movement from moisture exchange as well as from stresses created in the drying process.

By way of explaining how I settled on the combination machine, let me recount my stock preparation history. I think many readers will relate to much of it. Very early on, two things became obvious. First, it is very limiting to use only the thicknesses available in pre-dimensioned hardwoods, and second, dimensioning with only hand tools is slow and really not a lot of fun.

So, I got one of those ubiquitous cast iron 6″ jointers, and rigged up a marginally effective way to also use it as a thicknesser. Then, some years later, in the late 1980s, I bought a Ryobi AP-10 portable thickness planer, and its 10″ capacity made me feel like I was in heaven (“. . . man”). Still, I was stuck with only 6″ of machine jointing capacity and, despite trying the workarounds found in the tips sections of magazines, I was still doing too much hand work and longed for more machine jointing width, especially since I enjoy using fairly wide boards in my projects.

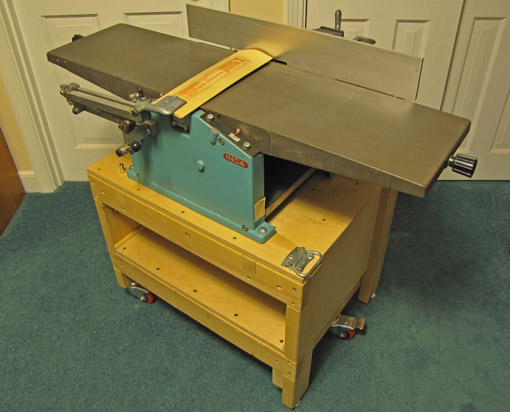
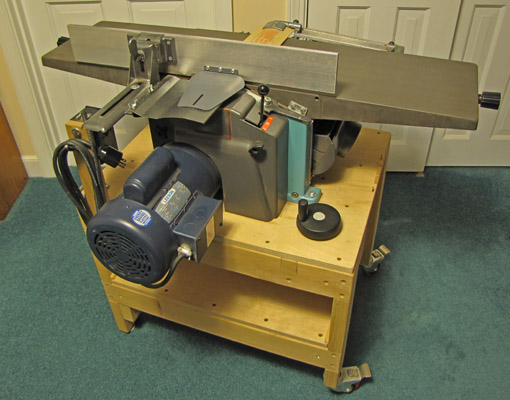
Enter, the Inca 10″ over-under jointer-planer. This wonderfully accurate machine, with its precise cast aluminum tables and great Tersa cutterhead, served well in my shop for more than ten years, perched on the feature-rich, battleship-grade stand I made for it. The only thing the dear Inca lacked was a lot of muscle, and so when I upgraded, I felt at peace selling it to a musical instrument maker.

Inca jointer-planer

Inca jointer-planer

Now, after 2 1/2 years of using the Hammer A3-31, and privately answering many inquiries about it, I’m ready to write. The opening photo shows off its width. I will discuss the A3-31 in some detail (spoiler alert) – I like it! – but will precede that with a post to consider the merits of the whole idea of a jointer-planer combo.

One more thing. I made the case several years ago for a portable jointer-planer as an excellent choice for a first machine for small-shop woodworkers making furniture and accessories. After many discussions with woodworkers during the ensuing years, I still hold that opinion, though I certainly understand how many feel a bandsaw should be first in line (I place it second) among other valid opinions.

Keep in mind that with a thickness planer as the only machine available, the initial jointing of one face by hand (which, again, I’d rather not do!) only has to produce a surface that will sit on the planer bed without twist, bow, or flex. It can be ugly with tearout, scrub plane gutters, or whatever; it just has to register on the bed so the planer can produce a flat surface on the opposite face. Then the board is flipped over, etc.

Author:
• Sunday, May 25th, 2014

DWP611

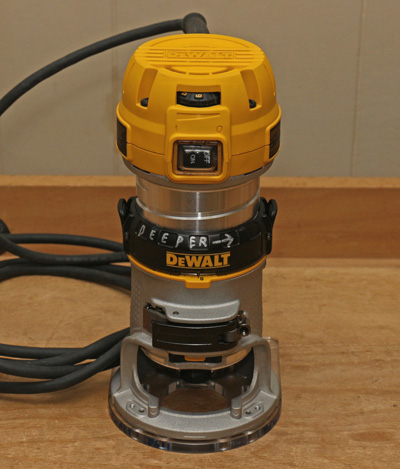
Just a few woodworking machines have the adaptability and almost the friendliness of hand tools. Chief among them is the bandsaw, but the compact router, especially the DeWalt DWP611, also earns a place in that category.

In the stage of building where the big machines have been unplugged, the radio is on, and the hand tool work is proceeding, it still is handy to call on a controllable, precisely adjusted tool that has more power than a horse.

For example, in mortising for hardware, I will clear the bulk of the waste and produce an accurate final depth with freehand routing. Rather than set up a jig or fence for the router, I simply chisel to the side layout lines, though this has been made much easier by the router.

On the other hand, for the socket part of a short sliding dovetail, I make a dedicated jig and use a bushing. The only chisel work is to square the end.

My general approach is to use the power of the compact router and, when convenient, its precision, especially in depth. I take advantage of its maneuverability for freehand work and use jigs and fences when necessary or when there is a clear advantage in overall time spent.

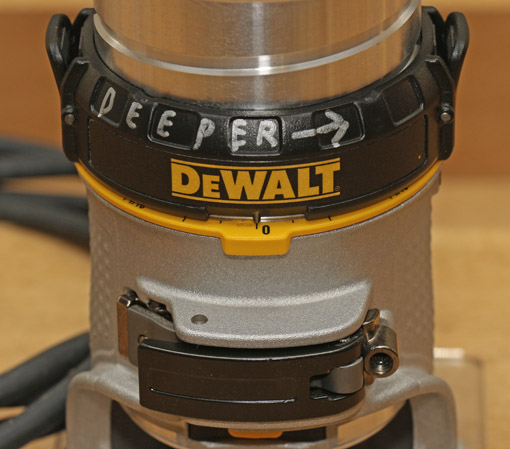
The best feature of the DWP611 is the precision cutting depth adjustment. The indicator on the large black adjustment ring moves more than 1/4″ along the adjacent yellow scale ring for each 1/64″ of depth change. When adjusted in the upright position, backlash is minimal but even that amount can be easily cancelled by resetting the zero mark on the scale ring, which is movable. After the depth is dialed in, the cam clamp holds it reliably. In this way, cutting depth adjustments rival the precision of a paring chisel or router plane.

DWP611 adjustment

This is a larger and heavier tool than the Bosch Colt and the Ridgid model but I found neither could be adjusted in cutting depth with the precision of the DeWalt, which is still easy to maneuver with one hand. I’ve used the DWP611 for about three years now and it is my clear favorite.

The 1/4″ collet is a two-piece self-releasing type, a must for any router. Unfortunately, bit changing involves one wrench and a shaft lock, a sadistic system, though I suppose DeWalt can be forgiven considering the tight quarters of a tool this size. The clear plastic sub-base has an extension on one side that improves stability for edge routing. The base can be repositioned for an optimal configuration of hand grip and sight line. I also bought the accessory base for standard bushing inserts.

The two LED lights that straddle the collet are invaluable for freehand work. The soft-start, 7 amp motor gives surprising power for a small tool.

This tool feels so friendly in hand that it might cause you to let your power-tool guard down. When routing, I remind myself that this little guy really does have more kick than a horse. Also, there is a tendency with this type of tool to get in close to the spinning bit and flying chips, so safety goggles are a minimum must.

A set of 1/4″-shank carbide straight bits down to 1/8″ cutting diameter is helpful for freehand work. Use good judgment and very conservative depths of cut for narrow bits. I also have a 1/16″ bit but I avoid using it.

So, hand tools and power tools can play together. I like to use the advantages of each to find simple and reliable ways to get the work done.

Category: Product reviews, Tools and Shop  | Comments off
Author:
• Friday, April 25th, 2014

IMG_1218_edited-2

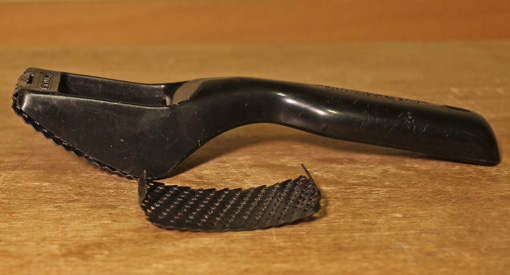
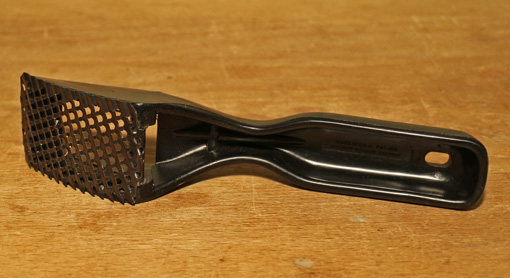
This unpretentious tool, for about six bucks, is surprisingly useful to modify concave curves on fairly narrow work such as table legs. I use it for fast, corrective takedown if my bandsawing has wandered off the layout line, or if I’ve changed my mind about the curve after having sawn it.

Its molded plastic handle and snap-in cutter certainly do not exude cool-tool cachet, but the varying curve of its sole, flatter toward the toe, steeper toward the handle, is quite effective. It cuts on the pull stroke. However, it tends to tear the wood and leave a surface too ripped up for efficiently transitioning to refinement with finer tools.

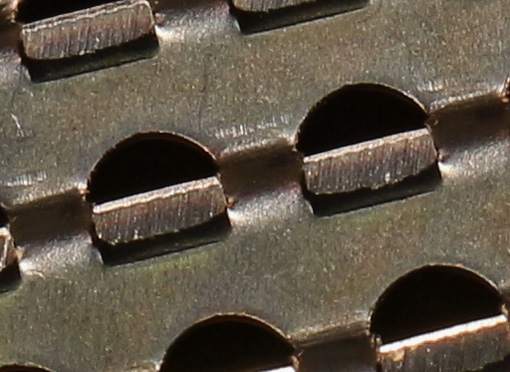
To remedy this problem, I hone the cutting face with a fine diamond stone. While this sharpens the cutting teeth, it has the more significant effect of limiting their depth of cut. This does make it a somewhat slower tool, but the resulting surface is considerably improved, so the whole process of refining the curve is actually faster.

The macro photo below shows the honed teeth, which have been lowered relative to the peaks of the “waves” on the cutting surface. (The cutting edges are facing upward. The honed area is the silvery line visible on each of the two teeth near the center of the photo.) This is similar to the working of an “anti-kickback” router bit, in that it limits the depth of bite of the cutter. If you go too far with the honing, the teeth will have too little bite or won’t work at all, so proceed gradually with the modification and test the tool as you go.

IMG_1216_edited-3

The tooth lines are angled to the length of the tool, pre-skewed, in effect, so I find it works best after this modification by pulling it with little or no additional skew.

IMG_1219_edited-2

A great tool it is not, but it does the job decently well. I wish Stanley (or Microplane) would make a longer version, say four or five inches, retaining the varying-radius curve, with room to place a second hand on the front of the tool. Not currently made, but perhaps a Shinto rasp in such a profile would be useful, or larger rasps in the style of curved ironing rasps, both with a knob at the toe for greater control and power.

Other options for a tool that is curved along its length and flat across its width include: metal and wooden compass planes, Auriou and Liogier curved ironing rasps, shop-made curved sanding blocks, and a new flexible rasp by Liogier that they call “The Bastard,” which I have not tried.

The Stanley Surform Shaver now comes with a bright yellow handle. Nuance that.

Category: Tools and Shop  | Tags:  | 3 Comments
Author:
• Tuesday, April 22nd, 2014

IMG_1234_edited-2

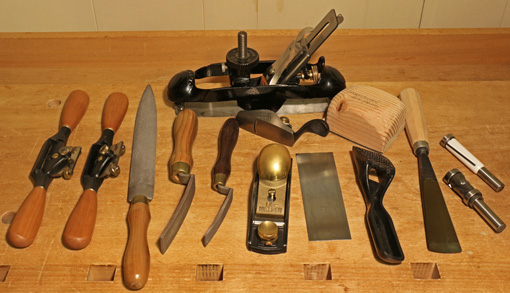
As I said, I’ll use whatever tool it takes to get the desired result for a particular curve in a particular wood. So let’s take a look at the available players and which make the cut (pun intended). Most of the game is won or lost on concave (inside) curves; the outside curves are easy.

Spokeshaves perform well on relatively narrow work with cooperative grain, but they can disappoint on highly figured woods, even using a skewed attack. The round shave sees almost all of the action, while the flat shave spends most of the time on the bench because I generally don’t find it has much advantage over a block plane or other flat tools on gradual outside (convex) curves. It’s all in the wrists.

The convex side of a half-round rasp is a good workhorse but has some weaknesses. If it is held at an acute skew, such as for steep inside curves, the teeth start to function ineffectively as tiny knives slitting along the grain, but if the tool is pushed more across the work, tearout results at the far side. Also, the tool is really working the curve at different points, and thus possibly different radii, at once.

So, for more control on gradual curves, I call up the Auriou curved ironing rasps (fourth and fifth from the left in the photo). They have an excellent reliable feel on the curve but lack speed, so they are not for hogging off a lot of wood.

The compass plane, which is a shaping plane in my view, was covered in two earlier posts, but a different twist on curved soled planes deserves mention. As discussed in the previous post, the sole must be set to accommodate the steepest portion of a chosen length of inside curve, so a given setting is approximate at best. Thus, a reasonable alternative to an adjustable compass plane is a set of a two or three wooden fixed curve sole planes, vintage or shop-made.

Hunting on vintage tool sites will turn up a few wooden curved sole planes with an adjustable toe piece to accommodate different inside curves. I have not tried one but I wonder if any readers have.

The little Lie-Nielsen spoon bottom plane is a different type of player but performs well despite its lack of size.

A card scraper is a good player if used in the proper role – great for smoothing curves but poor for shaping them because it simply rides whatever curve it encounters.

Underestimated but well within anyone’s salary cap is the curved sanding block. Customized in length, width, and curve, they can smooth curves but also can be designed as pretty fair shaping tools using coarse grit paper.

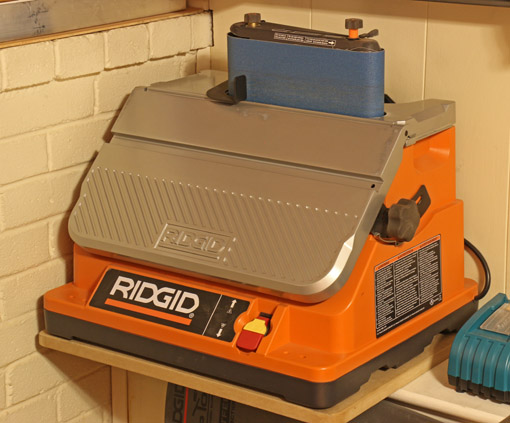
Speaking of sanding, the Ridgid oscillating spindle sander is very handy because it can be set up as a sideways belt sander or as a simple spindle sander in a range of sleeve sizes.

IMG_1235_edited-2

Back to the opening photo, the humble Stanley Surform shaver, a product of a program whose glory days are past, is an effective rough hogger. Surprisingly, it can be tuned to perform with a bit more finesse, as will be discussed in a future post.

The Allongee style gouge, #5 sweep, 38 mm, is a good reserve player for cross grain hogging in wide curved work, much like a freehand scrub plane for curves.

A couple of other tools are not in the TFC Team photo because, though they arrived with promise, were cut after tryouts. I found the flexible curved float file to be slow and awkward, and did not live up to the reputation of its flat cousins. The same was so for the Microplane flexible insert for a hacksaw frame. These are just this coach’s calls; you might like them.

When there is a simple curve in one plane, as shown below, to be made in multiples, I go to the pattern routing game plan, as represented by the pattern/flush cut bits on the right in the top photo.

IMG_1236_edited-2

Of course, just about all curves start with good, accurate sawing, which usually means a well-tuned bandsaw. That’s the fan base behind the whole team.

Next: nuancing the Surform Shaver.

Category: Tools and Shop  | Tags:  | 2 Comments
Author:
• Saturday, April 12th, 2014

IMG_1210_edited-2

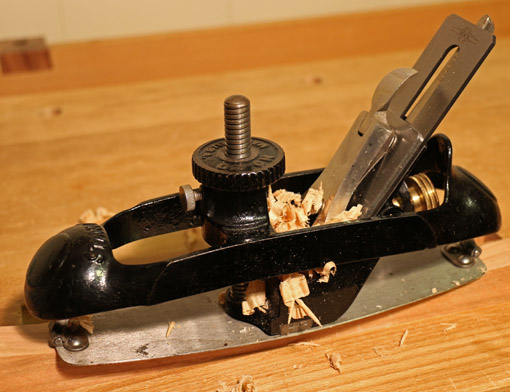
The compass plane is an effective tool when thought of as a jack plane for curves. It is mostly a shaping plane, where the shape is a curve, not a flat surface as for a regular jack plane. It is mostly fantasy to think of the compass plane sleigh riding over varying-radius curves spilling out long silky shavings.

The most important step in efficiently forming true curves in solid wood is to saw consistently to a good layout line. However, there will inevitably be some lumps and bumps in the sawn surface, so the curve must be “faired” to make it pleasing.

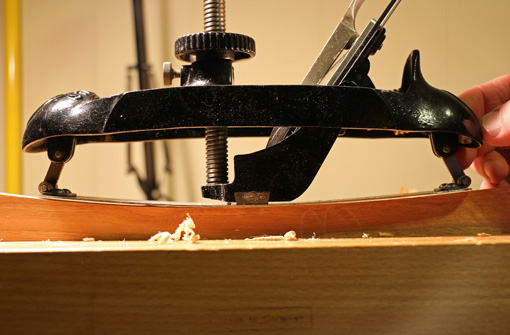
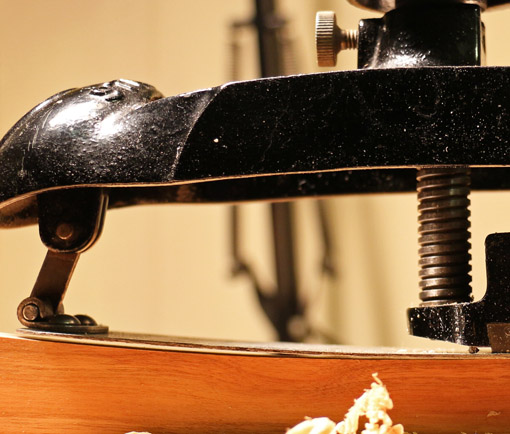
Key to using the compass plane is that the sole must be set a bit steeper than the work piece for concave (inside) curves (see photos above and below), and a bit shallower than the work piece for convex (outside) curves. Furthermore, the planing should proceed into downhill grain, that is, with the grain, which means you may have to turn around often. Outside curves are generally easier to negotiate, and shallow ones can often be worked well with a flat-sole plane such as a block plane.

IMG_1210_edited-3

This all sounds good except that most of the interesting curves in woodwork have a varying radius (i.e. are not circular) and some reverse from inside to outside. So that means a single sole setting is ideal for only a relatively short length of curve. As a practical matter therefore, for inside curves, the sole is set to accommodate the steepest portion of a length of curve that you choose to work in which the radius does not vary too much. It is a matter of feel and judgment. Which is to say that these planes are not very practical for abruptly changing curves.

Because we want the plane to remove lumps and bumps, the shavings, especially early on, will mostly be short, and the cutting edge will engage and disengage the wood as you take fairly short strokes. Then as the fairing proceeds, the shavings will lengthen; that is, if the planets are aligned.

IMG_1202_edited-2

The compass plane is capable of fairing a nice gradual curve in the right circumstances and wood. Remember too, it can handle wide surfaces that are difficult to manage with spokeshaves and rasps.

Also, it is often helpful to initially remove some of the roughness of the sawn surface with a rasp (not a sanding block) to avoid a very rocky ride in the early stages of planing.

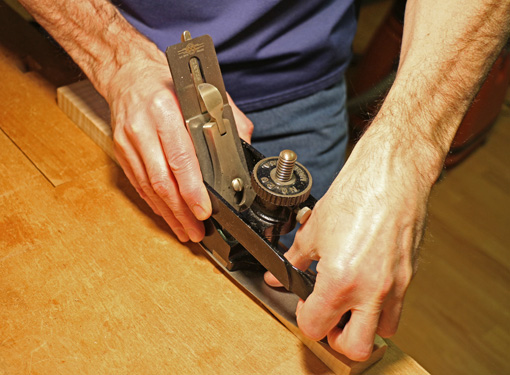
The anatomy of the compass plane does not permit it to transmit the wood-hugging stability that we expect from a good bench plane. I like to make the ride firmer and improve my feel of the plane’s interaction with the wood by placing my right hand as low as possible at the heel, sometimes with my fingers touching the top of the sole plate. Meanwhile, the palm of my left hand hugs down on the nose as my thumb reaches down onto the sole plate.

IMG_1205_edited-2

Ultimately, it’s not about the tool, it’s making the product come out the way you want it that counts. I’ll use whatever tool it takes to produce the desired curve in a particular wood. Sometimes, that’s the compass plane.

Next: scouting reports on each player on the tools for curves team.

Category: Tools and Shop  | Tags:  | Comments off