Archive for the Category ◊ Techniques ◊

Author:
• Tuesday, October 31st, 2017

Domino joints

The Domino sure makes joinery easy: fast layout, cutting parts directly to length, mortises in a flash, no fussy trimming of tenon shoulders, and no trips to the sharpening bench. This may come at a price, however, if you fall into the seductive trap of machine woodworking, which is letting the limitations of the machine govern too much of the aesthetic and structural design.

Let’s look at some possible frame or rail joints made by the Domino DF 500. The photo above shows the “tenon” half of the joint where the long grain of the Domino matches that of the frame member. The two on the left are fine by me. The third from the left is marginally acceptable. The one on the far right is awful.

A little arithmetic backs up what I think most of us would intuitively see as a waste of potential glue area in that last joint. The flat width of the Domino is 13.7mm, or 0.54″, irrespective of its thickness. With a tenon insertion of about 1″ (half the length of the 50mm Domino), we get a total effective glue area of about 1/2 square inch x 2 (for both sides of the tenon) = 1 square inch. I don’t count the rounded areas because they are not good glue surfaces.

At the other extreme, since the rail is 1 ⅞” wide, a slip joint or full tenon would give about 7 square inches of effective glue area! The demands of the design might not need all of that, but giving away 86% of the potential glue area is too much to sacrifice for convenience. I want my work to last.

How can we increase the glue area, at least somewhat, and retain the convenience and speed of the machine? As an example, in the photo below, on the right, the same 1 ⅞”-wide piece has two slightly overlapping Domino mortises. I simply trimmed the Dominos on their inner edges with a block plane to make them fit.

Domino joints

The piece on the left (the marginally acceptable one in the top photo), as another example, has two mortises that overlap a lot to make one wide mortise, wider than widest setting on the machine. It would be easier to make a loose tenon for this than to divide Dominos.

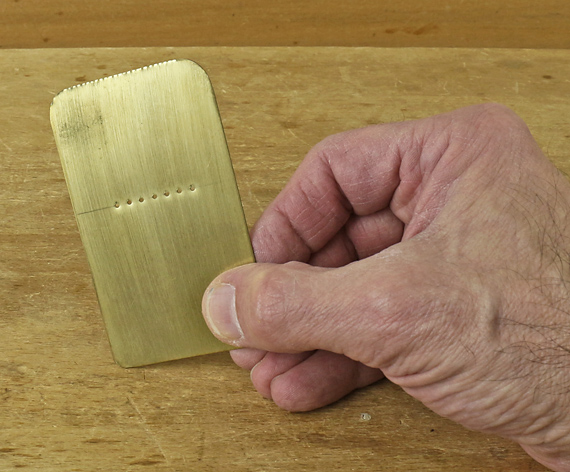
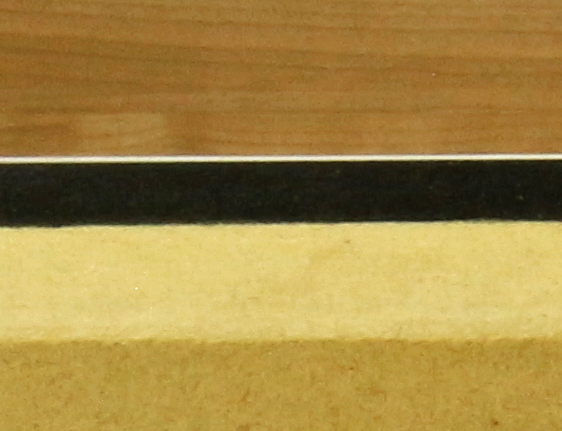
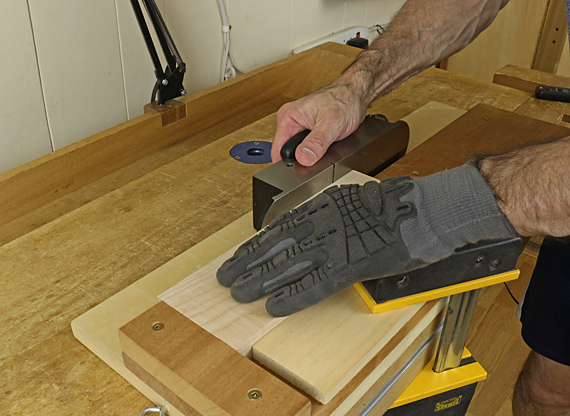
To get the Domino machine to chain together small mortises into a neat, continuous mortise that has no steps in the walls (photo below), the fence must be exactly parallel to the motion of the bit.

Domino joint

My Domino DF 500 – yes my $800 Domino – did not meet this level of accuracy. The machine cannot be adjusted for this, so I carefully shimmed the fence. That was complicated because the shims have to essentially create a new fence surface that is at a very slight angle to the original one.

I had sent sample mortised pieces to Festool but they told me it was within tolerance. Well, it was not within what I tolerate in my work. This is not a tool review, it is simply an account of my experience with the machine I bought.

Domino accuracy

The general point of all of this is to take charge of your woodworking machines, and not let them lull you into woodworking that you know is second-rate.

Category: Techniques  | 7 Comments
Author:
• Saturday, September 30th, 2017

wedged mortise and tenon

The usual directive is to flare the end grain mortise walls and wedge the tenons against those walls, as in the photo above. With the opposite configuration, which has the side grain mortise walls flared, there is reasonable concern that the wedges might exert pressure across the grain of the mortised board sufficient to split it.

However, there is another important way to consider this joint.

In the conventional configuration (photo above) with a well-fit joint, strength is created by the glue bond of the long grain-to-long grain interfaces, which are not wedged. In the long grain-to-end grain interfaces, which are deficient as glue surfaces, strength is created by the mechanical action of the wedges. Thus, all four interfaces contribute to the strength of the joint.

In the opposite configuration (as in the photo below), the wedges apply some “clamping” pressure for the long grain interfaces, but I would contend that is largely superfluous. At the same time, the long grain-to-end grain interfaces are mostly wasted as strength components.

Therefore, to maximize the strength of this type of joint, the conventional wedge configuration is better. In all cases, I think it is best to clamp across the joint and then insert the wedges.

Now, realistically, splitting is not likely in the opposite configuration with judicious wedging, especially if the joint is not too near the edge of the board. And the multiple mortise and tenon joint is probably more than strong enough in either configuration for its typical applications. Still, it is a labor intensive joint and one therefore tends to minimize the number of tenons, so it pays to get the most strength from each one.

The whole point here is to think about what is actually going on in the design of the joint, and make rational choices.

You can find step-by-step instruction on making this joint in my article, Making Multiple Through-Mortise-and-Tenon Joints, in the August 2008 issue (#170) of Popular Woodworking magazine. By the way, an important aspect of my method is to not use a fully housed tenon board as is often advised.

We should not be too definitive about these matters because each piece has different requirements for strength and appearance, and other factors inevitably influence both. Interestingly, in the same issue of PW, Bob Lang uses dual M&Ts to join shelves to the sides of a bookcase, using an approach very different from mine. Yet, I’d bet his bookcase is still going strong.

[Photo of the “opposite” configuration courtesy of Mark Ketelsen.]

Category: Techniques  | 2 Comments
Author:
• Wednesday, September 13th, 2017

woodworking skills

How would you reply if someone asked you, “Are you a good woodworker?” I think most of us seriously involved in the craft eventually ask ourselves this question. So, what might comprise a test of fundamental furniture making skills?

Here is what I suggest as a basic skill set for making furniture and accessories. It obviously does not encompass all of woodworking, nor does it include specialized techniques. As such it does not include skills, some of which you will eventually want to add, such as carving, turning, wood bending techniques, resawing, veneering, and finishing. And, of course, everyone will be able to cite exceptions and omissions.

The “test” recognizes that good work can be accomplished with both hand tools and machines, but also that principles of hand tool woodworking form a solid basis for learning and understanding the craft.

1 Wood:

  • Assess several boards of wood regarding grain orientation, defects, seasoning, and fitness for various uses.
  • Demonstrate an in-depth understanding of a few favorite species.

2 Stock preparation:

  • Using only hand tools, foursquare a rough 4/4 board, say 6-8″ wide by 18-24″ long to 3/4″ thick. The product should be sized to a snug fit between standards in length and width (fit by shooting).
  • Smooth the surface to an excellent appearance without applied finish.
  • Do another board with the aid of machinery.

3 Joinery: Make the following joints, demonstrating knowledge and skill in the critical aspects of joint design, strength, and appearance. You can use hand tools and machines, as long as the method does not reduce the quality of the outcome.

  • Use edge-to-edge joints to make a three-board panel, 12-18″ wide and 24-30″ long.
  • Make a three-shouldered blind mortise-and-tenon post-and-rail joint.
  • Make a through-dovetail joint with at least four tails.
  • Make a frame mortise-and-tenon joint of your choice.

4 Additional skills:

  • The tools for the test will be provided in good working condition but the “instructor” will randomly throw in a tool that will require minor tune up, so you will have to know how to assess all of them.
  • Starting with the factory grind, sharpen a 2″ plane blade according to its application (e.g. in a smoothing plane), a 1/2″ bench chisel, and a card scraper.
  • Layout, cut, fair, and smooth a reversing curve in 8/4 stock, 18-30″ long.

5 Basic constructions: All of the above skills are academic if you cannot integrate them to produce the fundamental constructions of woodworking. Again, you can use hand tools and machines, as long as the method does not reduce the quality of the outcome.

  • Build a dovetailed box/carcase in solid wood ­– just the four sides will do.
  • Build a post and rail frame – a “table” with straight legs and no top will do.
  • Build a frame-and-panel door.

These are just raw basic constructions but the results must be neat, flat, true, and square. You must demonstrate the ability to control tolerances. Within reason, the size of the constructions is up to you but the precision will be scrutinized commensurate with the size. (Hint: smaller is not necessarily easier.)

A few more things:

  • The test is timed only if you make money from woodworking; otherwise, within reason, it’s not.
  • You have to be able to design what you want to build, or at least be able to follow plans.
  • You can do the test in your mind if you want, but don’t cheat!
  • You automatically fail if you don’t enjoy every bit of it.

You’ve arrived.

Category: Techniques  | 3 Comments
Author:
• Saturday, June 24th, 2017

edge joint failure

Many of us woodworkers have a habit of casting our judgmental eyes on woodwork we encounter anywhere, at anytime. Imagine if we were hair stylists. Recently, I noticed the condition of the tables in a certain non-chain pizza shop, which happens to serve the best pizza I have ever tasted. Great pizza joint, bad edge joints.

Only a year old, the joint in the tables are failing. Because we do not want this to happen in our work, we ought to ask why. It is not enough to point out that the exposed end grain produces more and faster moisture content cycling at the ends of the tabletop than toward the middle, which produces greater stress at the ends during the dry months.

bad edge joint

The situation requires more explanation. If the joint lines were truly as strong as the wood itself, the failures would not occur almost exclusively at the joint lines. Those joints are, in fact, weak spots – they were not made well. Furthermore, even if they were intact, they do not look good.

There are many reasons to consider. Because I do not want this to happen to your work, or mine, I direct your attention to a series of three full-length articles I have written for Furniture and Cabinetmaking magazine. They really constitute a book chapter on the subject, and I think you will find they cover the topic thoroughly. The first is in the current issue, July 2017 (issue #259). The second and third will be in F&C August (#260), available any day now, and October (#262).

Much of it is from the series on this blog but I have refined everything and added more useful material, along with all new photos. I think you will find the photos supporting the explanation of the all-important matter of wood selection to be particularly useful.

If you are not familiar with Furniture and Cabinetmaking magazine, I suggest give it a look. Produced in the UK, it is full of high quality content, beautifully presented. A single copy off the newsstand here in the US is pricey but the digital version is a good value at $36.99 for one year of 13 issues from PocketMags. You can also get small bundles of any selection of back issues.

And then put aside any fear that anything you make will end up like those tables in the pizza joint.

Category: Techniques  | Comments off
Author:
• Wednesday, May 31st, 2017

Tormek SE-77

For those not familiar with the Tormek grinder, the SE-77 jig, an upgrade over the older SVH-60, holds the blade and slides onto the guide bar, where it rotates to present the blade edge to the grindstone in a very consistent manner. The niftiest features of the SE-77 are its ability to reliably put a controlled amount of camber on a plane blade, and to microadjust the lateral angle of the blade edge to the stone.

The SE-77 has a sturdy build. The left clamp screw slides to adjust the width between the two clamp screws. This more securely holds a wide range of blade widths. There is an end stop on the right side that squarely registers the right side of the blade into the jig, which is useful for blades with parallel sides.

The pair of small thumbscrews, shown in the foreground of the photo below, controls the two special functions of the jig.

Tormek SE-77

To microadjust the lateral angle of the blade edge against the stone, you back off one of the screws and advance the other the same amount. This is much more reliable than shifting and reclamping the blade in the jig.

To camber the blade edge, you loosen both microadjust screws. This creates a pendulum motion about the small stem. (See the photo: the small stem has a brass washer and external snap ring on its end.) With this pendulum motion, you can guide a controlled amount of camber onto the blade edge. The system works very well, though you do have to blend a gradual arc. A too-heavy touch can create a shallow V-point edge instead of a nice smooth camber.

Another welcome feature of the SE-77 is the design of the lower jaw of the blade clamp, which gives a good grip on Japanese chisels (hallelujah!), even onto the shank.

At $66, the SE-77 is not cheap. Having used the Tormek for a many years for grinding – very little on the leather honing wheel – this new jig has been a worthwhile upgrade.

Dear readers, I hope this series on blade camber has been helpful. As always, what I write is born of “the sawdust and shavings of my shop.” These are the techniques and approaches that work for me as I make things. I welcome your ideas and comments.

Rob

Category: Techniques  | Tags:  | 6 Comments
Author:
• Wednesday, May 31st, 2017

skewing effect

Creating the camber

There doesn’t have to be high art in producing the camber. On a coarse diamond stone, I start by leaning the blade to the left and slightly raising the right side. It is important not to overdo this. I then gradually reduce the lean, keeping aware of the approximate number of strokes, and blend the camber through the middle. Then I repeat this on the opposite side.

On the Tormek grinder with the older SVH-60 blade holder, I would lean on the slightly flexible guide bar to create some camber. The newer SE-77, which I will cover in the next post, is more controlled. The camber can be refined on a medium stone. Mild camber, such as in a high-angle, bevel-down smoother, can also be refined when honing the secondary bevel.

It is easy to underestimate the amount of camber by just looking at it without a straightedge reference, so I check the camber by holding a small, wide aluminum square (straightedge) against the edge and observe it against mild backlighting. Eventually, one can reliably relate the appearance to the performance on wood. Again, I do not measure it, nor recommend that as a habit.

cambered plane iron

If you overdo the camber, the nose of the blade will dull first, so when you go back to the stones to clean up the secondary bevel, some of the camber will automatically be reduced.

Skewing the plane

Skewing the plane at a typical angle used routinely has no significant effect on the camber function. However, an extreme skew angle, such as the 45° shown in the top photo, or even 60°, can occasionally be used to advantage to get the plane to pull a shaving from an isolated area, such as to correct a bit of tearout.

This is really just playing with how the plane sole bears on the surface contour of the board. The full camber depth is retained but is effectively spread over a shorter length of blade. (The plane stroke is still about parallel to the length of the board.) With some trial and error, you may be able to get the blade to “reach down” into a localized area.

Camber the chipbreaker too?

Very small differences, on the order of .1mm/.004″, in the setback of the chipbreaker may affect planing performance, at least according to this Japanese experiment. Should the chipbreaker therefore have a camber that matches the blade to create a consistent setback? With a straight-edged chipbreaker on a cambered blade, is there a difference in the shaving characteristic or wood surface across the width of the blade that cannot be explained by the difference in shaving thickness?

In theory, maybe so, but I have only rarely encountered advice to camber the chipbreaker. It also seems like too much trouble, so I don’t do it. Maybe it would help for a highly tuned smoothing plane. Any ideas, readers?

chip breaker setting

Next: the Tormek SE-77 jig

Category: Techniques  | Tags:  | 2 Comments
Author:
• Wednesday, May 31st, 2017

plane iron camber

To master handplanes, a woodworker must master the matter of blade camber. To introduce the bevel-up/bevel-down/frog angle issue, please refer to my 2009 post. Here I want to present a more intuitive approach to guide you at the sharpening bench.

The issue

When checking the blade after grinding, you naturally hold it up and observe the camber, sighting at 90° to the face of the blade, like this. But when the blade sits on the frog at an angle, the effective amount of camber is reduced. Think of it this way: if the cambered blade were laid flat, there would be effectively no camber at all.

So, you have to create what looks like more camber than you need, and just how much more depends on the bed angle.

Please note that I am not suggesting that you take out a leaf gauge and measure the camber! I took measurements for these posts and other writing but that is not my method in the shop. I suggest use the guidelines set out in part one of this series, work intuitively, using a bit of trial and error, and get a sense of how the camber that you see performs on the wood.

As an example, in the photo at the top, with the blades standing vertically, the blade on the left shows about .004″ camber, and the one on the right about .14″. In the photo below, the blade on the left is set at 45° and the blade on the right is set at 12°. This results in an effective camber of about .003″ for both of them.

plane iron camber

So, to get the same effective camber, we had to grind an additional approximately 1/3 more (observed) camber for the blade bedded at 45°, but for the blade bedded at 12°, we had to grind almost five times more (observed) camber.

Here is a handy table to help absorb a general sense of the differences.

Bed angle       Grind this multiple more camber than what the plane needs

12°                 4.81 [whoa, must grind lots more to get what you want]

20°                 2.92

22°                 2.66

45°                 1.41 [grind just a little more than what you want]

50°                 1.31

55°                 1.22

60°                 1.15 [what you see is just about what you get]

And another thing

Camber is somewhat of a nuisance to grind into the blade edge. It slows down grinding and, especially, honing. Unfortunately, and, I contend, for little or no good reason, almost all bevel-up planes made today have a 12° bed. That requires you grind a lot more camber than in a bevel-down plane. If the bevel-up plane had a 22° bed, this problem would be greatly reduced.

This is yet another reason why I continue to advocate that bevel-up planes should be made at about 22°. I explored the matter several years ago in this post and elsewhere.

Skip this part if you want

For those who like this sort of thing (as I do), here is the derivation of the chart above. The key point is that it is a non-linear function because of the sine curve. So, there is a big difference between 12° and 22°, and much less difference between 50° and 60°.

Please refer to the diagram in the 2009 post, which shows how the camber that you observe when your line of sight is 90° to the face of the plane blade is reduced by the sine of the bed angle when the blade is placed in the plane.

f = functional camber with blade in plane

c = observed camber normal to blade

A = bed angle of blade


f = c · sin A

c = f/sin A


c/f = (f/sin A)/f

= 1/sin A

=sin-1 A

The ratio c/f means how many times greater must the observed camber be to produce a given functional camber. c/f is just the inverse of the sine of the bed angle.

Category: Techniques  | Tags:  | Comments off
Author:
• Sunday, April 30th, 2017

plane iron camber

Revisiting this matter, there need be no confusion as long as you keep in mind that the amount of camber that belongs in a plane blade is a function of how the plane will be used, and particularly, the kind of shavings the plane will take. Without getting hung up on numerical absolutes, here are three reliable guidelines that I use, which I hope readers will find helpful.

I wrote about camber in 2009 but I think some of it bears restating, and there are a few things I would like to add.

For a smoothing plane blade: Make a very small camber to allow the plane to produce very thin shavings, perhaps .001″, that are thickest in the middle and feather out to nothing at barely less than the full width of the blade. This produces only imperceptible scallops on the wood surface. The finer the shavings you intend to take, the shallower the camber should be.

For a jack plane blade: Use more camber to take thicker shavings without producing stepped-edge “gutters.” Vary the camber according to how aggressively you want to remove wood with the plane. The camber also makes it easier to direct the cut to take down the high spots on the surface of the board.

For a jointer plane blade: Make a very small camber to make the plane capable of correcting an out-of-square edge by laterally shifting the plane without tilting it. Position the deeper part of the camber over the high side of the edge to bring it down, and thus incrementally work toward a square edge. The camber also creates a miniscule concavity across the width of the edge of the board, which ensures there is never any convexity there, which would produce an inferior joint.

So, there’s the essentials. Coming up, I’ll revisit the bevel-down/bevel-up issue (that I brought up in 2009) in a quantifiable but intuitive way, look at the effects of skewing the plane, present a thought on chipbreakers, and maybe another thing or two that popped into my head while I was in the shop but forgot to mention so far. Then, we’ll take a look at the Tormek SE-77 jig, which I’m liking a lot.

Category: Techniques  | Tags:  | 4 Comments