Author Archive

Author:
• Sunday, January 30th, 2011

If you are looking for ideas for a project, an excellent source is Lark Books’ 500 Series. While this series covers many craft media, woodworkers will find the most inspiration from 500 Cabinets, 500 Tables, 500 Chairs, 400 Wood Boxes, and 500 Wood Bowls. Even if you are not looking for ideas, there is much in these books to appreciate and enjoy. You will probably do lots of nodding, plenty of eye widening, some jaw dropping, and, naturally, some wincing.

The books, all stout 8″ x 8″ paperbacks, sell for about $12-14 on Amazon.

Each book delivers a huge quantity of outstanding work. There are no artist’s statements or lengthy ruminations, just a quality photograph, occasionally two, of the piece, with the artist’s name, a title for the piece, and size, material, and finish information.

I like to look at lots of sources, in print, online, and best of all, in person. Aside from the sheer pleasure of it, this activity expands my creative thinking as the imagery mixes and reacts with my own design chemistry. The eventual product is, hopefully, something meaningfully personal.

When looking through these or similar collections, ideas come from all directions. A box may start a chain of thought for a cabinet, or a chair for a table, and so forth.

To be clear, I am not advocating lifting designs, a form of theft, and purporting them to be yours. Yet, there is unlikely anything completely original since we all absorb what came before even as we make our own discoveries.

By way of disclosure, my work is in one of these books, which gets me a single free copy, but this review is not compensated. I just like the books.

Category: Ideas  | 2 Comments
Author:
• Tuesday, January 18th, 2011

This is really a matter of opinion and personal work habits, but I would like to make a case for the humble workbench tool well. The bench that I have used for more than 25 years has one and I would feel awkward working without it. Here’s why.

The tool well is a place for tools, small parts, and other sundry items not in immediate use while working at the bench. When placed there, the items are protected from bumps and dings because they lie below the level of the work surface. Think about vigorously jack planing a board, pushing the plane in various directions, and the possibility of the toe of the plane crashing a square, gauge, or straightedge. Ouch. Working a curve with a rasp, sawing joints, and paring with a chisel are other examples.

Of course, the tool in hand may also be damaged from such collisions.

Without a tool well, it will actually take up more space to place the unused tools on the work surface at a safe distance to create sufficient clearance from the work at hand to avoid feeling inhibited. Thus, the tool well saves, not wastes, space.

The work on the bench surface is likewise protected from the items in the well, such as chisels. Wood parts are rotated, pushed, and otherwise manipulated on the work surface and you want to avoid unintended meetings with tools.

The outer edge of a tool well at the end of the width of a bench should be flush with the work surface. Thus, for most purposes, the bench width effectively includes the width of the tool well. The same is true of a well in the middle of the bench width. The inside of the well on my bench is 5 1/4″ wide and 2 3/8″ deep.

Of course there are some disadvantages to the tool well. Tool wells at the end of the bench width prevent most clamping in that area. Also, there is less continuous flat area on the bench. (Though Bob Lang has a clever solution to this in a bench he designed and is detailed in Popular Woodworking.)

The disadvantage that seems to be stated most often, that the tool well collects dust and debris, is not a disadvantage at all. Yes this does happen, but I would rather the debris, such as chips from chopping joints that didn’t get swept to the floor, be out of the way in the well than sit on the work surface. Anyway, it’s no big deal to sweep out the well since there is a handy ramp at one or both ends.

So, for woodworkers who are buying, building, or upgrading their workbench, these are some considerations to keep in mind and which I hope will be helpful. There are many bench designs and many excellent sources to study. Decisions are ultimately personal, so go with what seems right for you and enjoy every minute at the bench.

Category: Tools and Shop  | 11 Comments
Author:
• Tuesday, January 04th, 2011

This wood has beauty, strength and variety. Its deep color, density, and figure impart a certain gravitas to a piece. In no sense is this wood a lightweight.

Plain (non-figured) bubinga’s brick red color is accented with darker annual ring lines. These are thinner and more subdued on the rift surface and more variable and bold on the flatsawn surface. Figured bubinga, well, wow! My favorite is the swirly “waterfall” figure, a variant of quilt, which is showiest on the flatsawn surface, becoming a slightly more modest ripple on the rift surface. This species can also produce fantastic broad, ropy curly patterns and pommele figures.

Bubinga (Guibourtia spp.) is available in clear, wide, long lumber. I suggest inspecting the boards for compression failures which seem more common in this species, perhaps occurring when these big trees are felled. These appear as jagged cracks running across the grain and are often very difficult to see on the roughsawn surface.

Giant highly-figured slabs, if you can pay for and haul them, can make fabulous table tops. An internet search will reveal some monster chunks of wood. Veneers are available, with the rotary-cut variety being known as kevazinga (variable spelling).

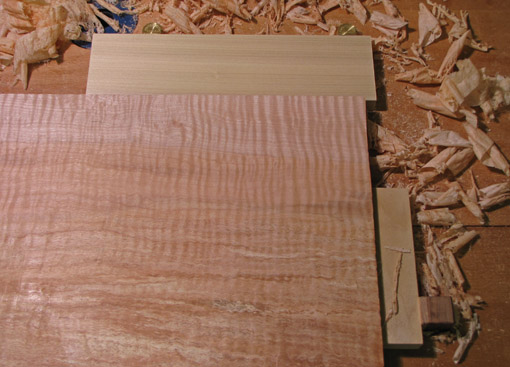
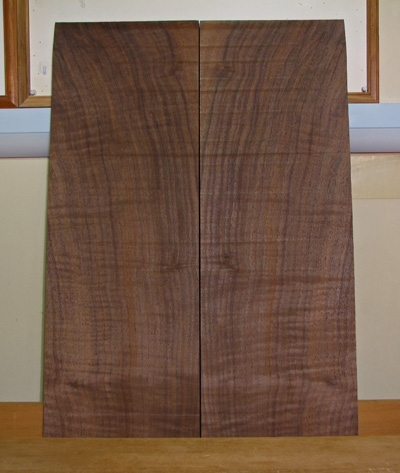
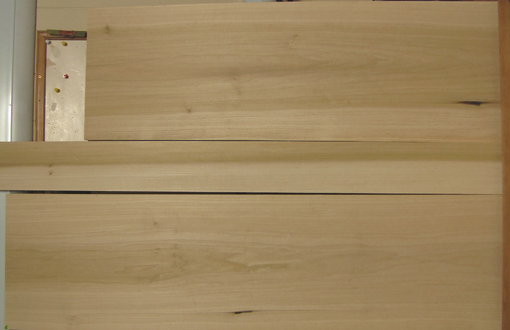
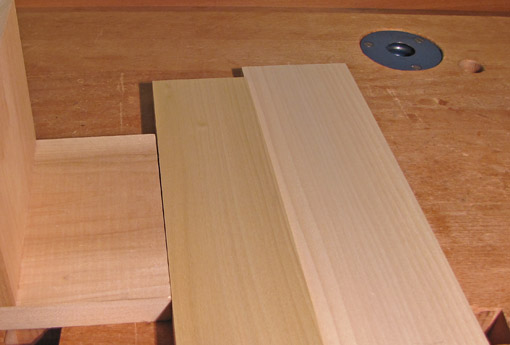
Below is a sampling from the shop. From top to bottom: rough flatsawn, machined-planed 8/4 rift leg stock, machine-planed rift waterfall with a coat of lacquer.

Bubinga works reasonably well, at least the non-figured boards, despite its high density, listed variably in the 0.75+ range (sugar maple is about 0.63). It can be hand planed and sawn well, although more muscle is required than for domestic hardwoods. Likewise, take only small bites when chiseling. Cutting on the table saw requires plenty of horsepower and a good sharp blade to move the stock with enough pace to avoid burning. To prepare leg blanks from 8/4 or thicker stock, I prefer using my bandsaw in conjunction with the jointer and planer instead of my 3HP cabinet saw.

Surprisingly, figured bubinga can often be hand planed reasonably well using a 55-60̊ cutting angle. If that doesn’t work, no worries, because the wood scrapes exceptionally well with card scrapers and scraper planes, even wildly figured stock. It responds well to using a scratch stock to create beading and other profiles. It sands to a high polish. The wood holds edges very well and end grain cuts particularly cleanly.

For finishing bubinga, I like wiping varnish, not too thick, as always. In some cases, preceding with an oil-varnish mix can enhance the look of highly figured pieces, but experiment because sometimes that can result in a muddy look.

I’ve read that bubinga can sometimes be troublesome to glue but I have not had any problems using PVA glues in edge-to-edge and other joinery. Two-part urea formaldehyde glue has worked well for laminations – URAC 185 dries to a dark maroon which blends with bubinga’s color.

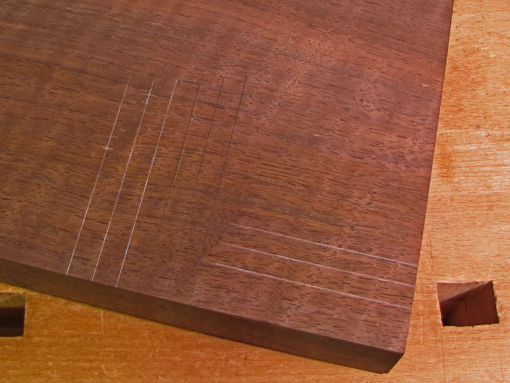
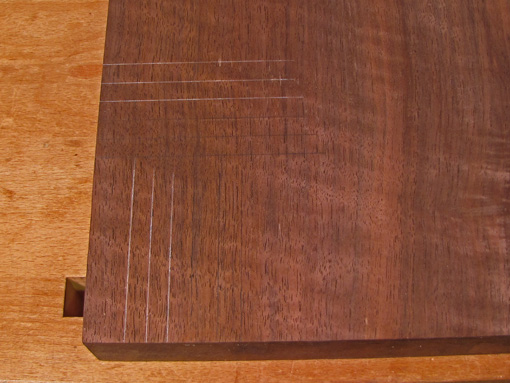
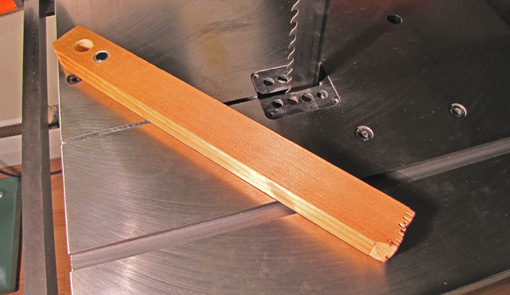
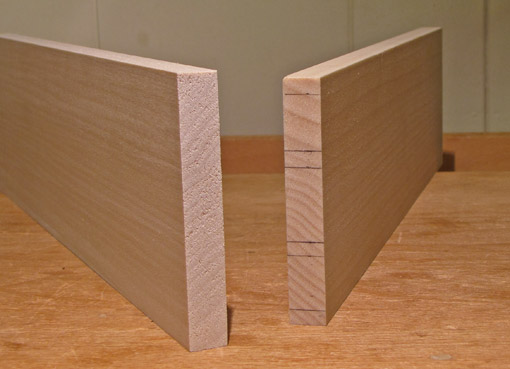
Shrinkage is listed by the Forest Products Laboratory as a decent 8.4 tangential, 5.8 radial, 14.2 volumetric with a very good T/R of 1.45. Most of its strength properties, including its freakish shear strength, are about 50% higher than domestic tough guys white oak and hard maple, while its side hardness is about double of those. It is an excellent choice for shop tools and fixtures such as the dovetail markers and lamp mount pictured below.

If there is a downside to bubinga, it is that it can be tiring to work with, sometimes producing a bit of a love-hate feeling on my part. This is a heavy, dense, and unyielding wood. Parts must mate well – there’s no helpful mush factor in fitting joints. After completing a project in bubinga, you might feel a longing for some friendly walnut, but after admiring the finished piece in bubinga, you’ll soon have ideas to use this wood again.

Category: Wood  | Tags:  | 4 Comments
Author:
• Tuesday, December 28th, 2010

Well, a bad day in the shop sure beats a good day doing a lot of other things! Seriously though, I want to explore the unnerving phenomenon of why sometimes working wood I feel like I can do no wrong, everything just flows, and yet at other times I feel like a neophyte who needs all the good luck in the world for things to go right. Can you relate to this?

I am not referring to obvious interference from things such as fatigue, worries, tool failure, wood disappointments, struggles with a new technique, and so forth. Rather, the mystery is why, absent apparent hindrances, some woodworking sessions are strained, poorly productive, lacking in confidence, or simply a struggle without ease.

Here is the best I’ve been able to discern. At least, I’m convinced that what follows is the key for me.

I believe that to be simultaneously effective and at ease in woodworking requires heightened awareness of how the process at hand, each moment of it, fits into the larger picture of the piece being made. In other words, one does not just execute isolated procedures, such as sawing to a line, but maintains a background cognizance of the larger role of the task at hand in what is being created.

Working with this sense of direction produces focus and concentration. It also extends beyond the piece in process to a larger commitment of purpose about one’s woodworking in general. Everyone has his own view in this regard, of course, but it should be carried into the shop and kept alive in the background.

Work flow in my shop deteriorates and mistakes creep in when tasks are abstracted from their larger purpose. The right approach is, for example, to plane a board flat, not as an isolated goal, but to work it flat enough, appropriately nuanced, so the board will fulfill its role in the piece. Yes, this is a simple notion, but it is easy to get carried astray in the course of all the steps in building a piece.

I find that a quick mental warmup to attend to these matters greatly helps my focus when starting work in the shop. In short, a clear sense of purpose, at all levels, is the key to a good day in the shop!

Does working wood thus imitate life in general?

Category: Ideas  | 5 Comments
Author:
• Monday, December 27th, 2010

Here are more second thoughts regarding previous posts. The updates are based on additional experience, news, modifications, and ideas relating to these tools.

The Domino Effect, June 12, 2009. It takes time for woodworkers to develop faith in new forms of joinery, as in new glues and finishes. We would like to have a crystal ball to see how they perform a few generations into the life of a piece. To ease my lingering doubts, I assembled a few test joints with the Domino and annihilated them with a 3-pound drill hammer. The wood failed before the joints. A very light sanding of the surface of the domino tenons to improve wetting seems like good insurance.

I’ve used Domino joints in high-end pieces but still don’t think they will ever replace traditional mortise and tenon joinery. It would be helpful if the system could make the mortises at least 1/4 inch deeper than the current maximum of 28 mm (nominal; actual is 29 mm) and use accordingly longer tenons. The machine can also be used as a handy small mortiser even without using dominos.

It would be interesting to hear of readers’ experiences with Domino joints.

Lie-Nielsen Convex Sole Plane, September 11, 2010. Finger grips filed into the sides of the plane have proven helpful. In general, I almost feel that a tool isn’t really part of my repertoire until I’ve done something to personalize it.

8 Simple Shop Tips and Conveniences, February 15, 2010. The Ni-MH batteries in the Panasonic drill-light set have finally died after a long, productive life. I replaced the set with the Makita LCT 300W 18-volt drill-impact driver-light set which uses Li-ion batteries. Wow – lots lighter, faster and longer-lasting charge, and what a buy. The impact driver is more for DIY than furniture making but it’s a serious bad boy with 1280 inch-pounds of torque.

Minimax E-16 Bandsaw, May 18, 2009. It appears from the Minimax website that this model is no longer available from them. The E-16 remains a good fit for my shop because it covers just about all my needs while being lighter and more maneuverable than the more popular MM-16. Nevertheless, I feel as strongly as ever that a quality bandsaw will expand most woodworkers’ range of work as few other tools can and more than any other machine. Bandsaws do not take up much space and can be made mobile. I suggest a steel frame saw with at least 12 inches of resaw height.

How Much Camber Should Be in Plane Irons?, May 21, 2009. Having received a few questions on this, nope, I still won’t say how much. IT DEPENDS. And don’t bother measuring it. In addition to the plane’s function (smoothing, jack, etc.) and the bevel up or down factors, other issues include: is the plane skewed in use (which makes the camber’s “sag” have a shorter span), how sharp is the blade, how hard is the wood, and how is the cap iron adjusted? Also, the amount of downward deflection of the blade’s edge will be altered by most of these factors which will, in turn, affect the functional effect of the camber.

The key is to monitor the feedback from the blade’s performance and make adjustments at the next sharpening session. Usually, camber is overdone. Fortunately, this is easy to correct, since most of the dullness is at the crown of the camber where it is readily honed away.

An Inexpensive Saw that Does Its Job Well, May 30, 2010. This has been a great workhorse in the shop. I wonder if it could be manufactured with a taper-ground plate for a little higher price. That, and a little better handle geometry would make it even better.

There’s always more to learn!

Category: Tools and Shop  | 4 Comments
Author:
• Saturday, December 11th, 2010

This is about a way of working that is a mentality more than a specific technique. Above all, it is about awareness.

Accuracy is essential in woodworking – layout, cutting, surfacing, fitting, and so forth. We strive for this, perhaps even aiming for unattainable perfection, like a shooting at a bull’s-eye.

Consider William Tell, who, legend holds, was forced by a tyrant to take one attempt to shoot an arrow through an apple sitting on the head of the archer’s son. If he missed, the tyrant’s soldiers would kill the boy. Though he courageously took careful aim at the apple, surely Tell shot with the awareness that to miss low would kill his own son. If he missed high, at least there might be a Plan B to save his son. Fortunately he did not need to use the extra arrow under his coat, but one wonders what might have ensued if the first shot missed.

In woodworking, all inaccuracies are not equal. It is not like aiming at a concentric circle target. To do good work, one must be not only intent on hitting the mark but also cognizant of the consequences of the different directions of missing the mark. This awareness comes from understanding the significance of the task at hand and where it fits into the project as a whole.

This does not mean one should saw everything fat, nor does it excuse being timid about working to the line. It does mean that the concept of a one-sided tolerance can be applied to most woodworking tasks. Here it is: try to hit it right with an accuracy appropriate to the function of that part of the project, with an awareness that errors in some directions are less consequential (and perhaps fully tolerable) than errors in other directions which can seriously compromise the work.

As an example, in sawing a tenon, strive (courageously) to saw to the layout line but be aware that sawing it too thin is a considerably bigger nuisance to correct than sawing a bit too fat, which can be quickly remedied by paring or planing. In the bigger picture, you are aware that a loose tenon will compromise the strength of the structure. The same general idea can be applied to cutting dovetails, fitting drawers and doors, even flattening a board.

By contrast, you broaden your tolerances planing a chamfer with a block plane. If it looks about right, fine.

This is a much more effective approach than pursuing the illusion that you must or might get it “perfect.” Don’t believe the “perfect every time” promise in some woodworking ads and literature. It is neither necessary nor real.

Be always aware of: How does this process that I’m doing at the moment, fit in and affect the whole of the piece? (In this way, does art imitate life?)

With this approach, the craftsman works with ease and confidence. He does not pursue, nor is intimidated by, perfection. Rather he knows what he is after in reality and how to work effectively toward it. Put another way, the craftsman accepts his humanity, and does not fight it but rather works with it to function effectively. In this work of creativity, the craftsman is superior to any machine.

Category: Ideas  | 2 Comments
Author:
• Tuesday, November 30th, 2010

Here are some updates to previous posts, mostly regarding tools.

Since the original posts appeared, I’ve had the time to accumulate experience with additional tools, incorporate modifications to tools, or have additional ideas about their function.

Rust Busters, January 15, 2009, discussed helpful rust prevention products. Shortly thereafter, I installed Zerust drawer liners in my tool cabinet drawers. These look and feel like non-slip router mats but contain corrosion inhibitors which work invisibly and odorlessly. The gripping effect of the mat prevents tools from sliding, bumping, and rattling when the drawer is opened and closed. A 1 x 6-foot sheet costs $8.95 and protects up to 5 years according to the package label, 2 years according to the website. A definite winner.

Dovetail Chisels, September 28, 2008. Opinions vary because there is more than one good way to do almost everything in woodworking, but I still find it helpful to have a set of narrow chisels with side relief to clear the waste between tails. My Japanese chisels for this purpose are more than 20 years old. Bob Zajicek of Czeck Edge Tools has addressed this issue by producing a chisel design with side bevels that directly meet the back at a 70̊ angle, and have a one degree taper along the length to further reduce binding. I have not tried these but it looks like an excellent design and they are doubtless as meticulously crafted as the other products by Bob that I have tried.

Other options to consider are the Ashley Isles round back dovetail chisels sold by Tools for Working Wood.

More Workbench Upgrades – Pups, Anchors, and Stops, December 2 and 6, 2009. The longer I used these helpful additions to my workbench, the more it became apparent that the Veritas Wonder Pups would provide even greater versatility to the wood-holding repertoire. I put thin PSA cork on the clamping faces. They are now part of the team and are clear winners. 

Ditto for the Gramercy holdfast, and the bench already has several of the required 3/4″ holes. This tool is as good as it gets in combining simplicity and effectiveness. I think a piece of modern abstract sculpture can now be held securely on my workbench.

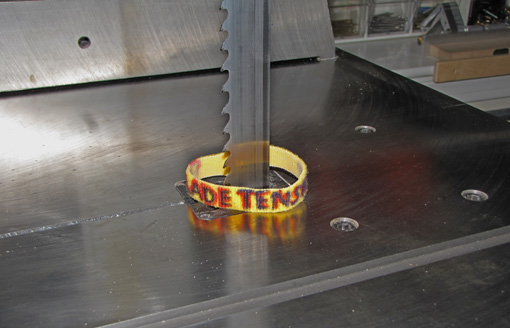
Bandsaw, Hand Tool With a Motor, June 15, 2010. In response to a reader’s question, I noted that I do my bandsaw work with just two blades by Suffolk Machinery, a 3/4″ wide, 2/3 tpi variable pitch blade for resawing and other straight cuts, and a 3/8″ wide, 6 tpi blade (see the Comments section of the post for more details.) I still think they are superb blades. Lately, I have been using the SuperCut’s Premium Gold ½” wide, 3 tpi blade which has bone-chillingly sharp carbide-impregnated teeth. I was skeptical that the ½” width would be sufficiently stiff for resawing. I still need more experience with the blade, but so far, so good.

The handy benefit is that I can also cut my usual shallow, sweeping curves with this ½” blade which comes with the back smoothly rounded. This usually saves me from one of the most unpleasant jobs in the shop: changing bandsaw blades.

More “second thoughts” to come in a future post. I’m always learning more about this craft and enjoy doing so. I hope this information is helpful to you for your woodworking.

Category: Tools and Shop  | 2 Comments
Author:
• Friday, November 26th, 2010

This wood is so beautiful, varied, and agreeable to work with, that I imagine if I could have only one species of wood to use for everything, it might well be Claro walnut. It is so captivating that there is a real temptation to just join a few pieces corner to corner without any thought to a real design, state that “Woodwork is made by fools like me but only God can make a tree” (apologies to Joyce Kilmer), and leave it at that.

If there are doubts about this wood, it is only in being sure of its proper scientific label. Perhaps oversimplifying, Claro walnut is Juglans hindsii, native to northern California. The well-known Eastern (U.S.) black walnut, a great wood in its own right, is Juglans nigra. As best I understand, “Claro walnut” lumber may come from trees that are J. hindsii or a hindsii x nigra hybrid, or from the hindsii root stock upon which Juglans regia, English walnut, has been grafted. Botanical technicalities aside, it’s just gorgeous wood.

Claro’s strongest appeal to me is in the variety of rich colors that can be found mingled in a single board, most compellingly on a marbled quartered or rift surface. Even more spectacular, curly figure, delicate or ropy, may be superimposed on the marbled color array. Flatsawn boards are very often too gnarly for my taste, but certainly have their own appeal. Crotch figure is also available.

The working properties of Claro are much like black walnut: excellent. It is a medium-hard wood, pleasant to work but with enough surface hardness for any furniture item. Sawing, joinery, and gluing are almost always without problems. Layout lines can be difficult to see but angling a light source can pick up the glistening of a graphite line fairly well. White art pencils blunt quickly but can be helpful for less critically precise layout.

The wood responds well to hand planing which gives an exciting clarity to vertical grain (quartered) and most rift surfaces. It can sometimes be a bit brittle under the plane. If you like swirly boards, scraping works better. For finishing, varnish and oil-varnish mixes have worked well. Shellac is another good option; water base is not, in my opinion.

The stability figures for Claro are very favorable and this is my shop sense as well. According to The Wood Database, Claro shrinkage is 4.3% radial, 6.4% tangential, 10.7% volumetric, and T/R is 1.5. Quartered boards, as expected, are very stable.

Here on the East coast U.S., I purchase Claro from across the continent so it is particularly important to buy from a dealer on whom I can rely. As for big-leaf maple, Northwest Timber in Oregon is my first choice for Claro walnut.

Category: Wood  | Tags:  | 4 Comments