Author Archive

Author:
• Tuesday, November 29th, 2011

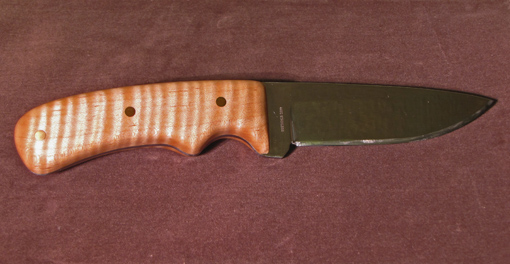
I was browsing in a Woodcraft store a while ago and saw some blank knife blades to which only a wooden handle needed to be attached to produce a nice knife. I am not a knife maker but I certainly like tools, including knives, and figured this would be an easy diversion for me, an experienced woodworker, while more profound projects ruminated in my head. Ha! Yeah, right.

I bought two. I was thinking vaguely, without fully admitting to myself, that one was to screw up and learn on, while the second had a shot at turning out OK. Really, it was not a difficult project, but even such a seemingly straightforward job as this harbored glitches that, lacking specific experience, I was unlikely to anticipate.

How was I to know that the quick-set epoxy would make an ugly thick glue line, or that blending the handle near the heel of the blade would be tricky? Even though I’ve handled knives for many years, decisions for the figure, weight, thickness, and contours of the handle were confusing. I also was not accustomed to seeing sparks fly off the drum sander along with the usual wood dust.

In short, after irretrievably messing up my first attempt, the next try resulted in a decent handle. The process still felt awkward, and I know there is plenty of room for improvement.

So, while not wholly unfamiliar, this was new territory for me. The experience reminded me how damn difficult it is to make things, especially to make them come out the way you really want them to come out. It’s not quick, easy, or perfect every time.

To students of woodworking, and that means all of us, I suggest we ignore the popular trend of hawking this or that technique as easy-peasy, quick as a flash, or (ugh) “perfect every time.” Woodworking is none of those. Sure, you and I can and will learn new skills and do excellent work, but it’s really not easy.

So, ignore the hype and keep making sawdust. Happy woodworking!

Category: Ideas  | 4 Comments
Author:
• Monday, November 21st, 2011

Here is a practical way to choose the height of the workbench that you are planning to buy or build: First, consider the tasks you will commonly perform at the bench. One height will not be ideal for all of them. So, prioritize them, and then try out heights for the major tasks.

I think this method is better than a formula. The most commonly quoted of these states that the top of the workbench should be at the level of your palm when you stand with your arm straight down with your hand extended forward, or simply at the level of your wrist. That might work for you but it might not. I know it does not work for me.

I dissuade you from using a simple formula because this is a personal matter like many aspects of craft. It is not only your height and arm length, but also your back, neck, eyes, posture, and style of work that come into play. The best way to integrate all these factors is to simply try out different heights. Here’s how.

First consider your tasks. As an example, here is my list.

Very common jobs, at which I often spend a long time: planing, sawing dovetails and tenons (sometimes using an auxiliary vise), chopping joinery (often while seated), shooting, scraping, sanding, and finishing.

Shorter duration or less frequent tasks: marking out, paring, sawing with the bench hook, and assembly.

Machine work at the bench: mortising with the router, Domino and biscuit joinery, and using a benchtop drill press and portable electric drill.

Maybe you do lots of carving or inlay, maybe you do all your joinery with machine jigs and the bench is mostly for fitting and sanding, or maybe you prepare all of your stock by hand, and so forth. Remember too, that workbenches are not saw horses; ripping and crosscutting stock to size with handsaws require much lower support.

The next step is to use a sturdy table, Workmate, or a friend’s workbench along with some clamps, and stack/remove 3/4″ or ½” plywood or MDF on it to create various heights to try out the tasks on your list. Pay attention to:

  • your posture – neck, shoulders, back, core, knees
  • reach
  • range of eyesight
  • how you tire
  • any physical limitations you may have.

Find what feels right for you. Your most common and long duration tasks should govern your final choice of height, along with some accounting for the other tasks.

If you are getting a new bench, you get to choose, of course. However, you can easily raise an existing bench by attaching blocks at the bottom. While lowering a bench is a bigger job, it can be done because you’re a woodworker.

There are other approaches. Adjustable height benches and plans to make your own are available which could be used as a primary or secondary bench. Japanese woodworkers do much of their work on the floor and on an angled heavy beam.

In summary, I suggest forget the formulas and trust yourself. You will, after all, be spending a lot of hopefully happy hours at the bench.

This is what works for me, but who cares, find what works for you!

Category: Tools and Shop  | 2 Comments
Author:
• Friday, November 11th, 2011

Isn’t learning wonderful? You acquire new things that become part of you, you can do it all you want, it’s good for you, and you don’t ever have to stop. It does, however, require humility in that it must start with the admission of the enormity of what you do not know. Thus, I am a permanent student of woodworking. The learning I like best is the kind that I can put into action in the shop.

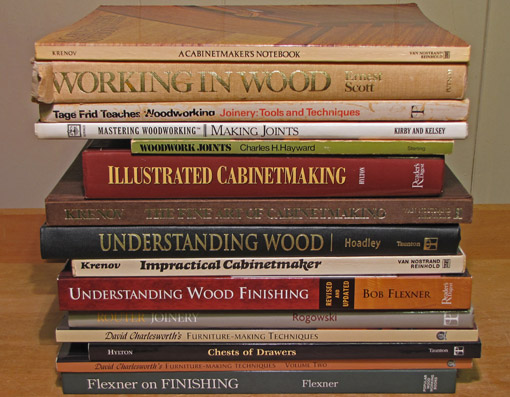
When asked, I say that I am a self-taught woodworker, true in the usual sense. In reality, I have had countless teachers, almost all from afar. I would like to share with you the woodworking teachers from whom I have learned the most.

James Krenov has to head the list. His writings and work catalyzed my intuition that making high quality things in wood, with a personal touch, is powerfully meaningful. Further, his level of technical refinement continues to set a standard.

Ernest Scott’s Working in Wood, published in 1980 and, as far as I know, long out of print, was an encyclopedic challenge to absorb, especially for learning joinery. I would literally blow the sawdust off the pages as I turned them and practiced making joints. Tage Frid had a legendary breadth of practical woodworking knowledge. His Taunton Press books and articles remain directly usable at the bench. Ian Kirby offers clearly reasoned explanations of techniques that advanced my understanding and helped develop my habit of thinking through woodworking processes instead of accepting them by rote.

There are many more. To learn about wood, I turn to Bruce Hoadley (Understanding Wood), and the wonderful Fine Woodworking articles on different species authored by Jon Arno. Bob Flexner’s lucid demystifying of finishing in his books, and articles in Popular Woodworking, is some of the best explanatory writing I’ve read on any topic. I still refer to Charles Hayward’s Woodwork Joints, copyright 1975, to sort out joinery. David Charlesworth’s incisive understanding of technique is top of the line.

For furniture construction, I often look to the writings of the following woodworkers in numerous sources. Bill Hylton must have taken five lifetimes to learn his range of ability. Chris Becksvoort gives reliable advice borne of long experience. I keep rereading Will Neptune’s articles, there is so much in every paragraph. I’ve always enjoyed Gary Rogowski’s enabling way of teaching several different ways to accomplish a job.

Still, there are so many more. Without a doubt, every devoted woodworker has his favorite teachers and sources. The explosion of woodworking information on the internet adds immeasurably to our learning opportunities. To all of the above and the many more unmentioned, thank you.

Category: Ideas  | 2 Comments
Author:
• Thursday, November 03rd, 2011

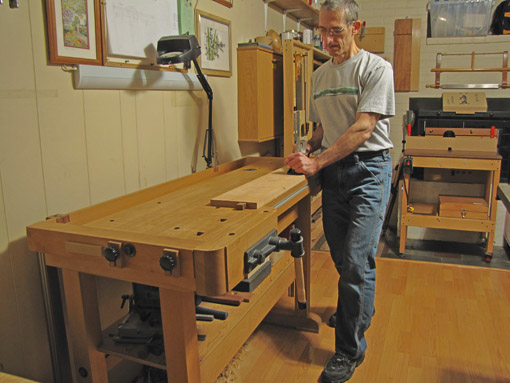
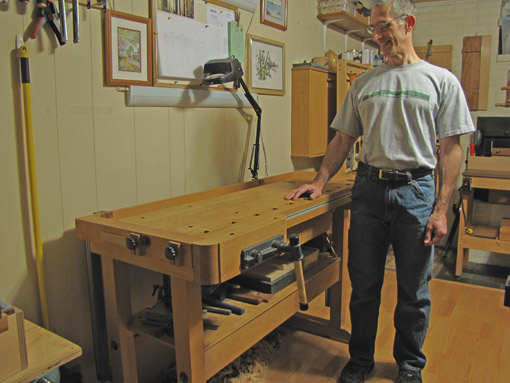
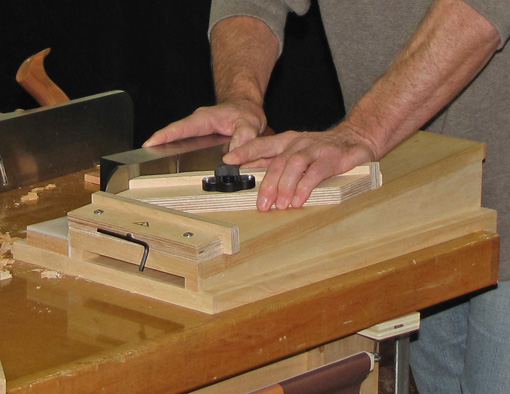
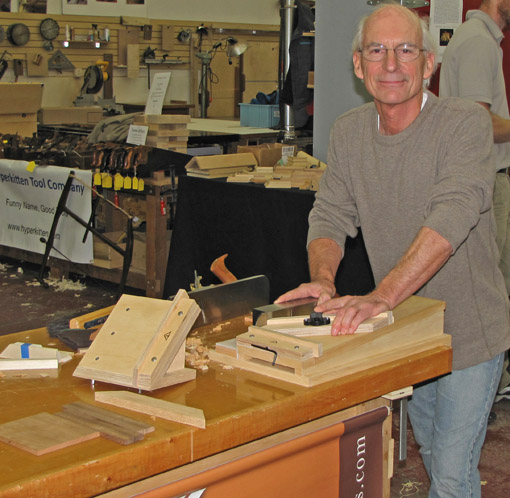
This is the best shooting board I have ever used. I believe it is probably the best available anywhere. Tico Vogt made it and he can make one for you – the Super Chute 2.0. A shooting board is an extremely useful, almost magical, tool that can greatly elevate your control of woodworking processes. After watching Tico develop and improve his version of this tool, I finally had a chance to use it last week at a Lie-Nielsen Hand Tool Event at the Connecticut Valley School of Woodworking.

That’s Tico in the photos using his Super Chute 2.0.

It was like slicing baloney with a sled on an ice track. Tico showed me the tool’s incredible quality details and nuances that only could come from a seasoned woodworker who knows from experience what really works in the shop. To elaborate on all of them here would make this post too long, but I will point out a few highlights.

The plane rides on a track of super-slick UHMW plastic. Importantly, the work piece sits on an angled bed which facilitates a strong stroke with the plane and distributes wear and cutting resistance over a greater width of the blade than a flat bed would. The 90̊ and instantly-installed 45̊ fences register in eccentric bushings which make their angles micro adjustable. The fences are also laterally adjustable to completely eliminate end grain spelching. To my mind, these user-controlled features respect the skill and intelligence of the craftsman using the tool. A donkey ear miter attachment that installs easily is also available.

Tico uses CNC technology and sources components manufactured with a high degree of sophistication to a produce a product with quality evident throughout. No, it’s not cheap; excellence never is. This is Lie-Nielsen-type quality in a shooting board.

A plane such as L-N’s sweet #9 makes shooting all the more of a pleasure but don’t feel you must have a dedicated miter plane to start shooting. A well-tuned and well-sharpened jack plane, bevel-up or bevel-down, can shoot very effectively. Shooting is a gateway technique, easily learned, that will allow you to produce precise ends on components of casework. It is a must for making precision high-end drawers with hand tools.

This review is unsolicited and uncompensated. I just think the Super Chute 2.0 is a heckuva tool.

Author:
• Tuesday, October 25th, 2011

Using a straightedge is easy, right? Yes, but it does pay to use a technique that is both practical and consistent with the tolerance to which want to work.

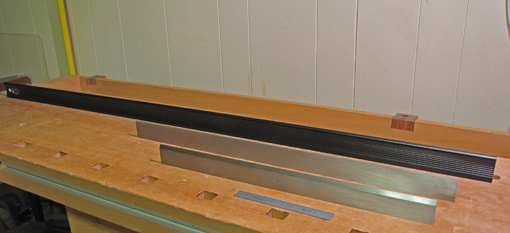
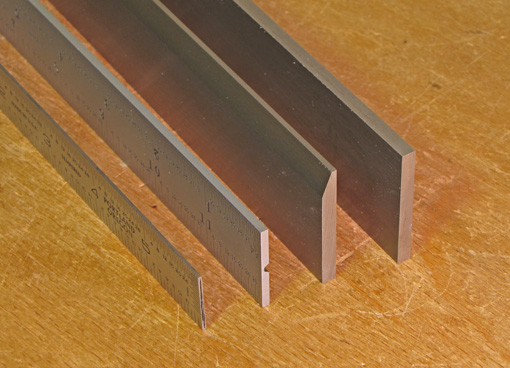
Pictured above are, from front to back, a 6″ Bridge City rule, the 18″ beveled Starrett #385, the 24″ unbeveled Starrett #380, and a Lee Valley 50″ aluminum straightedge. The photo below shows the thicknesses, from left to right, of the 6″ rule, a Starrett combination square blade, the #385, and the #380. The Lee Valley is about 7/16″ thick at its base. 

Let’s look at three techniques for using a straightedge and consider some of the related features of different straightedges.

1. Eyes won’t lie

This is the way a straightedge is usually thought to be used. You simply hold the tool against the surface and look for gaps against a light. Done properly, this allows the eye to easily detect gaps of 0.0005″ (half a thou) or less.

It is helpful to use a diffuse, linear background light, such as a fluorescent bulb, and a thin edge against the work, such as a beveled edge. If a wider edge is used, ensure that your line of sight is parallel to the surface. A false impression of accuracy will result if the light under a gap is blocked from view simply because there is an angle between your line of sight and the width of the tool’s edge.

This technique can be awkward and tiring because you have to hold the tool and the work up to the light, or bend and maneuver to view a stationary surface. It is good for testing a plane sole or other small, very precise work. The #385 or an accurate small rule are good choices. Avoid tipping the straightedge which can introduce errors caused by any slight bow of the tool along the length of its face.

2. Shim it, shim it again

Here you lay the straightedge on the surface and use feeler gauges to seek out gaps. Look for hollows near the middle of the tool, but also press down near an end to check for gaps at the opposite end created by a bump somewhere in the middle.

A good way to work to a specific tolerance, say 0.001″ for a plane sole that you are lapping, is to put a leaf gauge under a wide-edged straightedge, and then gently pull the leaf to see if it drags the straightedge or slips through freely. The former indicates you are within tolerance (as long as there was no previous rocking of the straightedge), the later indicates a gap. Decide how large and where you can tolerate errors.

This technique is also handy to test a tablesaw top or jointer bed which you cannot lift and where bending is difficult or impossible to get your line of sight parallel to the surface.

The #380, or any tool with a similar wide edge, is a good choice for this technique.

3. Swing it easy

The first two techniques are slow and almost always overkill for wood preparation. So here’s the quick, easy, practical method that I suggest for dressing stock.

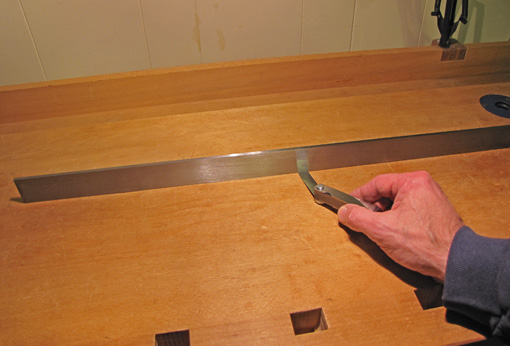
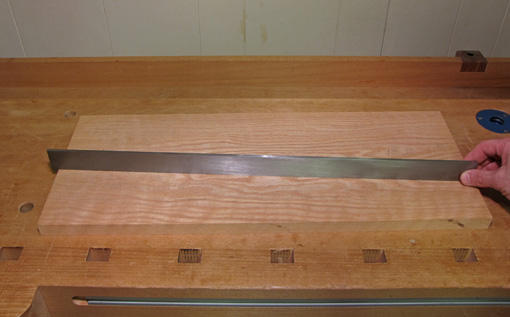
Set the straightedge on the wood, grasp and unweight one end, but do not lift it, and gently swing it along the surface. See where the tool “grips” or pivots. If it pivots just barely at the opposite end, the surface is slightly concave. If it pivots somewhere in the middle, you’ve got a bump. In woodworking, bumps are generally undesirable so you work with a one-sided tolerance, flat or a trace concave. You’ll quickly get the feel of this method.

Here is where a heavy, wide-edged, metal straightedge gives you a nice feel on the wood. The steel Starretts or the big Lee Valley aluminum work well.

This is convenient – no lifting or unclamping the work – and it quickly tells you what you want to know – that one-sided tolerance. It allows you to work in rhythm with your craftsman’s intuition.

In conclusion, the straightedge, while the simplest of tools, requires matching the technique to the task.

Category: Techniques, Tools and Shop  | Comments off
Author:
• Thursday, October 20th, 2011

It can be argued that a straightedge is unnecessary. When using a handplane, for example, a woodworker can sense the flatness of a board from the bite of the blade and the shavings produced as the work progresses. As another example, the ultimate test of an edge-to-edge glue joint is how the boards meet each other rather than an external standard. You would, however, mostly have to just trust that your planes’ soles, tablesaw top, jointer beds, and so forth are accurately flat.

As a practical matter, a high quality straightedge is a fundamental reference tool that is very useful in the shop and is easy to acquire. I prefer factory-made metal straightedges, but wooden straightedges can be made in the shop to a very high standard. 

Here’s a simple method:

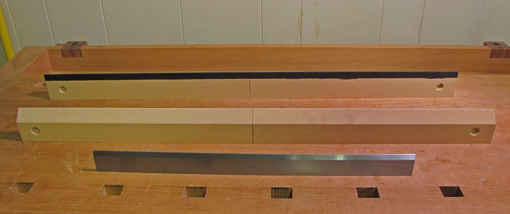
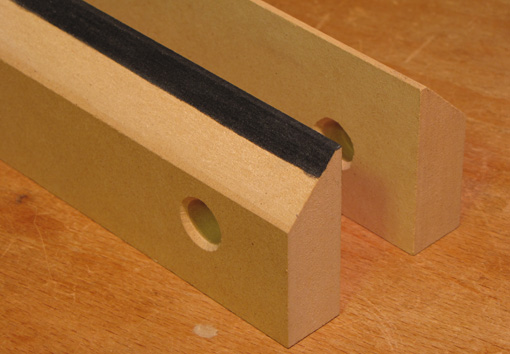
Start with two pieces of a stable, fine-textured wood such as mahogany or cherry, quartersawn, flat, with straight grain, about 2″ wide, 18″ – 30″ long, and 3/8″ – 1/2″ thick. MDF will also do. Join the two pieces face to face by clamping, or by pinning with nails or dowels that are snug but removable. Bevel a pair of adjacent edges to make each 3/32″ – 1/8″ wide.

Now plane both the thick and the thin pairs of edges as flat as you can. I think the easiest way to accurately plane the edges is to shoot them. Put the plane on its side, clamp the pair of sticks on a flat board with a pair of edges overhanging, and plane away. Uncouple the pieces and check the edges against each other.

You can start off by simply ripping each piece on an accurately set up table saw and then go to the planing steps.

Because two edges are being planed together, they will have the same type of inaccuracy – concave or convex – at the same places. The inaccuracy will be effectively doubled when you place the edges against each other and compare them against a lighted background. [There is no realistic possibility of creating a falsely acceptable result by producing one concave edge which happens to mate with the other edge being symmetrically convex.] Work until you achieve whatever level of accuracy that you think is practical for your work.

You now have made two straightedges AND a pair of winding sticks!

I made the 30″ winding sticks, pictured above, from 3/4″ MDF. Only minimal planing was required to refine tablesawn edges. They’re good to about 0.001″ over their lengths. I use them only as winding sticks, which is another topic for another time.

For straightedges, I like steel and, in some cases, aluminum. A quality metal straightedge, such as a Starrett, is accurate to an extremely high tolerance and has the advantage of durability. I like the weight, contact feel, and affordability of a steel straightedge in lengths up to 24″. For longer ones, aluminum keeps the weight and cost down. Properly cared for, these tools will last a lifetime.

Next: a selection of straightedges and techniques for using them.

Category: Tools and Shop  | 4 Comments
Author:
• Thursday, October 06th, 2011

First and foremost, a woodworker needs to know wood. No degree of prowess with tools and techniques can compensate for a lack of understanding of the material into which steel cuts. The guys at American Woodworker magazine have put together a sawdust-in-your-pockets practical collection of topics that I think would benefit any woodworker: Getting the Most From Your Wood-Buying Bucks, published last year. My recommendation is unsolicited and uncompensated; I just want to share good information.

The sections of the book are:

  • Finding Great Wood. This includes getting wood from locally cut trees, using salvaged wood, dealing with wood defects, and understanding lumber grading.
  • Sawing & Milling Great Wood. Topics include flitch-cut logs, resawing, milling rough boards, and the best explanation of reading grain direction that I’ve ever read.
  • Drying Your Own Wood. Even though you might not use the plans to build your own kiln, the explanations of drying wood and moisture meters are very helpful.
  • Very Special Wood. My favorite section. Five different authors share their intimate knowledge of eight different wood types and species, such as spalted wood and mahogany and its look-alikes.
  • Special Finishes. This is a sampling of finishing strategies and principles for woods including pine, walnut, cherry, and oak.
  • Projects for Special Wood. Here are some interesting furniture projects and techniques for managing large slabs.

Even in areas where I think I have a good amount of knowledge and experience, I was able to pick up useful tips and helpful clarifications. Typical of Fox Chapel books, the layout and photography are attractive and inviting.

What I do not like about this book is the title. The book does give information for you to achieve that goal but, as a title, it underestimates the scope and value of the contents. One of the reasons I wanted to write this review was my concern that the book might be overlooked because of its title.

I’ve tried to open the cover for you in this review, but I think if you take a look for yourself, you’ll like it. Its practical approach makes it a good addition to books I’ve previously recommendedUnderstanding Wood, by Bruce Hoadley, and the encyclopedic volumes, Wood, by Terry Porter, and Wood Handbook, from the US Forest Products Laboratory.

Don’t you just love wood?

Category: Resources  | 2 Comments
Author:
• Wednesday, September 28th, 2011

That title may make my spam-comment filter work overtime. Anyway, this post continues the discussion of managing figure in wood. Let’s look at the orientation of the annual rings in the rectangular blanks from which curved legs will be cut. Short sections of Douglas fir will be used to illustrate the principles.

All of this refers to legs which curve in three dimensions (planes). The curves may be cut on all four faces (e.g., a cabriole leg) or just two adjacent faces. Legs in which the curves are cut only on two opposite faces are curved in only two dimensions (picture the leg sandwiched between two flat sheets of plywood) and are a somewhat different matter. Bent lamination legs are an entirely different matter. Please do not ask me about legs which alter the time-space continuum.

The photo above shows the three possible basic orientations. The dot on the end grain indicates the inside corner of the legs. The two faces adjacent to this corner usually each have a flat portion where the aprons are attached with mortise and tenon joints.

In the three legs, from left to right, consider the endgrain patterns:

  • The annual rings are approximately parallel to one face and perpendicular to the other, producing one flatsawn face and one quartered face.
  • The annual rings are approximately 45° to all four faces and run “across” the inside corner.
  • The annual rings are approximately 45° to all four faces but run parallel to an axis from the inside corner to the outside corner.

For simplicity, I cut the curves into two adjacent faces. The effects would be the same if curves were cut into all four faces such as in a cabriole leg.

Let’s look at the results.

The leg on the left is bad news. The irregular figure produced by cutting a curve into the flatsawn face is unpleasant in itself, and the inconsistent figure among the faces distracts from the shape of the leg.

The middle leg is an improvement but, to my eye, the figure lines fight the curves of the legs. There is too much run-on and run-out of the annual ring lines.

I like the leg on the right. By cutting the blank from approximately 45̊ riftsawn stock and orienting the growth rings in this way relative to the inside corner, a good lookin’ leg arises. The shape of the leg (though uninteresting in this example) coordinates with the figure.

Here are closer views: 

Note that another disadvantage of the leg on the left is the exaggerated consequence of a small knot intersecting the cut line. Small pin knots, such as are common in cherry, can be difficult to avoid, but the middle leg demonstrates that they will have much less consequence with that grain orientation.

It is hard to find a thick, purely riftsawn board from which to make leg blanks, but most fairly wide flatsawn boards contain some effectively riftsawn stock toward the sides. I examine the end grain and face grain and carefully select the best sections of such boards. I pay attention to the straightness of the figure along the length of the board, recutting the edge to “straighten” the figure lines if necessary. I also try to somewhat coordinate bends in the figure with bends in the leg design.

Of course, you can choose however you like to use figure, but the key is to be aware of it and manage it. Making your design and the beauty of the wood work together, each enhancing the other, can bring class, beauty, and quality to your woodworking projects.

Happy woodworking to you.

Category: Techniques  | Tags:  | 2 Comments