Author Archive

Author:
• Wednesday, June 30th, 2021
shopmade dowel jig

It is reasonable to be skeptical of dowel joinery. After all, half the joint involves gluing the long grain of the dowel into a hole where the glue surface is partly end grain with limited true side-grain glue surface. However, the carcase dowel joint, used in the right circumstances and made properly, works and lasts without doubt. Joints in pieces that I have constructed as long as 20 years ago and have been able to observe since are still cleanly tight.  

We associate this joinery with the late James Krenov who wrote about it in detail in The Fine Art of Cabinetmaking. Here my attempt is to humbly add tips and refinements, particularly toward ensuring accuracy.

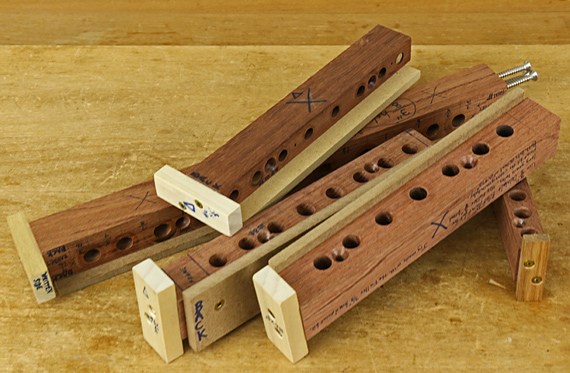
Making the jig is more than half the job for this joint. Use a very hard, fine-grained wood that will hold clean, sturdy holes to last through repeated use, including inevitably repurposing the jig for future projects. I have long used bubinga, though its availability is now limited. Your shopmade jig will be at least as accurate as manufactured jigs of this type, and it will be customized to your project. 
dowel jig

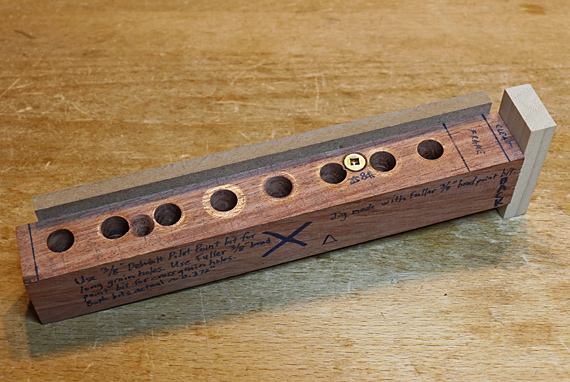
I usually make the block about 1 1/8″ thick (in the direction of the length of the holes) and about 1″ wide. The width does not need to match the width of either workpiece but will, in fact, be a little wider than the end grain workpiece to ensure good seating on the side-grain workpiece. The length will usually be a little longer than the width of the workpieces.

Employ every effort to make the block with two absolutely flat surfaces that are dead parallel to each other. This is critical because the jig will be used to drill from both directions. Any error in parallelism will be doubled when making the joint. 

A third face, the reference face, should be flat and dead square to the two faces with holes. The fourth face, which I mark with a big “X”, is not critical.

The holes should be drilled with a well-tuned drill press. This is cross-grain drilling, so a good brad point bit is the best choice. 
dowel jig references

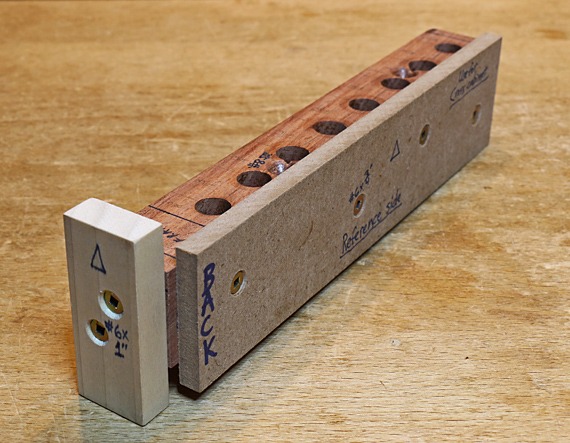
A small, removable cleat on the end of the block serves as a physical reference against the workpieces. This can be augmented depending on whether the workpieces meet flush at their edges. 

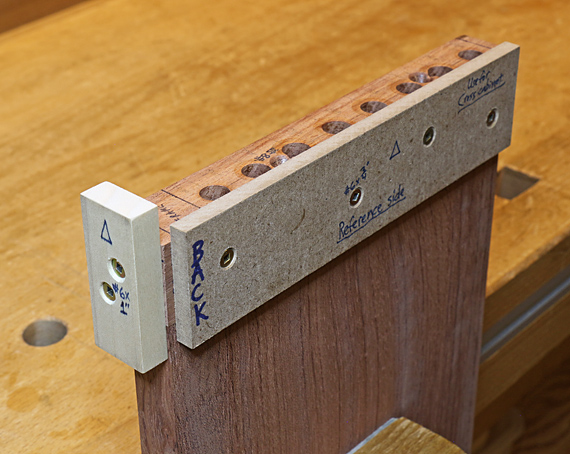
Krenov’s description shows the block being nailed to the end grain workpiece, using the tablesaw top as a flat reference. I do not like this method. Instead, I use a removable side piece to reference the jig on the end grain workpiece. The jig is attached with two #8 screws going through countersunk clearance holes and penetrating the workpiece only about 3/8″. The jig is attached to the side-grain workpiece without using the side piece but instead squared and clamped to the workpiece, and then screwed in place. 

Below, the jig is placed on the endgrain workpiece using the back cleat and side piece to ensure solid referencing. (I have not screwed it in place for the photo.) Note that both the end cleat and the side piece extend beyond both hole-faces of the jig. This allows the jig to be used at both ends of the workpiece.
dowel jig in place

I mark up the jig all over: “back,” “Reference” face, “X” for the non-reference face, the size of screws to use, the drill bits to use, etc. 

Now, more than half done, next we’ll look at designing the joint, dowels, drill bits, etc.

Category: Techniques  | Tags:  | 11 Comments
Author:
• Monday, May 31st, 2021
carcase doweling

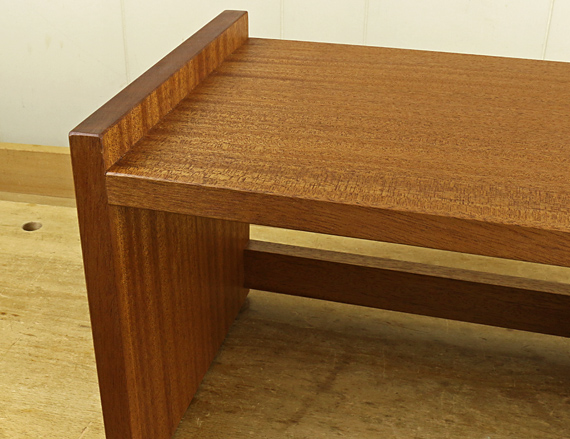
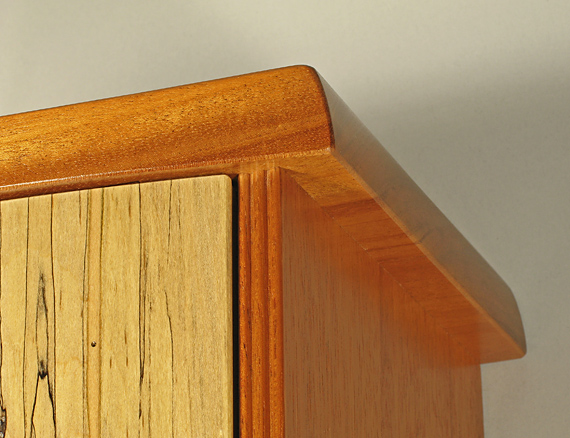
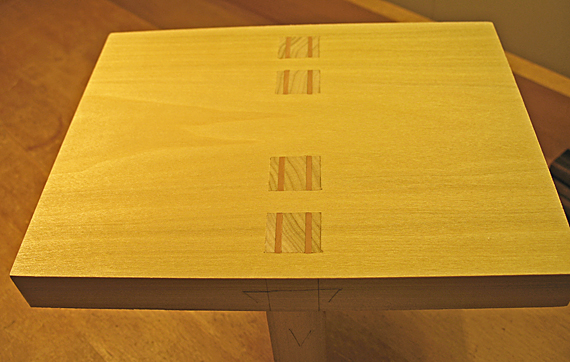
Consider the options for joining solid wood boards across their widths where the endgrain of one board meets within the length (not at the end) of the side grain face of the other. This is what you see in the pieces above and just below, which are constructed with dowel joinery.

A common situation is joining the sides of a cabinet to the top and bottom where the boards do not meet at the end of each. If they did, dovetail joinery is usually the best choice. Another common situation is an interior divider or fixed shelf of a cabinet or bookcase. 

carcase dowelling

Before delving into the topic of this series, here are some alternatives that might be used in the same situation as carcase dowelling. By the way, this series is not about post and rail joints with dowels, a different matter with its own considerations. 

1. The multiple wedged through mortise and tenon. This has plenty of side grain glue surface and the flared mortises coupled with the wedged tenons provide a mechanical lock. It does take a lot of work though, and the exposed wedged tenons may be a nice feature or unwelcome. The blind version of this joint is an exercise in masochism.

For an efficient method for this joint, see my article in Popular Woodworking, issue #170, August 2008, pages 62-65. 

multiple wedged through mortise and tenon joint

2. The tapered sliding dovetail. This provides a strong mechanical lock, and can be made efficiently with careful router setups and a bit of fine tuning by hand, though it does take some trial and practice to get it right. It can be designed to be invisible but only at one end. 

3. Nails and screws. We do not usually associate this approach with fine woodworking but not everything has to be high end. I have a 44 year-old large bookcase held together with nails and it is still rock solid. The nails are hidden (mostly) with the technique of raising an attached chip, driving the nail inside the tiny ditch, then gluing down the chip. I can do better now, but it’s not bad. 

Covering the heads of screws with side-grain tapered wood plugs is a decent option in plywood and could pass in solid wood utilitarian work if done judiciously.

4. Hidden knockdown fasteners such as cam fasteners. Nah, not where I want to go in solid wood; weak. 

5. Dado joints, fully housed or shouldered. Here we have no mechanical lock and no mating of side grain glue surfaces. Biscuits or dominoes would help but I still would not bank on the strength. 

OK, with the other options noted, let’s go ahead and look at the carcase dowel joint. Part 2 is coming up. 

Category: Techniques  | Tags:  | 2 Comments
Author:
• Wednesday, May 05th, 2021
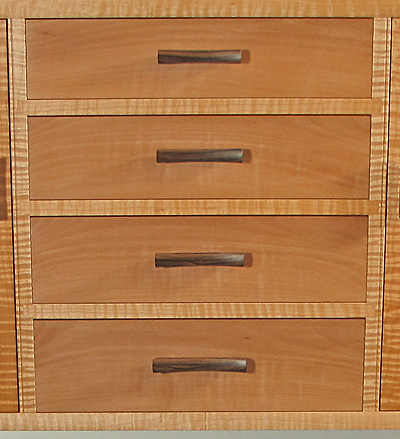
wooden drawer handle

Here are some thoughts on handle design that I hope you will find useful for your work.

We experience several aspects of woodwork at once – design, spatial sense, texture, color, sound, smell, style reference, etc. A hand-friendly handle can be a significant addition.

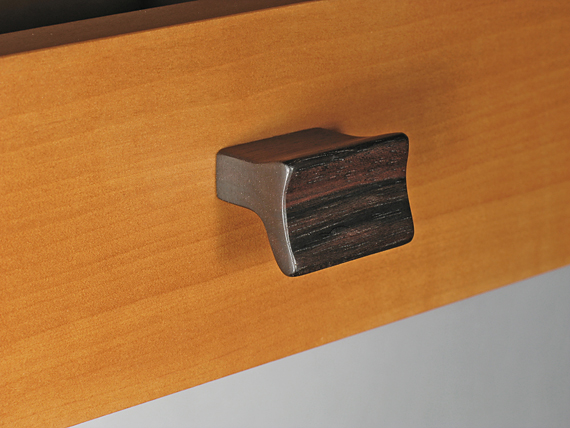
Exotics such as the Macassar ebony, above, are my favorites for handles. They finish beautifully and wear well. Note the stand out from the surface of the piece. This avoids finger grime from building up on the surface of the woodwork.

I almost always want a shape that is directly consistent with the design of the piece. In fact, the curves and proportions of the piece tell me how to shape the handle. I rarely want to introduce a new theme in the handle, though that might work more often for designers more talented than I.

The cabinet handle below is shaped much like the cabinet itself. The hard edges on the top will not be grabbed but the hard edges on the sides have a nice feel, especially since the sides are undercut. 

wooden cabinet handle

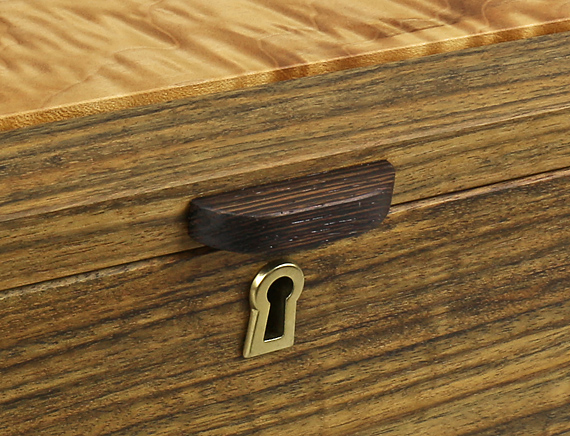
Below, the very simple small chest handle in wenge is in keeping with the simple design of the piece that relies mostly on the beauty of the wood, pleasing proportions, and the joinery for interest. The underside of the handle is slightly hollowed to make for a nice finger grab.

wooden box handle

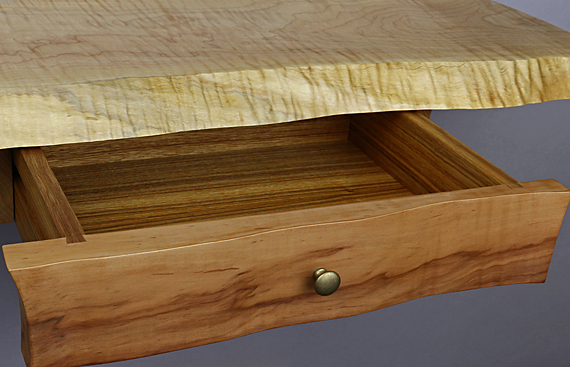
Below, this wall shelf with a side-hung drawer has so much going on with the wood species and figure, plus the undulating surface on the drawer front, that any further statement from the handle would be too much. The simple brass knob fits the bill.

metal drawer handle

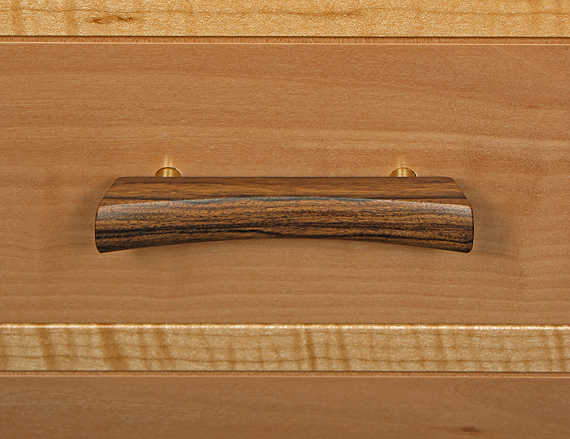
This drawer handle, below, in Honduras rosewood, borrowed shamelessly ripped off from a design by Michael Fortune, also fits with the gradual curves of the cabinet. (Hey, I did add the bowed front, which made it a lot more difficult to make.) Speaking of “borrowing,” I will be nothing but flattered if you borrow any of my designs shown here.

wooden drawer handle

The length and bulk of the handles are graduated to be consistent with the graduation in drawer sizes. Yes, that took a lot more work.

graduated drawer handles

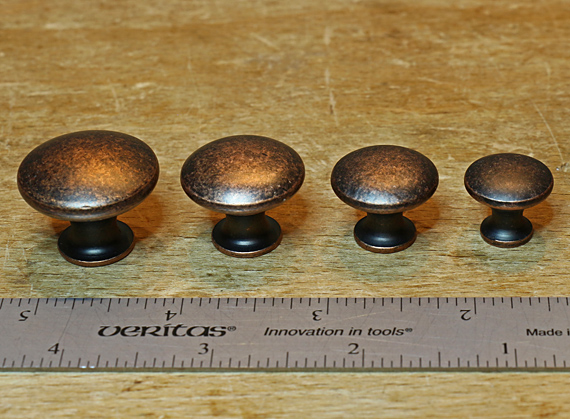
Lee Valley offers graduated-size metal handles in a variety of finishes.

graduated size knobs

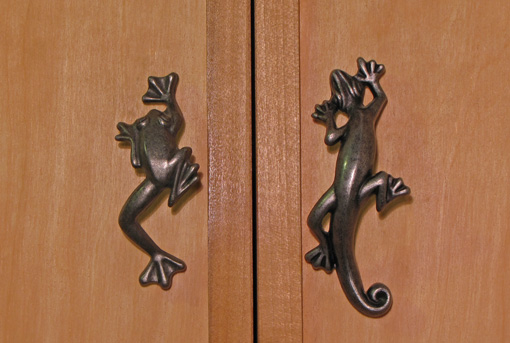
Finally, sometimes it is fun to introduce something different, such as these manufactured handles, which have been on my tool cabinet for a very long time. 

metal cabinet handles

Give it a try – enjoy enhancing your work with custom handles. Keep in mind too, that thoughtfully selected manufactured handles also can go a long way to add to your woodwork.

Category: Techniques  | Tags:  | 4 Comments
Author:
• Tuesday, May 04th, 2021
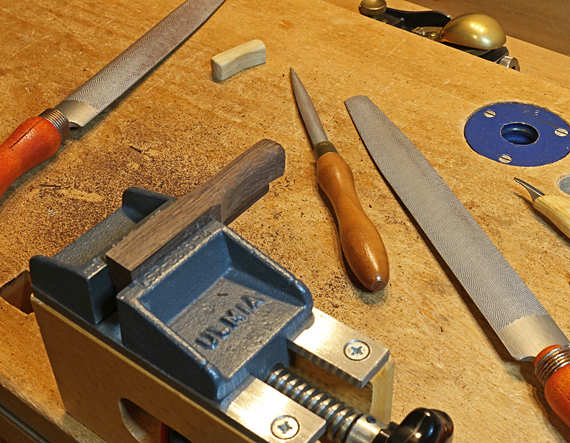
making wooden handles

When sculpting the handle, keep the workpiece large for as long as possible. Of course, at some point you will have to cut loose the handle itself but the work becomes more difficult on the smaller piece, which may be impossible to clamp. 

Decide early on if you want a knife-cut finish or a smooth, sanded finish. Work for a good appearance but also keep testing the feel of the handle.

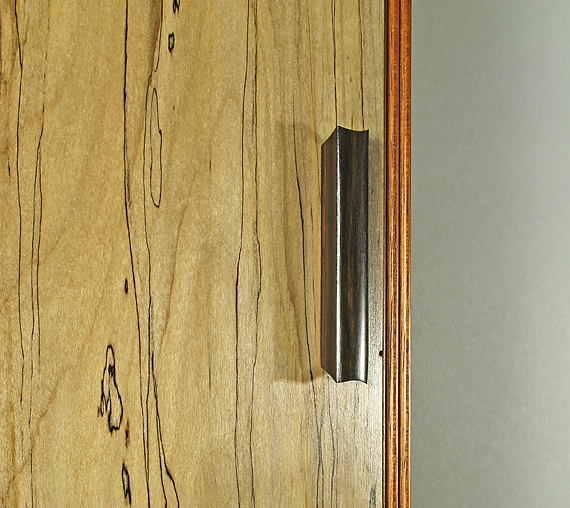
wooden cabinet handle

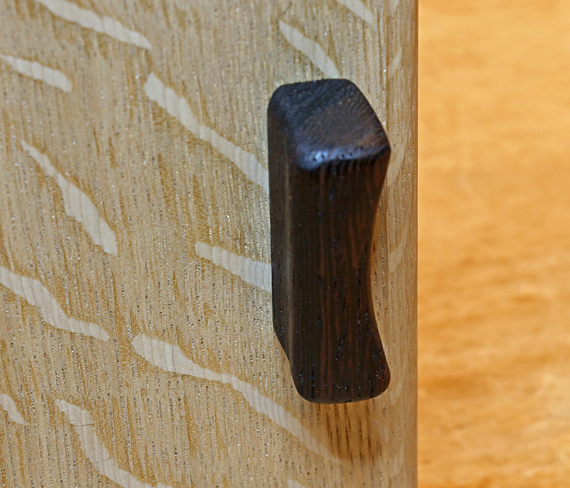
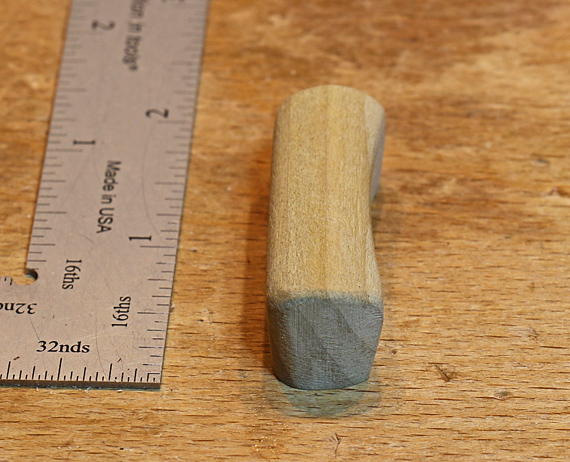
The finished handle in wenge is shown above mocked up on a piece of white oak scrap. (The scrap was used to test an edge profile; it is not a door). Note the hollowed left side and that the curved right side is also sloped toward the door. These features make for a pleasant grab by the thumb and first two fingers.

A hand-friendly handle does not necessarily mean that all the edges must be softened as they are here. Sometimes a distinct edge or corner feels right.

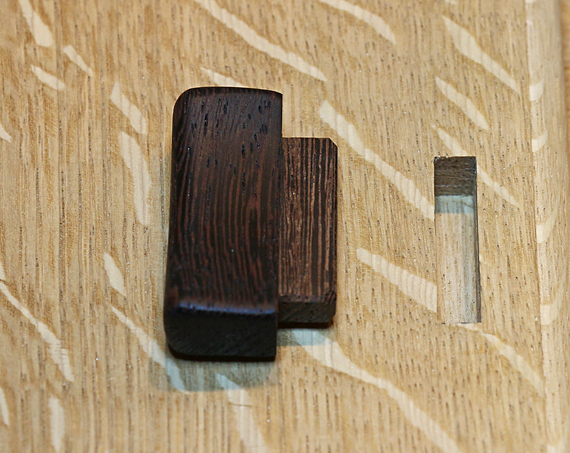
Create shoulders on the end of the tenon. The mortise, created with a shopmade slot jig for the router, is 1 1/4″ long and 3/8″ deep. 

mortise for handle

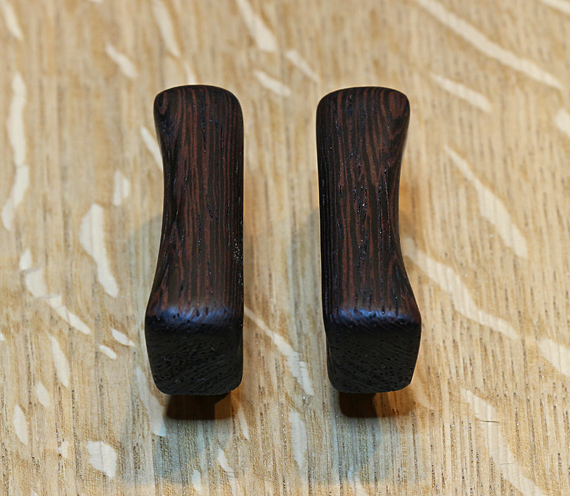
Here is the pair of handles.

pair of wooden handles for cabinet

Next: designing handles for your woodwork

Category: Techniques  | Tags:  | 2 Comments
Author:
• Friday, April 30th, 2021
handle mock-up

Like most furniture makers, I am not a sculptor, artist, or serious carver. However, I do want interesting handles to truly enhance the woodwork in which I have invested so much time and effort. With few exceptions, generic handles just will not do. 

I will first discuss how I make handles, step by step, and later consider design. The goal here is to transmit a practical approach to making unique wooden handles accessible to most any woodworker. For much more on designing for woodworkers, see this extensive series

1. Sketch

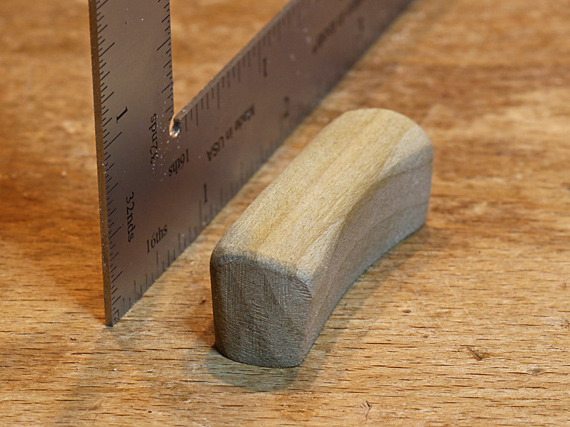
I sometimes start by briefly drawing ideas on paper but sketching on a small block of wood is the principal starting point. The wood gives me a better sense of size, partly because I am holding the wood as I sketch, and it is, after all, a handle that I am making. There are two requirements for sizing the handle: it must coordinate with the woodwork (drawer, door, etc.) and with the human hand. Use an easy-working wood like poplar or pine. 

2. Mock-up

Once I have a decent three-dimensional sketch on the wood, I hack away at it with carving knives, rasps, and a coping saw – whatever it takes. Here again, it is not only appearance that is developing but also hand feel. CAD is not the answer here. Like all mock-up work, this should be a relaxed, fun process with some happy anticipation. Maybe you will be lucky on the first try or maybe it will take a several tries. No problem. And the last mock-up does not have to be perfect or great. For example, you might end up with something like: “It’s good except just a quarter inch longer and a bit thinner.”

The finished handle is going to look a lot better but this mock-up will do for now.

mock-up

3. Analyze 

Now I analyze the mock-up to decide on a wood species and the specific section of a board to be used. Further, I figure out how to machine blanks from which the handle can be efficiently produced. At this point, I also decide on the joinery – usually a tenon – to attach the handle, and how to make the joinery as I machine the blank.

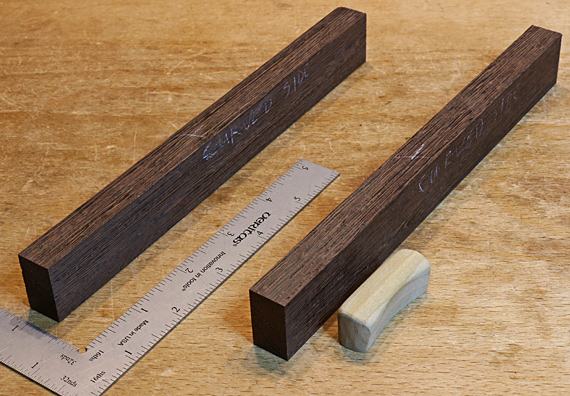
handle blanks

Above, each wenge blank is about 8″ long, wide enough to allow the handle to be shaped from it, and tall enough to incorporate the tenon. The extra length allows for safer machining, easier handling later when shaping, and mistakes. 

4. Machine the blanks

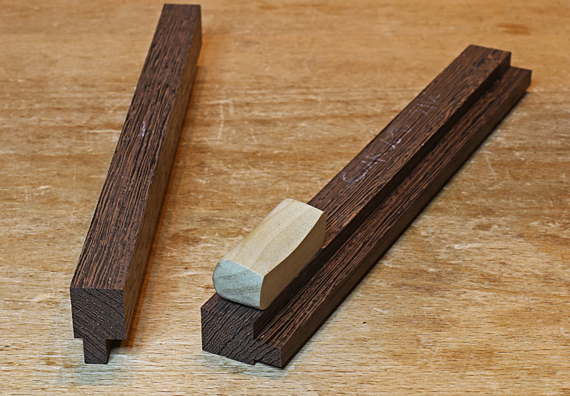
The offset tongues, produced on the router table, will later become tenons. Use whatever your good judgment indicates at the router table, such as featherboards, push blocks, etc. If you have enough wood, work the tongue near the edge of a board, then rip away the blank, but think ahead to end up with nice figure for the final handle.

The key is to essentially make the joinery now. These tongues are a precise barely fat 1/4″ thick. 

blanks with tenon

Next: Sculpting the handles to look and feel good.

Category: Techniques  | Tags:  | Comments off
Author:
• Thursday, April 22nd, 2021
joint failure

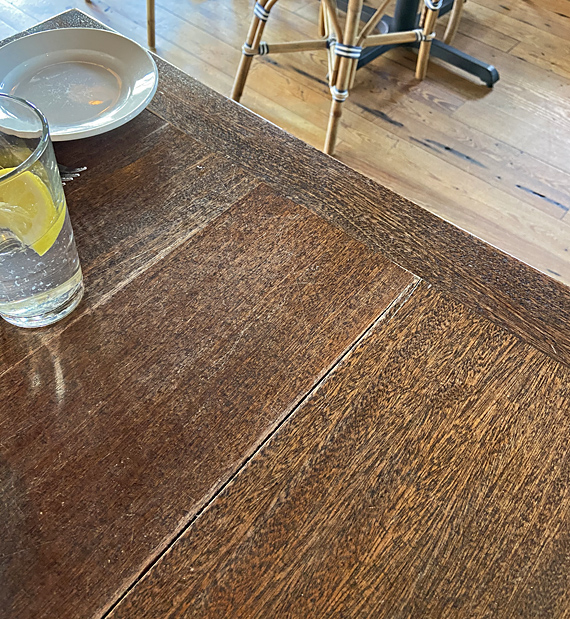
The companions seated at a restaurant table with an avid woodworker may find it odd that while they are studying the menu, the wood guy is studying the table. But much can learned by observing wooden structures in the wild, and so it was at a recent outing – just a few moments to choose the sashimi, but now let me see what’s going on with this table.

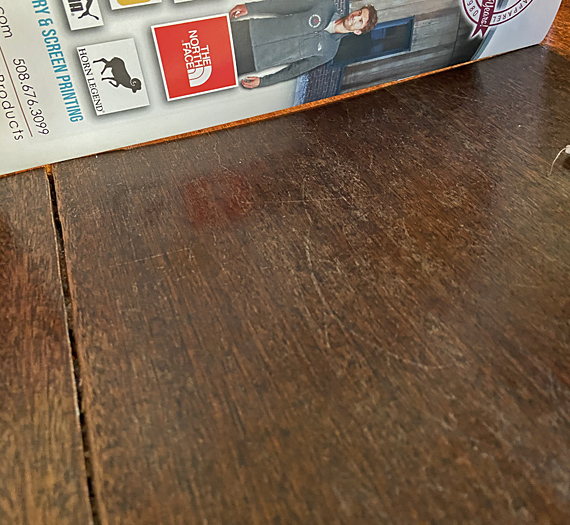
The big split (above) is easy to diagnose. There is a breadboard end cap running cross grain to the main section, and is no doubt glued along its entire length. It probably took only a year or less for the wood, probably dark red meranti, to split during a dry season when it was restrained from shrinking across the grain by the long grain length of the end cap.

Was the maker unaware of the problem inherent in the construction? Was it made just to look good at delivery without regard for its fate? One wonders. 

The split appears to be along an edge joint. As I have discussed in an earlier post, this is not a coincidence. The edge joint was weaker than the wood, a situation with many possible causes and that woodworkers try hard to avoid. My extensive series on the edge joint can help prevent this from happening to your work! 

table top warp

What about the concavity in the top surface? In the photo just above, I am demonstrating the warp in the surface using the straight edge of the spine of a brochure. (Sorry, I didn’t have my Starrett with me.) Seasonal movement of flatsawn wood perhaps? No, the wood does not look flatsawn, and I am almost certain this same cup is present year round, and eventually in most of the tables there. 

The finish on the tabletop eventually deteriorates from repeated wetting, scratches, and perhaps ultraviolet light exposure. Liquid water, inevitably and repeatedly on a restaurant table, can then enter the wood fibers near the top of the board and swell them. The top surface of the board wants to get wider across the grain. But each time the fibers swell, they are compressed against each other, probably aggravated by the top of the board being relatively restrained from expanding by the drier bottom of the board, along with other aspects of the construction. The fibers undergo permanent deformation; they get crushed. This is compression set.

Later, when the top of the board re-equilibrates to a drier state, the crushed fibers want to shrink the width of the board. The board thus becomes concave on its top surface. This effect is irrespective of the usual come-and-go of flatsawn cupping, which may be additive to it. 

It is important to realize that these hygroscopic forces of wood movement are stronger than the wood structure itself. 

Taking a walk on a wood deck later that day, the boards showed another example of this.

We have to consider how the woodwork we make will fare long after it has left our hands. It is good to remember Yogi Berra’s advice, the title of this post.

[Who is the player with the most World Series championshhips in Major League Baseball history? Yup, it’s the great philospher himself, Yogi.]

Category: Wood  | 6 Comments
Author:
• Friday, March 19th, 2021
pre-threading good

This is just one of those simple little matters that somehow seems to go unattended.

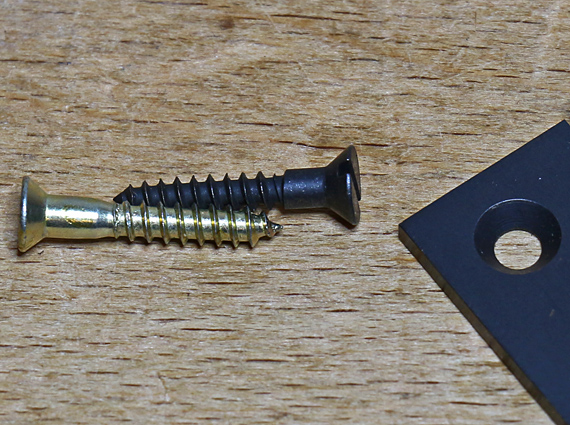
A small solid brass hardware screw, such as a #4, is not very strong and can be easily torqued past its breaking point, leading to all sorts of profanity filling the air of even the most peaceful woodshop. A commonly recommended way to avoid this frustration is to pre-thread the pilot hole with a steel screw, which is stronger.

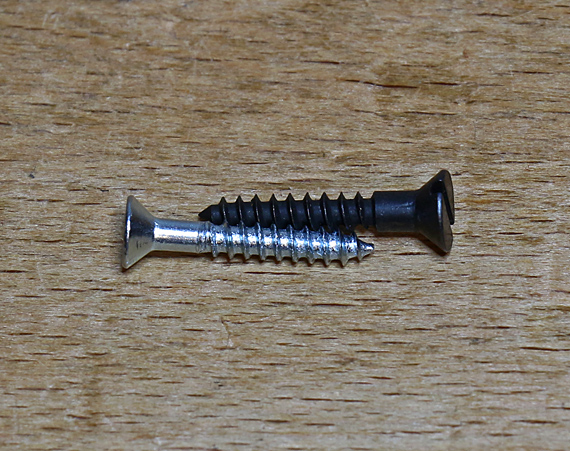
The steel screw should have the same thread pitch as the brass screw for which it is preparing the way. Otherwise, the preparatory threads will be misplaced and so the brass screw will have to cut most of its own threads anyway. The two sets of misaligned threads may partially merge and probably weaken the wall of the hole in a situation where you want all the holding power you can get.

In the photo above, the steel and (antique finished) solid brass screw threads correspond perfectly. (It is difficult to photograph this in position so please take my word for it.)

Below, the steel screw is a slightly finer pitch and so will cut threads out of sync with the (antique finished) solid brass screw threads. Yes, they are close but that’s just the problem. Not only does this defeat the purpose of the preparatory threading but I think this will also weaken the wood wall and reduce holding power. 

pre-threading no good

A maker of one the best, if not the best, quality hinges supplies such incorrect steel screws with their brass screws. So, beware and check for yourself. 

OK, what if you cannot find a proper steel screw in your Miscellaneous stash? Not a big deal. I find that with proper care, the brass screws hold up well. The key is to first test the screw procedures in scrap wood. 

With or without preparatory threading, there is a good chance you will find you have to use a pilot hole that is slightly greater than the root diameter of the brass screw. (The little steel screws can break too!) I also enlarge the upper part of the pilot hole with my Czeck Edge awl to accommodate the unthreaded portion of the screw. It also helps greatly to dab a bit of wax or Slipit into the pilot hole using a sliver of wood (better than on the screw itself) to reduce the torque required to seat the screw. I do not think this reduces holding power. 

Part of good craftsmanship is preventing little matters from becoming big headaches.

Category: Techniques  | Comments off
Author:
• Friday, March 19th, 2021
pin the panel

This is a simple, reliable way to keep the floating panel centered in a frame-and-panel construction. Without anything to keep it centered, a panel usually shifts to one side because one groove grips it a bit more than the others during seasonal movement. This leaves the field and the gap around it off center, which looks less neat.

In fact, this is the only way I ever do this. I like that there is no need to deal with any extra procedure during glue up such as inserting Space Balls or placing a dab of glue in just the right spot to keep the panel laterally centered. Because there is virtually no movement along the grain, only minimal clearance is needed in the grooves in the rails, so the vertical position of the panel is essentially constant.

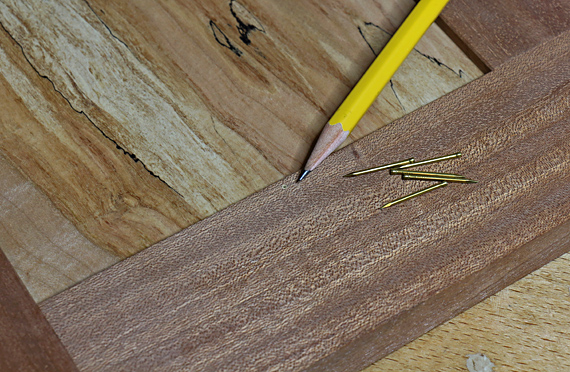
When the clamps are off and the glue set, carefully center the panel laterally, and mark each rail at its midpoint between the stiles. The 3/4″ 18-gauge brass brads (Hillman item #123743) are 0.051″ in diameter, so drill a pilot hole with a 3/64″ or #56 wire gauge drill bit, which are about 0.004″ less than 0.051″. Drill from the back side and stop safely short of the front surface. Place the hole near the edge of the frame and within the tongue of the panel. 

Gently tap in the brass brad. You may want to nip off the point first to get a bit better purchase in the front side of the rail. When it is seated, nip off the excess with flush cutting wire cutters, and file away any remaining protrusion. Of course, pin the panel in the top and bottom rails.

That was easy.

Category: Techniques  | One Comment