Author Archive

Author:
• Tuesday, March 24th, 2015

Early on the long road to proficiency in a craft or any serious skill, there are many mysteries to solve. In this first stage, there are countless individual elements that are difficult to master and all together they can seem overwhelming. For example, the vast range of tools can be paralyzing for a novice woodworker, and to make matters worse, most new tools must be tuned or sharpened before they can even work properly.

Gradually, each element is conquered and these early mysteries dissolve. Despite this progress, there is a growing feeling that, “I know what all the buttons do but I can’t get the thing to work.” In other words, the elements still must be synthesized – another set of mysteries to solve. In this second stage, the developing woodworker who has learned to use all of the tools and make joints must still learn how to integrate many skills to actually make a piece of furniture.

This is the big picture and it is becoming clear. Now you know what you are doing and you know it. You can really make stuff. With continued ambition, more practice, and, of course, a fair share of missteps and even disasters, you can make better stuff. There will always be lots more to learn but the big picture is no longer a mystery.

After all of this comes a mystery of a different sort, an important one that is actually welcome and is meant to persist. The skillful person is now doing some things without being cognizant of why, at least at the moment, yet the moves are very right.

It is as if the program, so to speak, runs on its own – not always, but at least during some of the most productive times. Call it instinct, flow, intuition, grooved neural pathways, or just a lot of plain old practice, but there is indeed a wonderful mystery to it.

Sure, this happens during some days or hours and quite disappointingly not during others. Moreover, some flights of supposed brilliance could be very wrong, though that is a risk hopefully worth taking.

Here are some examples.

  • Watch the great soccer player Neymar. He is surely not aware at the time of exactly how he makes split-second moves on the field, and even afterwards probably cannot fully explain his mental processes.
  • All the studies and data in the world will never fully supplant the instincts of an experienced medical clinician or a financier, each faced with the unique specifics of a case at hand.
  • A craftsperson’s hands seem to have mind of their own.
  • A very good every day driver may save his life with a moment of prescience, and NASCAR drivers probably do this all the time.
  • A good teacher knows with a sixth sense how to reach each student as an individual.
  • Most wonderfully, a refined creative sense tells us that when it feels right, it is right.

So OK, this is a very good place to be but what of use can be said about it? After all, it is a difficult matter to deconstruct. Certainly, reaching this level is not easy and requires time, practice, and talent.

I think most important is the realization that this level of functioning cannot be borrowed or directly taught. This form of doing something truly well must arise uniquely within each person after the first two stages have been taught and learned.

This happens as you train, practice, and confront the expanse of your freedom with courage. This learning grows in the quiet moments of concentration when persistence seems inevitable and you trust yourself even if the effort is uncomfortable. With humility and some luck, mastery may be ahead.

The late, great basketball coach John Wooden said, “It is what you learn after you know it all that counts.”

Category: Ideas  | 5 Comments
Author:
• Friday, March 20th, 2015

Corner blocks (corner braces) are a practical, effective way to strengthen furniture, particularly post and rail assemblies.

As previously discussed here, a properly designed and executed mortise and tenon joint will itself rarely fail but the wood around the mortise still can break. Two feet of leg extending below a table apron can impose huge leverage on the wood in the area of the joint.

Corner blocks are routinely used by chair makers but it surprises me when they are absent in tables where they could have been included. I use them whenever possible – belt and suspenders. Of course, sometimes there is no room for them, such as when a drawer is in the way, and sometimes they would disturb the appearance of the piece. The different mechanical stresses involved in casework make corner blocks generally less useful but there too they are still probably underutilized.

Working with tables

If the table aprons are at 90°, it is easy to make corner blocks with the table saw and miter gauge. The long side of the triangle could be as little as 3″ for a small table and 4 – 5″ or more for larger work. For thickness, 1 – 1 1/4″, using a single row of screws, is usually enough for small to medium work, though for large pieces, 2″ or more with a double row of screws is more in line.

I make corner blocks with a notch to accommodate the inner surfaces of the leg. I think it is best to leave a tiny gap between the block and the leg to avoid possible problems with wood movement that might affect the tenon shoulder line. However, in the past I have not always made a gap there and that has not caused problems.

If the aprons are not at 90° or are curved, I find it easiest to place a blank of wood diagonally spanning the aprons and simply trace the inside edges of the aprons and leg onto it, provided the top of the legs and aprons are flush. Then I bandsaw to the lines and, if necessary, refine the result with a plane. Alternatively, one straight cut, if required, could first be made on the table saw and used as a starting alignment. If the legs extend beyond top of apron, measure out and cut a notch, then place the blank and trace.

Another approach that is sound, though not my preference, is to make the block span the aprons but completely clear the leg. This sacrifices some glue area but should still be sturdy enough and seems easier to make.

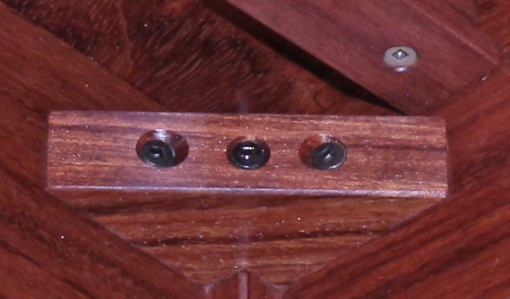
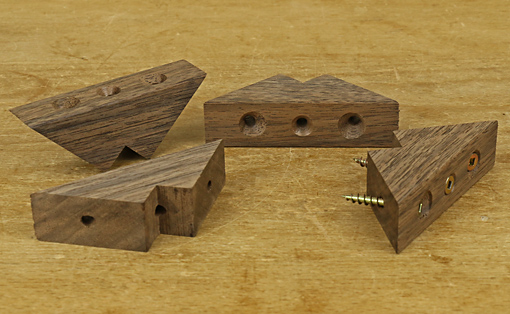
Prepare the block by drilling and countersinking clearance holes for the screws. The center hole for the screw that will penetrate the leg is at 90° to the long edge of the block. I make the holes for the screws that will penetrate the aprons at 75°, not 45°, to the long edge of the block so there will be a good bulk of wood around the clearance hole. This also allows a little more screw length to penetrate the apron.

The blocks in the photo above show the features discussed.

I glue the blocks in place with Nexabond 2500M CA glue after sizing the end grain for about one minute, or similarly with quick set epoxy if the sawn surface is at all rough. After the glue sets, I drill pilot holes into the legs and drive those screws. Then I reset the masking tape depth stop and do the same for the apron screws, being extremely careful not to drill too far into the aprons.

If there is room for only a thin corner brace that cannot support a screw, a dovetailed attachment to the top of the aprons could be used. Otherwise, dovetailed attachments are difficult to make and unnecessary.

Category: Techniques  | 3 Comments
Author:
• Friday, March 13th, 2015

Mini Gorilla dust collector

My small shop requires making efficient use of every bit of floor, wall, and air space, including for dust collection. The setup described here has proven convenient and effective.

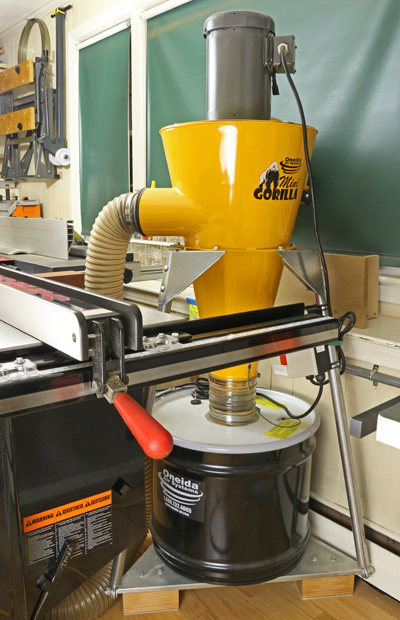
The Oneida Mini Gorilla is set on the “mobile” stand but since it will not be moved, I took off the wheels and attached wooden blocks under the platform (see photo above) to save a little space and make the assembly more stable. The whole thing is tucked away just to the right of the table saw, with the filter facing mostly away from the interior of the shop.

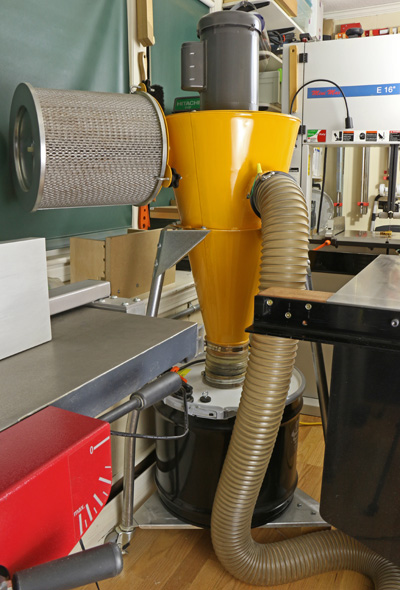
Using a 5″-4″ reducer, I attached a 4″ flexible plastic-wire hose to intake port of the collector. This type of hose, available from Rockler, Woodcraft, etc., is durable and easy to handle. A 5″ hose seems more awkward to handle and the 4″ certainly handles all of the chip production from my machines, as discussed in the previous post. It also meets the requirement specified by the manufacturer for airflow through the filter.

Mini Gorilla dust collector

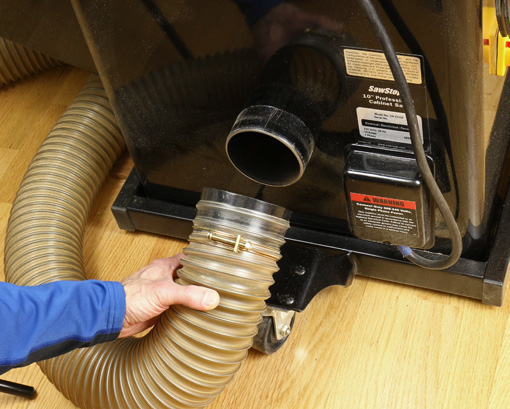
I simply bring the hose to each machine as needed, which is very quick to do. The default location is attached to the table saw and with some of its length curled under the saw’s motor hood. Each machine – table saw, bandsaw, jointer-planer, router table – and a dust hood accepts a simple press-fit plastic female connector that is attached to the end of the hose. The ports on some of the machines required modifications for the hose connector to fit uniformly on all of them.

Mini Gorilla dust collector

The remote control is very handy, almost a must. It works by radio frequency, not infrared, so no optical line of sight is required.

Mini Gorilla dust collector

The steel collection drum holds 17 gallons. I empty it into a 45-gallon trash bag, which makes the job easy. Smaller trash bags made the job considerably more difficult. It is fairly tight quarters getting the drum off and back on the machine but not a big deal. I would have bought the super deluxe infinite capacity drum at an untold price but, um, I was told these have been banned because they defy the laws of physics.

The Mini Gorilla can also be ordered from Oneida with a wall mount bracket. This would not have worked out in my shop but you may want to consider it. It allows the use of a 17, 35, or 55-gallon drum, while the mobile stand is limited to the 17-gallon drum.

Now the steel drum is, of course, opaque, and if you let it fill up such that dust gets backed up higher into the system, you will have a very unpleasant time cleaning the pleated HEPA filter. I made this mistake – twice!

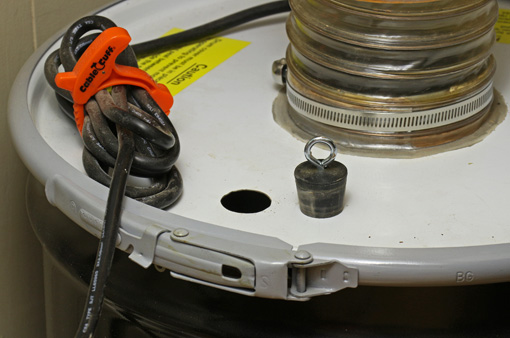
A drum level sensor is available from Oneida but my solution was to drill a hole (approximately 1″ in diameter) in the lid and block it with a rubber stopper with a screw eye handle. When my guardian angel taps on my shoulder, I check on the bin by removing the stopper and peering in with a flashlight or just inserting a rolled up piece of paper or dowel as a depth gauge. It works.

Mini Gorilla dust collector

The Mini Gorilla motor can be wired as 110V/16A or 230V/8A. I run mine on a 110V/20A circuit with a dedicated outlet. Keep in mind the collector draws a lot of juice and there will always be another machine running with it, so check your electrical capacity and outlets.

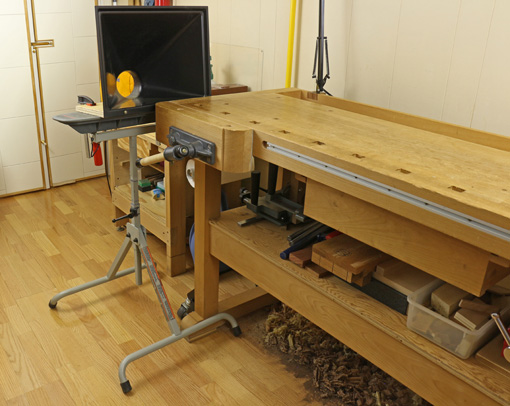
The dust hood shown below clamped to an outfeed stand is helpful at various locations, especially for the storm of debris produced by router mortising with an upcut spiral bit. By the way, the shavings under the bench are just fine for a while where they are, without a dust collector.

dust collection hood

Category: Tools and Shop  | 3 Comments
Author:
• Thursday, March 12th, 2015

Mini Gorilla dust collector

For many years, dust collection in my shop had been the basic bag-over-bag single-stage collector familiar to most of us small shop woodworkers. A few years ago I upgraded to the Oneida Mini Gorilla, a cyclone collector, and it has been excellent. I’ve received many inquiries about it from woodworkers considering upgrading their dust collection system, so I hope this report will be helpful.

A cyclone collector is more efficient that a single stage collector because it involves two stages of collection based on particle size. Here’s what happens. The impeller fan whips around the intake material in the big sheet metal cone that give these machines their characteristic appearance. The chips and larger dust particles that constitute almost the entire volume of the intake fall into the collection drum below the cone.

Thus, only the finest dust – the most unhealthful – gets passed on to the air filter, the cage-like cylinder sticking out the side of the yellow cone in the photo above. This permits the use of an incredibly efficient sub-micron pleated HEPA filter without it getting continually overburdened and clogged with debris.

What all this means is that my shop is cleaner, and more important, healthier.

The Mini Gorilla easily handles the biggest producers of chips in my shop, the Hammer A3-31 12″ jointer-planer and the DeWalt DW735 planer. The only limitation is the dust gathering efficiency at the source. Fortunately, the A3-31 and DW735 are great in this regard. The Minimax bandsaw is good while the Saw Stop table saw (vintage 2005) is just fair.

Oneida rates the noise produced by this machine at 76dB(A) at 10 feet. As a practical matter, it seems noisier than what I remember of the old bag-on-bag collector but it’s not bad and certainly not a deal breaker. The Mini Gorilla is very space-efficient – notice the motor on top of the cone – so its footprint is smaller than most small single-stage collectors.

It’s not cheap. The base price is now $780, according to Oneida’s website. A mobile stand or wall bracket, steel drum, and shipping push the total over $1 large.

Oneida’s website has details about the Mini Gorilla and the rest of their large line of dust collectors. This review is unsolicited and uncompensated.

Grunt machines like a good dust collector are not glamorous and there is a natural reluctance to invest in them. However, I think they support a sense of freedom in the shop because they take good care of the dirty work and produce a better working environment. That freedom, in turn, produces more creativity, which is what this is all about.

Next: How I set up the Mini Gorilla in my small shop.

Author:
• Saturday, February 28th, 2015

expansion washers

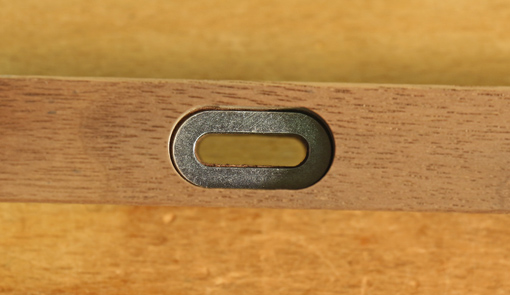
These are so eminently practical that it seems they should have been around for a century but it has been just several years since Lee Valley started manufacturing Chris Becksvoort’s clever idea. Since then, I’ve been using them whenever there is a need for a substantially long slot to accommodate the movement of a screw caused by dimensional changes in wood related to humidity.

One of the most common uses is for screws that go through cross grain support pieces and secure a table top. Another is at the back of drawer runners that are cross grain to the sides of a case.

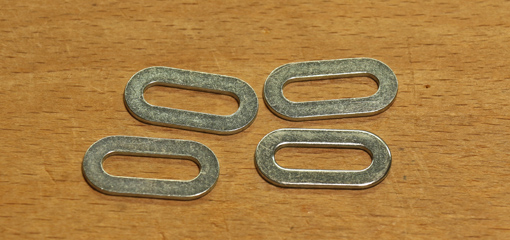
The washers come in two sizes, designated #10 and #14, and both are thoughtfully made to convenient dimensions. The #10s shown here are slightly less than 1/2″ wide and 1″ long, with a slot slightly greater than 3/16″ wide. They are 3/64″ thick.

It is possible to rout slots for these but I find it easier to simply drill two 1/2″ holes with their centers 1/2″ apart using a Forstner bit in the drill press. Pare away the remaining web with a 1/2″ chisel. Next, without changing the fence setting, drill 3/16″ through holes on the same two centers. Then drill overlapping holes in between and gradually drill away the waste to form the slot.

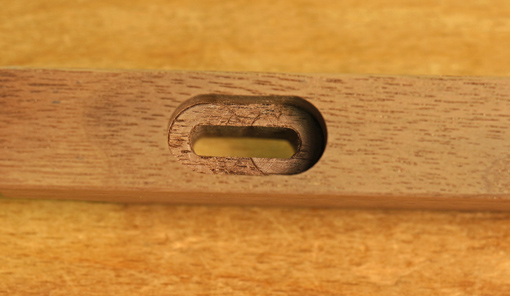
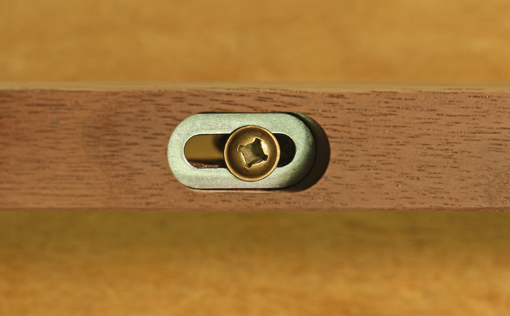
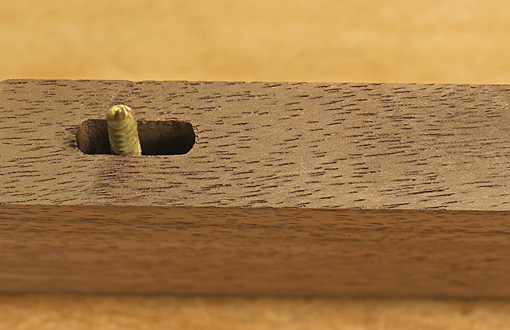
The finished slots, and the washer and screw in place are shown below.

expansion washers

expansion washers

expansion washersFor this type of assembly, I prefer square drive, hardened, deep-thread, washer head screws, #8 in this case, available from McFeely’s. (Technically, this is a combo drive head but who in his right mind, given the choice, would use a Phillips driver instead of a square driver.) Of course, the depth of the large slot must be worked out according to the thickness of the stretcher or runner, the thickness of the piece that the screw will bind to, and the length of the screw. The view from the other side is shown below.
expansion washers

True, the same slot construction can be done without the washer and in fact, those that I have so made have functioned well for many years. And there are other good approaches to this issue. However, when sizable dimensional swings must be accounted for, it has always been too careful a setup done with some doubt about the possibility of the screw head binding. Perhaps if it was socked down too tightly in dry wood, I’ve wondered, it might get stuck in the swell of wood around it and not slide.

These washers make things simple and remove any doubts. The screw head will not catch on the metal washer. The construction is clean and sure. Thanks to Chris and Lee Valley for this handy hardware item that should be in routine use.

Category: Techniques  | 4 Comments
Author:
• Saturday, February 21st, 2015

mortise and tenon

The glue line of a properly constructed mortise and tenon joint will almost never break from external load. Other things might break but not that.

To get a good sense of this, let’s think about what’s going on in just a small joint with a tenon 3″ wide by 1″ long. There are 6 square inches of glue surface, which is equal to that in an 8″-long edge joint between ¾”-thick boards. Now imagine trying to break that edge joint, not in tension as in hammering down on the unsupported joint line, but in shear! The wood will break, the glue line will not.

The mortise and tenon joint is strong because even in a fairly small joint there is plenty of glue line and it is stressed in shear. So if you’ve fit that decently, don’t worry; it is very unlikely to break. The tenon shoulders transfer much of the stress to that glue line. (By the way, the glue line of a half-lap joint can be stressed in tension if, for example, a frame undergoes severe twisting forces.)

The tenon itself is stressed mostly in tension and compression along the grain, which are also quite strong. So don’t worry there either, because a reasonably sized tenon is also very unlikely to break.

Furthermore, for the purpose of strength, there is no point in fitting the tenon tight to both ends of the mortise. That does not make the joint strong.

If something is going to break, it is most likely to be the wood of the stile or leg, which can succumb to stress in tension across the grain. This is especially so if the joint is designed with injudicious distribution of wood among the components.

Thus, make sure the stile or leg will be strong around the joint. In general, the walls of the mortise ought to be at least as strong as the tenon. And though it seems less popular lately, a haunch is a good idea when joining an apron at the top of a leg.

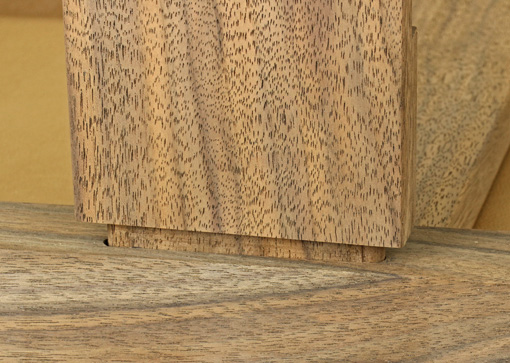
Also, hygroscopic cycle changes in the wood will stress every mortise and tenon but don’t let this be any more than it must. Don’t let a tenon and excess glue bottom out in the mortise and don’t jam a tenon to each end of the mortise (see above). Placing a peg too far from the shoulder will tend to make hygroscopic movement eventually produce a gap at the shoulder, though placing it too close to the shoulder will make the mortise wall more liable to break.

Inspecting old broken or cracked furniture and other wood structures, wherever you can find them, and thinking about why the failures occurred, is one of the most useful habits a woodworker can have. I’ve been doing this for several decades – I suppose because I would rather not have the same things happen to anything I make.

Category: Techniques  | 3 Comments
Author:
• Saturday, January 31st, 2015

wood floor

If you are working in a shop with a concrete floor, such as in a basement, consider installing a wood floor. It may be easier than you think.

If you are working in the garage, consider coming indoors and using your hard-earned living space for what really matters to you. For example, banish the TV set to an obscure corner somewhere.

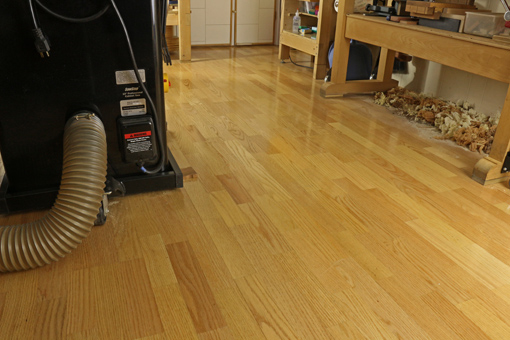
A wood floor is easier on your feet and back. It is also much kinder to a dropped tool, especially an edge tool. The wood floor dampens sound so it’s easier on your ears, and it certainly is a whole lot easier on your eyes. You’ll feel better in a shop with a wood floor and enjoy your time there more. Take it from someone who spent too long here:

concrete floor

Consider a floating installation of engineered flooring. The material is basically plywood topped with a thick ply of beautiful hardwood of your choice, pre-finished with a very heavy duty finish. It comes in strips about 5″ to 7 1/2″ wide, which can contain multiple sections across the width, as seen in my floor in the top photo. The planks are attached to each other but not to the floor below, upon which they simply sit. The planks connect to each other with tongue and groove plus glue, or with a super easy “click lock” connection without glue.

Not tough enough for a workshop? I can tell you my experience. Twelve years ago, I installed an engineered floating red oak floor over concrete in my workshop, which is a few feet below grade. It has held up very well, including no cracks and no separation of the planks, with 600-pound machinery rolling over it, big planks of hardwoods dragged over it, sawdust, dropped tools, and so forth.

I do note that the finish of the particular brand that I installed was later assessed to be more susceptible to denting but it is minor, and the floor still looks great. I also find the finish rather slippery, though this has diminished over time, so I would also keep that issue in mind when choosing material. Ask the experts, let them know you are putting the floor in your workshop, and consider the denting and slippery issues.

Installation involves first, a simple moisture test. Then the concrete floor will probably need to be leveled with leveling compound. Next, a heavy poly plastic sheet is laid down and a thin foam sheet goes on top of that. Then the floor is laid down. Finally, molding and thresholds are installed. The biggest issues are strategies to facilitate laying the flooring, such as starting from the correct side of the room, baseboard heating appliances, and so forth.

You can do this; you’re a woodworker for goodness’ sake.

You do, however, need professional advice. Here in eastern Massachusetts, Hosking Hardwood is well-known (you may recall them from their appearances on the “This Old House” PBS TV series), has an informative website, and offers expert advice.

Category: Tools and Shop  | 4 Comments
Author:
• Saturday, January 31st, 2015

tail vise liner

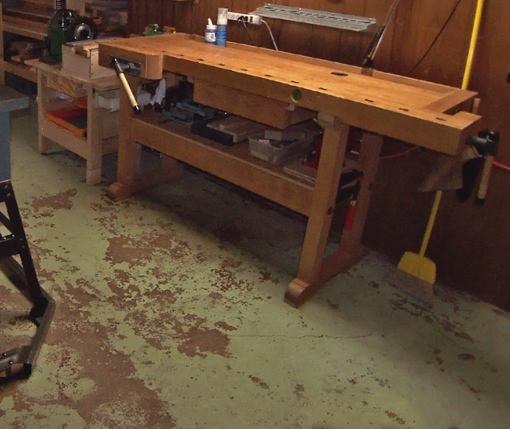
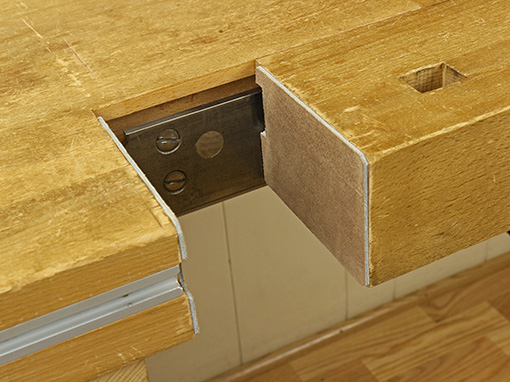
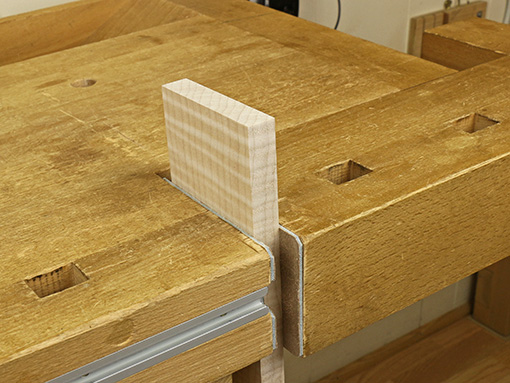
The jaws of the traditional tail vise on my old Ulmia workbench seem to the eye to meet accurately but there must be a minute misalignment because in use the grab on the work piece was slightly inconsistent across the full area of the bare jaw surfaces. Paring or scraping tiny corrections on the end grain surfaces of the jaws would have been difficult if not impossible to get right.

Then too, the opposite faces of the work piece not being precisely parallel may also cause an imperfect grip. And the smooth end grain of hardwood does not have much gripping power anyway.

The solution is to line the jaws with material that is firm but with a just bit of give to compensate for such those slight misalignments. It should also be somewhat grippy but not too much, which would prevent adjusting the work piece position when the vise is partially loosened.

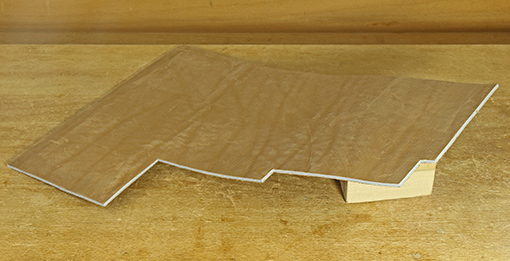
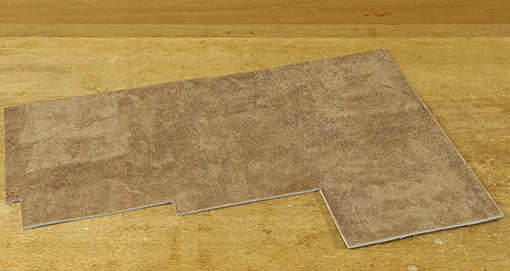
I’ve tried various liners such as thin rubbery material and cork but there is no equal to leather – real leather. Cowhide lace leather works very well. This is tough, firm leather, almost 1/8″ thick (thick enough to make laces). Here is one source.

lace leather

lace leather

I applied it with Nexabond 2500M CA glue, rough side out. A little experimenting showed that the rough side grips better than the smooth side, though surprisingly there is not much difference. The rough surface does not seem to make impressions even in soft species like poplar.

The tail vise now has a monster grip. Yet backing off the pressure on the vise makes it easy to reposition the work piece, such as when adjusting the angle when sawing tenons.

tail vise

Category: Tools and Shop  | 4 Comments