Author Archive

Author:
• Saturday, April 01st, 2017

I was asked not long ago by a major software development company, whose product line includes architectural and design software, to consult on an exciting project that is now in the latter stages of development. Of course, I cannot name the company, which I will call “G, Inc.” (No, not them). However, I do not need to hide my excitement – this has the potential to change how we approach our woodworking.

It is a furniture genome project of sorts. G, Inc. has compiled an enormous data bank of the elements of style of countless pieces of furniture. This includes proportions, motifs, woods, hardware, characteristic curves, secondary materials, joinery, carvings, and much more.

I worked with two G, Inc. project leaders, an architect and a programmer, who explained that the data is drawn from sophisticated visually mapped analyses of furniture from numerous sources. The data exists as visual files with verbal tags such as “cabriole legs,” or “hand-hammered hardware,” and so forth. There are also broader categorizations such as “few curves,” or “carvings,” and so forth.

Here is how you interact with the software. Again, I think this is really exciting.

You start with a piece of furniture that you want to make such as a “tea table,” or, simply, a “small table.” Then, to move quickly in narrowing your preferences, you enter a style category such as American Queen Anne c. 1740, Arts and Crafts, or Nakashima.

But here is the really cool part. If you lack any appreciation for style, you can sift through displays of furniture elements, accepting those that appeal to you and rejecting those that do not. You do not have to conjure anything of your own. The software detects your style tendencies and through the magic of Artificial Intelligence decides what you really like. In short order, you will have your table design. All that remains is to build it.

And even for building, it coaches you through everything. You set a slider scale for joinery ranging from strictly traditional (e.g. mortise and tenon joints) to anything-goes modern, which might include pocket screws, for example. The result is a 3D CAD rendition of the table, plan and elevation drawings, and full-scale drawings of the joinery and details.

The developers are giddy that you will not have to use your imagination at all. After all, your job is to follow the Masters and this program makes it pleasantly easy to do just that. This way, you can be assured that you will spend your efforts making only real furniture – the tried-and-true good stuff. There is no need to work through your own ideas, which are probably inferior anyway.

As with all software, this currently contains a glitch, which is that it only seems to be operative on one calendar day of the year.

Today.

“You just have to try; you have to use your imagination.”

–Sam Maloof

Category: Ideas  | 8 Comments
Author:
• Friday, March 31st, 2017

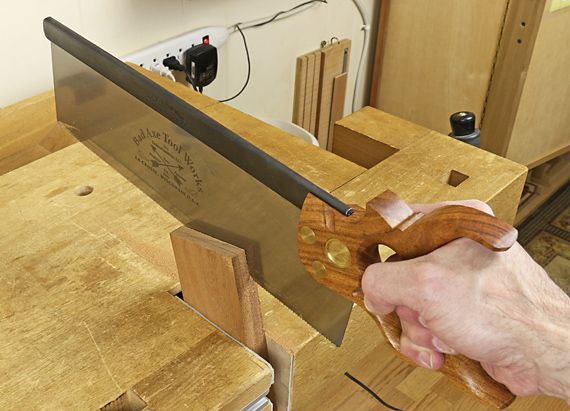
Bad Axe tenon saw

Years ago, Japanese saws were the staples of my saw armamentarium. They offered very good quality and value.

However, another big reason for using them was to save myself the trouble of maintenance. The replaceable blades, especially those by Gyokucho and Z brand are of remarkably consistent and high quality, especially for their prices. Back then, alternatives were to rehabilitate vintage saws, or try to soup up a new, but low quality, Western saw.

Times have changed.

The renaissance of saw making that started in the US in the 1990s with Pete Taran and Patrick Leach’s Independence Tool Company (since folded) was followed by several fine saw makers producing at artisan volumes. Equally important, more sources of excellent information became available to help us with understanding, using, and maintaining Western handsaws.

At the head of the class, in my opinion, is Bad Axe Tool Works. Their combination of quality, performance, and range of options exceed any maker in the world today. If you read this blog much, you know that I am not given to overstatement. I also have had the opportunity to try out saws from a substantial majority of the artisan makers around today. I use Bad Axe saws.

I have seen Mark Harrell and his crew work their apparent magic in his Wisconsin shop, making, sharpening, and fixing saws, and I can tell you that it is no magic at all. They simply work with incredible care from an awesome base of knowledge and skill.

Now, back to the saw maintenance issue. Mark has made that a much more accessible job by producing solid, clearly written information on saw sharpening, repair, and restoration. Short of visiting his shop, please see the trove of instructional information available on the BATW site. It will elevate your skills and understanding tremendously.

First-rate tools, knowledge, and skills – that’s what we want. Times have indeed changed in woodworking.

Category: Tools and Shop  | 7 Comments
Author:
• Tuesday, March 14th, 2017

crosscut technique

A reader recently emailed me to ask the best kind of question – a simple one with broad implications. Using only hand tools, he asked, how do you “cut several pieces of wood exactly to length.” He stated further that he wanted to make several pieces “exactly the same length.”

There are really two issues here. In furniture making, it is not often that you need to saw a piece to an exact absolute length, such as 18 5/16″. By exact, I mean to a tolerance well under 1/16″. Usually, a component must be cut to precisely match another part or an opening, after the general dimensions of the piece have been established. What’s more, most of the time, sawing to length does not demand high precision.

Let’s examine the matter by looking at the fundamental types of construction in furniture making.

Post and rail

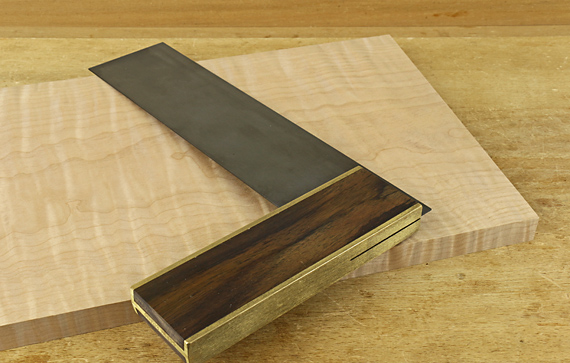
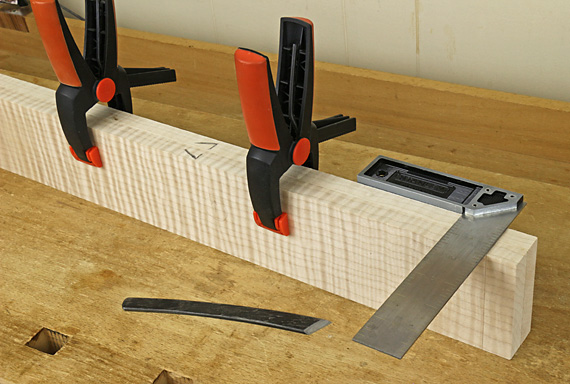
In a table frame, the critical matter is for the lengths of the aprons on opposite sides to be equal. The precision comes from knifing the tenon shoulder lines with the pieces ganged together. The absolute distance between the shoulder lines is not critical; it just has to be the same for the pair of aprons.

length technique

The sawn crosscut at the end of the apron just defines the length of the tenon, and since there should be extra depth in the mortise, it does not have to be a precision cut. As for the legs, gang them together, mark out the ends of the mortises, and cut the legs to length with adequate precision by hand.

Frame and panel

For a cabinet door or back panel, the precision in the frame components comes from knifing pairs of shoulder lines together. Later, you will plane the slightly oversized frame to fit the door opening or case. As for sawing the panel to length, those crosscuts end up inside the grooves, which give some margin for error. So again, the crosscut hand sawing just has to be good, not dead-on precise.

Board construction

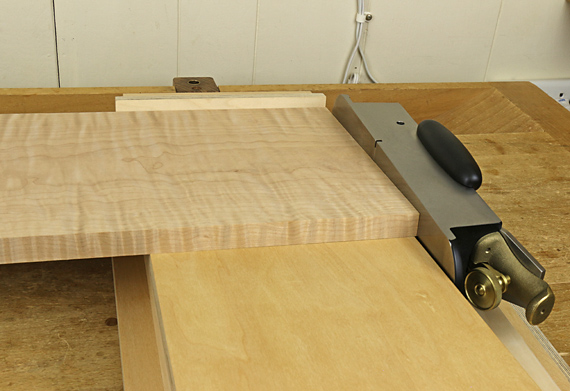
For a case or box, the absolute dimension is again much less important than making the opposite sides match. This is where shooting is an essential technique of woodworking. Saw the two boards to length as consistently as you can, shoot three ends, then incrementally shoot the fourth and final end to make two boards of exactly the same length with clean, square ends.

shooting to length

Oops, you overshot that fourth end? Shoot the end of the other board down to match. The absolute length is not important.

By contrast, fitting a drawer front to an opening is a matter of meeting an absolute measurement, and there is no going back. For this, shooting allows you to sneak up on a precision fit in a way that sawing cannot.

By the way, to answer another question that came up, one cannot use a stop block on a shooting board set up to trim endgrain because you are not cutting to a line. Rather, you are removing a certain amount with each pass, based on the blade depth. You must advance the board after each pass, so stop block set-ups are not used.

One more thing – and it’s important

Even if you use a table saw and miter gauge/sled to make your crosscuts, as I do, you still want to be able to nuance them with hand techniques. Very often in fine woodworking, we want to intentionally tweak a component slightly out of square, make something not quite straight, or correct a fit.

Theoretical exactness is often not the goal, and understanding the variance can elevate your technique and results. That is why incremental hand-tool techniques are so valuable. Some examples of this follow.

The top and bottom of a solid wood case may intentionally have ends that are not quite square because you want the case a trace wider at the back than at the front to allow well-fitting inset drawers.

Even if those table aprons were supposed to come out just right, you find during dry assembly that you need to tweak one shoulder with a shoulder plane. Now that apron does not quite theoretically match the opposite one, yet the whole piece fits together just right.

You can adjust the side snugness of a drawer front in its opening with the last shooting pass or two.

After fitting the hinges for a cabinet door, even though everything was supposedly dead square to start with, you plane the edges of the door to produce surrounding gaps that are consistent to the eye.

In the craft of woodworking, sometimes what you thought was exact is not right.

Category: Techniques  | 2 Comments
Author:
• Monday, March 13th, 2017

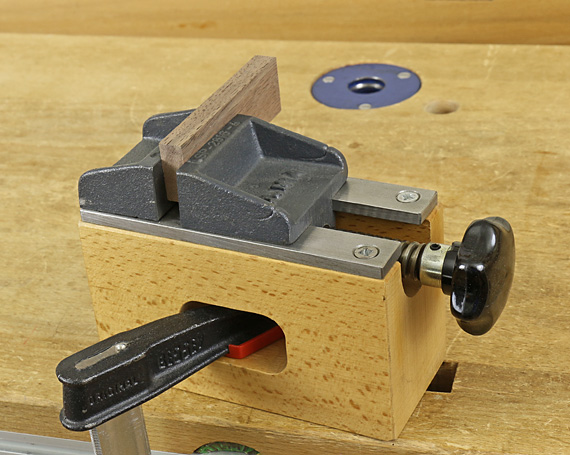
Ulmia auxiliary vise #1812

Ulmia used to produce this auxiliary vise, model #1812. I first saw it many years ago on page 145 of my copy of the 1977 hardcover Van Nostrand Reinhold edition of The Fine Art of Cabinetmaking, where the author, James Krenov, commented that it is “well made and very useful.”

I wish I bought one before Ulmia discontinued production. I have tried with some success to use a modified small drill-press vise, a shop-made wooden vise, and handscrews to gain some of the functionality of the Ulmia. Still, I coveted a real #1812 hilfs-spannstock.

About three years after posting the above links, and missing out on Ebay in the meantime, someone from Germany contacted me to offer a new-old-stock #1812. I jumped at it and have since found it to be every bit as useful as I had anticipated.

The vise jaws are 2 3/8″ x 1″. The fixed jaw is further from the knob, while the other jaw moves on a 9/16″-diameter, acme-threaded screw feed to produce a maximum opening of 2 1/8″. The wooden base is 5 3/4″ x 3 1/4″ x 2 1/2″. The vise is surprisingly beefy for its size.

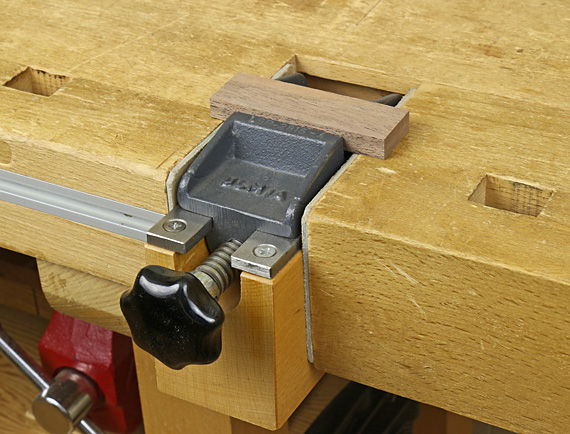
Ulmia auxiliary vise #1812

The hole in the base makes it convenient to clamp to the bench top, as shown in the top photo, for a wide variety of small-scale tasks. With the #1812 held recessed in the tail vise, as in the photo just above, the jaw still travels freely. You can adjust the protrusion of the jaws above the bench surface to keep them out of the way while planing or paring small work pieces.

It would be good to have this very useful tool back in production. I wonder if Ulmia would consider making it again, or, depending on patent restrictions, if another toolmaker, such as Veritas, would be interested in producing it. I am sure that woodworkers who would own one would turn to it often, as I do.

Category: Tools and Shop  | 10 Comments
Author:
• Tuesday, February 28th, 2017

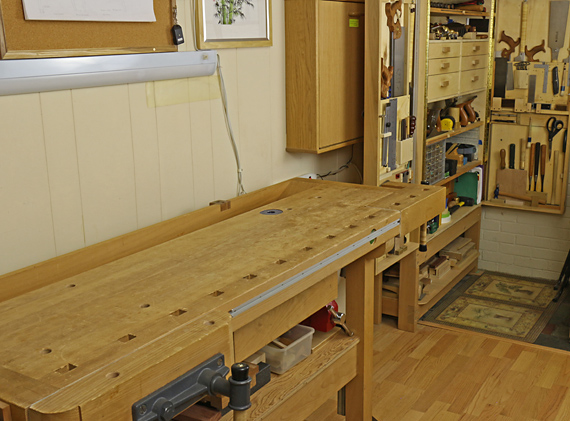
workbench

Who is learning? Who is a student of woodworking? All of us, I contend, are, or at least should be, and almost always.

Now, the healthy innocence of a student, not to be confused with a lack of confidence, is apparent when you start learning a new fundamental skill, such as paring with a long paring chisel. The same is true when you apply solid basic skills to a completely new task, such as using your layout, sawing, and chiseling skills to execute unfamiliar joinery, such as a multiple mortise and tenon.

However, the presence of a learning situation is not so apparent at other times. An example, might be when you use a skill set that you have long mastered, such as cutting a through dovetail joint, in a different circumstance. You are very good at making that joint but this time the wood is different, a bit harder perhaps, and your customary slope ratio creates problems. You discover that you must also adjust your tolerances, tooling, and expectations.

Thus, this too is a learning situation but you may not recognize it as such. You are, in effect, overconfident. Worse, you are mentally closed but you should be open.

I believe that an absolute requirement for learning is to first recognize and accept that I do not, right now, know. Experience and previous successes must not obscure this.

To learn – and learn, we must – we have to see the door, open the door, and walk through it.

The late, great basketball coach John Wooden: “It is what you learn after you know it all that counts.”

Category: Ideas  | 3 Comments
Author:
• Wednesday, February 22nd, 2017

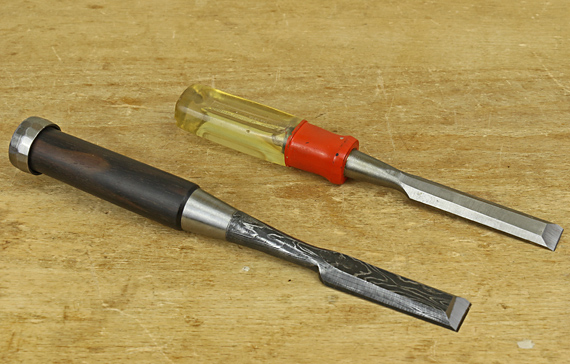
cheap tool, great tool

The most crucial impediment to learning woodworking skills that I have observed when advising woodworkers is the use of cheap, inappropriate, or poorly prepared tools. It is amazing how often student woodworkers – and this really includes all of us to varying degrees – are baffled by poor results from bad tools. Worse yet, the worker blames himself.

Well, it’s not your fault.

Sure, you can saw a tenon with a home center backsaw meant for rough carpentry – “just practicing,” you say – but not well and not reliably. What’s more, you will restrict learning the skill. You can also make that hardware-store chisel, shown above, fairly sharp and chop dovetails with it, but the edge will not last long, so you almost certainly will end up doing much of the work when it is dull or chipped. More subtly, you will not appreciate the final paring cuts that produce an excellent fit because you just cannot do them with control.

Do not blame yourself.

Though a skilled worker might get by with modest tools that are artfully modified, there are thresholds in the quality and fitness of a tool below which good work becomes nearly impossible.

Here is what to do, and it’s simple. Obtain tools that are appropriate to the task, and properly prepare, tune, and maintain them. Get a few very good tools – core tools – start woodworking, and then gradually get additional very good tools.

This will impose some limitations on the projects that you attempt, at least for a while, but that is better than attempting more ambitious projects with inadequate tools that lead to discouraging results, hampered learning, and worst of all, blaming yourself. Remember, an excellent general use tool will perform better at a wide range of tasks than multiple, more specific but mediocre tools.

If you do take the wrong road and slog on with lousy tools, then that will be your fault.

Category: Ideas  | 4 Comments
Author:
• Sunday, January 29th, 2017

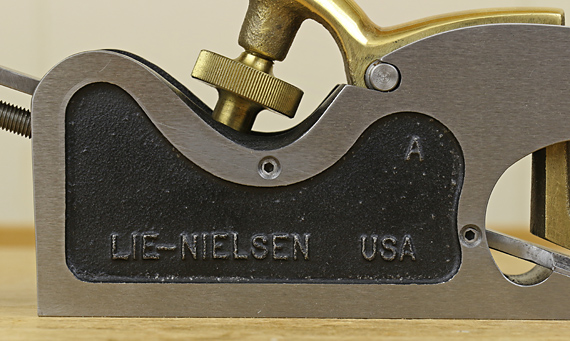
set screws added to Lie-Nielsen shoulder plane

Since I cannot have my dream shoulder plane with all of the nifty features discussed in the previous post, an easy, helpful modification to my shoulder planes was in order: set screws in the style of the Veritas shoulder plane.

First, I marked the blade position on the sides of the body, and within that, locations for the screws on flat areas. I drilled and tapped for #8-32 screws (#29 drill for 75% thread). On the Lie-Nielsen large shoulder plane, above, I ground the socket end of 1/4″-long screws to shorten them to 7/32″ because 3/16″-long screws were barely long enough for all situations.

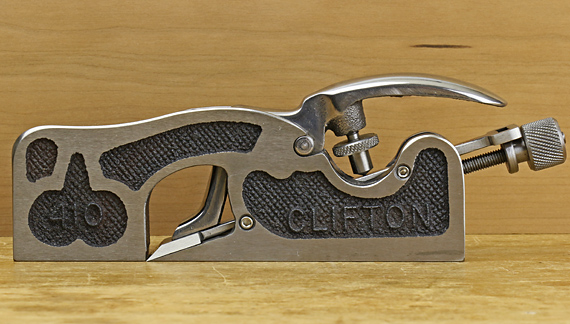
The 11/16″ x 5 5/16″ Clifton 410, below, which I have owned since before Lie-Nielsen made their similarly sized shoulder plane, is shown below with the set screws added. The 18° bed is sufficiently resistant to deflection, on par with the L-N.

Clifton shoulder plane modified

On the Clifton, there is less room to fit the #8-32 screws into flat areas on the body, so I put the higher pair of screws to the rear of the lever cap wheel. They barely cleared the blade bed there, so it probably would have been better to instead put screws forward of the wheel where there is no blade bed to interfere. #6-32 screws would probably have been easier to install but the #8-32 x 3/16″ screws work well as they are.

In use, I have been finding it easiest to approximately set the lateral position and angle of the blade with the lever cap lightly clamped. Then I adjust the lower two screws, one on each side, to barely meet the blade. The screws themselves can then be used to fine-tune the blade position. Next, I advance the two higher screws to barely touch the blade. Then I adjust the cutting depth and snug the lever cap wheel. Note that the set screws may need to be backed off, just a trace, to adjust the cutting depth.

The set screws have proven to be helpful in setting and maintaining the blade position in these shoulder planes.

Category: Tools and Shop  | One Comment
Author:
• Friday, January 27th, 2017

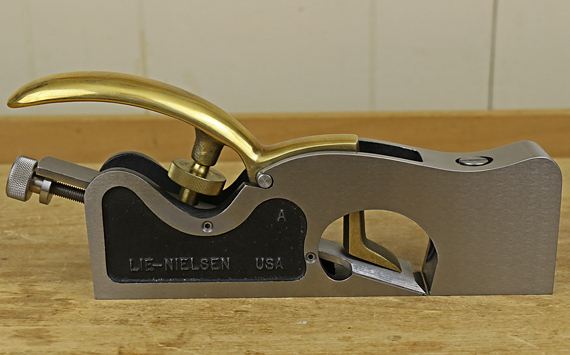
Lie-Nielsen shoulder plane modified

In considering features of all-metal shoulder planes, I will say at the outset that I am not entirely happy with any that I have owned or tried out. Later, I will explain a partial remedy.

Let’s look at some of the key features of planes from the two major players, Veritas and Lie-Nielsen. Spoiler alert: there’s a deal killer coming.

1- The blade adjustment knob of the Veritas controls both the depth and angle of the cutting edge. This is handier than the single function depth adjuster on the L-N.

2- Both planes have an excellent adjustable mouth but, like many vintage infill shoulder planes, the Veritas’ is set significantly further back from the front of the plane than is the Lie-Nielsen mouth. I find the longer initial registration of the sole on the work makes it easier to work accurately.

3- The Veritas has a special hole in the body and knobs that some woodworkers may find helpful in gripping the plane. I tend to like fewer of such grip aids on tools, and find that the L-N handles just as well as the Veritas.

4- The Veritas plane uniquely has four set screws in the body that make it easier to set and maintain the blade alignment. Shoulder planes are finicky to adjust; the screws really help.

5- Both planes are made from stress-relieved ductile iron to the wonderfully precise standards that woodworkers gratefully expect from these two great companies. We can count on receiving a plane with a good 90° angle between the sole and both sides. The blades come well prepared and are of excellent steel. As for the small matter of looks, I do not really care, but if there was a shoulder plane beauty contest, let’s just say that the Veritas has a shot at Most Congenial.

Why, then, do I own a L-N and not a Veritas shoulder plane? Because Veritas has, for me, a real Deal Killer.

The Veritas blade is bedded at 15°. This scant support makes the sole too sensitive to downward deflection beneath the blade. Working with the medium size Veritas, I found that the deflection is quite variable with even small changes of torque on the lever cap wheel. Lee Valley instructs that while little clamping pressure is required, the deflection itself can be used to tune the cutting depth. My interpretation of this is that the lever cap pressure is assigned two purposes, which may be at odds with each other.

Sure, any plane sole that lacks side support, such as on a shoulder plane, can be made to deflect with enough pressure from the lever cap, but for my money, the Veritas shoulder plane was just too sensitive to this. Though the set screws do indeed help maintain the blade alignment, I found that making the blade reasonably secure involves creating an annoying bump in the sole.

This bump prevents the plane sole from registering on the work as well as it otherwise might; it rocks. If it is important for the sole of a plane used for precision work to be very flat, say within a thou or so, what sense is there in tolerating a noticeable bump behind the blade?

The 18° bed of the L-N resists deflection much better. This is why, all things considered, I prefer the Lie-Nielsen shoulder plane. Perhaps there are factors in the design of their plane body other than the bed angle that also contribute to this better resistance to deflection. Taking the matter further, maybe a 20° or 22° bed would even better resist deflection, as those are very workable bed angles in general for a bevel-up plane.

Next: an easy modification (yes, you can see it above)

Category: Tools and Shop  | 2 Comments