Founded in 2008, Heartwood is among the longest-running active woodworking blogs on the internet. It contains 266,000+ words of original content in 600+ posts, all written by me alone. (That is not including comments.) And there are 1400+ original photographs.
Here you will find plenty of serious woodworking instruction, information on tools, shop setup, and wood, along with musings about the craft. All for you to enjoy for free. No adds, no selling, no nonsense.
Very conservatively, there has been 6 million+ visits and 20 million+ page views (actual human visits, not bots, crawlers, etc.).
I am always delighted to hear from fellow enthusiasts and anyone exploring fine woodworking.
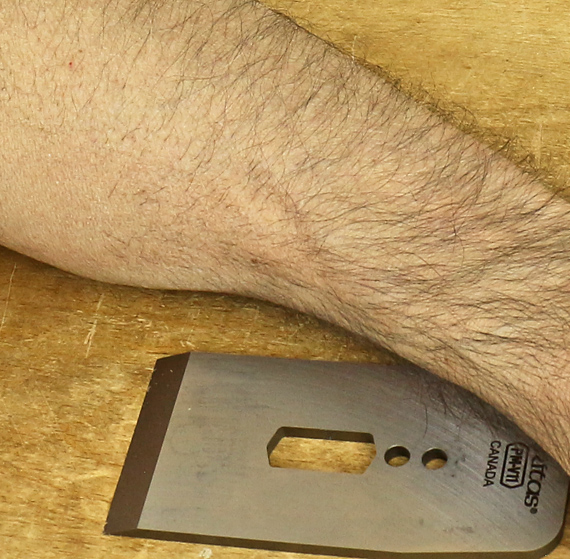
Knife Grinders is one very serious bunch of sharpening experts. Located in New South Wales, Down Under, their website is full of interesting information. What particularly caught my interest is their detailed list of sharpening tests that can be done with simple equipment, notably hair.
I recently posted about the sharpness tests that I use, but these guys have refined things to an ethereal level. Caution here, it bears repeating: the only fully meaningful tests of a sharpened edge are its performance and endurance in its assigned task. We also must consider appropriate edge geometry and endurance.
But check out the Knife Grinder’s list. I like the arm hair shaving gradations on page 1. The hanging hair tests (pages 4-5) are intense.
Maybe you think this is fetishizing sharpening beyond practical woodworking. OK, maybe it is, but it is nice to know that there are convenient, fairly standardized ways to test how your sharpening procedures are performing. To get scientific, one could get a BESS tester from Edge On Up.
You probably have your own sharpness tests but I suggest taking a look at that list. It’s pretty cool.
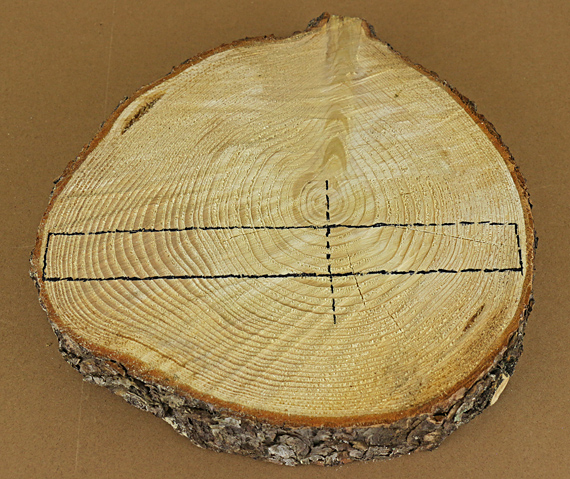
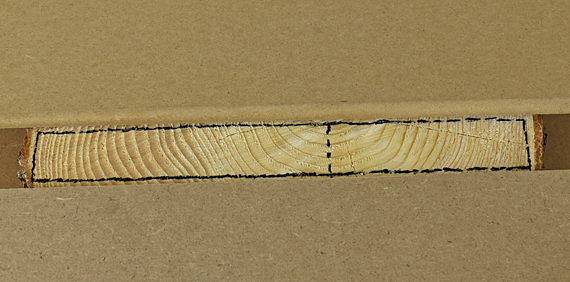
Being a woodworker, and thus appropriately obsessed with wood in all its variety, I could not resist grabbing a sample slice of a mildly leaning hemlock tree that was recently taken down on my property.
On the left side of the slice, which was the underside of the leaning tree, note the darker, wider latewood in the enlarged growth rings. That is “reaction wood,” specifically called “compression wood” in softwood species.
How does this relate to shopping for wood? A board with end grain as outlined in the photo would show signs of trouble:
The deduced location of the pith is off-center even with an equal number of annual rings on each side of it.
The width of the annual rings is asymmetric on opposite sides of the pith.
The wide annual rings contain that odd looking latewood. This will probably also be noticeable on the face of the board.
The compression wood is abnormally brittle and weak. It also shrinks a lot along its length, whereas normal wood has essentially no such shrinkage. This can result in splits, crooks, and finishing problems. This is a board that you do not want.
These boards are definitely out there lurking in stacks of softwood lumber (hardwoods have their version of reaction wood known as “tension wood”) and they’re just waiting to give you trouble. Leave them behind.
Oops, I had a SawStop “event.” But it was not my flesh that met the blade. Rather, I foolishly forgot to reset the miter gauge fence when setting up an angled crosscut, and ran the aluminum fence into the blade, and . . . boomp! So, I had to send out the damaged blade for repair along with my spare blade that was damaged 14 years ago when I was setting up the new saw. This, plus buying a new SawStop brake, made for an expensive goof up. All told I’ve lost use of the tablesaw for four weeks.
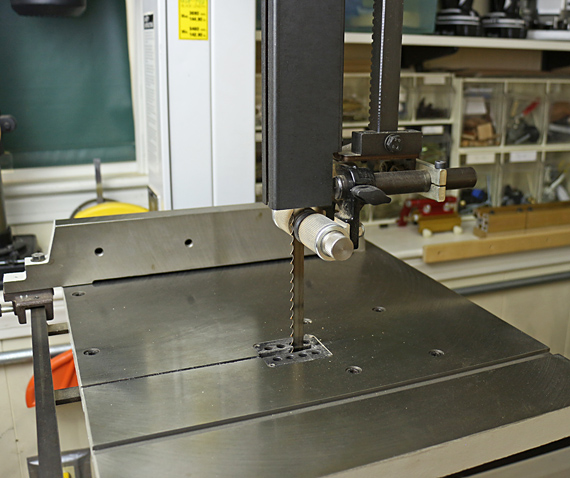
But, I’m doing just fine, thank you. In fact, the episode has reinforced my longstanding conviction and advice that the tablesaw is not the key machine in the furniture maker’s shop. In my view, that distinction belongs to the bandsaw, especially when it teams up with a good thickness planer, or better yet, a wide jointer-planer combination machine.
Far from being a hand tool purist, I was happy ripping on the bandsaw with surprisingly little clean up required with a handplane. I also cleaned up lots of 15/16″-thick, 3″/3 1/2″-wide pieces by standing them on edge going through the DW735 planer with the Shelix cutterhead. I made sure the rollers and bed stayed clean, and it went well.
“What about crosscutting,” you say, “that’s not likely to go well on the bandsaw.” Well, using the little miter gauge that came with my bandsaw, the crosscuts are pretty accurate and not too rough even with my all-purpose 3-tpi blade.
Which brings me to another longstanding conviction and advice. And that is the importance of shooting. It was a pleasure to clean up the bandsawn crosscuts cleaner and more accurately than even the tablesaw could do. Shooting is so critical to accurate furniture making that I suggest sparing no effort and tools to set up good systems for end grain and long grain shooting. (I’ll describe my current long grain setup and have some tips in an upcoming post.)
I won’t be selling my tablesaw – it does a lot of tasks efficiently and well. However, I do want to reinforce this advice regarding machines, especially for woodworkers setting up or upgrading their shops:
The first machine to buy is a good portable thickness planer. The DW735 has no peer.
As soon as you can, buy the best bandsaw you can. Steel frame style, at least 12″ resaw height, preferably something close to 2.5 HP or more.
Get a 12″ jointer if you can.
And sometime, yes, you’ll probably want a tablesaw.
Most important, no matter what tools you have, build things.
There has to be a certain level of energy to carry you through a project. You need a good spark to start things off and enough fire to make it through the inevitable difficulties that come along.
Where do you get this energy to build? Well, there may be secondary motivators – maybe you need to get it built for the money, to fulfill a promise, or you just need the item for its practical use.
At best however, “love and need are one” and sheer creative joy is driving you to build. Maybe it’s the design, and you feel you’re onto to something powerful. Maybe you’re eager for the challenge of a new or refined technique. Maybe the wood itself is so compelling that you can’t wait to build with it.
In any case, you have a real problem if the fire is not truly there: if you sense the design is only so-so, or the materials are not compelling, and building will be grunt work that you don’t strongly care about. And you lack even secondary motivators.
Well, in that case, I think it’s best to do something else!
Make a decision. There’s no point in kidding yourself by further pursuing a project without The Energy. Try a different project. You’ll think of something. It might be better to just buy that bookcase that you were going to build, and instead build a table that you’re excited about.
I’ve been down this road more times than I care to admit. I’ve found it best to be honest and tough with myself even if that means junking a project in which I’ve already invested considerable hours. Drawings get torn up and wood gets sacrificed.
If the energy is not in you, it won’t be there in the final piece, and you’ll know it for always. And those who see and use the piece will know it too.
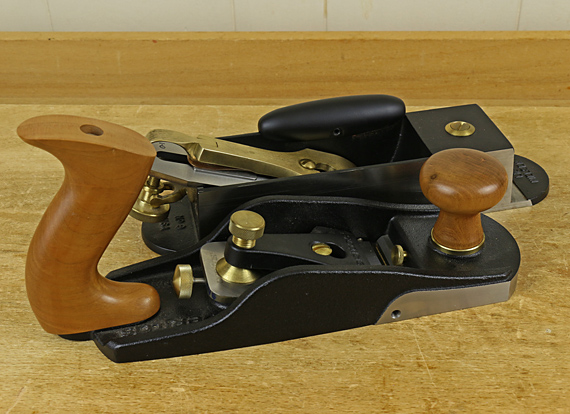
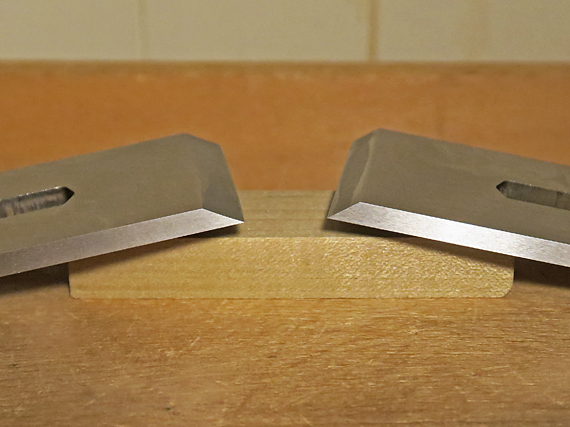
1. If you had a BU jack plane with a 20° bed, could you still use it on end grain? Sure. My Lie-Nielsen #9 “iron miter plane” has a bed of 20° and it works wonderfully on end grain, and so does my L-N shoulder plane with a bed of 18°. Perhaps this is so because resistance is indeed determined solely by the attack angle and not by the sharpening angle per se.
2. This is not about block planes, which, of course, also happen to be bevel-up. It is about BU smoothing planes and, to a lesser extent BU jack planes. Incidentally, I suspect one reason for the popularity of 12°-bed block planes over 20°-bed models is that the former are more compact and thus easier to manipulate with one hand.
3. This is not just a theoretical discussion. BU planes with 20-22° beds have been designed and are available from distinguished planemakers. Take a look at Karl Holtey’s #98 Smoother. Philip Marcou offers bevel-up smoothing and jack planes with 15° and 20° bed angles. [Drool, drool . . .] Though not it’s intended to be used as a smoothing plane, I’ve experimented with setting up my L-N #9 (20° bed) as a high-attack smoother. It works.
So, what’s the point of these four posts? It is simply this: a good addition to the Lee Valley and Lie-Nielsen product lines would be, at the least, the option of a bevel-up smoothing plane with a 20-22° bed. (22° would suit me just fine.)
To create higher attack angles, such as 55°, to reduce tearout with a bevel-up smoothing plane, here are more advantages to a 20-22° bed angle versus the commonly produced 12° bed angle.
1. A higher bed angle requires less camber in the edge to achieve a given “functional camber.” Please see my post that defines the terms I am using and explains the simple math, and this post that shows the effect of bed angle. A blade placed in a 12° bed requires about 75% more “observed camber” to achieve the same functional camber as when placed in a 22° bed. For example: you must grind .014″ camber to achieve .003″ functional camber in a 12° bed, but only have to grind .008″ to achieve the same .003″ functional camber in a 22° bed.
Putting camber in the blade edge takes time and it’s easier to do if there’s less of it.
2. As the wear bevel develops on the lower (flat) side of the blade, an adequate clearance angle is maintained longer when the bed angle is greater. Again, I reference Terry Gordon’s article in Furniture and Cabinetmaking magazine (November 2018, Issue 276, pp. 48-50) and Brent Beach’s website.
Here are two more possible advantages to a 20-22° bed versus a 12° bed, but these are speculative.
1. For a given attack angle, the narrower sharpening angle (as would be used with the higher bed angle) may produce less resistance in the cut. I’m not sure. Maybe resistance is instead determined only by the attack angle, as has been suggested to me by a planemaker. I do not have a way in my shop of making an apples-to-apples comparison. I’d need two planes, identical except for bed angle, then make the same attack angle in each – for example, one with a 22° bed and a 33° blade (=55°) and the other with a 12° bed and a 43° blade (=55°).
2. Perhaps the steeper 20-22° bed is an advantage in design and manufacturing in that it is sturdier and less likely than a 12° bed to deflect downward. I don’t make planes, so I don’t know.
In the previous post, I discussed how a 20-22° bed in a bevel-up smoothing plane can produce a wider range of useful attack angles without resorting to excessively high sharpening angles. The use of narrower sharpening angles has, in turn, several advantages:
1. Sharpening is easier. It is simply more difficult to get a good, sharp edge at, for example, 43° than 33°. It is also awkward to work at the higher angles, and the feedback from the surface of the stone is not as good. I think this is readily evident but some may disagree.
2. Based on my experience, and I think most woodworkers would agree, a blade with a very steep secondary bevel dulls faster than one with a more usual, narrower bevel, all else being equal.
—————————–
Sidebar: how an edge dulls
The profile of the sharp edge of the blade ideally starts out as two straight surfaces meeting at a clean, sharp point. As the edge wears, steel is abraded away from the surfaces near the edge, and the original point becomes rounded over. The worn surfaces of the blade that approach the blunted edge can be thought of as “wear bevels.” Thanks to Brent Beach and Steve Elliot for their development and detailed study of these concepts.
For both bevel-up and bevel-down planes, the wear bevel on the top side of the blade (the side facing away from the wood) is wider than that on the bottom side, because it is the top (front) of the blade that bears the brunt of the collision with the wood. The bottom-side wear bevel, which is on the flat side of the blade in a BU plane, is nonetheless important.
Brent Beach explains the value of removing the lower wear bevel when sharpening to regain a truly sharp edge, to maintain proper clearance of the blade edge from the wood, and to avoid the need to apply undue pressure when planing. David Charlesworth’s Ruler Trick is thus particularly helpful for bevel-up plane blades.
——————————-
3. A functionally sharp edge is preserved longer when the blade is sharpened at a narrower angle. This is consistent with point #2. Australian planemaker Terry Gordon explains this nicely in a recent article in Furniture and Cabinetmaking magazine (November 2018, Issue 276, pp. 48-50). It is best understood diagrammatically but the gist is that a skinnier edge retains useful sharpness longer by remaining narrow longer.
In summary, there are important advantages in sharpening and edge endurance when using the narrower sharpening angles permitted by a higher bed angle in bevel-up smoothing planes.
For example, if you want a 55° attack in your BU smoother, you’re better off being able to sharpen at 33° with a 22° bed (=55°) than having to sharpen at 43° with the 12° bed (=55°) in currently offered stock planes.
Coming up: still more issues. Can you tell that I’m building a case that I think L-N and L-V should hear?
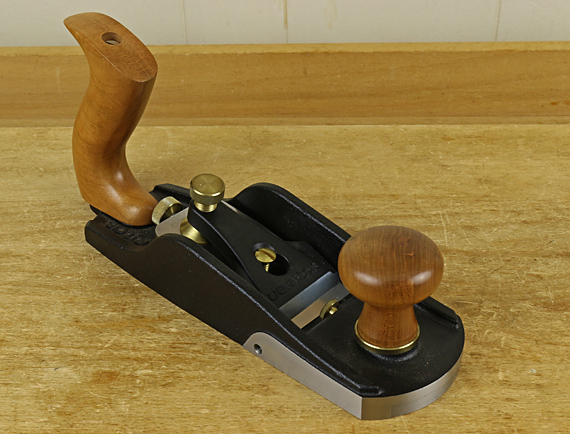
Lee Valley and Lie-Nielsen both use a 12° bed for their bevel-up (BU) bench planes. At least for smoothing planes, I think there are better options. I addressed this issue in a 2010 post but now would like to add additional reasoning.
Let’s start with the issue of attack angle.
One of the advantages of BU planes is the attack angle (the angle between the wood and the leading surface of the blade) can be altered simply by changing the sharpening angle of the final microbevel. There is no need to change the frog and/or create a large back bevel (a large bevel on the normally flat side of the blade) as with a bevel-down plane. The attack angle is a key factor in how a plane functions, especially to control tear out.
In a bevel-up plane with a 12° bed, to achieve a 50° attack angle, a good all-around angle for a smoother, the sharpening angle must be 38°. (Note that all of the sharpening angles in this discussion are only the final, steepest microbevel, which is what actually interacts with the wood.) A 55° attack, a good choice to manage most figured woods, would require a 43° sharpening angle. A 60° attack, which is about as steep as you can go before the plane acts more like a scraper but is nonetheless useful for difficult woods, requires a 48° sharpening!
Alternatively, let’s consider a 22° bed for the bevel-up smoothing plane. Much lower sharpening angles can be used. For example, a 33° sharpening angle yields a 55° attack, which is a nice setup with an A-2 blade. The 60° attack requires a still-manageable 38° sharpening. On the other hand, if you want a lower attack, you could sharpen at 28° or 30°, such as with an O-1 blade, to yield a 50-52° attack. If slightly lower attack angles suit you, a 20° bed is a good, versatile compromise.
So, a 20-22° bed anglein a bevel-up smoothing plane allows you to a create a good range of attack angles without the excessively high sharpening angles required with a 12° bed.
For a BU jack plane, the case for a steeper bed is less compelling, though still interesting. A 12° bed with a 33° sharpening – typical for an A-2 blade that would often be found in a jack – gives a 45° attack, which many woodworkers consider to be a good all-around choice for a jack. Still, a 15° bed would increase the versatility of the plane in creating slightly higher attack angles without having to increase the sharpening angle too much.
To summarize the main point: a bevel-up smoothing plane with a 12° bed requires excessively high sharpening angles to achieve the very helpful range of attack angles that is one of the key advantages to this type of plane.
Much more to come on this topic in upcoming posts. Those excessively high sharpening angles produce several disadvantages. Furthermore, the lower 12° bed is a disadvantage in itself, and actually lacks a traditionally-cited advantage.