Established in September 2008, this site contains 260,000 words of original content (through December, 2025), not including comments, and 1406 original photographs.
Here you will find plenty of serious woodworking instruction, information on tools, shop setup, and wood, along with musings about the craft. All for you to enjoy for free.
Heartwood is one of the longest running woodworking weblogs on the internet with, conservatively, 6 million visits and 20 million page views (actual human visits, not bots, crawlers, etc.).
I am always delighted to hear from fellow enthusiasts and anyone exploring fine woodworking.
A violin maker in Los Angeles, Hans Benning, relates a story from many years back when a man came to his shop seeking repairs on his violin. The violinist wanted Hans to come to his house to work on the instrument but Hans declined, explaining that all his tools and fixtures were there in his shop. The work could not be done properly on a kitchen table. After looking around the shop a bit, the man left.
Now this was no ordinary violinist who had come to Hans’ shop. It was Jascha Heifetz, one of the greatest ever, and his violin, an 18th century Guarneri del Gesù, was no ordinary violin. That’s right, Hans turned down work from the great Heifetz! The craftsman would not lower his standards.
A few days later, Heifetz returned, this time with the violin, and agreed to have the work done by Hans in his shop. This was the start of their 15-year working and personal relationship of great mutual respect. Some time later, Heifetz acknowledged to Hans that he appreciated Hans’ refusal to compromise his standards as a craftsman at their first meeting.
Picture that. The most discriminating imaginable client, famous and at the pinnacle of his art, seeks your services as a craftsman on work of the highest caliber, and you say, “Nope, sorry, I don’t work that way.” But later he returns, seeing it your way, and the work commences. Wow.
So, here’s a thought. What if, instead of Jascha Heifetz, it is you who walk into your own shop. You have a conversation with Yourself, and walk away. Reconsidering, you decide to return and accept the conditions – and the work commences.
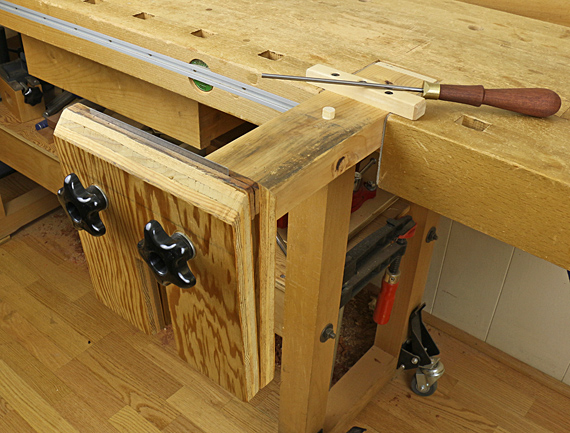
I built this as a saw-sharpening vise long ago from directions on page 16 of the 1979 book Tage Frid Teaches Woodworking – Joinery: Tools and Techniques. After considerable modification, it has long since become my dedicated scraper-sharpening vise.
In its original form, the vise was designed to secure the saw blade by the vise itself being clamped into the front vise of the workbench. I made the long notch in the lower part of the jaws to clear the vise screw but it is no longer functional. Now instead, the jaws are tightened by the two star knobs at the ends of carriage bolts.
The 8″ jaws are faced with hardwood, which allowed me to tune their apposition, including planing a slight camber along the length. The angle at the top of the jaws provides clearance for tools and hands. The jaws grip just fine without a leather lining, which would tend to grab and accumulate metal filings.
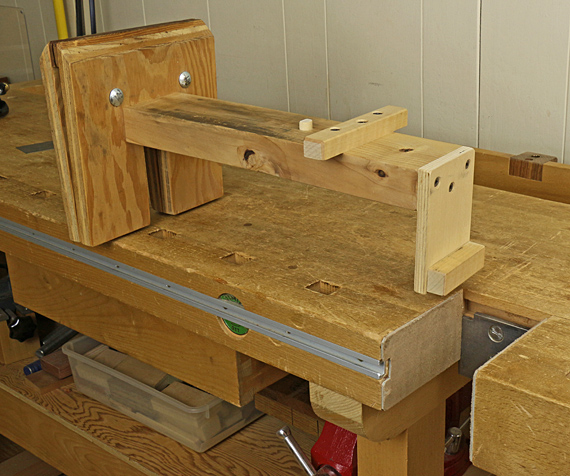
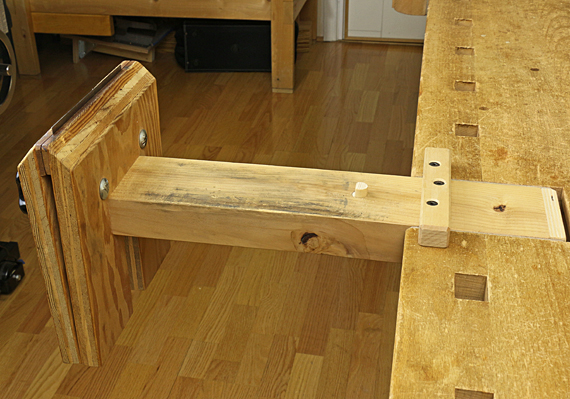
What makes my design really different is the vise is lag-screwed into the end of a 14″ length of 2×4. At the other end of the 2×4 you can see the L-shaped cleat that hooks under the steel plate of the tail vise. Along with the top cleat that contacts the bench surface, this makes the whole setup rock solid when the tail vise is tightened.
The 2×4 extension piece serves as a handy platform for diamond stones, and for running the burnisher along the side of the scraper. The removable dog acts as a stop. The extension also keeps the vise well away from the workbench to prevent metal filings from defiling it.
Of course, the vise is systematized with my method for sharpening scrapers. I do all of the work on the edges of the scraper – filing, diamond stoning, and burnishing – with the scraper clamped in this vise. I’ll save the details of that for another post but here I’ll say that scraper sharpening is easy, and I highly recommend a polished carbide burnisher.
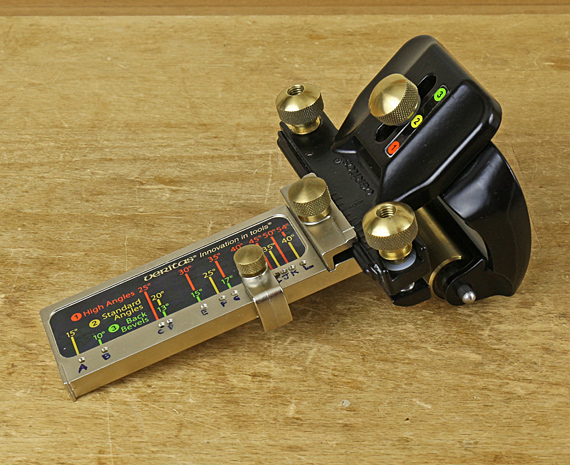
Like many woodworkers, I have a mixed view of honing guides. After many years of using a modified freehand technique involving simple shop-made angle setting blocks, I now use the Veritas Mk.II guide for much of my honing. Maybe it’s because I have more blades, maybe it’s a matter of less patience, but I do like to try to refine my systems and this is where I am now.
The main advantage of a mechanical honing guide is in reliably and accurately returning to a secondary bevel formed in the previous sharpening or within the same sharpening session. This comes at the price of more complexity in the system. Moreover, the versatility of the Veritas Mk.II makes it more complex than most other guides.
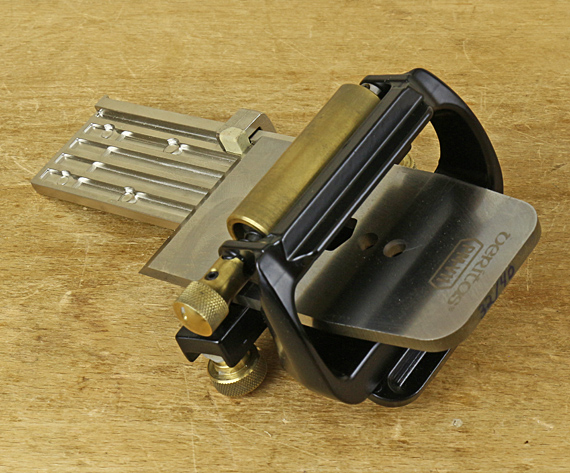
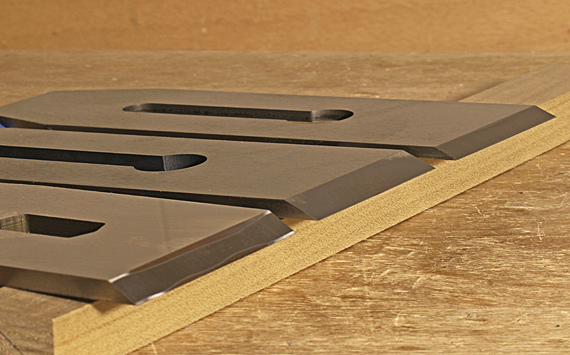
My attempt to simplify use of the Mk.II involves setting the extension of the blade from the front of the jig, which is one determinant of the honing angle. To register the extension (and square the blade to the jig), the MkII uses an attachment to the main guide that you have to slide on and tighten. Then you bring the edge of the blade up to a metal stop on the attachment. Once you have tightened the blade in place, the attachment is removed and you can commence honing.
The registration stop on the attachment is set in one of a dozen locations, each with a dimple to maintain repeatability. Each location of the stop allows several different honing angles depending on three possible settings of the clamping head on the roller base and four possible adjustments of the roller itself. The specific angles are in a table provided with the tool.
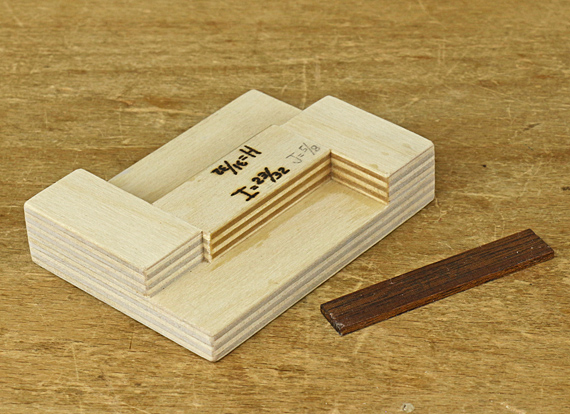
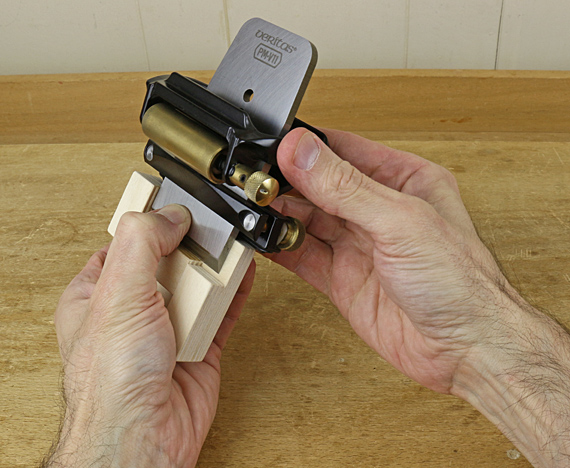
Ugh! But it’s not as bad as perhaps I’ve made it sound. In any case, 90% of my honing (and probably yours) can be accomplished with just two blade extension settings, specifically, the “H” and “I” extension lengths, which can render honing angles from 30° to 47.2°. (See Veritas’ instructions.) So, instead of fiddling with the attachment device, I use the simple wooden extension stop shown in the top photo. The little shim produces the “J” setting, which covers most of the other 10% of the angles I use.
I find this wooden stop to be faster than the Veritas attachment, and just as repeatable. It does take a little practice to coordinate the stop, blade, and Mk.II in your hands. Another advantage of the wooden stop is in avoiding metal near the edge of the blade, particularly if you have to repeat the setting in the same session for a partially sharpened blade that you want to work on further. It also works with the narrow blade clamp, which is especially helpful for Japanese chisels.
With this simple shop-made jig, I can enjoy the advantages of the excellent Veritas tool while avoiding some of its complexity.
Addendum 12/8/19: The letter designations, H, I, and J (referred to above) for the dimple positions on the Veritas blade registration jig that is used with the MkII honing guide are no longer used in the current version of their instructions, copyright 2018. In the original instructions, copyright 2011, which I have, they use letters to refer to the dimples in the jig. H is the 20-30-40° hole as labeled on the jig, I is the 45° hole, and J is the 35° hole. The blade registration jig and the honing guide have not changed, so the rest of the above remains applicable.
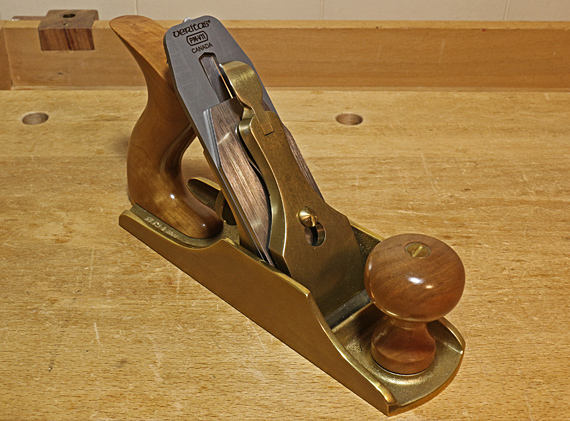
Will the PM-V11blades made for Veritas standard bevel-down bench planes work in a Lie-Nielsen plane? These are nominal 1/8″ thick blades, the same thickness as the L-N blades. I am not referring to Veritas PM-V11 blades made for “Stanley/Record planes,” which are .100″ thick (a little more than 3/32″).
Manufactured by Lee Valley/Veritas, PM-V11 is a wonderful steel that I’m glad to have in my Veritas bevel-up planes. Veritas offers lots of information about it, including their extensive testing, in a dedicated website.
First, here are my impressions from using PM-V11 blades in my LV BU planes. Though obviously not scientific, they differ somewhat from Veritas’ testing.
For ease of sharpening, Veritas found PM-V11 about the same as A-2 but, as we would expect, not nearly as easy as O-1. My sense is that PM-V11 is actually noticeably easier to sharpen than A-2. I don’t think it actually wears faster on my CBN grinder, diamond bench stones, and 0.5 micron ceramic finishing stone, but somehow I feel more confident in creating a reliable final sharp edge. This is completely subjective and perhaps is just a matter of how the steel feels on the stones.
As to the sharpness of a new edge, it’s hard to beat O-1 but I think A-2 can get pretty close. PM-V11 seems to me to be even closer to O-1, and probably equal. Again, this is subjective and perhaps is more of a matter of ease and reliability in getting to a pristine final edge.
Regarding edge retention, it seems odd that the Veritas testing found that A-2 barely beat O-1. With the caveat that A-2 blades vary considerably, I think most woodworkers find as I do that A-2 holds its edge significantly longer than O-1. My unscientific sense is in general agreement with the extensive Veritas testing that the edge in a PM-V11 blade indeed outlasts most A-2, though not by as wide a margin as Veritas found. I think the Hock A-2 blade that I have in my jack plane would give PM-V11 a run for its money. Still, you’ve got to respect the extensive testing that Veritas has done.
In short, there is good reason I’d like to use PM-V11 in my bevel-down Lie-Nielsen planes, which are, of course, absolutely fantastic planes.
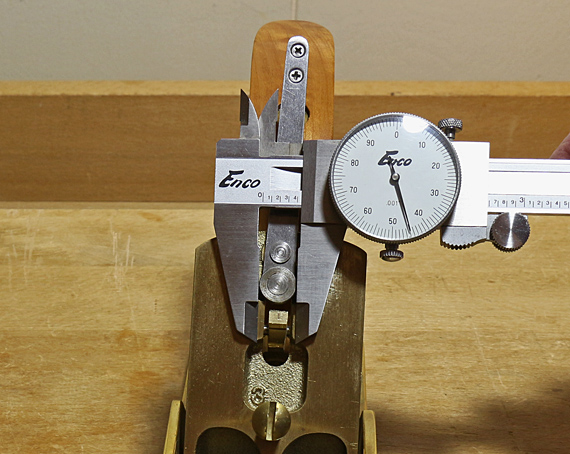
In my L-N #4, the lateral adjustment button measures .445″ across. The slot in the L-N O-1 blade that I own is .455″ wide, and .452″ in my L-N A-2 blade. The slot in the Vertias PM-V11 was .441″ when I received it.
I simply widened the Veritas blade slot to .446″ using a 2″ x 6″ DMT extra-coarse diamond stone and cleaned up the resulting harsh edges with the other (coarse) side of the stone. Though this results in just minimal clearance of the slot around the adjustment button, the blade beds just fine. In fact, the reduced play in the lateral adjustment mechanism makes it a bit more responsive.
The Veritas PM-V11 and Lie-Nielsen blades are virtually identical in thickness (within one thou) at about 1/8″. There is no need to compromise by using a thinner blade. There is also no problem connecting the chip breaker, nor with the fit and function of the blade advancement pawl. The slot in the Veritas blade is longer than in the L-N blade but that does not matter as far as I can tell.
I think now I’ve got the best of both of these great companies in my good old #4.
We want to build. We want to work at a pace and get things done.
The key to working at a craft the way we should work – where the job is done well and we are well – is to coordinate the pace of four factors. Let’s consider what’s really going on when we work.
The hands must work with clear intent, guided by skill embedded into muscle memory. For most good craftspeople, this is usually not a limiting factor. Rather, the hands that can easily run ahead of the other factors, which leads to awkwardness and fumbling. We all know what happens when the hands rush ahead of the brain. You neatly saw on the wrong side of the line or cut yourself with a chisel that you’ve picked up a thousand times.
The mind must focus unwaveringly on the specific task at hand, yet maintain cognizance of its place in the overall mission. The mind, of course, governs all and so is the master pace setter. Try to outrun it, and trouble comes: “How did that happen?” – a surprise mistake that really isn’t surprising. Skill of mind is the greatest skill.
Each of our tools must be put to work within the range of its intended purpose, not forced beyond it. So, maybe you should chop that waste in two passes, not one. And the tablesaw has only so much horsepower. Push a tool beyond its limits and you’ll both pay the price. For a craftsperson, knowing your tools is almost like knowing yourself.
The body must be respected with regard to energy limitations and fatigue. It is not a machine. Usually, posture is the first thing to break down. When core stability breaks down, the fine motor tasks performed by the hands will suffer. If your work is becoming less accurate as a session in the shop proceeds, consider that core/posture fatigue may be the cause.
When these four factors are exerting synchronously, you are happily at ease and do good work. This is peaceful productivity and efficiency – the way we should work, and the way things best get done.
Sadly, many, maybe most of us, are pushed in our pay-the-bills jobs with little regard for the truths of human work, driven by the fantasies of those who do not actually do the work but instead tell others how to work. (Anyone remember Lucy in the chocolate candy factory?) Appreciation of the work dissipates. We become detached from it, and from ourselves.
Happily being human almost always includes integrating our various faculties, being cautious not to neglect parts of our true nature. Hopefully, we can work well in the woodshop as we produce, and do so with joy. Work is best when we pace it this way. And it is the way we live best.
Here are a couple of handy little tools that might get overlooked. More important, they call to mind a similar shop-made necessity.
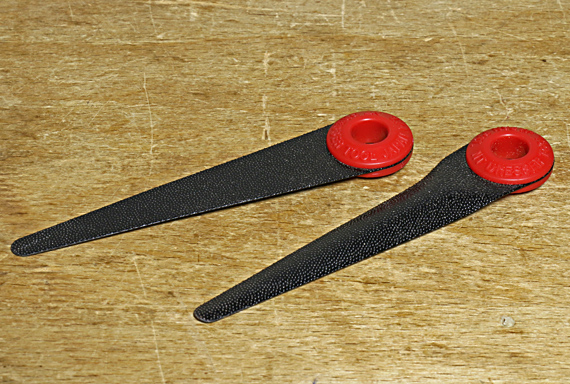
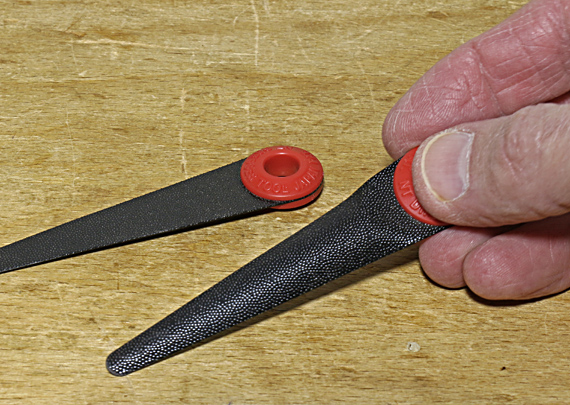
I got these NT Dresser mini rasps from Lee Valley, who call them “Japanese finger files,” as a last minute add-on to an order. No regrets though, because over the past year I have found them very helpful for finishing off details.
Made of stainless steel and only .023″ thick including the grit, they can get into very narrow recesses. Yet they are stiff enough, when backed up as needed with a finger, to apply adequate cutting pressure and to preserve crisp details. Below, I am holding the half-round mini rasp, which is, of course, stiffer than the flat one.
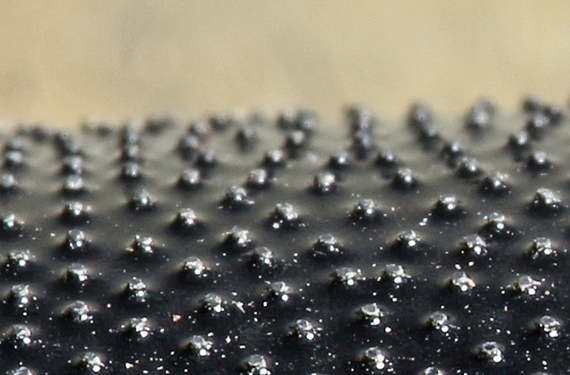
The “grit” is composed of tiny rough, tough knobs on the steel plate. Unlike conventional detail rasps, the NT Dressers cut in any direction so they can work in some places that those other tools cannot. I easily clear them of wood dust with the same stiff hog bristle brush that I use on regular rasps.
The “medium” grit sold by Lee Valley is actually quite fine. The tool feels about like 220-grit sandpaper but leaves a surface more like 320-grit sandpaper. These are not aggressive tools; they are for details.
NT Cutter (Japan) makes these in different shapes and grits, along with a line of larger tools.
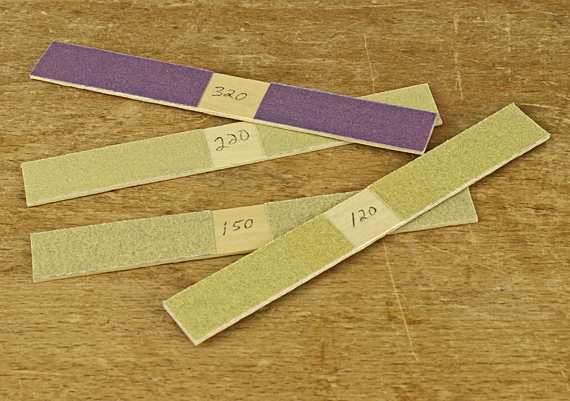
I’ve always kept a set of these little shop-made sanding sticks, pictured below, for use in countless detail and touch-up situations. They are probably not in any book’s list of important woodworking tools but I consider them shop necessities. They’re just PSA sandpaper (or glued-on regular sandpaper) on a squared-off tongue depressor or similar sliver of wood. The NT Dresser tools are more nimble though, which makes them a good complement to the old standbys.
Made or bought, sometimes these humble little tools are just what you need.
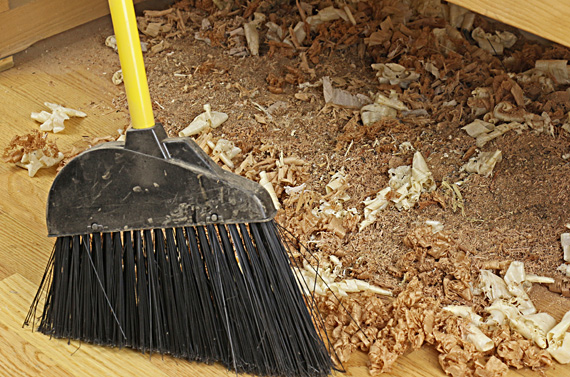
As much as we love wood, it can hit us with some awful surprises. Honeycomb, a drying defect, is among the worst. Here I will recount my sad tale of 8/4 quartersawn white oak, hoping you will be spared the same fate.
First, let’s briefly review a simplified version of the drying process.
The outer part of the board – the shell – loses it bound water and shrinks earlier than the inner part of the board – the core. The shell is in tension because it wants to get smaller but is limited by the still moist and swollen core, which is thus in compression. If this happens too fast, surface checks may result, which later may close and go unnoticed.
The shell sets in size. Now, as the core loses its moisture, it wants to shrink but is limited by the surrounding shell. Thus, the core is now in tension and the shell in compression, a condition known as case-hardening.
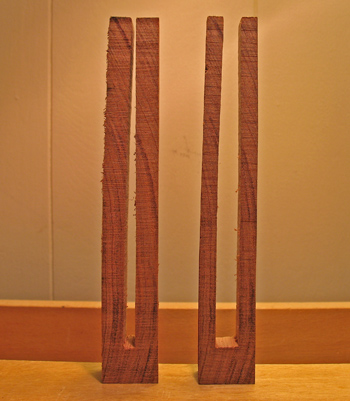
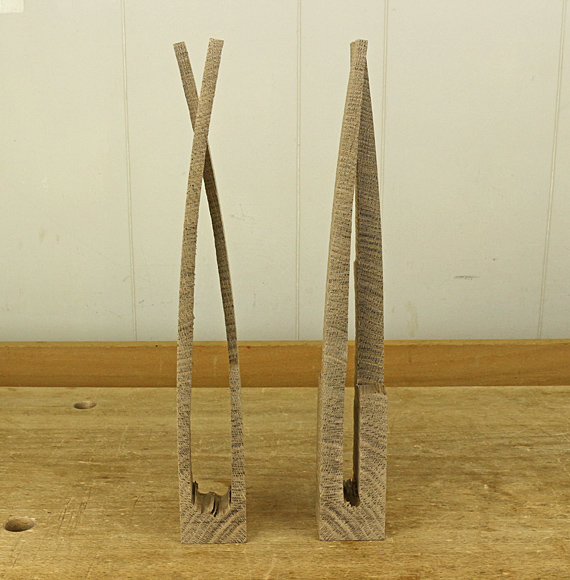
The kiln operator modifies the moisture content at the end of the drying process, and ideally, there would be no remaining stress. However, the irremediable state of reverse case-hardening must be avoided, so a bit of case-hardening is acceptable in the final state of most kiln-dried lumber, demonstrated by a slight inward curve of the tines of a test fork sawn from a cross-section sample of the board (below).
Note that this is not a matter of a moisture gradient across the thickness of the board; it is physical stress. If you resaw lumber, you’ve certainly encountered this.
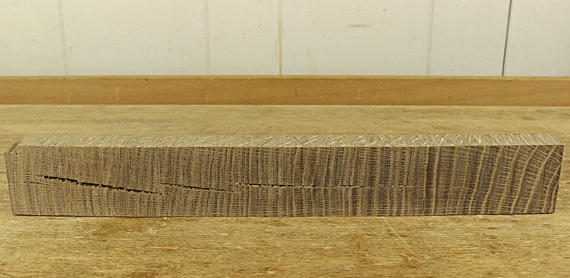
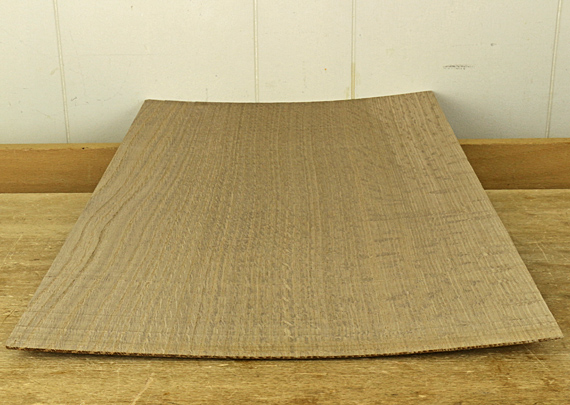
But what if the core dries too fast? Hygroscopic wood movement is a powerful force, stronger than the wood itself. Therefore, the core of the wood, desperately trying to shrink within the restricting frame of the shell, simply breaks. Honeycomb! (top photo)
Worst of all, this is not visible from anywhere on the outside of the board. The only clue you might get, which is inconsistent at best, is to note the board is oddly concave across its width on both sides. The cracks, revealed only when you crosscut the board, occur perpendicular to the annual rings in both flatsawn and quartersawn lumber.
So, what happened in this white oak board? Probably several factors conspired. 8/4 is, of course, much slower to dry than 4/4, white oak is a relatively difficult species to dry well, and quartered lumber is a bit slower to dry. My guess is that this board was not sufficiently air dried before going to the kiln. Further, since 8/4 white oak is less common, this board was probably lumped together in the kiln with thinner lumber and/or faster drying species for which a faster kiln schedule would work. In other words, it was rushed to market.
What about using the parts of the board without honeycomb? Nope, best not. Even sections distant from the frank honeycomb were severely case hardened, as demonstrated by these test forks (above). Whether a lot or a little of the interior core was removed, the tines are bent over each other. It was amazing how forcefully they bent inward against each other before I halved their widths so they could cross over each other. Again, to be clear, there was no moisture content gradient across the thickness of the lumber.
Severe stress like this wreaks havoc in the building process. I tried to salvage the expensive board but as I would incrementally remove thickness, attempt to resaw, or shape the wood, it persistently distorted. I was constantly and futilely chasing true surfaces. Enough.
Sharpening is so much at the core of hand tool woodworking, and so here are a few thoughts that build on the previous post on sharpening tests.
1. Can we close the loop and say that the proxy tests are actually validated by the tool’s performance? Based on experience, yes, regarding sharpness, edges perform as the tests predict. The tests are worthwhile.
2.Edge endurance, however, is another matter. There you are relying on the “design” of the edge and the reliability of your sharpening process. The only “test” is over time – seeing how long the edge lasts. For good results, you must match the edge geometry to the steel and the task.
For example, A-2 is a good choice of steel for a jack plane blade but if the bevel angle is too narrow, such as would be good for O-1 steel, the edge will be prone to premature chip-out.
As another example, a plane blade with a wide bevel angle (e.g. 43°), though correctly employed in a bevel-up plane to create a high attack angle to reduce tearout, will necessarily have a shorter useful working life than narrower edges.
3.Squareness or, as appropriate, the correct skew angle, is, of course, easy to test. By the way, I find that a chisel edge that is just a bit out of square is not a big deal, as is sometimes supposed. There’s also a bit of squareness tolerance in most plane blades.
4. For many woodworkers, the most vexing matter of edge geometry is plane blade camber. For choosing, producing, and assessing camber, I invite readers to visit this series of five posts, which is about as in-depth a treatment of the subject as I think you will find anywhere.