It is not surprising that setting the depth of cut in a hand plane can be difficult to learn. After all, we are dealing with differences of as little as a thou or two with a smoothing plane, and even a heavy cut with a jack plane should have a balanced, efficient setting.
Ultimately, the best gauge of the proper blade projection is the performance of the plane. You sense the bite of the blade, observe the shavings, and make adjustments.
Nonetheless, you want a good initial setting before the plane is brought to the workpiece to avoid lots of trial and error adjustments after starting to plane. Both the left-right balance and the overall depth of cut must be set. These initial adjustments can be made in two ways: visual and tactile.
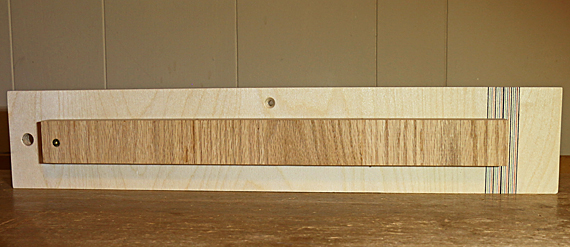
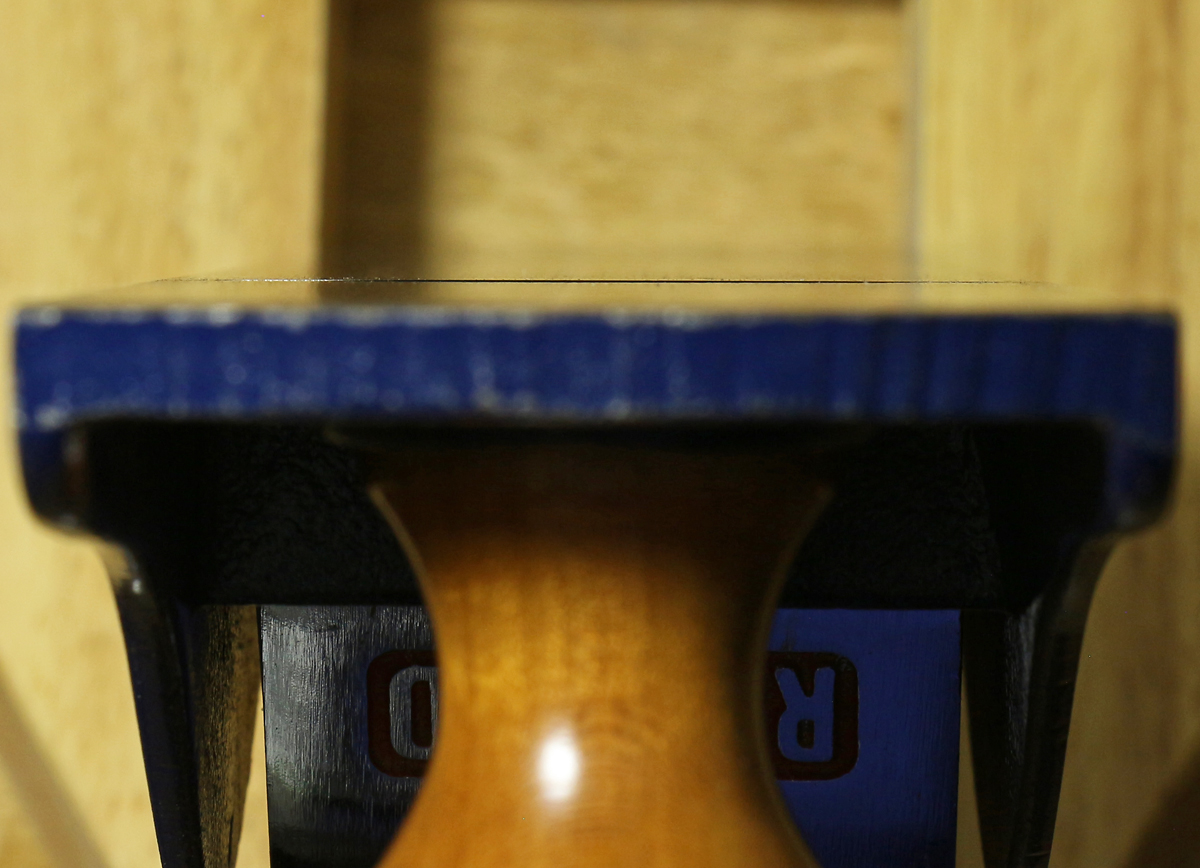
To see the blade projection, sight down from the front of the sole at a very low angle with a lamp positioned in front of your forehead. The light will be diffusely reflected from the sole (metal or wood) but not from the protruding blade, which thus appears black. Subtly shift your viewing angle to see the thin black strip of the blade. (As a further optional visual aid, note that light will probably also be reflected from a neatly filed tiny wall at the back of the throat at the extreme sides of the mouth where the curve of the blade camber reveals it.)
The photo at top shows a moderately cambered jack plane blade projection. Click on it to see a larger version.
Adjust the blade for lateral balance with the lever, Norris style adjuster, or hammer, depending on the type of plane. Usually, this is easier to observe and manage with a substantial overall blade projection, which you can then back off to a shallow cutting depth. For a smoothing plane, I make this depth almost nothing and then increase it as needed when I start planing. For jack plane work, I usually go directly to a more aggressive cutting depth.
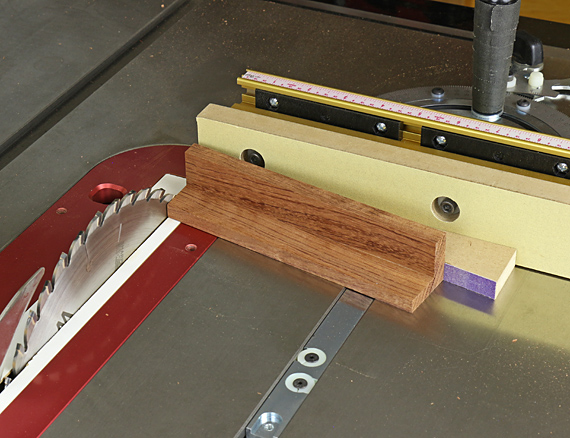
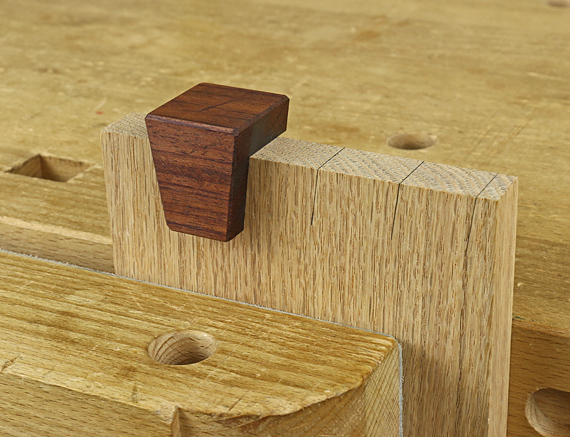
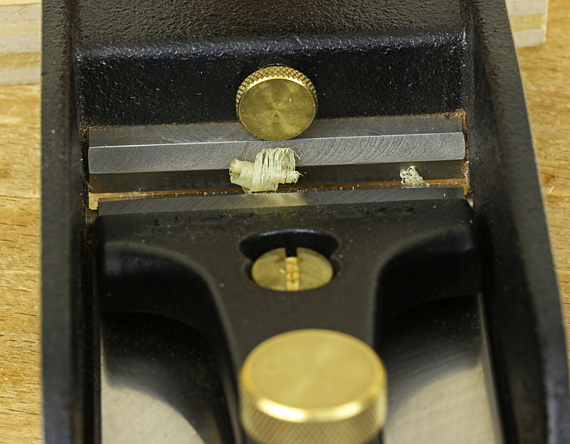
For tactile confirmation of the visual adjustment or instead of it, use a small block of wood about 5/32″ thick as shown here. I learned this method from David Charlesworth. I prefer to use the edge, not the corner, of the block to pull shavings from each side and then from the center of the blade.
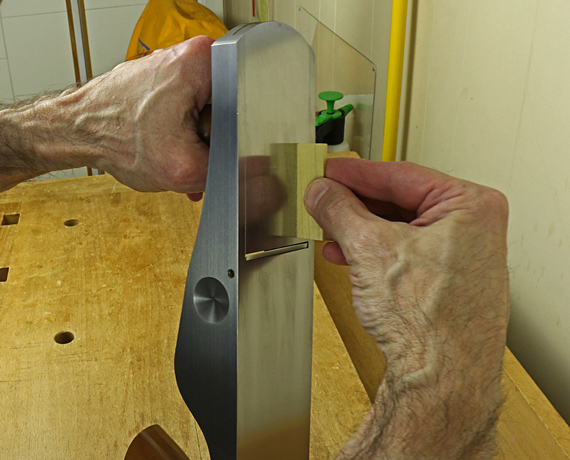
As with the visual method, get the lateral balance correct first, then go for a good overall depth of cut. The difference with the tactile method, however, is that it is easier to start with a minimal depth of cut to make the lateral adjustment. The assessment is made by feeling the pull of the cutting edge as it takes a shaving from the little block of wood.
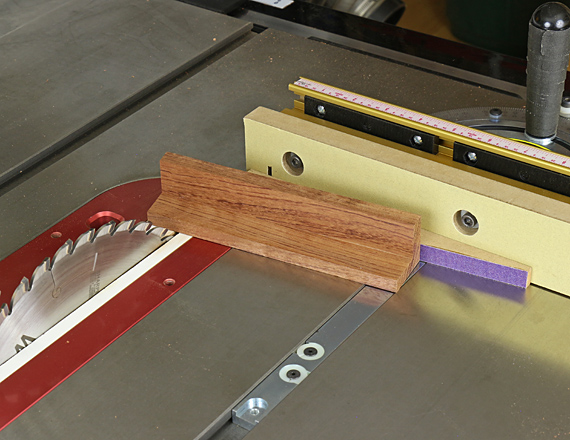
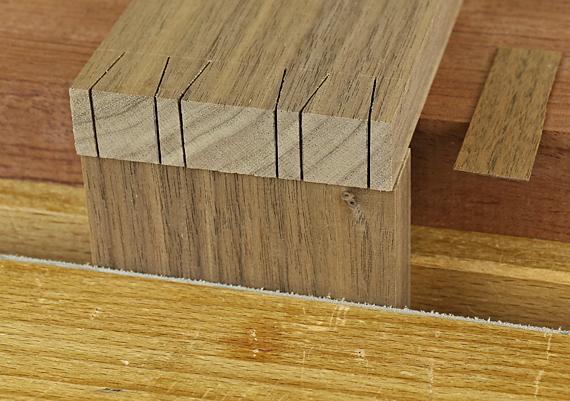
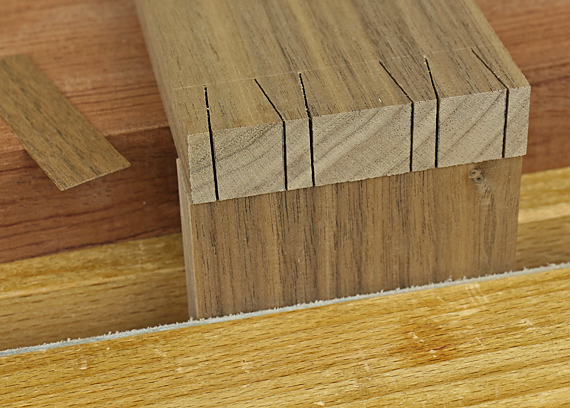
Below is an example of the result. Note that this is to illustrate the principle. In practice, I do not usually bother to turn the plane over to look at the tiny shavings. The assessment is done by feel. You can see that this blade has a nice small camber but the lateral adjustment is not correct. The cutting edge pulled almost nothing on the left side in the photo.
For smoothing plane work, I’m more likely to use the tactile method because it directly gauges precise small adjustments that may be hard to see. For jack plane work with a moderately cambered blade, I’m more likely to use the visual method because the more prominent blade silhouette makes an adequate adjustment fast and easy.
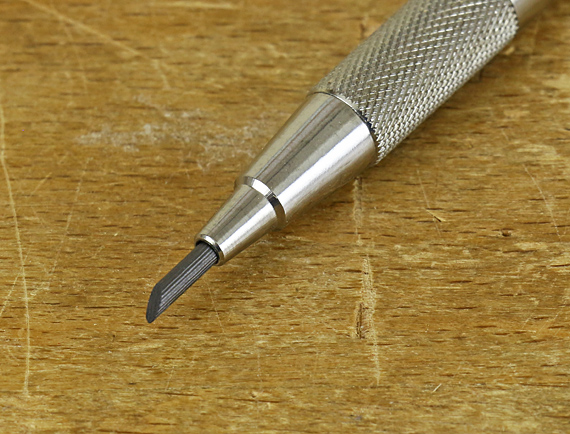
For planes with a straight-edged blade, such as a rabbet block plane, the same methods apply but you are trying to get an even blade projection across the full width of the mouth.