Drilling the holes for the cross-rail joint is easy as long as you keep track of reference points and orientations.
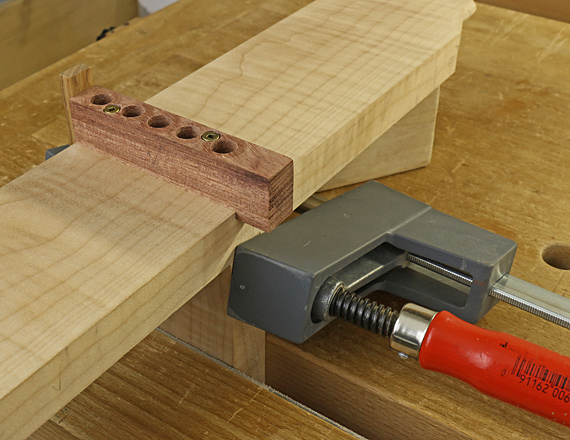
First, attach the jig to the first side of the joint. Use the reference cleat to set the jig in place in the dado, and clamp it there. Pass a snug fitting transfer punch or brad-point drill bit through the fixation holes to make dimples in the floor of the dado. This creates reliable centered marks to drill minimal-depth pilot holes for the screws. Screw in the fixation screws, which only project about 1/4″ into the workpiece, and then remove the clamps.
With the jig now securely in place in the dado, you can prepare to drill the dowel holes. I have found no good way to accurately secure the jig onto the end of the tongued piece, so it is best to insert and clamp the tongued piece in the dado on the opposite side of the dowel jig in the orientation it will be when the joint is assembled. Thus, the holes will be drilled, guided by the jig, through the dadoed piece and into the tongued piece, all in one step.
The photo above shows the setup in the vise. Note the support block that helps keep the components at 90°.
For drilling the holes in the joint, I use a hand-held electric drill and a DeWalt Pilot Point bit. Well made, its diameter is a good match to the high quality brad-point bit that I used to make clean holes across the grain in the jig. The DeWalt produces a little tearout drilling cross grain in the dadoed piece but that will not be seen and does not matter structurally. More important, it advances strongly through the long grain of the tongued piece, where a brad-point bit (essentially a cross-cut device) tends to bog down and burn.
A good drill stop is a must for this work. I do not like any commercially available stops, and so I use shop-made stops (described here), which have never let me down. When working out the drilling depth, remember to take into account the jig and the dadoed workpiece. I drill 1/16″ – 1/8″ extra deep into the tongued piece to allow for excess glue.
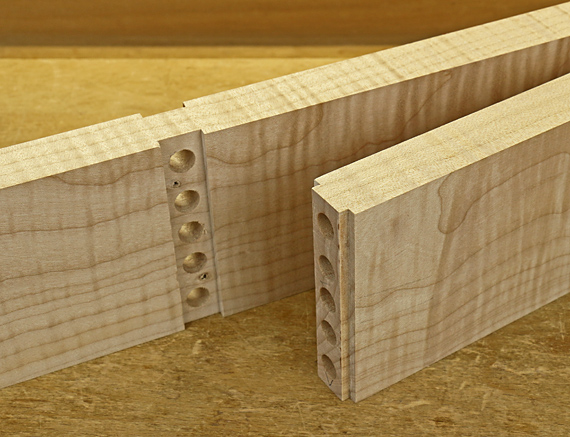
This is the joint so far:

Once you have finished drilling from the first side of the joint, detach the jig and reattach it to the dado on the “second” side of the joint. The cleat stays against the same edge of the dadoed piece but the opposite drilled face of the jig sits on the floor of the dado on the second side. The second tongued piece is set into proper orientation in its dado and the setup is clamped and registered the same as for the first side of the joint.
For this second round of drilling, the holes in the dadoed piece already exist, so you are just going through them directly into the long grain of the tongued piece.
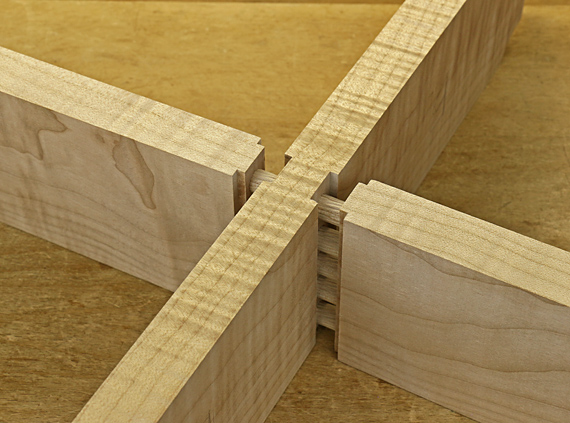
Here is a reminder of what we are trying to produce:

This is more difficult to describe than to do. This method ensures that all the components are drilled in the actual position they will be in the final joint. And that is why the dowel jig is made to be useable from both sides.
Next: assembly and completion.


Hi Rob,
Everything is clear and straightforward, thanks to your instructions and good pictures. Also thanks for mentioning the Grr-Ripper. I purchased one today after viewing Marc J. Spagnuolo video on it. Looks like it will save me time when cutting thin strips instead of measuring off the saw blade every time. Looking forward to your next post.
Thanks, Pascal. Clarity is one of the major goals of my writing.
Rob