This series will explain the wood finishes that I use. I will tell you the specific finish formula, how I apply it, and explain where and why it works.
The finishing systems that I present here are anecdotal and based on my preferences and experience. I can tell you that through many years and many trials, I know these work for me and I think they will work for you as long as you use them in appropriate situations.
For expert comprehensive discussions of finishes, there is no better source than Bob Flexner’s book Understanding Wood Finishing.
We’ll start with:
SHELLAC
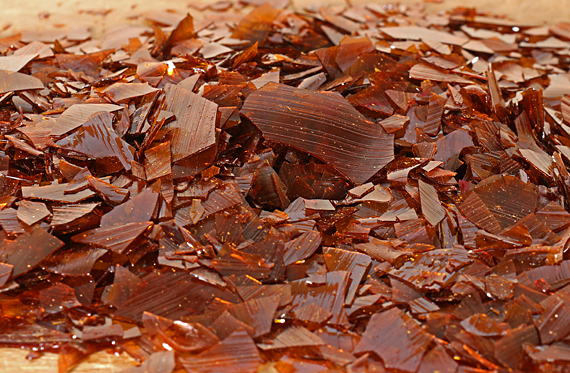
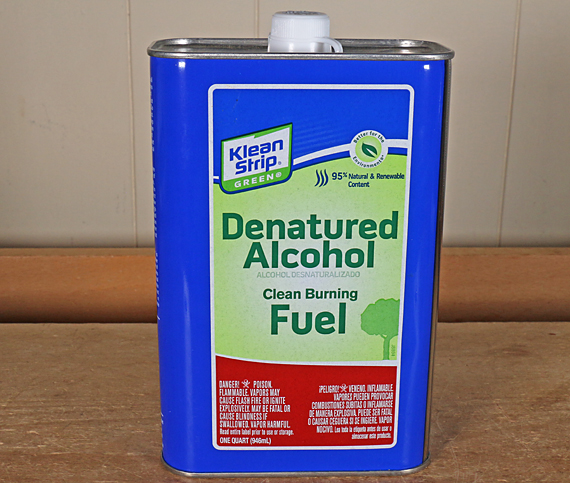
I turn dewaxed flakes into powder in a spice grinder and mix the powder into Klean Strip Green denatured alcohol. I use glass canning jars with two-piece lids to minimize the problem of ordinary lids sticking (you’ll see). Swirl the jar repeatedly over about 20 minutes or so to get all of the shellac to dissolve. Some will latter gum up on the bottom but that is no problem because it is easy redissolved.
This is nowhere near difficult and has important advantages over premixed shellac. First, you can choose the shade that you like – super blonde, blonde, orange, ruby, garnet – to achieve the look you want. Of course, experiment on scrap wood.
I also know that it will be fresh and thus dry properly because I bought the flakes from a reliable dealer and I know when I mixed it. I store the flakes in the refrigerator. I mix what I need for a project. Mixed dewaxed shellac will probably last at least six months but if you have any doubts, smear some on a smooth surface. It should dry hard quickly and not remain at all tacky.
There are several good shellac dealers. I have had good luck ordering from Shellac Shack.

Why Klean Strip Green? The MSDS says it is 80-90% ethanol, which is very good. It evaporates quickly. In my opinion, there is no need to bother with exotic alcohol concoctions or Everclear from the liquor store.
[Addendum: A reader has pointed out that the Klean Strip Green denatured alcohol product is no longer available. However, there are good alternatives available. Please see the Comments section below.]
I use a one-pound cut. [In shellac parlance, a one-pound cut is defined as one pound of flakes in one gallon of alcohol. This equals one ounce of flakes in 8 fluid ounces of alcohol.] That may sound thin but I usually use four coats. Each coat is very fast and easy to apply. I much prefer the reliable incremental approach of using thin, problem-free coats. Also, I do not like thick finishes in general. However, you can build to whatever thickness you want.
As with everything in finishing, always test on scrap, including the number of coats. The color and look will change as you progress through coats.
I prepare the wood surfaces by handplaning and/or sanding. For oak, 220 grit is plenty fine to stop sanding. For a finer-pored wood like maple or cherry, 320 is usually enough. Test and observe. Do the least sanding work possible; it’s boring.
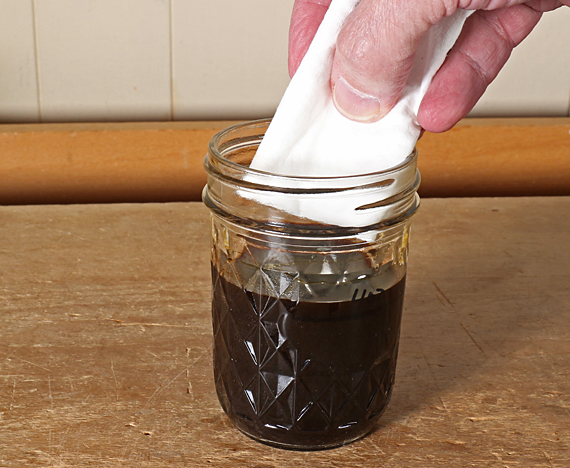
To apply the shellac, I use what I will call a cloth “pad-brush.” I find brushing surfaces with an expensive bristle brush no faster or better. In fact, after repeated experimenting, I get more reliable results with my padding method. For detail work such as moldings, brushing is better.
I use lint-free cloth such as PFC Paint and Cleaning rags from the home center store. I fold a 6-8″ square of cloth three times to end up with an approximately 1 1/2-2″ x 3-4″ rectangle. The short end with the folds (i.e. not loose ends) acts like a combination pad-brush. I dip that end into the jar and pick up enough shellac to be just short of drippy.

The key now is to move fast! Mimic smooth, fast airplane landings and takeoffs with the cloth on the wood. Keep a “wet edge” and do not allow the shellac to flow over edges and ends. When practical, say for a 15-18″ long panel, apply shellac to the full length and then go to the next row. It is easier to neatly blend application strokes laterally than end-to-end.
Do not be intimidated by what you may have read and do not make a big deal about this. Your job is to get the shellac on the wood thinly and smoothly without drips, sags, or ripples. Remember, this stuff dries extremely fast. Remember too, you can correct errors with sanding or by partially redissolving uneven runs or build-ups with an alcohol soaked pad-brush.
After the first coat, I sand with usually 220 grit to remove grain raising, dust, and application imperfections. This goes better with just hand holding the sandpaper or using a very soft block (even cork is too firm). Use a light touch.
I can usually get the second coat on by the time I have finished all the parts with the first coat, such as by 30-60 minutes or so. After the second coat, I lightly sand with finer paper, say 320 or 400. After the third coat, I very lightly touch up sand with 400. Do not overdo these sandings; some may not even be necessary. Shellac is a fast finish; not like the days of waiting with varnishes or oil-varnishes.
Depending on the sheen you want, you can sand after the final coat. It will probably already be smooth if you have done a good job but do not worry about slight remaining roughness, just remove it. I do not like high sheen finishes but I do like smooth finishes. I lightly use 2000 grit silicon carbide paper after the final coat. Sometimes a 2500 Mirlon pad gives me the look I want.
Usually that is all but sometimes, such as for mahogany or sapele, a buffed coat of wax gives a nice look. I still like Renaissance microcrystalline wax.
For some reason, there is commonly an intimidation factor with applying shellac. Forget that. It is not difficult. Give it a try. Applying shellac gives a wonderful sense of immediacy, and you can adjust the look to what you want within a wide range. Also, there is a certain authentic clarity that a shellac finish produces.

