Archive for ◊ August, 2017 ◊

Author:
• Tuesday, August 29th, 2017

Pat Warner

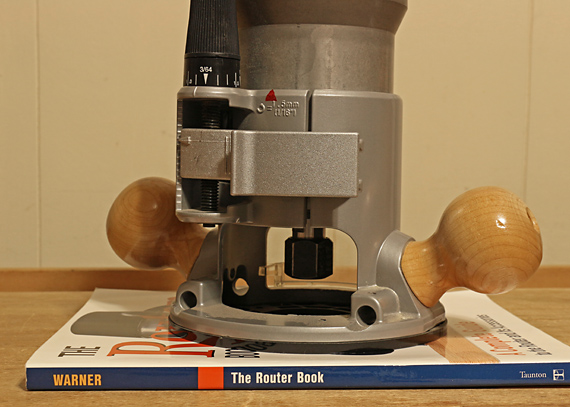
The passing of Pat Warner, July 28, 2017, should not go without tribute. His contributions to the techniques of woodworking is among the finest of our time based on his unsurpassed knowledge of the use of one of our most versatile woodworking tools, the router. He was truly an expert’s expert.

Especially remarkable were his profound insights into the precision tolerances involved in tooling and work processes, as well as his ability to manage them in the shop. His hands-on inventiveness produced an impressive array of precision tools and jigs. His writings, full of intelligence and clarity, include four books, numerous articles, and the resources on his website.

I never met the man but his generosity and kindness were evident in the assistance he provided to me by phone. There was no doubt I was taking in the advice of a rare master craftsman. For countless woodworkers, our approach to not only the use of the router, but to small-shop machine woodworking in general, owes greatly to Pat Warner.

Category: Ideas  | 7 Comments
Author:
• Friday, August 25th, 2017

mortise jig wedge clamps

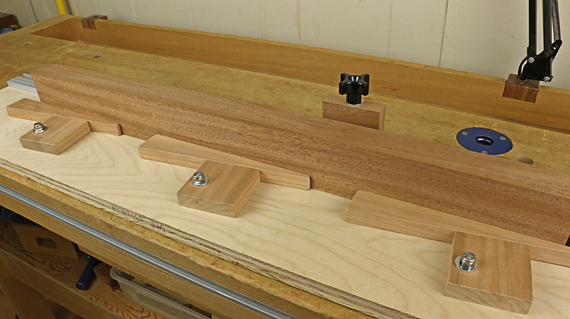
In two earlier posts, I presented a router mortise jig. As writing is a good occasion to rethink matters, I have upgraded the clamping system on the jig. What’s more, this general design for a wedge clamp system can be applied to other shop jigs and fixtures to increase their holding range.

The mechanical advantage produced by the humble wedge is a wonderful earthly thing. I used larger blocks that rotate on an off-center pivot to accommodate a much greater range of workpiece width. The plywood base of the jig is also wider than the original to allow for this, and thicker at 3/4″ for greater strength. The blocks and wedges are 5/8″ thick.

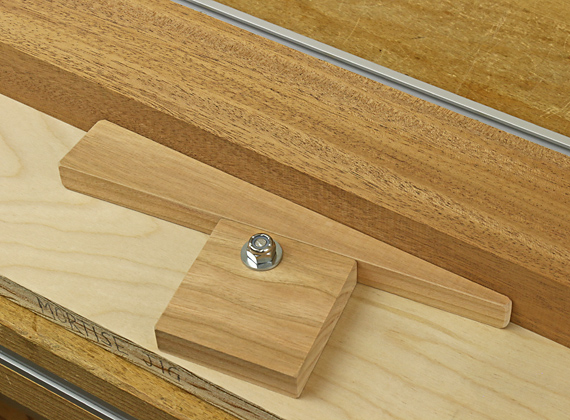
Each block is 2 1/2″ square. The center of the pivot hole is 1/2″ from one edge, and 1″, 1 1/2″, and 2″ from the three other edges. Thus, there are four different rotational positions to create a large range of clamping width capacity.

Below, the block is in position to clamp the widest workpieces.

wedge clamps

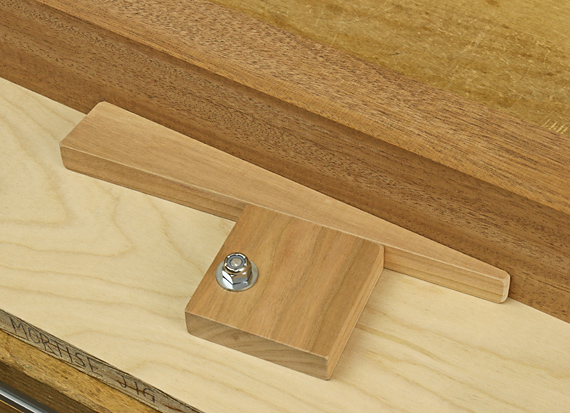
The wedge is 8 ¼” long with a 1:7 slope. This produces slightly more than 1/2″ range of clamping width, which spans the difference from one block position to the next.

Below, the block is in position for the second-to-narrowest clamping capacity.

wedge clamps

A 1/4-20 x 1 1/2″ hex bolt, unthreaded in the 5/8″ nearest its head, enters from the bottom of the base with the head recessed in a counterbore. It is secured above the block with a nylon-insert lock nut, which is tightened to allow free but firm rotation of the block.

The wedge clamps work so well that they may obviate the need for the toggle clamps. The wedge system particularly makes the jig better for mortising frame members. Because these are narrower than leg blanks, they are best clamped in a pair to increase the seating width for the base of the router jig.

Author:
• Wednesday, August 23rd, 2017

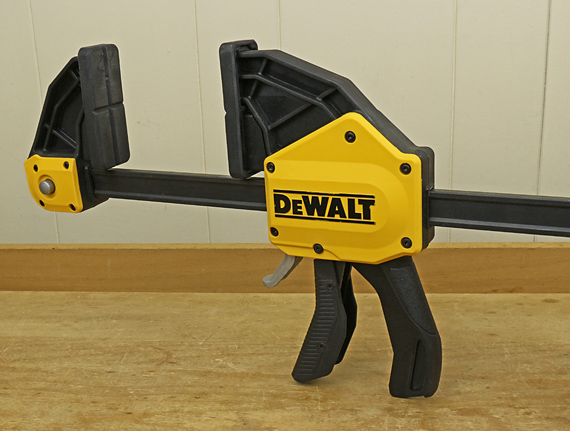
DeWalt XL trigger clamp

Of all the squeezy clamps that I have tried out in a store or used in the shop, this is the first one that I can reach for with confidence.

The tightening handle is big and comfortable, making it pleasant to apply the rated 600 pounds of force. The bar is a sturdy I beam. The release trigger is readily accessible and has a nice curve onto which I can hook my finger, making it easy to release the clamp pressure. And my fingers do not get bumped in the process. Most of the other clamps of this type that I have tried out have an annoyingly uncomfortable release.

What I like most are the large rectangular pads, which are almost like those of a parallel bar clamp. The throat depth is about 3 3/4″. The pad material is just right – soft enough to protect the work but not squishy. The fixed jaw can be easily reversed to use the clamp as a spreader.

Squeezy clamps are wonderfully handy for bench work, but have a tendency to shift the workpiece alignment when used for assembly. This is inevitable if you squeeze down the force in one fell swoop.

I suggest the following technique to avoid workpiece shifting. Gradually pump in the jaw contact while maintaining the workpiece alignment with the other hand, readjusting it if necessary. As you take up the toe-in of the jaws (which is mostly in the moveable jaw) and build just a little bit of pressure, the clamp itself will stabilize. This is the key moment because then, and only then, can you bull down the force and the workpiece will remain stable. I usually find it best to hold the fixed jaw against the workpiece and advance the moveable jaw into contact.

You can find them at the orange palace and elsewhere.

This review is unsolicited and uncompensated.

Author:
• Tuesday, August 15th, 2017

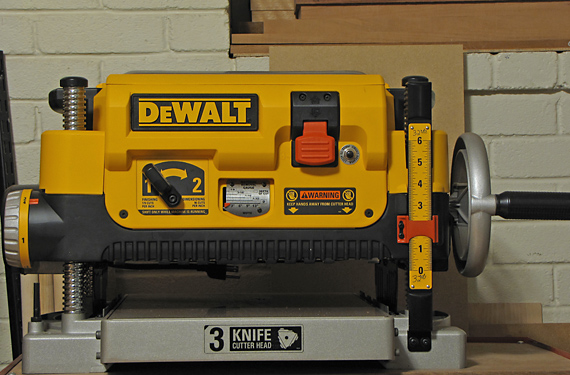
DW735

Commenting on a recent post, a reader asked:

Do you typically use your DeWalt 735 for planing, and your Hammer A3-31 for jointing? I am starting to look at combo jointer-planer units, and would be interested in knowing if you typically use separate machines for these two functions. You mentioned in a previous article you have a Byrd Shelix cutterhead on the DeWalt and straight knives on the A3-31.

My reply follows-up on, and reinforces the large amount of material on this blog regarding jointer-planer combo machines, the Hammer A3-31 in particular, the Byrd Shelix spiral cutterhead on the DW735, and options for the first machine a woodworker should buy. Thanks for asking!

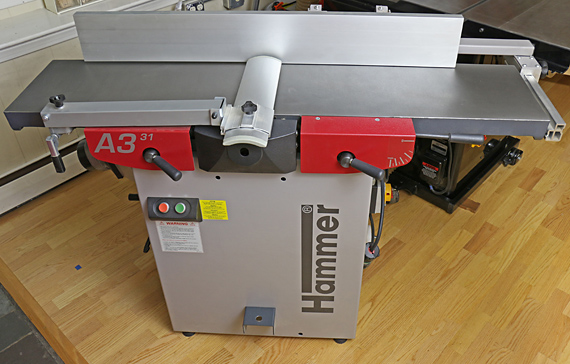
Hammer A3-31

The big factor is the wood. For easy-going boards – tame species, not rowed, no curl/blister/birds eye, etc. – I will usually go ahead with the thicknessing on the A3-31 because it is already up and running, and I know the results will be good. For figured wood, I will definitely go to the Shelix because it performs magnificently for that. For very hard or abrasive species, even without figure, I prefer the Shelix to save wear on the straight blades in the A3-31.

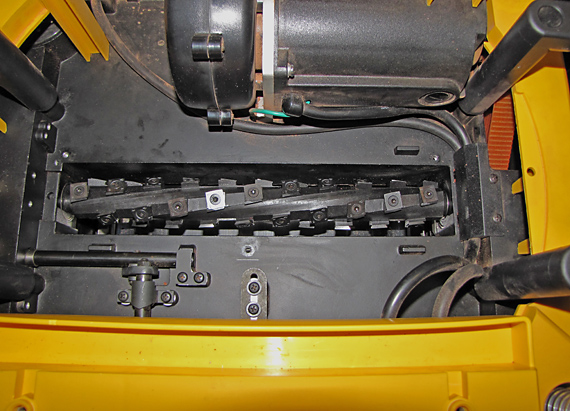
Byrd Shelix on the DW735

A couple of other factors also come into play. The DW735 has a longer snipe than the A3-31, though the depth of both is very small. Snipe can be avoided altogether with continuous feeding, but that can be awkward in a one-person shop.

Also, a tiny bit of thickness cannot be removed well on the final pass with big planers because the impressions created by the metal pawls will often not be entirely removed by the shallow depth of cut. Sometimes I do want to remove just a very small amount such as for matching another piece that I’ve messed up. I can remove as little as I want on the final pass with the 735 because the rubber rollers do not create impressions (assuming they are reasonably clean).

As for width, the A3-31 cuts 31cm wide (hence its name), about 12.2 inches. I want every bit of that. A wide jointer is a wonderful thing in the shop!

I installed the Shelix in the DW735 about one year before I bought the A3-31. Then I did not want to spend the extra money for a second segmented spiral cutterhead, this time on the A3-31. I expected to use the 735 with the Shelix for almost all of my thicknessing, but in time I have come to use the A3-31 with its straight blades for plenty of my thicknessing too.

I think for most of us, shop equipment evolves with our resources rather than follows a master plan. I am content with my current setup. However, if I were to start fresh and buy one machine, it would be an A3-31 with their “Silent Power” spiral cutterhead.

For an option that is less expensive than a big jointer-planer combination machine, but is still highly versatile, start with a good portable thickness planer as your first machine in the shop. I still recommend the DW735. Then apply the following process:

Jackplane and/or scrub plane a rough surface on one side of a board. It should have no cup, twist, bow, or flex. It will not be pretty, but it only needs to register on the planer bed. Draw pencil lines every few inches across the opposite side of the board, including close to the ends.

Send the board through the planer with the worked side down on the bed. Take the passes necessary to remove the pencil lines, indicating that the blades have touched all of that surface. Then, flip the board and clean up the side that you worked with the hand plane. Then joint an edge by hand, rip to width, and clean up with a hand plane.

I do not recommend a 6-inch jointer as a fundamental tool for a serious furniture maker. It is limiting from the start and will very likely be obsolete later. On the other hand, wouldn’t it be nice to have a 16-inch Felder jointer-planer with a spiral cutterhead? Yes, yes it would.

Category: Tools and Shop  | One Comment
Author:
• Sunday, August 13th, 2017

A2 steel chipping

Before making my point, here is a synopsis of the differences between A2 and O1 blades, as I understand them, and have experienced in using them. Better however, you should also read a much more learned discussion by the Man of Steel himself, Ron Hock.

In general, for comparable quality blades:

  • O1 is finer grain steel and can be brought to a sharper edge than can A2. It is not a big difference but may be important depending on the application. Some dispute this; perhaps O1 only seems to get sharper because it is easier to sharpen, and because of this next point.
  • Due to the difference in grain size, the honing angle for A2 should be a few degrees higher than for O1.
  • A2 is more difficult to sharpen than O1, both in speed and in feel on the stone. However, both are well within the range of a basically skilled sharpener.
  • Owing primarily to its tough chromium carbide particles, an edge in A2 is more durable than in O1. However, that is not the whole story because . . .
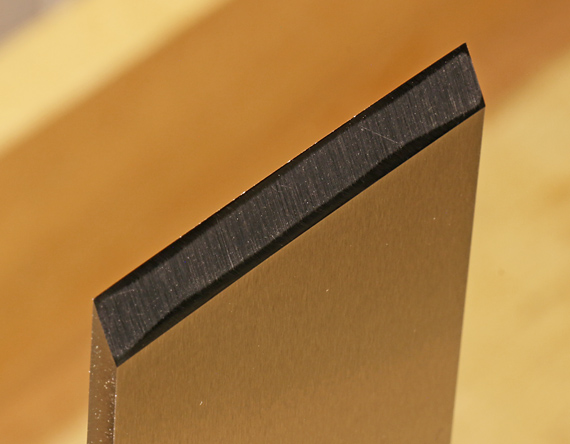
  • They may dull differently. The O1 edge is likely to slowly and simply round over, while A2 may chip. Ron explains that chipping occurs when oversized chromium carbide particles in A2 steel pop out of the edge.

This last point is the one I would like to explore, specifically with regard to differences among A2 blades. We would expect some differences among manufacturers because they vary in their formulas and processes. However, I suspect there can also be significant variations in edge behavior – the tendency to chip – among blades of a given brand, and even within a single blade.

I want slow and steady dulling wherein the edge simply rounds over increasingly. I do not want precipitous edge break down – chipping. It is unwelcome, though I suppose tolerable, in a jack plane, but downright infuriating in a smoothing plane. Everything is going fine until, ugh, those little ridges suddenly appear on the wood surface that I am trying to finish plane to otherworldly exquisiteness. And so, a certain Bad A2 Blade (pictured above) has been banished from my shop. It got those hideous chips as I planed not teak, but affable poplar, and only for several minutes.

I have sharpened this blade exactly the same (same stones, 33° secondary bevel) as other A2 blades which hardly ever chip in typical use. Even more annoyingly, the bad blade has behaved worse after some sharpenings than after others. I would think 33° is high enough for the grain structure of A2, and anyway, going a bit higher gave little or no better results.

Perhaps chipping is not a problem with any blades of one or more brands, and thus the problem could be avoided simply by choosing a good brand. Interestingly, I have two other A2 blades of the same brand as the Bad Blade that do not have this tendency to chip. I also have two Hock A2 blades that give me no such problems, and I had another blade of another brand that exhibited a milder but still troublesome tendency to chip.

This is not a tool test, so I cannot fairly generalize from this sample size as to which brand, if any, is best in this respect. I can only relate my experience. There is some test evidence that Hock A2 blades are indeed better in avoiding chipping, but this is based on testing a single blade. I wonder if one of the magazines might explore the issue using adequate sample sizes to account for potential variability within, as well as among, brands.

Which brings me to my main point: There seems to be considerable inconsistency among A2 plane blades – among brands, within at least some brands, and perhaps even within individual blades. To me, this uncertainty is a disadvantage of the A2 genre as a whole. That is not to dismiss A2 altogether, but simply to recognize this among its disadvantages

So, for my bevel-down smoothing plane, it’s O1. A2 is just not worth it in that role; the uncertainty plus its inherent disadvantages outweigh its advantages. By the way, PMV-11 is another matter for another day, but I do currently use it in my bevel-up planes. And the Hock A2 in my good old bevel-down jack is going to stay there because the edge is wonderfully durable and it does not chip.

Category: Tools and Shop  | 8 Comments
Author:
• Tuesday, August 01st, 2017

Woodturner's Wonders CBN wheel for Tormek

I was pretty much content with my Tormek for grinding tools for 16 years. It sacrificed speed for relaxed and reliable grinding with excellent jigs, especially the SE-77. Though that tradeoff suits me, I like woodworking a lot more than sharpening, so a faster pace at the grindstone was always welcome. Thus I was drawn to try a CBN grinding wheel available from Woodturner’s Wonders.

After working with a CBN wheel for several months, I am completely sold. The main reasons are simple: It is much faster than the Tormek OEM wheel, and it never needs dressing. For my sharpening system, detailed in an earlier post, the 200-grit wheel works extremely well.

I can grind the primary bevel out to the edge, such as for completely reshaping the edge, with no worry about drawing the temper, even using the wheel dry. From there, I will usually do a bit of work on the 45µ DMT DiaSharp stone, and progress from there. If I stop grinding the primary bevel short of the edge, I may go directly to the 9µ DiaSharp, or touch up on the 45µ, depending on what I am dealing with. In any case, I then move from the 9µ, to the 3µ DiaSharp, and finish with the 0.5µ Gukomyo. Creating even substantial camber on a plane blade using the CBN wheel, particularly with the SE-77 jig, is so easy that it feels like cheating.

Woodturners Wonders sells these Tormek replacement wheels, called “Tornado Waterless CBN Wheels,” in grits from 200 to 1200. Depending on your sharpening system, you may want to consider the finer grits. Of course, finer grits are slower but leave shallower scratches. I found the 600 to be slower than I wanted, but it still beat the Tormek OEM wheel.
CBN wheel for Tormek

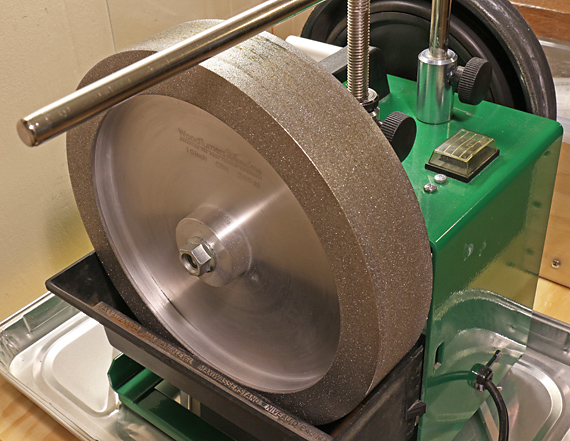
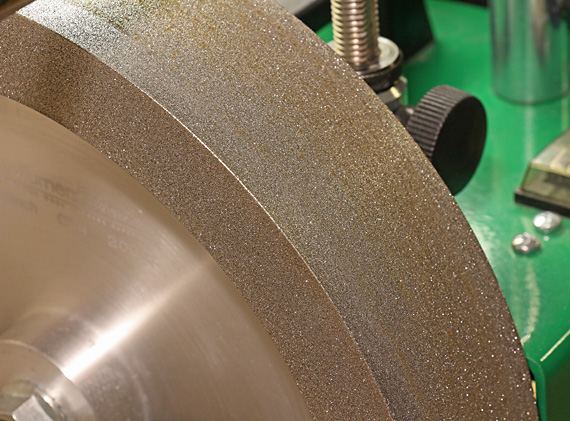
The Tornado wheel is two inches wide, flat and true, 10″ in diameter, with one-inch sidewalls. If I were a piece of tool steel, I’d wave a white flag at first sight of this thing. CBN, cubic boron nitride, is a crystal lattice of boron and nitrogen molecules, with a hardness near that of diamond, but with superior chemical and thermal stability, which increases its durability. Ken Rizza of Woodturner’s Wonders, the same guy who sells this great lamp, also sells a wide variety of other CBN wheels for regular bench grinders, including radius-edge wheels.

By the way, fellow Tormek users, I do not miss the touted dual-nature (220/1000-grit) of the Tormek OEM wheel, which is achieved by using the grading stone. I have always found this to be of marginal benefit and just not worth the hassle. Incidentally, the Tormek leather honing wheel does not get much use in my shop; it is not part of my main sharpening system.

The Tornado wheel can be used dry on the Tormek. Aggressive sharpening will produce some heat but I have not found this significant because the work is done so quickly. However, I prefer to use a little water to reduce the spread of the steel dust, including into the air. I just wipe off the accumulated steel dust on the tool itself.

[UPDATE: Based on Ken Rizza’s comment (see below), I did some more experimenting and found that just two or three light spritzes of water on the wheel is sufficient to keep the steel dust contained. I’m done grinding before this small amount of water evaporates a few minutes later, leaving the stone dry. I will not use water in the trough at all. To emphasize, heat build-up on the tool is not an issue and is not the reason I use the water.]

One more thing. If your Tormek wheel, like mine, has been on since the pre-smart phone era, it may be tough to get off. The folks at Tormek advise us to remove the stone with the shaft, use penetrating oil on both sides of the shaft, and let it work in overnight. Tap the shaft with a mallet. Repeat. It may take days. Don’t ask me how I got the wheel off my Tormek because it wasn’t pretty.

This review of the WTW CBN wheel is unsolicited and uncompensated. I just want you to have great tools . . . so you can make great stuff from wood.