In this series, we will take a close look at gauges, sorting out their useful features and subtle refinements. Though basically simple tools, they deserve our attention because it is awfully difficult to do fine work without clean and accurate marking out.
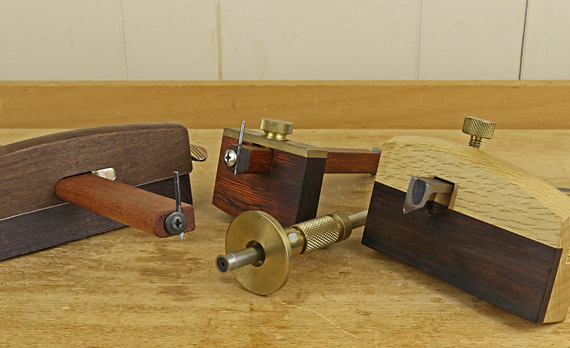
Notice the common feature among these gauges: the point or cutter is at the end of the stem. I prefer this because it makes the marking action easily visible. The starting and stopping locations, and the depth of the mark are plain to see. This feature also makes it easy to set the gauge to an edge or mark in an existing component of the construction.
Most of the available gauges, like the one below, have the point (or cutter) placed well in from the end of the stem where it is less visible. True, tilting the gauge in use, as one should, can give you some view of the point if you push the gauge, but not much if you are drawing the gauge toward you. True also, depending on the situation, attention may be better paid to the registration of the fence against the edge of the board. Still, in my view, it is better to always have the option of easily seeing the point.
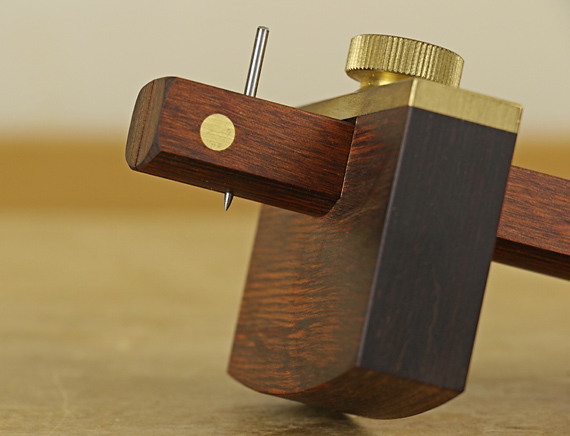
The mortise gauge is another matter in this regard, which will be covered later in this series.
I have modified the two gauges on the left in the photo at the top. Leftmost is a Japanese gauge that originally used a cutting knife but is now a 12″ panel gauge. Second from the left, in the back, is a modified Cullen gauge. In front is the Titemark gauge. More on these later in this series.
On the right in the photo at the top is a wonderful Japanese cutting gauge that is just about perfect. This is the gauge I always use for dovetailing. It has a broad, beefy fence that is easy to grip in varied ways. The hard exotic wood inlay glides smoothly on the work piece and resists wear.
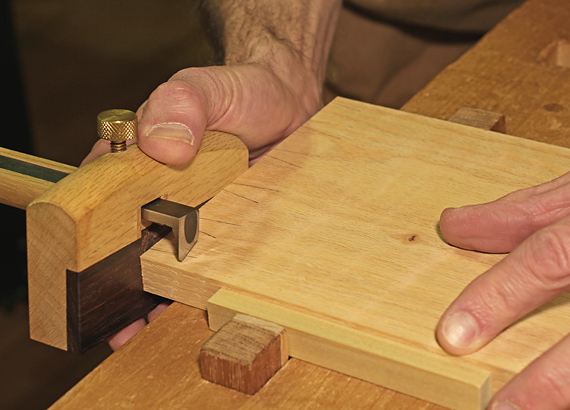
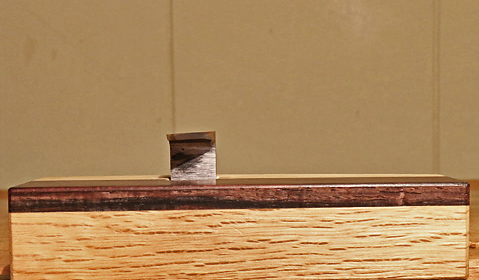
The knife has a modified V-point with the bevel toward the fence, which places it in the waste wood. This gauge is primarily used on the pull stroke. Accordingly, the plane of the face of the knife is slightly angled away from the fence on the side near you. (See the side-view photo, below.) This tends to draw the fence inward, helping to keep it snug against the edge of the work piece. This angle does not at all reduce the quality of the cut.
I much prefer to avoid leaving gauge marks in finished dovetails. One way to do this is by making the gauge cut shallow but I prefer to eliminate that variable by gauging the cut only where it is needed and thus where it will be automatically eliminated. This goes for tails and pins. This way I can gauge a substantially deep cut, which helps when chiseling out the waste, and not worry about having to later plane away any marks.
The short arm of the V-point is very helpful to bring the cut up to the penciled tail lines and the squared pin lines by nudging the gauge forward.
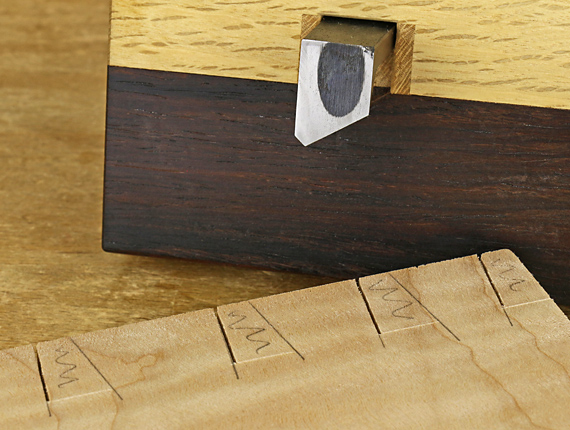
The laminated Japanese blade takes a very sharp edge and holds it very well.
I bought this gauge about 15 years ago, as best I recall, but similar ones are quite expensive now. Suzuki-ya sells a model with double blades, Iida with a single blade, and Tools from Japan sells a much less expensive double-blade model without the V-point, but perhaps that could be worked in by the user.
One more thing. I clamp the work piece for any major gauging such as dovetail and tenon layouts. It makes no sense to me to do the cool, casual whip of a gauge across a work piece that is grasped with one arm, like we see in some videos. Gauging is important, just like sawing and chiseling, so it is worth the time and effort to clamp the work piece.
Next: Is there a gauge that works well both along and across the grain?
