Stock preparation is the essential foundation for any woodworking project, and there are three keys to doing it well: accuracy, efficiency, and knowledge. A jointer-planer combo machine can be a big help.
There are countless pitfalls in stock preparation that can haunt even the most skillful woodworking that may follow. Twist, convex edges, and bowed surfaces are common inaccuracies that create problems. As for efficiency, well, I like making things and I do not want to spend forever grunting out stock, so the noise emanating from well-tuned machinery is music to my ears at the start of a project. Still, none of this works if a woodworker fails to appreciate wood movement from moisture exchange as well as from stresses created in the drying process.
By way of explaining how I settled on the combination machine, let me recount my stock preparation history. I think many readers will relate to much of it. Very early on, two things became obvious. First, it is very limiting to use only the thicknesses available in pre-dimensioned hardwoods, and second, dimensioning with only hand tools is slow and really not a lot of fun.
So, I got one of those ubiquitous cast iron 6″ jointers, and rigged up a marginally effective way to also use it as a thicknesser. Then, some years later, in the late 1980s, I bought a Ryobi AP-10 portable thickness planer, and its 10″ capacity made me feel like I was in heaven (“. . . man”). Still, I was stuck with only 6″ of machine jointing capacity and, despite trying the workarounds found in the tips sections of magazines, I was still doing too much hand work and longed for more machine jointing width, especially since I enjoy using fairly wide boards in my projects.
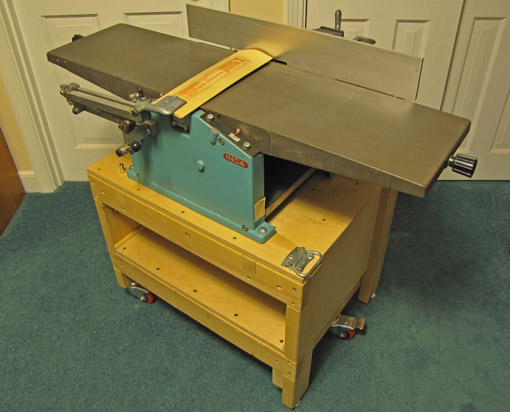
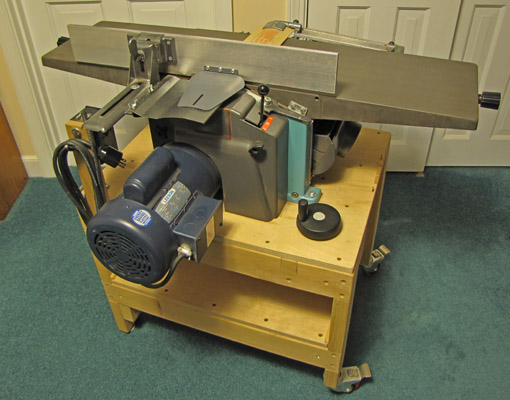
Enter, the Inca 10″ over-under jointer-planer. This wonderfully accurate machine, with its precise cast aluminum tables and great Tersa cutterhead, served well in my shop for more than ten years, perched on the feature-rich, battleship-grade stand I made for it. The only thing the dear Inca lacked was a lot of muscle, and so when I upgraded, I felt at peace selling it to a musical instrument maker.


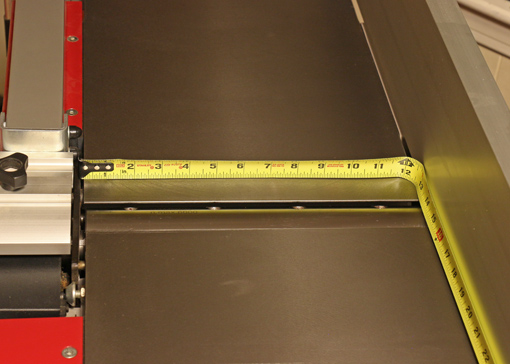
Now, after 2 1/2 years of using the Hammer A3-31, and privately answering many inquiries about it, I’m ready to write. The opening photo shows off its width. I will discuss the A3-31 in some detail (spoiler alert) – I like it! – but will precede that with a post to consider the merits of the whole idea of a jointer-planer combo.
One more thing. I made the case several years ago for a portable jointer-planer as an excellent choice for a first machine for small-shop woodworkers making furniture and accessories. After many discussions with woodworkers during the ensuing years, I still hold that opinion, though I certainly understand how many feel a bandsaw should be first in line (I place it second) among other valid opinions.
Keep in mind that with a thickness planer as the only machine available, the initial jointing of one face by hand (which, again, I’d rather not do!) only has to produce a surface that will sit on the planer bed without twist, bow, or flex. It can be ugly with tearout, scrub plane gutters, or whatever; it just has to register on the bed so the planer can produce a flat surface on the opposite face. Then the board is flipped over, etc.


Am looking forward to this series! (and especially any comparisons to flattening by hand and then using a powered thicknesser)
Matt
I’ve noticed your Hammer in several photos and the profile of your shop in FWW and wondered how it was working for you, especially since you still have an additional thickness planer.
PS–any more details on the stand for the Inca?
Matt,
The stand is constructed with notched 2x4s, glued and screwed. If you look carefully at the photos, notice also the two notched-in cross members that are positioned to receive the lag bolts that hold down the base of the machine.
Heavy plywood panels eliminate torsion in the structure – it is super stiff. The stand therefore moves on THREE heavy duty locking urethane wheel casters from Woodcraft. The three-point stance compensates for any irregularity in the floor. When parked for use, a leveler on the leg on each side of the unpaired wheel gets extended to meet the floor, making for a very stable stance.
The lower shelf, in addition to helping to eliminate torsion, is handy for storing the outfeed table when it is removed for thicknessing. There is also a post for the switch box, plus hooks to wrap the cord. There are holes in the top to store the thicknesser crank and a shop-made drill attachment used to crank the thicknesser table very fast with a power drill.
That stand is miles better than the one offered by Inca, when they were still in business.
I’m glad that the whole setup is still making music, so to speak, in someone else’s shop.
Rob
Phil,
I still use the DW735 a lot because I installed the Shelix cutterhead a few years ago (see the series on that in Series Topics) which is fantastic for figured woods, which I use a lot, and there is an extra inch of width (13″) over the Hammer.
Segmented cutterheads are available for the Hammer and other combo machines such as the Jet. My Hammer has conventional blades which do a good job for general work.
Rob
Rob,
Great series on the Hammer a3-31. Thanks for sharing.
I own one and I am currently adjusting for coplanar. I require some adjustments on the infeed hinge side per the manual. As you pointed out the documentation doesn’t describe the adjustment of the axis very well.
Could you share how the two adjustment set bolts/nuts (on the infeed hinge side) affect the axis?
Thanks
Jon
Thanks, Jon.
What do you want to fix, misalignment of the tables across their widths (twisted relative to each other) or along their lengths (tipped toward each other – a valley – or away from each other – a mountain)? Or both, in which case you correct the width alignment (twist) first.
So, the process starts with an assessment.
Rob