Archive for ◊ May, 2014 ◊

Author:
• Friday, May 30th, 2014

fitting tenon

A good fit of the tenon to the mortise can be described as a comfortable swish fit. You should not need to pound the joint together, nor should the tenon simply drop into the mortise, nor should the tenon wobble in the mortise.

This matters because a mortise and tenon joint derives its strength from the restraining effect of the shoulders transferring stress to the bond between the tenon cheeks and the walls of the mortise. Against this shear stress, a well-made bond has great resistance, stronger than the wood itself.

To create a square assembly, M&T joints must also be true – the tenon cheeks should be in planes parallel to the reference face of the rail. Also, ideally, the tenon should have a good fit over the entire surface area of the cheeks, though perfection is not necessary because the glue does permit some leeway.

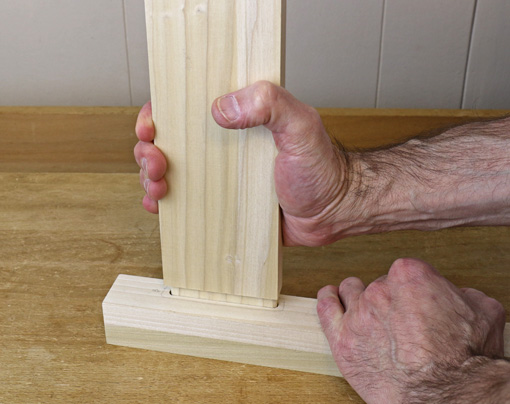
Whether the tenon is made by hand or machine, it is very helpful to have reliable ways to adjust the fit using hand tools. Test the corners of tenon into the mortise and feel for tight areas, then check the cheeks for burnishing. Look for bumps and steps from inaccurate sawing.

A rabbet block plane is one of my two favorite tools for trimming tenon cheeks. It starts easily, works right up to the shoulder, and automatically makes a flat surface. Pictured next to it is Lie-Nielsen’s big 1 1/4″ shoulder plane, which also can be used. Though it’s a great plane for other tasks, it and other shoulder planes are a bit tippy for this work.
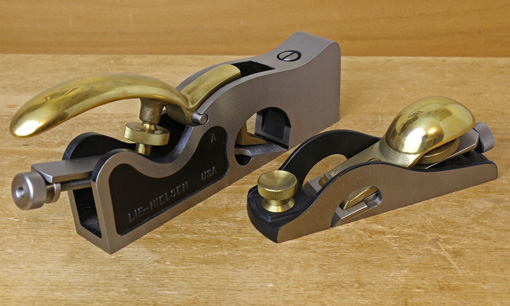
rabbet block and shoulder planes

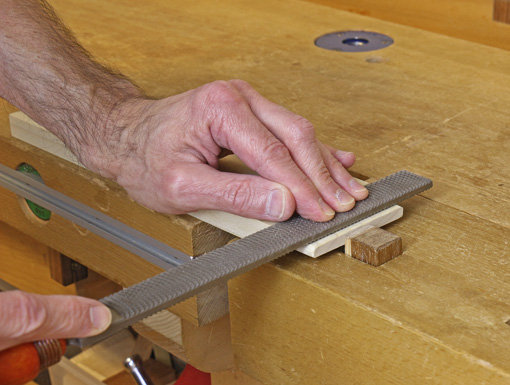
My other favorite is the Iwasaki 10″ coarse float. One might expect a file or rasp to round over the surface but this tool has such a decisive bite it can be controlled very well. What’s more, it leaves an incredibly clean surface, without tearing, for a tool with such big teeth. The safe edges prevent damage to the shoulder. I use three fingers on top of the tool for feel and control. I like this tool a lot.
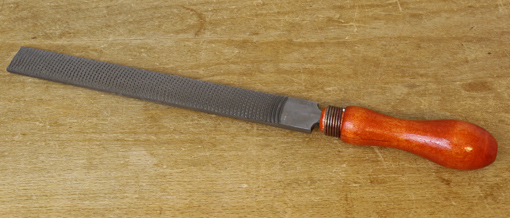
Iwasaki float

using the Iwasaki

A wide paring chisel is another good option, especially for localized clean up. The length of a paring chisel offers considerably more control than a bench chisel. Pressure with left hand fingers on top coordinates with the right hand, which transmits depth of cut via the handle. Still, for a thin shave down of the whole tenon, the rabbet plane works better.
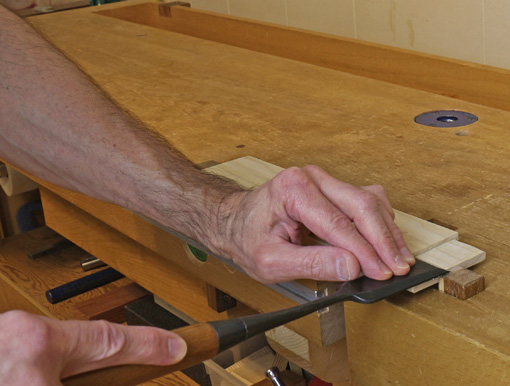
using paring chisel

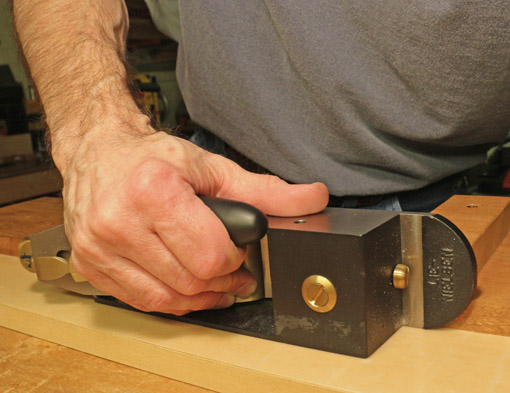
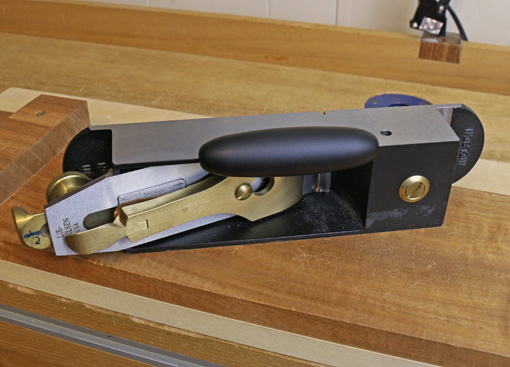
Yet another option is the router plane. I only use this if I think I’ve messed up the trueness of the tenon and need to establish a cheek into a plane parallel with the face of the rail.

Press the sole of the plane onto the face of the rail and start by setting a light cut at the most prominent part of the cheek, then work down from there. Mostly swing the plane, pivoting on the rail face, more than push it, to maintain steady contact and thus depth control. The tool is acting as a gauge to make the cheek face parallel to the rail face.
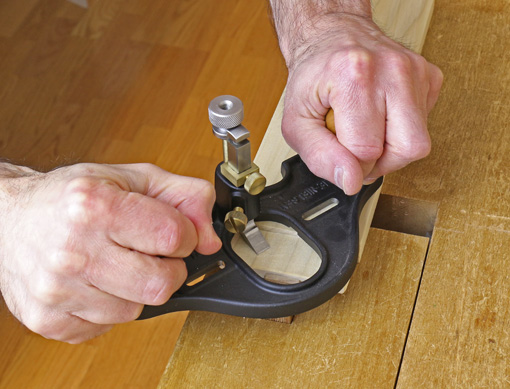
router plane in use

I generally hand saw tenons because setting up machines is usually not worth it for me for one-of-a-kind pieces. Even with several good options for fine tuning the tenon cheeks, I strive for a good fit directly from the saw, maintaining a one-sided tolerance to avoid having to patch up a tenon.

Category: Techniques  | Comments off
Author:
• Sunday, May 25th, 2014

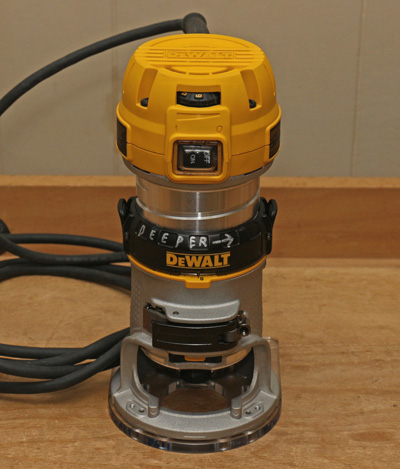
DWP611

Just a few woodworking machines have the adaptability and almost the friendliness of hand tools. Chief among them is the bandsaw, but the compact router, especially the DeWalt DWP611, also earns a place in that category.

In the stage of building where the big machines have been unplugged, the radio is on, and the hand tool work is proceeding, it still is handy to call on a controllable, precisely adjusted tool that has more power than a horse.

For example, in mortising for hardware, I will clear the bulk of the waste and produce an accurate final depth with freehand routing. Rather than set up a jig or fence for the router, I simply chisel to the side layout lines, though this has been made much easier by the router.

On the other hand, for the socket part of a short sliding dovetail, I make a dedicated jig and use a bushing. The only chisel work is to square the end.

My general approach is to use the power of the compact router and, when convenient, its precision, especially in depth. I take advantage of its maneuverability for freehand work and use jigs and fences when necessary or when there is a clear advantage in overall time spent.

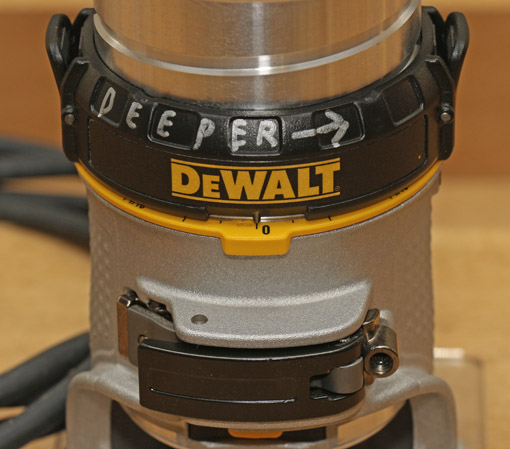
The best feature of the DWP611 is the precision cutting depth adjustment. The indicator on the large black adjustment ring moves more than 1/4″ along the adjacent yellow scale ring for each 1/64″ of depth change. When adjusted in the upright position, backlash is minimal but even that amount can be easily cancelled by resetting the zero mark on the scale ring, which is movable. After the depth is dialed in, the cam clamp holds it reliably. In this way, cutting depth adjustments rival the precision of a paring chisel or router plane.

DWP611 adjustment

This is a larger and heavier tool than the Bosch Colt and the Ridgid model but I found neither could be adjusted in cutting depth with the precision of the DeWalt, which is still easy to maneuver with one hand. I’ve used the DWP611 for about three years now and it is my clear favorite.

The 1/4″ collet is a two-piece self-releasing type, a must for any router. Unfortunately, bit changing involves one wrench and a shaft lock, a sadistic system, though I suppose DeWalt can be forgiven considering the tight quarters of a tool this size. The clear plastic sub-base has an extension on one side that improves stability for edge routing. The base can be repositioned for an optimal configuration of hand grip and sight line. I also bought the accessory base for standard bushing inserts.

The two LED lights that straddle the collet are invaluable for freehand work. The soft-start, 7 amp motor gives surprising power for a small tool.

This tool feels so friendly in hand that it might cause you to let your power-tool guard down. When routing, I remind myself that this little guy really does have more kick than a horse. Also, there is a tendency with this type of tool to get in close to the spinning bit and flying chips, so safety goggles are a minimum must.

A set of 1/4″-shank carbide straight bits down to 1/8″ cutting diameter is helpful for freehand work. Use good judgment and very conservative depths of cut for narrow bits. I also have a 1/16″ bit but I avoid using it.

So, hand tools and power tools can play together. I like to use the advantages of each to find simple and reliable ways to get the work done.

Category: Product reviews, Tools and Shop  | Comments off
Author:
• Sunday, May 11th, 2014

shooting glove

Shooting is a gateway technique that produces reliable accuracy and control unattainable with machines. Here are three simple tips to improve your results with shooting.

1- Put a grippy glove on your left (non-dominant) hand

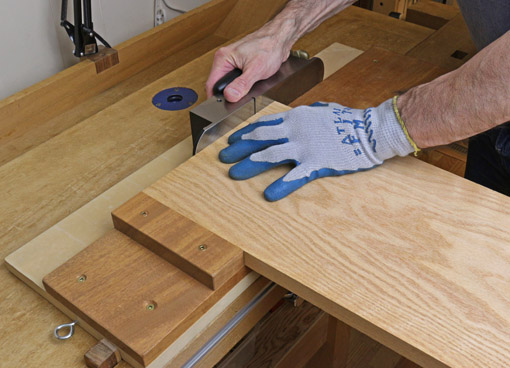
An inexpensive, widely available glove with a rubbery grippy palm adds remarkable strength to your hand. The work piece must be controlled with the left hand in two respects. First, it must not slide or pivot during the cutting stroke of the plane. The torque can be considerable with a wide work piece of dense wood. The glove gives you control with much less effort than a bare hand.

Second, in preparation for the cut when shooting end grain, the work must be advanced a tiny amount along the fence toward the plane. Without this, the blade edge will simply clear the work piece because it has already cut away the previously projecting thickness.

Practically, the work piece is advanced just to meet the toe of the plane sole, as in the photo below. This is done almost without thinking but it is a precise move made more controllable by the gloved hand.

registering the board

2- Simple microadjustability

Everything is not square in woodworking, even when we intend it to be so. For example, when fitting a drawer front to its opening, the sides of the front piece should be made to match the opening, even if it is a bit out of perfectly square.

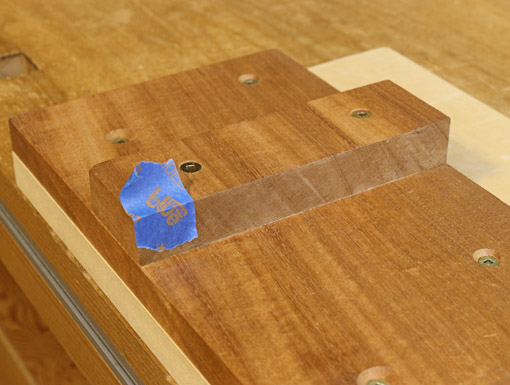
To minutely adjust the shooting angle away from 90°, just place a piece of blue tape at the appropriate end of the shooting board fence. Realize too, that the angle can be adjusted with phenomenal precision by slightly altering the position of the tape.

microadjustability

Of course, this is done empirically, but for some mathematical fun, note that a .003″ thick tape placed at the end of a 7″ fence will change the angle .025° from 90°, and moving it to the 6″ position will adjust that new angle, in turn, by .004°. Using a .001″ plane shaving would create an initial adjustment of .008° from 90°. Shims are magic!

3- Hold the plane like you mean it

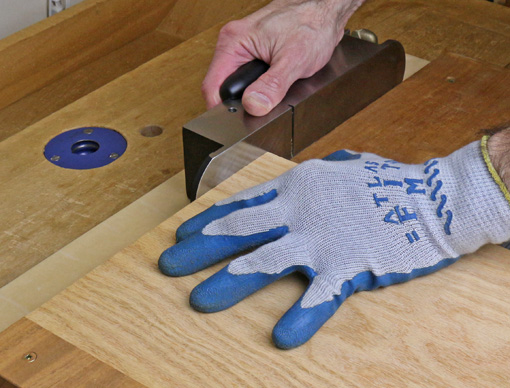
Whether you have a dedicated shooting plane like the #9 I use, or use a nice heavy bevel-up bench plane, or, yes, a bevel-down bench plane, grip that righteous beast over the blade. Get the big muscles at the base of your thumb firmly down on the sidewall of the plane, wrap your fingers around into the throat of the plane, and plant the ends of the fingers on the lower part of the lever cap. That way, you can control the ride of the plane on the horizontal track while keeping the sole tight sideways against the vertical runner.

grip the plane for shooting

Furthermore, you get a good tactile sense of the blade’s cutting action. In concert, all of this promotes accuracy by preventing the plane from tipping in any direction as it takes a firm, uninterrupted stroke.

I like the “hot dog” attachment from Lie-Nielsen on the #9. This is something I imagine could also be readily made by the user.

hot dog attachment

Category: Jigs and Fixtures, Techniques  | Tags:  | 5 Comments