Archive for ◊ January, 2014 ◊

Author:
• Thursday, January 30th, 2014

IMG_1170_edited-2

The visual beauty of wood, its warmth to the touch, and lovely sound properties are so enticing that we might neglect the variety of pleasing scents many species have to offer. Smells are registered deep in the primitive brain in the limbic system where they are associated with memories and emotions, so this is a powerful aspect of wood.

When recently working with some nice quartersawn Douglas fir, the aroma brought me back to my youthful days of projects in humble fir plywood and the simple joy of making things. Continuing to nowadays, the particular scent of a species released by its sawdust and shavings is part of the experience of woodworking and thus, in my mind, part of the personality of the piece.

I think of, as examples, the shop being filled with the aromas of walnut or spicy Port Orford cedar or even the unmistakable horse barn smell of zebrawood. Using canarywood recently for the first time was a pleasant olfactory surprise.

Unfortunately, the aromas then usually disappear under layers of finish, unavailable to the end user of the piece. Of course, with most work, especially things like tables, there’s no getting around that. However, in some casework there is an opportunity to add a wonderful aspect to the piece that will be enjoyed for years to come.

Consider using aromatic woods, left unfinished, for interior drawer parts, case back panels or partitions, and box linings. The “cedars,” sassafras, and even pine are some options.

By the way, I avoid using oil or oil-varnish finishes on the interior of cabinetwork. A light application of a hard-drying varnish or thin shellac are better choices.

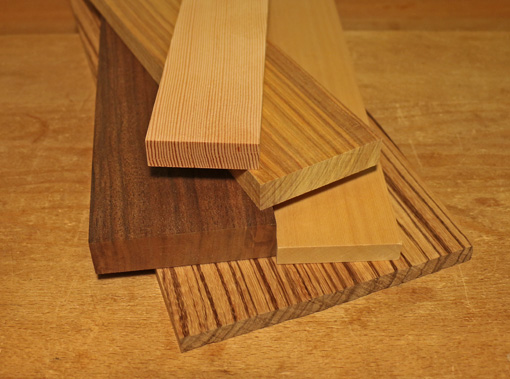
Pictured above are, from top to bottom, quartered Doug fir, canarywood, Claro walnut (left), Port Orford cedar (right), and zebrawood. But you have to meet the woods in person for the full experience.

Category: Wood  | 2 Comments
Author:
• Tuesday, January 28th, 2014

IMG_1163_edited-2

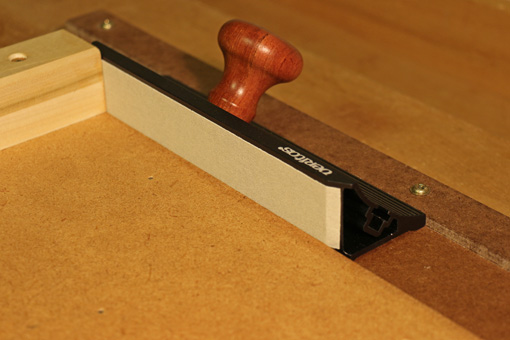
The Veritas Shooting Sander uses the principle of shooting – a guided vertical cutter is pushed to engage a work piece that is stably oriented by a surface and a fence – but uses sandpaper instead of a plane blade as the cutter. It’s simple and useful.

Though it certainly is not intended to replace shooting with a plane and a good shooting board, I’ve been so far finding it handy for odd-shaped parts that cannot be fully backed by a conventional shooting board fence, and for small parts.

As we would expect from Veritas, the tool is well made and thought out. The accurately made anodized aluminum extrusion body and the nifty adjustable wooden handle are good reasons to forego a shop-made attempt at this low-cost tool.

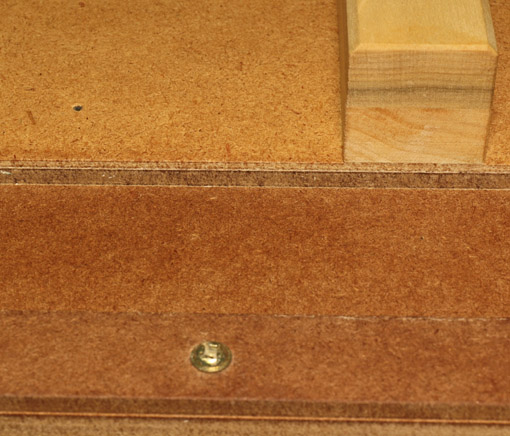
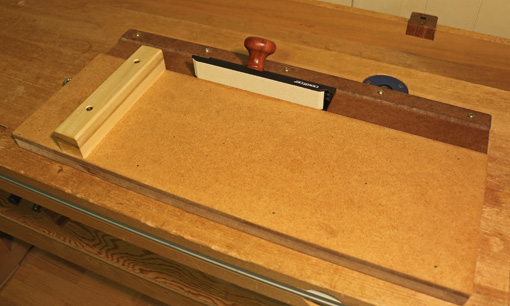
The shooting board I made for it is straightforward but there are a few fine points. The base is 3/4″ MDF, 23″ long. The work surface is 7 3/4″ wide with a nice straight edge against which the sander runs. The track for the sander is 2 1/8″ wide with a 1″-wide outer guide rail.

The work surface must be elevated at least 9/32″ above the track surface for the sandpaper to meet the lowest part of the work piece. I made the work surface from two pieces of MDF (just what was handy) for a total thickness of 11/32″, which gives a little margin for error when applying the sandpaper to the tool. That is, the bottom edge of the work piece is sure to be within the width of the sandpaper, even if I don’t apply the PSA paper to the tool perfectly accurately.

IMG_1164_edited-2

The fence is about 1 3/8″ high, screwed down 3 1/2″ from the end of the board with slightly oversized clearance holes that allow fine tuning for squareness.

Break in the shooting board just as you would for a plane shooting board by running the sander along the edge of the work surface so that a tiny width of sandpaper, say 1/16″, cuts a miniscule rabbet along the edge of the work surface. Then screw down the 1″-wide guide rail on the outside of the track so it is snug against the sander for the full length of the track.

IMG_1166_edited-2

A generous amount of oil-varnish finish toughens the MDF surfaces. Finally, I waxed the track. It all works well.

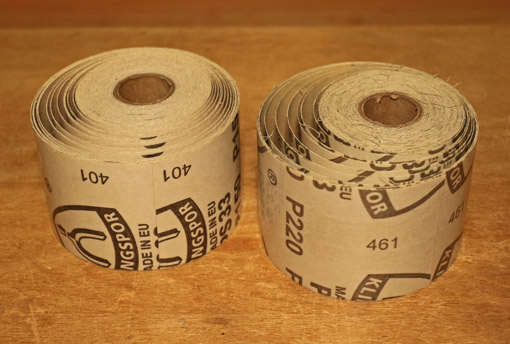
1 1/4″ wide adhesive-backed sandpaper strips are used for this tool. These are most economically made by slicing 2 1/2″ Klingspor PSA abrasive roll paper down the middle of its width. The paper strips that Lee Valley supplies are Klingspor’s.

IMG_1165_edited-2

After removing the first piece of sandpaper from the tool, I cleaned the residual adhesive off the tool with a citrus-based remover, but did not then clean off the slightly greasy residue of the remover. I found that subsequent sandpaper stuck plenty well enough and left hardly any residual adhesive when removed.

The tool is very easy to use but there are a few caveats. The sandpaper leaves grooves that are surprisingly deep for a given grit. That is simply because the tiny grits on the sandpaper are running in the same tracks over and over, unlike with regular hand sanding where the slight variations in movement erase most of the tiny grooves.

The work goes slower than shooting with a plane, especially since sandpaper seems to cut slowy on endgrain. Also, the thickness (height) of the work piece is limited to just under 1 1/4″.

The tool can be used ad lib to sand odd angles without using the fence by holding the work piece very firmly and offering its edge at the desired angle (such as indicated by a scribed line) to the sander running in the track.

All in all, this so far has been a worthwhile addition to the shop. My sense is that it will increasingly become a valuable quick “problem solver” tool that I’m very glad to have.

Category: Jigs and Fixtures, Tools and Shop  | Tags:  | Comments off
Author:
• Sunday, January 26th, 2014

IMG_1172_edited-2

Come on, woodworking isn’t really so hard to do. Just have all your stock flat, straight, and square, cut to the layout line, and never make a mental error. Everything will go just fine.

Just kidding.

But starting saw cuts accurately does help to make woodworking, especially joinery, go much better. “Well begun is half done” is true for this task. Accordingly, it is worthwhile to explore nuances of technique.

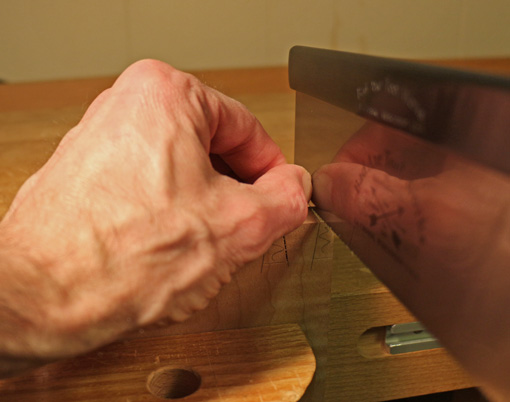
Laying the saw teeth on the wood and pushing without any guidance is generally too unreliable. So the left (free) hand is set on the wood and a finger, usually the thumb, contacts the saw plate above the toothline to provide stabilization.

This can be done with the thumb alone, but it is more stable when the side of the index finger is placed against the pad of the thumb while the hand rests on the work piece. However, the thumb pad tip is squishy, so it works better if it is also firmed by pressure from the index finger.

Even better is to angle the thumb a bit to the left so as to engage the hard thumbnail tip against the saw plate. The index finger acts to not only stabilize the set up but to help bring the saw teeth to the proper place to start the cut and fine tune the placement.

I find that using the thumb knuckle is less controllable since it is not on the most distal portion of the finger.

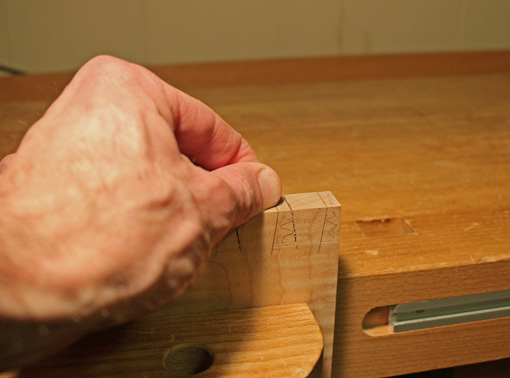
Below, with this angle of the thumb, only the soft tip will contact the saw plate.

IMG_1173_edited-2

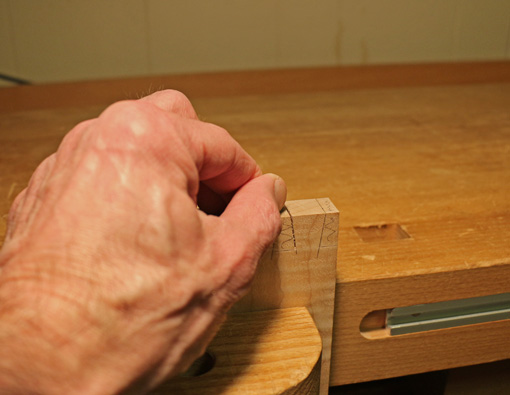
Below, I’ve re-angled my thumb so the nail will contact the saw plate. This will vary depending on the angle of the cut, sight line considerations, wrist flexibility, and even the length of the nail. In some situations, it may be too awkward or impossible.

IMG_1174_edited-2

Is this getting too punctilious, picky, or perhaps persnickety? I don’t think so. These are the bits of technique that are not mentioned in books but can make a real difference in work. Though these finger configurations work for me, the key point is to work out the details to suit your hands and the circumstances of the task to achieve the control and ease that is part of good craftsmanship.

Category: Techniques  | 2 Comments