Lines made with pencils are a ubiquitous and essential part of woodworking, so it pays to take a close look at pencils, points, and how they are used.
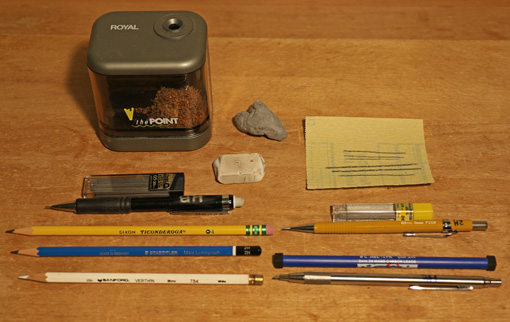
The basic hexagonal wood pencil with HB (#2) lead, such as the classic yellow Dixon Ticonderoga is a handy workhorse for general non-critical layout and labeling. I stay away from round pencils and the annoyingly flexible cheap ones made from composite material.
The point wears quickly on the ol’ #2, so consider using a 2H art/drafting pencil. The harder lead retains a point better so it draws a finer line for a longer time. I find that pencils harder than 2H tend to dent many woods, or make lines that are too light.
For dark woods, I prefer a white pencil, though some like red. Colored pencils are softer than regular ones so must be sharpened more frequently. The Sanford/Prismacolor Verithin #734 seems to be the most durable white pencil.
A battery-powered sharpener at the front of the drawer under my bench top is fast and handy for these wooden pencils.
For a more consistently fine line, a 0.5 mm mechanical pencil is useful. The ratcheting style allows the point to be easily advanced with one hand, a significant advantage when the other hand is holding a square in place. My favorite is the Pentel Twist-Erase. It has a bulky rubbery grip and a robust eraser that is not hidden by a cap and has plenty of spare length. (It is the black pencil at the top left in the opening photo.)
For these pencils, I find HB lead to be the most practical. There is little advantage to the harder 2H since the line will always be about 0.5 wide anyway.
Unless the 0.5 mm lead is extended and held vertically against the layout tool, which is not always possible or desirable, one is not quite sure exactly what distal point on the lead will actually contact the wood, and thus how far from the tool the line will be drawn. This can make it difficult to accurately meet a previously drawn line or mark. Sometimes it helps to place the pencil point on the mark and then slide the layout tool up to it.
0.3 mm pencils make finer, more accurately placed lines, but I gave up using them a while ago because the lead is so prone to breaking, even Pentel Hi-Polymer. I have also found colored 0.5 lead to be too fragile.
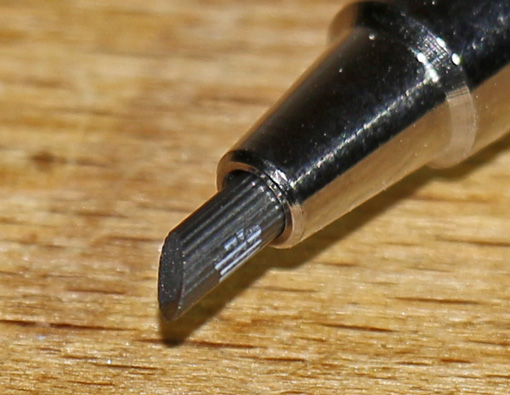
The way to step up to greater accuracy when you need it is to use a chisel point. For this, I use 2.0 mm 2H lead in a drafting “lead holder.” (It is the silver pencil at the lower right in the opening photo.) Here is a close up of the point:

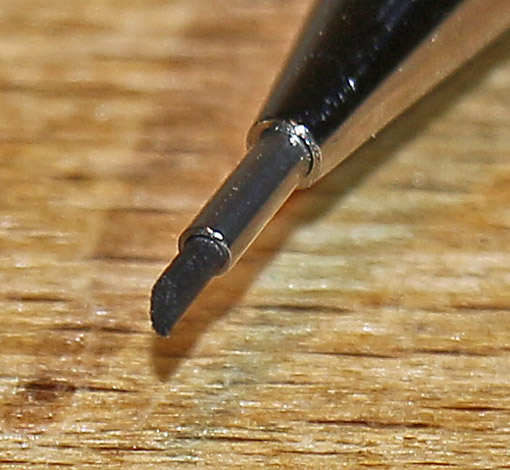
For tighter quarters, 0.9 mm 2H in a slim Pentel P209 drafting pencil is useful. (Below, and it is the yellow mechanical pencil at the top right in the opening photo.)

The chisel point is created with a single pass of 2-3 inches on 400 grit sandpaper with the pencil held at about a 45° angle. Use the location of the clip to consistently orient the pencil – I always keep it down and to the right.
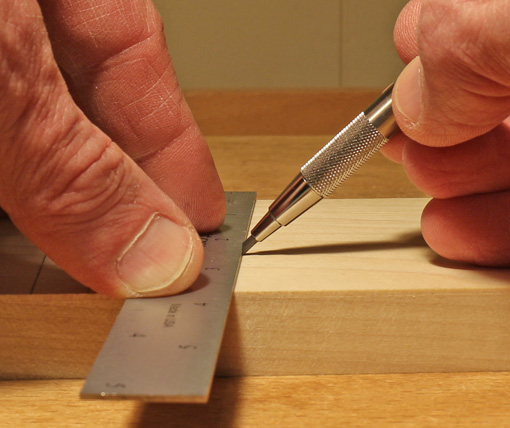
The flat side of the chisel point is placed against the edge of the square to make a very fine line that is placed with near marking-knife precision. In situations where the pencil cannot be held at such a steep angle, the rounded side of the chisel point can be held against the tool or other layout edge.

A chisel edge can be made with a wood pencil but I find this is messier, slower, and lacks the same feel of precision.
Next: comparison of lines and more on the subject.


It’s about time someone did a series on this topic! Thanks.