Archive for ◊ July, 2013 ◊

Author:
• Sunday, July 28th, 2013

IMG_0663_edited-2

Heartwood blog readers, I will be teaching classes starting this September at the new Woodcraft in Walpole, MA. The location is about 15 miles southeast of Boston, two miles north on Route 1 from Gillette Stadium, home of the New England Patriots and Revolution.

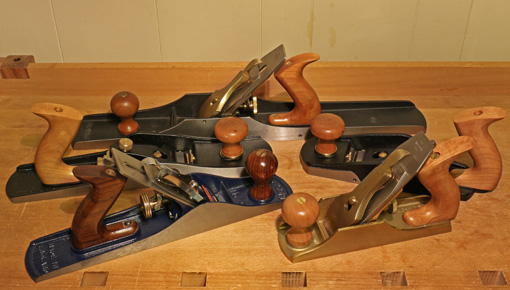
The first two classes I have scheduled are Fundamentals of Handplane Selection, Setup, and Use on Sunday, September 22, and How To Make and Use Mortise and Tenon Joinery on Saturday, November 2. Each starts at 10 AM and is five hours long.

I will present the topics in a clear, logical, at-the-workbench manner, much as topics are presented here on Heartwood. The classes will include demonstration, talking, and, of course, plenty of hands-on. If you have any questions regarding the class content, please email me or comment here on the blog.

Signup can be done by phone, email, or at the store. Please visit the site for details.

There are many classes available at this Woodcraft, which houses an exceptionally spacious, well-equipped teaching room. Topics include turning, finishing, sharpening, carving, veneering, power tools, guitar making, and classes for beginners.

If you are anywhere near the area, the store is a very worthwhile visit. It is gorgeous – huge and nicely laid out. Manager Jerry Klevas has thoughtfully assembled the inventory, and thus on a recent visit I was delighted to see tools and supplies that had been difficult to find elsewhere. The store also has a nice lumber selection including specialty woods.

For effective instruction, class sizes are small, so if you are interested, I suggest signing up very soon.
IMG_0620_edited-2

Category: Resources  | Comments off
Author:
• Monday, July 22nd, 2013

IMG_0629_edited-2

Surgeons employ a technique which woodworkers would do well do borrow.

Immediately prior to starting an operation, all action stops and the entire surgical team participates in a “time out.” Everyone takes a fresh look  – a figurative step back – and makes sure all details have been attended to. This includes technical matters such as physiologic indices and medications, but also seemingly obvious things such as patient identity, the procedure to be performed, consent, laterality, and operation site.

In other words, there is a deliberate break in the workflow to ground the situation – to stop and create clarity. No removing the wrong kidney from the wrong person.

A woodworker with a stack of boards ready to mill, or a set of mortises or dovetails to cut, is in a similar situation, ready to move into the next phase of a project. At the outset of the procedure, you must make plainly clear to yourself:

  • What you are trying to accomplish relative to the requirements of the project.
  • The critical steps that will determine success, and the critical things to avoid.
  • Are the basics all set?

If all of this seems just too obvious, let each of us recall his last forehead slap after a costly mistake performing a no-brainer procedure . . . let’s see . . .oh yea, that one . . . I’m done. OK, now we can talk.

Here’s an example. Imagine you are at the jointer and planer with a stack of boards. Stop. Time out. Name the task. Be more precise than just intending to dress the boards to 3/4″. Think, for example, that it is OK to be 1/64+” fat, but not OK to go under 3/4″, and minimizing tearout would save a lot of hand planing later. Since this is curly maple, the passes need to be thinner than usual. And oh yea, one piece needs to stop at 7/8″, so that one is marked and separated.

Is the machinery ready: jointer depth, guard in place, outfeed plan, and dust collection hooked up? Are all the boards oriented and properly marked as to face and end? Is this safe – what is my hand and pushing device procedure all the way through?

The point is that the while the content of the time-out thoughts or verbalizations are very simple, it is highly valuable to take a minute to do the time out. Most woodworking mistakes, and usually the biggest ones, happen because of a failure to heed what should have been apparent.

It takes just a quick time out to recognize that.

Happy woodworking.

Category: Techniques  | 5 Comments
Author:
• Sunday, July 14th, 2013

IMG_0528_edited-2

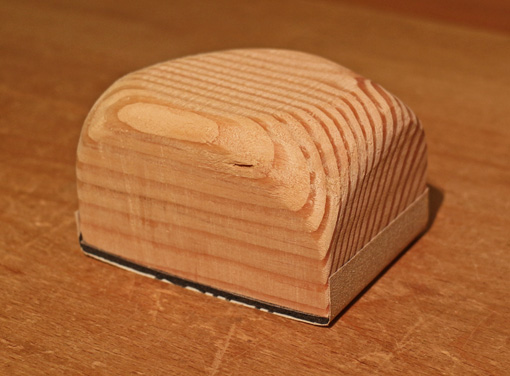
Sanding blocks with a curved face can be very effective for smoothing and, with coarse grits in the right circumstances, even shaping curved surfaces in furniture making. I use spokeshaves, specialty planes, rasps, and scrapers to shape and smooth curved surfaces, but not to the exclusion of the humble sanding block.

They can be made quickly and easily with the bandsaw or bowsaw. For working concave surfaces, the curve of the block should be slightly steeper than the steepest part of the curve of the work piece. For convex work, a flat block is adequate for working shallow curves. For working steeper convex curves, the block’s curve should be slightly shallower than that of the work.

IMG_0525_edited-2

The top of the block should be shaped friendly to the hand using saws and rasps. I like to steeply cut down the corner of the block near the base of my right thumb, as well as the diagonally opposite corner.

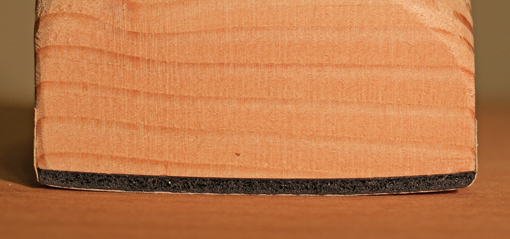
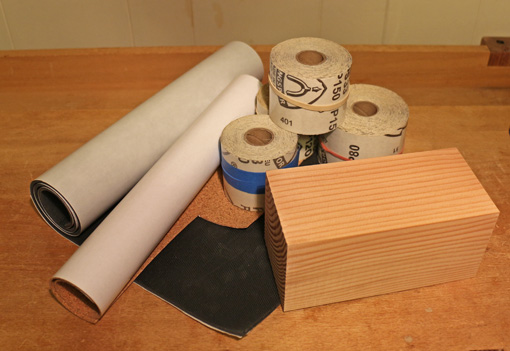
The backing surface for the sandpaper should be have some type of firm cushioning, similar to a random orbit sander. For most broad surfaces, I like the high-friction cushion material available in with a pressure-sensitive adhesive backing from Lee Valley. PSA-backed 1/16″-thick sheet cork is firmer and thus good for narrower, smaller scale, or more detailed work.

Cutting regular sandpaper sheets and wrapping them around these sanding blocks is particularly annoying because of the curved surface. I much prefer using PSA-backed sandpaper that comes in large rolls, such as that available from Klingspor. It is quick, effective, and wastes less sandpaper, especially if the block is made to the width of the sandpaper roll. It is also reduces hand fatigue because there is no need to grip the paper to the block.

IMG_0527_edited-2

A gum rubber block is usually associated with cleaning retained sanding dust from the sandpaper on power sanders, but it also works quite well on these sanding blocks, especially when doing heavy work.

As with any sanding, it is important to remember that only the coarsest grit – the first one in the sequence – should do any required  shaping. (Though most or all of the shaping will have already been done with other tools.) All the subsequent grits simply remove the scratches made by the previous grit until the surface is smoothed to your satisfaction.

In time, one accumulates a small collection of these curved sanding blocks, so some will coincidentally be just right for future projects. This is simple, effective woodworking – one more tool for working with curves.

Category: Techniques  | Tags:  | Comments off
Author:
• Thursday, July 04th, 2013

IMG_0471_edited-2

The American flag hangs at the top of my shop to remind me that creativity depends on freedom, which begets opportunity. And the best place for that is right here, supported by core American values. For this, I feel blessed.

May God bless America.

Happy woodworking.

Category: Ideas  | 2 Comments
Author:
• Tuesday, July 02nd, 2013

IMG_0400_edited-2

Take a look at the end grain of this live-edge board. Without causing undue stress and tension, do you notice anything?

OK, enough goofy hints.

You probably notice that the board is from a tree with an off-center pith. The wider growth rings on the far right side, compared with the corresponding years on the left side, represent tension wood.

When a tree trunk leans due to environmental stresses such as gravity, snow, or light availability, it wants to redirect its growth upward and thus bows. To accomplish this, it forms aberrant wood known as reaction wood on one side of the tree, often recognized by its wider growth rings with the pith located off center.

In softwoods, the reaction wood, called compression wood, is usually on the underside of the bow, while in hardwoods it known as tension wood and is usually found on the upper side of the bow. The growth ring width asymmetry and consequent decentration of the pith can be dramatic in softwoods, but mild to absent in hardwoods. Reaction wood differs from normal wood in cellulose content and structure.

There are visual and behavioral clues to the presence of reaction wood.

It may be difficult to recognize in roughsawn boards at the lumberyard. Look for growth ring asymmetry in flatsawn boards. This is easy to notice in a live edge board but possibly not in a board with sawn edges. An unexplained lengthwise split or a pronounced crook (a curve in the width plane of the board)  may be caused by the abnormally high longitudinal shrinkage of reaction wood.

After the wood is in your shop, take note of behavioral clues such as persistent and unexplained distortion after milling. Another possible clue that most woodworkers have encountered is a stubbornly persistent fuzzy surface on an area of wood despite repeated attempts at smoothing it – you sand it and the fuzz never goes away. More confusing may be an unexpected excessively blotchy look that shows up after finish is applied.

This wood does not want to play nice; avoid it. I have read, however, of wooden bow makers taking advantage of the abnormally greater strength of tension wood.

There are exceptions, of course. This is wood – every tree, every board is an exception!

IMG_0402_edited-2

Being very cautious, I’ve monitored this walnut board with suspicion for a long time now, through partial milling and changes in moisture content. There are only some old shallow surface checks and a little distortion that has settled. I think it is safe to use in a project.

It pays to watch the wood.

Category: Wood  | 4 Comments