Archive for ◊ December, 2012 ◊

Author:
• Sunday, December 30th, 2012

Even skillfully made, sound joinery may have occasional small gaps. These will probably summon little or no notice from people who view and appreciate the piece, but nonetheless disturb the vanity (oops, I mean genuine pride in craftsmanship) of the maker. The wood itself may also have small defects. As long as these imperfections are few and small they are not likely to disrupt the overall aesthetic impact of the work. Still, we want them to disappear.

This discussion deals with fine gaps, not craters, canyons, dents, or seriously mashed wood fibers. Keep in mind too, that you’re in trouble if you have to rely on fillers because your joinery is just plain sloppy, especially if its structural strength is compromised by poor technique.

Let’s look at various situations. (Caution: purists and fantasy woodworkers should stop reading here.) Where end grain and side grain surfaces adjoin, such as in dovetails, fillers can do a good job of hiding small gaps. The same is true where side grain surface meet along an irregular border, such as in artistic inlay. However, even small amounts of filler can be noticeable where the eye expects an unbroken linear border between side grain surfaces, especially if the grain directions are perpendicular to each other such as in a flush-fit tenon shoulder. It is much better to detect and correct that sort of problem after dry fitting. Finally, some problems are probably best just left alone.

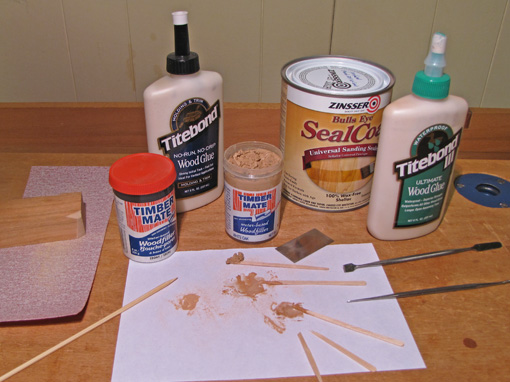
Here are some materials that have worked well for me. Readers, no doubt you have your favorites.

Timbermate, made in Australia, is the best premade filler I have found. It is ready to use, dries fast without shrinking, and takes stains and colorants in its wet or dry state. It is a water-based formula available in 13 colors plus a white tint base. An 8-ounce container is probably a lifetime supply for me. No worries, mate.

Of course, there is also the old sanding dust mixture routine. Most wood glues, such as Titebond III, make a good base. Titebond No-Run No-Drip produces a thick, fast-drying paste using less dust, and can make a lighter color paste. Zinsser Seal Coat dewaxed blond shellac makes a thin paste that dries very quickly. I find epoxy is too messy, and CA glues are quick but less controllable. Experiment.

Sand up a small pile of dust from a piece of scrap and mix in some glue or shellac. Use a file or fine rasp for coarser dust or if the possibility of grit in the paste is a problem. The key is to regulate the color and texture of the paste based on the glue or shellac, the tool used and thus the fineness of the dust, the species of wood used to produce the dust (which may not be the same as the project wood), the finish to be applied, and the anticipated long-term change in the color of the project wood.

For application tools, try toothpicks, tapered craft sticks, bamboo skewers, and so forth. I usually break the stick to produce a sharper end. Wax modeler’s spatulas, available from Lee Valley, are nice for precise work, though they superficially blacken Timbermate with continued contact. For removing excess paste and leveling the surface, I like to use a mini card scraper.

Wax filler sticks, available in lots of shades, are useful for quick touch up work after the finish has been applied. They have the advantage of color matching to finished work, but keep in mind that many woods darken over time.

I guess we can feel better recognizing that there is some art to covering up imperfections.
Category: Techniques  | 2 Comments
Author:
• Sunday, December 16th, 2012

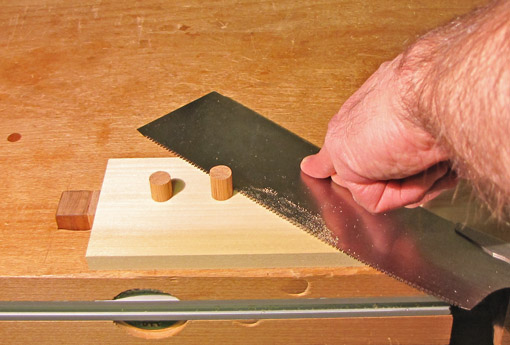
Finishing off dovetails, through tenons, and joint pegs often involves crosscutting projections of wood flush with the surface. Here I will discuss a few common ways to do this, each with its own set of problems, and present a simple solution that does not require a dedicated saw. Hint: the trick is hidden in the photo above.

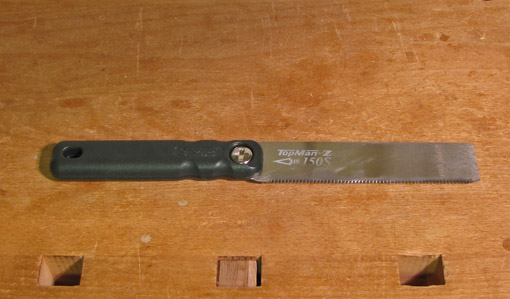
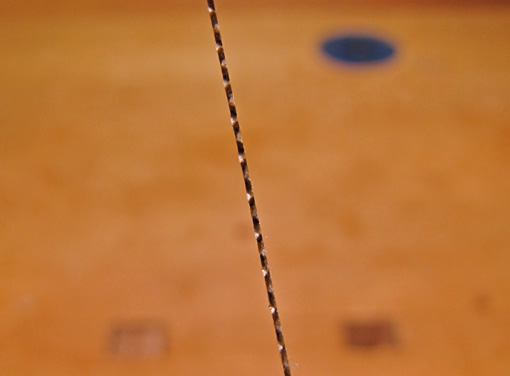
The flush cut saw is one approach. This is a specialized saw with no set (see photos below) on either side, most commonly with a Japanese-style crosscut tooth pattern. A portion of the very thin and flexible saw plate can be laid flat and pressed against the wood while the handle end is raised to grasp. If it is initially prepared for use by stoning away the minute burr from the manufacturer’s sharpening, it leaves a perfectly smooth surface, with virtually no cleanup paring required.

No set:

However, not surprisingly, this type of saw has a strong tendency to bind, even 1/2″ or less into the cut. For a through tenon, you can avoid binding by making multiple approaches at the projecting wood from different sides, but this is usually not possible with dovetails.

Veritas addresses the binding problem with their flush cut saw, which has set, but only on the upper side. Binding is eliminated, but the saw inevitably tracks away from the surface, leaving a significant amount of wood remaining to pare, especially in wider cuts. I find this annoying, and also do not like the lack of control when sawing. The set could be reduced but with a concomitant tendency to increase binding.

Here’s the simple solution using an ordinary flexible backless saw with a normal set. A Japanese crosscut kataba saw such as the Gyokucho 05 model works very well. It is very straight with very consistent set.

First, determine the amount of set. I used dial calipers. The 05 saw is .028″ thick at the teeth and .020″ on the plate, which means the set is .004″ on each side. Feeler gauges or trial-and-error could also be used.

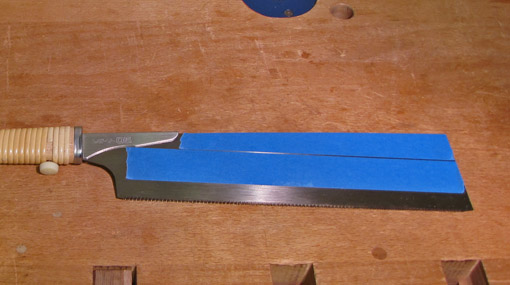
Apply strips of blue tape on one side of the saw to slightly exceed the set. I used 3M #2080 tape, which is .003″ thick. I applied two layers, .006″, to build .002″ above the set. Enough of the saw plate is covered to give a reliable registration of the taped surface against the wood, while enough of the saw is free of tape to permit a useful depth of cut, about 3/4″ in this case.

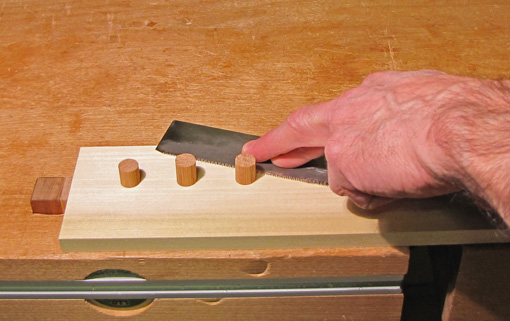
Flex the saw against the work, taking care to apply light pressure with your fingers on only the taped portion (see photo at top). Saw with a gentle pull stroke and avoid pressure on the return stroke. Here’s what you get:

  • No binding, since the set can do its job.
  • No drifting, since the set works on both sides of the kerf.
  • It’s fast because it is a normal saw functioning in a normal manner of cutting.
  • There are no scratches on the work.
  • No specialized saw is required! Remove the tape when you’re done; it leaves no adhesive residue.
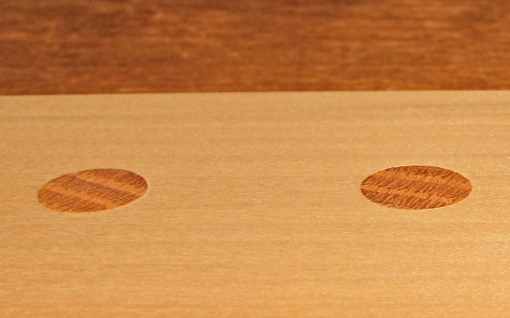
  • The amount of residual wood is miniscule. In theory, in my setup, it is .002″, but in practice it is less, barely a thou, and disappears with an extremely light pass with a paring chisel. In the photo below, taken before any paring, the oak peg on the right was sawn with a flush cut saw, the one on the left with the taped 05 saw.

One alternative is to position paper on the wood enough away from the projection to give clearance for the saw teeth. This may work but the paper can slide (and you may not see that), and if you press on an unsupported area of the saw, you can drive the side of the teeth into the wood. Another alternative, good for some situations, is to simply put tape on the wood, positioned clear of the saw teeth, but that is usually more trouble than preparing the saw with tape.

An awkward method is to put a card or paper under the saw, right up to the projecting wood. The problems are that the teeth scrape the card, and the elevation of the teeth above the surface will be inconsistent as you proceed. With thick card, the residual projection becomes too large and inconsistent.

Another option is to tediously rig a router, maybe using a flush trim bit for corner work, bring 22,000 screaming RPMs down upon your carefully-cut and almost-finished joinery, and say a prayer. You can if you want.

Category: Techniques  | 2 Comments
Author:
• Friday, December 14th, 2012

Planes, bats, birds, and bees: they all fly. The object is to get there.

In this segment, the final installment in the series, let’s look at some different but very effective plane designs that you may want to consider.

Japanese planes make use of a very thick blade tightly nested, bevel down, in a dense oak body (“dai”). Most of these are bedded at 40-42°, with very few higher than 45°, even for denser hardwoods. Does this contradict what we know about bed angles for Western metal planes? No, because other factors are involved.

The superb results possible with these planes are achieved first and foremost with blades that can be sharpened to phenomenal edges. The blades are a lamination of very hard, high-quality steel worked by masterful makers, and a soft iron backing. A heavy chipbreaker, also laminated, meets the main blade with great precision.

The sole is prepared so it contacts the work only at the toe and just in front of the blade. This makes the plane hug the wood through the stroke. The geometry of the throat is strategically designed to shepherd the shaving off the wood and through the plane. The resiliency of the dai buries vibration. Along with numerous other subtle refinements in design and preparation, these seemingly simple planes can produce beautiful results even though they are nominally just a bevel-down blade at 45°.

For years I used Japanese planes for smoothing before selling them away while transitioning to only Western planes to simplify my tool world. Though fussy to set up and maintain, I miss them sometimes.

Terry Gordon, in the land down under, takes a different approach in his wooden planes. Before my second tool purge, I used his very effective smoother, and, admittedly, I miss it too. He uses a 6mm thick blade which is bedded bevel down at 60°, without a chipbreaker, in a body of dense Aussie hardwood. They resemble Chinese planes.

Wait, how can this work, isn’t a chipbreaker essential? Once again, other factors change the game. The synergy of this high attack angle, a heavy blade held snugly in a dense body, plus a tight mouth, allows the plane to manage difficult figured woods.

Now at some point, it just is not worth trying to finish plane some woods in some situations. The factors to take into account include:

1. The wood! This is not just based on the species, but should be an assessment of what a particular board is telling you. Cherry could be a docile pushover or the curly cherry from hell.

2. The finish to be applied, oil or film. For example, the moderately open grain of walnut finished with oil will look better crisply planed, while the tight texture of properly sanded maple is fine under three coats of polyurethane. Experiment.

3. Where the wood is in the piece. Finishing planing a curly maple panel is a different matter than struggling to do the same with a curvy leg in the same wood. As another example, sanding is not likely a good way to fit drawers.

Thus, consider the other options. Scraping can almost always be employed to save a lot of sanding by using the scraper plane and/or hand scrapers, straight and curved. Set up and technique for the scraper plane can be found in this three post series: 1, 2, and 3.

I have two random orbit sanders in my shop and plenty of sandpaper. While I do not relish the work of sanding, I will do what is necessary to get the results I want for a particular piece in a particular wood.

That’s what it’s all about. It all flies.

Category: Techniques  | Tags:  | Comments off
Author:
• Sunday, December 09th, 2012

Bevel-up planes are another approach. While still basically a jigged blade that cuts wood, they have important differences from bevel-down planes.

The geometry of the edge, how it is supported, and how it interacts with the wood matter greatly in cutting tools. As an example, think of a piece of paper. It is a powerless cutting tool when approaching your finger square on – it collapses. Yet, when effectively stiffened by an extremely skewed approach, it can draw blood annoyingly well. Geometry matters.

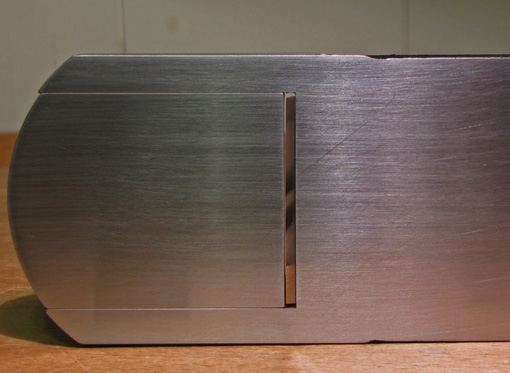
Bevel-up planes allow the use of thicker blades that are supported closer to the cutting edge than in bevel-down planes. Both factors dampen flutter and, along with alterations in the attack angle, obviate the need for a chipbreaker to pre-tension the blade edge. The Veritas Bevel-Up Smoother (above) has a 3/16″ thick blade that is supported up to about 3/32″ from the cutting edge.

This gives bevel-up planes some wonderful practical advantages. Blades changes are easy; there’s no fussing with a chipbreaker. On Veritas planes, the Norris-style adjuster conveniently controls depth and blade angle with one knob. Mouth adjustments are much faster than closing the throat by adjusting the frog on a BD plane. The gap below is about 0.010″.

The strategy here is simple: change the attack angle by simply swapping blades. With a 12° bed, a blade honed at 33° gives an attack angle of 45°. 38° and 48° honings give attack angles of 50° and 60°, respectively. Again, it is the angle of just that last bit of blade length near the edge, well within the width of a secondary bevel, which matters to the wood.

So, here we are back at a 60° angle to greatly reduce tearout, but it is not the same geometry as the 60° achieved with a 10° back bevel on a 50° frog in a bevel-down plane! The BU plane is driving a 48° wedge into the wood, while the BD plane is driving a 30-35° wedge. Add differences in blade mass, edge support, and edge tension, and these are two different animals, theoretically and in practical feel at the workbench.

Sharpening is also different. I find it is more difficult to get a keen edge honing a blade at 48° than at 30-35°. Remember too that the lower bed angle must be taken into account when estimating the amount of camber required. Please see here for the reason.

I continue to advocate that bevel-up smoothing planes are better with the blade bedded at about 20°. This would require a blade honed at 30° to make an attack angle of 50°, and honing at 40° to attack at 60°. Those are easier to sharpen and are narrower wedges to drive through the wood.

None of this should be construed as saying I do not like BU smoothers, or that BD or BU is categorically better. Both can perform beautifully but they must be understood to get the most out of them. Ultimately, the wood will speak. 

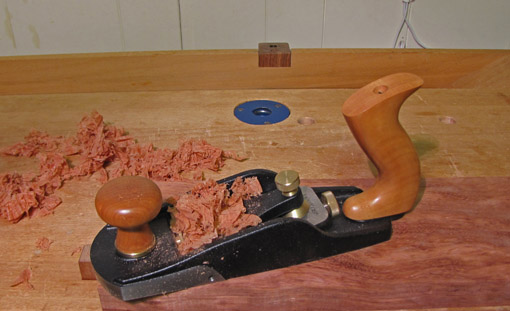
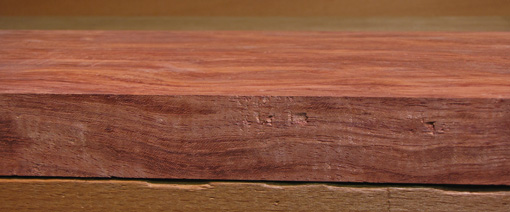
In the top photo, my BU smoother is hustling through figured bubinga. The photo directly above shows the wavy grain and what a jointer machine did to it. Tearout is virtually eliminated with the BU smoother but getting a 48° wedge through this hard stuff is tough. I like it better on less dense curly woods and rowy woods such as the quartered face of some mahoganies. It has also worked unexpectedly well on curly pear. You must experiment and pay attention to the wood.

For choosing which to buy, I think either BD or BU can generally get the job done if you knowledgeably configure the various elements of the plane to suit the work at hand. It is not necessary to own both types of smoothing planes, but I admit that I like having a variety of options.

And yea, I also kind of like messing around with them too.

Next: still more ways.