Archive for ◊ November, 2012 ◊

Author:
• Friday, November 30th, 2012

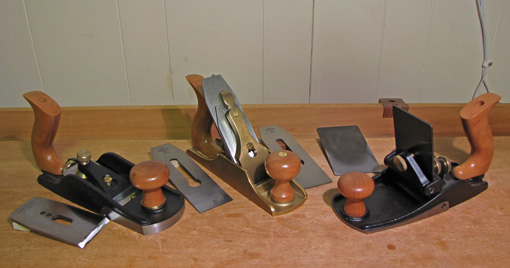
The #4 bench plane, about 9 1/2″ long with a 2″ wide blade, is probably the most popular smoothing plane among woodworkers, and will be the focus of this discussion. Some prefer the maneuverability of the smaller #3, and some like the added weight and 2 3/8″ blade of the #4 1/2, but all of these bevel-down smoothers can be used in several configurations to effectively work a range of easy to difficult woods. It is a matter of employing various strategies.

Strategy #1: Choose a 50° frog.

Bevel-down smoothers are, unfortunately, usually configured with a 45° frog as standard. Lie-Nielsen’s great planes are available with 45°, 50°, and 55° frogs. Other brands, such as Clifton, Wood River, and Anant, do not, to my knowledge, offer this important choice.

Why 50°? This will smooth tame woods, such as plain walnut and poplar, about as well as a 45° frog. In some cases, the 45° frog can produce a slightly more cleanly severed surface, but the difference is nearly imperceptible and, in most cases, a very sharp blade negates any practical difference between the two.

Yet, wonderfully, for most moderately figured woods, a high-quality #4 with the advantage in reducing tearout of the 50° frog, along with a properly prepared blade and chipbreaker, is all you need. I do not want the expense and hassle of changing frogs, and the 50° is more versatile than the 45° or 55°. Furthermore, with the alterations discussed below, a higher attack angle can be created without changing out the 50° frog.

This presupposes a well-tuned, high quality plane. To digress somewhat, here is a partial list of important features:

  • The sole must be flat in the key places, especially at the toe and around the mouth.
  • The frog should be accurately machined and of good design, such as Lie-Nielsen’s, and adjusted to create a tight mouth, just enough to pass thin shavings without congestion.
  • The blade must be properly cambered. How much camber? Ideally, shavings under 0.001″ thick should feather out to nothing toward the sides of the blade edge.
  • The chipbreaker should be set close to the blade edge. How close? Well, it depends on the wood, the chipbreaker edge design, and the thickness of the shavings you are taking, so you must experiment a bit. About 1/64″ gap is a starting point.
Strategy #2: Take very thin shavings!
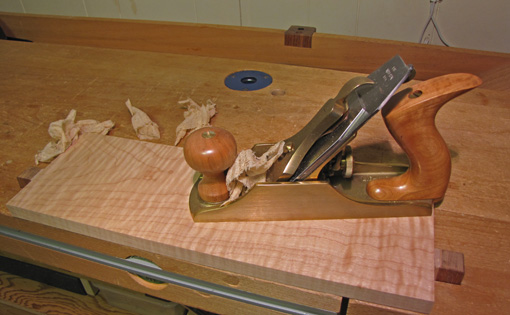
“But Rob,” you say, “that’s just obvious.” Yes, but to do this, you must have all your ducks in a row, as described above, and a damn sharp blade. A dull blade precludes very thin shavings and promotes tearout, regardless of all other factors.

So, there are two corollary tips:

  • Taking thin shavings means taking lots of passes, which leads to using a duller blade, unless the wood surface is properly trued beforehand. In other words, use your smoother only to smooth, and as little as possible. Set the surface up with your truing planes.
  • Consider an O-1 steel blade for most of your smoothing in moderate woods. It is easier to sharpen and shape, and probably can be made sharper, than A-2. It will likely dull faster though, or maybe just differently, so it will need touch ups.

Strategy #3: When the going gets tough with mean and nasty woods, try raising the attack angle by using a back-beveled blade.

I keep a separate blade for my #4 with a 10° bevel on the back (the “flat” side). Because this setup is used in tough woods, the abrasion resistance of A-2 steel is an advantage, and the back bevel facilitates sharpening. With the 50° frog, this creates an attack angle of 60°, which is a big advantage in eliminating tearout. It is much like having a separate plane with a 60° frog, which you therefore do not need.

The back bevel needs only to be very narrow since it is really just the first tiny bit of blade that matters – the first several thousandths, probably, that are involved in severing the fibers. At the sharpening bench, I use a magnetic angle gauge, in conjunction with a strip of wood on the stone, to make a reproducible back-bevel angle. The front-side bevel should not be too steep; 25° is plenty, creating a total bevel of 35°. More than that and the blade “wedge” will be too thick and, I feel, offer too much pushing resistance in the wood. The chipbreaker cannot be set as close to the edge with a back bevel but that does not matter as much due to the high attack angle.

Going higher than a 60° attack angle, by whatever method, does not seem to make planing go better, even in very difficult woods. The cutting action becomes more like scraping. I find that the best course of action for those situations is to simply use a scraping plane or hand scraper.
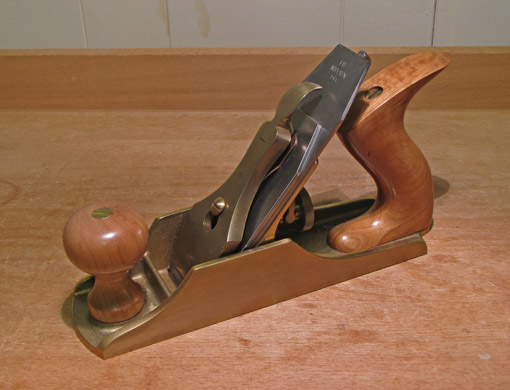
In summary, with one high-quality, well-tuned bevel-down smoothing plane, with one frog, and two well-prepared blades (three is a luxury), you are equipped to venture into smoothing lots of wonderful woods.

Of course, there are more options, and they too work. Next: Bevel-up strategies.

Category: Techniques  | Tags:  | Comments off
Author:
• Friday, November 23rd, 2012

Hand planing can leave a superb final surface on wood. However, the beautiful figured woods that are one of the great joys of woodworking often cause tearout and play havoc with our efforts. This is the first in a series of posts that will explore a compendium of options for achieving an excellent finished surface on difficult woods.

When planning a project, I consider early on how to put the final surface on the wood, along with which finish to apply. Understanding an arsenal of options, and testing the tools and methods beforehand, gives me the wherewithal to use the woods I love.

There are several prefatory issues:

1. The topic of these posts is finish planing or “smoothing,” not planing for stock preparation. For the latter, even highly figured woods such as tight curly maple, can be successfully worked with a conventionally configured jack plane: bevel-down on a 45° frog with a 30-35° honing angle, or bevel-up on a 12° frog with a 38° honing angle. The key is to plane at about 60-90° to the grain, which means across the curls. (This is not skewing the plane; it is pushing the plane diagonally across the grain.) This leaves a somewhat rough surface but one that is adequate for dimensioning, and there is little or no tearout to clean up with the smoother.

This method may not work for swirly figure, such as waterfall bubinga. For that, a toothed blade in a bevel-up jack plane, planing with progressively shallower blade projections, works wonders. Clean up the surface with a conventional blade.

My preference for dimensioning figured stock is the DW735 with the Byrd Shelix carbide spiral cutterhead. Then comes smoothing with a hand plane.

2. Why use a plane at all for smoothing? Why not just sand? Well, for some woods and in some circumstances, I think sanding is the better option. However, I prefer to smooth plane when I can because, compared to sanding, it is faster, more pleasant, and better retains the trueness of the surface. Furthermore, for some woods (walnut comes to mind), the final surface is distinctly superior when hand planed. I also recognize that for some woods (bubinga comes to mind), depending on the type of finish to be applied, sanding is just as good as planing.

3. Sharpness is king. Using a very sharp blade, properly cambered, solves so many planing problems. Conversely, using a dull or poorly shaped blade edge for smoothing will create problems regardless of the type of plane, the angles used, and so forth.

4. Skewing the plane helps with almost all of the plane and blade configurations that will be discussed for smoothing. The physics of why it works is an interesting topic for another time, but beyond the scope of these posts.

5. For some woods and some circumstances, light sanding with fine grit such as 320 or 400 is appropriate after smooth planing. The main thing is to be sensitive to what you are trying to achieve with the wood, and not be governed by purist dogma.

So, in this series we’ll look at different tools and setups, their advantages and disadvantages, but with the theme that there are multiple good ways to get excellent results. The key is to know your options.

Category: Techniques  | Tags:  | Comments off
Author:
• Tuesday, November 13th, 2012

If you are looking to acquire hand tool skills and can get to, or live in, the north-central Massachusetts or southern New Hampshire areas, consider contacting Steve Branam, author of the Close Grain blog. Earlier this year, Steve started his Close Grain School of Woodworking in Pepperell, MA.

Learning hand tool skills can be confusing and take longer than necessary if you go it alone. In Steve’s words, “Part of what I want to convey is that this is well within the scope of most people’s ability.” As you can see from the outline of the skills he teaches, his approach is systematic and thoughtful. It is skills-based learning, rather than project-based, which makes a lot of sense to me. I also like his down-to-earth approach, devoid of hyperbolic claims of quick and easy perfection.

The best part is that Steve offers you three ways to learn. At his Pepperell location, you can attend group classes. There you can also get private instruction from him in which you have the option of choosing the skill areas you want to work on. Thirdly, Steve will actually travel to your shop/home (within a 60-mile radius of Ayer, MA) for private instruction. In all cases, he even provides tools and materials, or you can use your own tools. There is no excuse left for sitting on the hand tool sidelines or floundering with trial and error.

By my calculation, Steve has somehow managed to circumvent the normal human requirement for sleep. Actually, this is my way of expressing admiration for his entrepreneurship as well as his dedication to sharing woodworking skills.

Category: Resources  | Comments off
Author:
• Saturday, November 10th, 2012

My recent hike in New Hampshire’s White Mountains prompted this thought.

As we attempt in our woodworking shops to make objects of some small beauty, I believe we are merely borrowing from the ultimate source of beauty, the Creator, to bring joy to us and to those who appreciate our work. That is truly happy woodworking, for which I am grateful.

Happy woodworking to you, dear readers.

Category: Ideas  | 4 Comments