Archive for ◊ October, 2012 ◊

Author:
• Wednesday, October 31st, 2012

Fresh designs are exciting to conceive and build. The effort and risk involved in developing a new design concept lead to a feeling of accomplishment when the work is done. By virtue of their novelty alone, such pieces draw attention, and tend to be called creative, imaginative, clever, or even brilliant. New interest is created, boredom is avoided, and challenges are met. Creativity expands.

Yet, if every project is fresh and different, when will you have a chance to refine your work? Most truly excellent work is a result of refinements of previous attempts at the same or similar idea. Such work builds upon a previous design concept by refining elements such as proportions, materials, textures, workmanship, and meaningful embellishments. The integration of the elements is also refined.

That’s how the best work comes about. It’s true of furniture, jokes, recipes, tools, music, and on and on. You have to work on something to make it better! Your work does not always have to be new and different. And as for “original,” I’m not sure there truly is such a thing. On the other hand, appreciating the value of refinement does not excuse working an idea to death, getting stale and unimaginative, complacency, or creative laziness.

As an example, look at the work of the late Sam Maloof. His iconic rocking chairs are the products of years of refinement of a core style concept, but his work is never boring. Still, early Maloof is not as good as later Maloof.

Another good study in refinement is Albert Sack’s Fine Points of Furniture books in which his keen eye identified the “good, better, best” of early American furniture and its features.

Now, here are some related bite-sized opinions for thought. The “arteests” and the arbiters of cool in some parts of the high-end craft world seem to reflexively give extra credit to work which is new and different, but often lack the attention span to extol work which is less flashy but has undergone sustained refinement. New is not automatically better. On the other hand, the approach from some corners (Architectural Digest?) seems to take it as axiomatic that the refined work of modern masters such as Maloof, Jere Osgood, and Silas Kopf cannot be as good as that of the 18th century masters. Oh, how I disagree with that!

In summary, while there is much value to fresh ideas, we should not forget the role of refinement in producing the best work.

Category: Ideas  | Comments off
Author:
• Sunday, October 28th, 2012

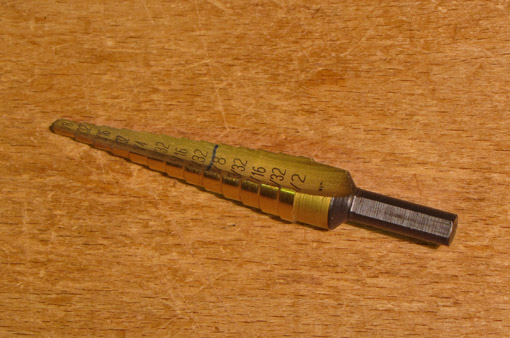
It is usually difficult to accurately concentrically enlarge a hole, especially when working with unpowered or electric hand-held drills instead of a drill press. Furthermore, the sides of the previously drilled hole tend to grab the larger bit and pull it in faster and deeper than desired, sometimes creating a ragged rim at the top of the enlarged hole. A simple tool that has saved the day for me a number of times over the years is the step drill bit.

The one I use, pictured above, has 13 steps, each 1/32″, from 1/8″ to 1/2″. Simply seat the appropriate diameter step in the original hole and drill down to the step of the desired size. It may be helpful to mark the desired step. The resulting shallow hole at the top can now concentrically register a regular bit for the new hole size. Of course, this won’t manage every situation, but it is a helpful option to have in the shop. I have never found a bit with 1/64″ steps.

These bits, sometimes called “drill tree” bits, are designed for drilling in thin metal and plastic, and for that I have found nothing better. They advance smoothly and produce a very clean hole with none of the grabbing or tearing common with regular twist bits.

They are available at home centers and hardware stores. It pays to keep an eye out for tools that are not intended for woodworking but which can nonetheless be useful in the wood shop. “Step drill” can also refer to concentrically ground twist bits, similar to those used for drilling pocket holes. W.L. Fuller in Rhode Island makes an incredible selection of step twist bits, including custom tooling.

Correcting one’s mistakes and finding a way out of jams are like every other skill: with enough practice, you get good at it. I’ve given myself plenty of practice, so I hope passing on these little tips will be helpful to you.

Category: Tools and Shop  | 3 Comments
Author:
• Monday, October 08th, 2012

Finally, let’s look at the most doubtful part of the joint which is the adherence of the round dowel surface to the end grain portion of the hole.

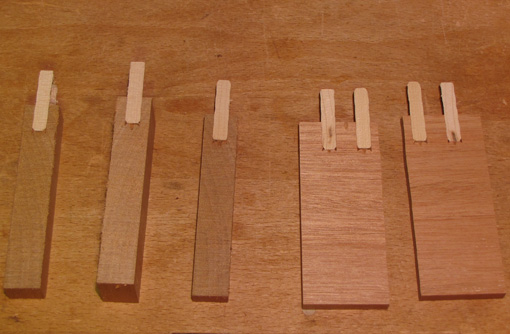
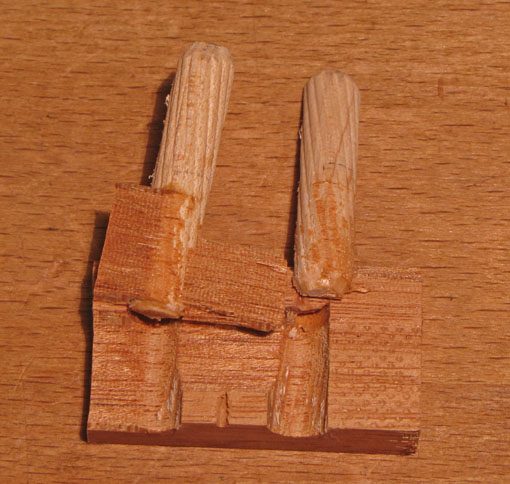
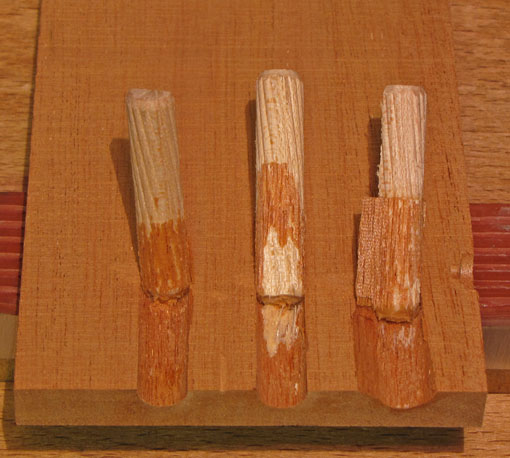
This time, 5/16″ diameter Laurier dowels were inserted 3/4″ into holes drilled with a brad point bit in mahogany to again mimic the face grain side of the dowel joint. After drying, some of the samples were cut with an orientation to to primarily examine adhesion to the end grain portion of the hole – see the three pieces on the left in the photo below. The two pieces on the right are oriented to primarily examine adhesion to the side grain portion of the hole.

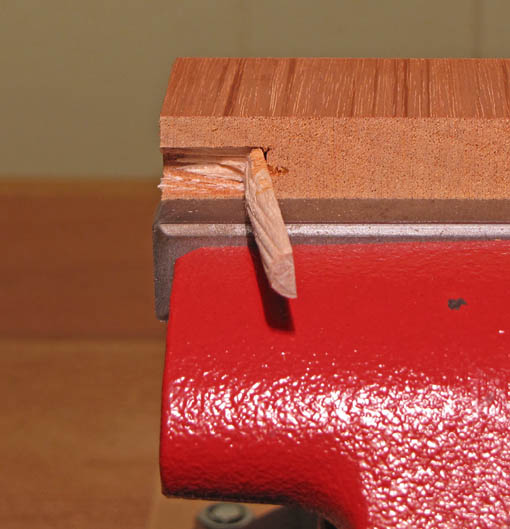
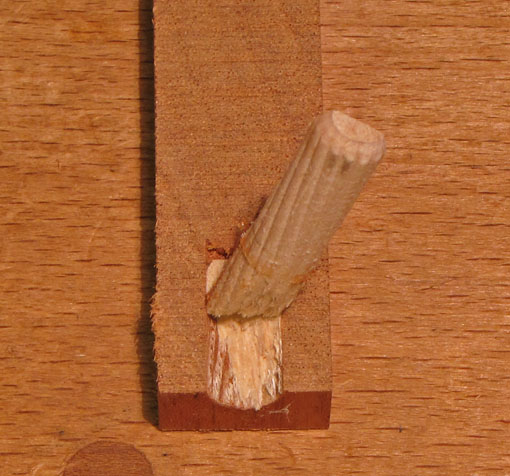
The dowels were smacked as described in the first post. The results shown are typical of several trials and they look good – the dowels adhere well to the end grain part of the hole, as seen in the first two photos below. For comparison, the next two photos show side grain and, from a separate trial, long grain adhesion.

This methodology is far from perfect. What is really demonstrated in many of the samples, essentially, is that the half joints are stronger than the half dowels. It does, nonetheless, give some sense of what is going on inside those holes with dowels glued into them. While not a joint strength test and certainly not scientific, this gives some insight into the behavior of the components of dowel joinery.

All in all, I am not surprised that in the test of the real world, the dowel joinery in my cabinets has held up well. Furthermore, these little experiments will help me proceed more knowledgeably building future projects, and I hope they will help you with your work.

Author:
• Monday, October 08th, 2012

Now let’s turn our attention to the face grain side of the joint where the grain of the dowels is perpendicular to that of the board. This is similar to a multiple mortise and tenon joint but among the important differences is that, because the dowel is round, there is limited side-grain-to-side-grain glue surface. So, it is reasonable to question the glue adherence of the dowel in its hole.

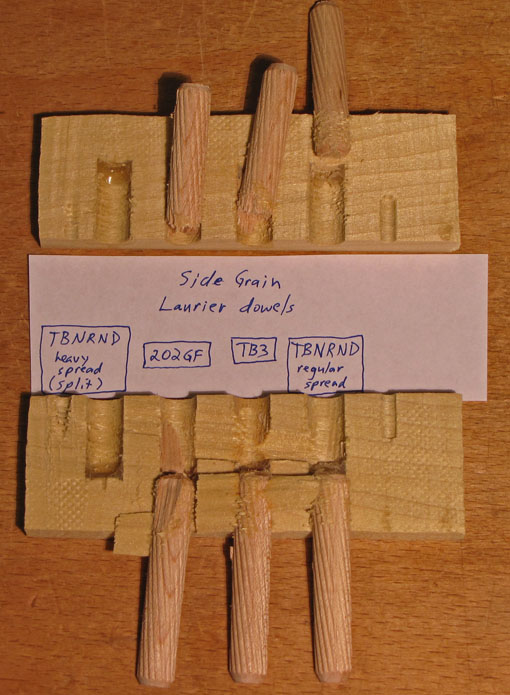
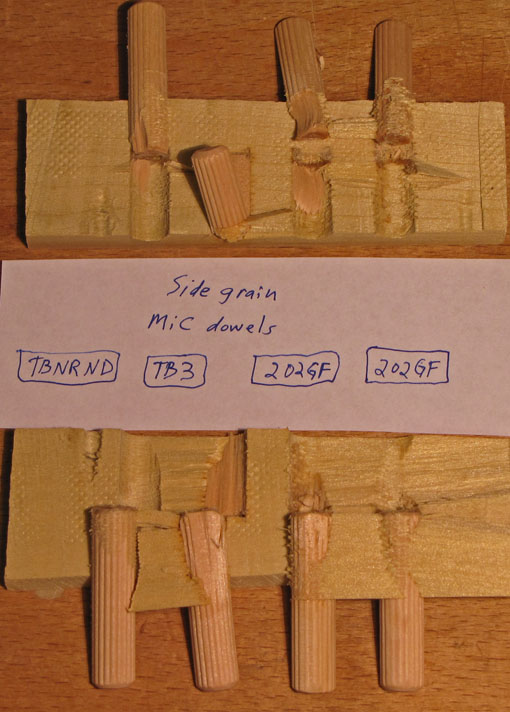
To mimic and investigate this part of the joint, 3/8″ diameter Laurier and Made-in-China dowels were glued 3/4″ deep into holes drilled with a brad point bit. The next day, the wood was resawn through the middle of the dowels. The dowels were then smacked to failure as described in the previous post. The orientation of this procedure primarily examines the adhesion of the dowel to the side grain portion of the hole.

As seen in the photos above, both the Laurier and the made-in-China (MiC) dowels performed well with both Titebond III and 202GF glues. The Laurier dowels were preferable in the long grain side of the joint, so they are my choice for dowel joinery, along with TB3 or 202GF glue.

Titebond No Run No Drip (TBNRND) glue did not create good adherence, and a heavy spread of it in one of the holes caused enough resistance to inserting the dowel that the wood split. It is an excellent glue for some jobs but I don’t think the best choice for this one.

Dowel joints have the same sort of cross grain dimensional change conflict as, for example, a multiple mortise and tenon. Nonetheless, I find these tests reassuring regarding the quality of the glue line in dowel joints.

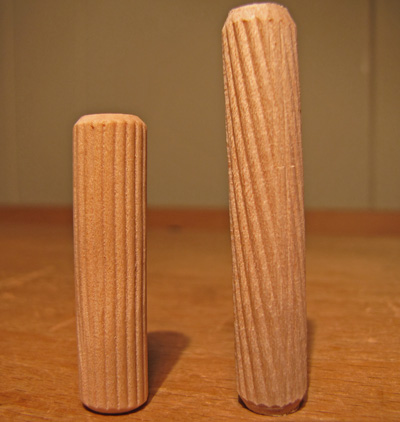
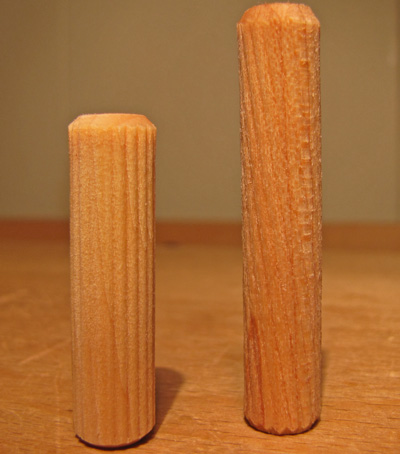
Here is another reason I prefer Laurier dowels. Their spiral grooves are shallower than the straight grooves of the made-in-China (and similar) dowels, as seen in the photo below. After a 15 minute soak in water (the second photo below), which mimics the response to water based glues, the Laurier grooves expand more to take up the space in the joint. The Laurier grooves are formed by compression, and therefore will retain their expanded profile.

But wait, there’s more! The most suspect issue with a dowel is how it adheres to the end grain glue surface in its hole. That will be addressed in the next post.

Category: Techniques  | Tags:  | Comments off