Archive for ◊ May, 2012 ◊

Author:
• Monday, May 28th, 2012

With over a half million apps available for the iPhone, surely there must be plenty of value to woodworkers. So I had hoped, but my search, while not exhaustive, has been generally disappointing. There are lots of apps for DIYers and contractors, but few of real value to small shop furniture makers. Some of the woodworking apps aren’t worth even their small cost, some are mostly designed to market in-app purchases, some directed at novice woodworkers give little truly useful information, and some just do not work well.

Here are some notable exceptions that I recommend.

The Woodshop Widget lists movement and hardness values for 288 wood species using data mostly from the US Forest Products Laboratory. You can easily calculate the change in width of flatsawn, rift, and quartered boards over a range of humidity that you specify. Also included are a board-feet calculator and several other handy functions. Its $3.99 price is about the most I can bring myself to spend on an app but this one is worth it.

Board Feet Easy Calculator does one job, does it well, and is free.

WoodworkerCalc, $0.99, is primarily a very handy fractional calculator designed for the fractions woodworkers use. I find it is faster, easier, and less mistake-prone in use than my old dedicated fractional calculator. It allows you to set the precision of fractions (e.g., to 1/32 or 1/64) and decimals. It contains a few other functions including, of course, a board-feet calculator.

Woodworking with the Wood Whisperer is a free companion app to Marc Spagnuolo’s website. The app gives you access to hundreds of videos, audio podcasts, the WoodTalk online forum, articles, and much more. The well-produced videos are not only informative, but also enjoyable because Marc is a gifted communicator with an engaging, likeable style.

Readers, if you’ve found other worthwhile apps to add to this list, please feel free to comment.

Category: Resources  | 4 Comments
Author:
• Saturday, May 19th, 2012

The manufacture of Bartley gel finishes had been discontinued for some time. Reader Mike Dedon gave me the heads up a few days ago that they are now available.

I missed the clear satin gel varnish, having been a fan for many years. Some old stash is pictured above. I called Bartley and they confirmed that the formula for this is unchanged with the exception of a new dryer because the original dryer is no longer made. The new dryer, I am told, imparts a purplish tint to the product but only when it is in the can. The clear varnish is available in satin only.

Seagrave Coatings, the new manufacturer, has been reported for a while now to have acquired the formulas from the former manufacturer and would be producing the finishes. There are several other brands of gel finishes but it is good to have Bartley’s available once again.

Mike tells me he tried one of the gel stains, and though the color was slightly different from his old stock, the application and results were just as good.

Two sources are Bartley and Woodworker’s Supply.

Category: Resources  | Comments off
Author:
• Sunday, May 13th, 2012

Tip #5: Be assertive “to the line.” Timid does not work.

To determine if your saw strokes are following the line, you have to observe sufficient incremental progress to close the loop of intent and result. In other words, you have to see how it’s going.

An ineffective strategy is to go very slow, with the supposition that although such extreme care is time consuming, at least things won’t go wrong. Yet if each stroke is barely consequential, such as when using a saw with too many teeth per inch for the job, it is difficult to know how it’s going and how to adjust. Much like learning to ride a bicycle, being overcautious will prevent you from ever learning. At some point, you have to let it flow, even if sometimes you will fall.

The answer is not a dovetail saw with 32 tpi. This is not to suggest being reckless or careless, but appropriately confident.

A similar problem is taking too much clearance from the line. This leads to excessive clean up maneuvers, creating more opportunities for things to go wrong and to lose direction. One-sided tolerance, an awareness of directional errors (discussed in another post), is one of the key concepts in craftsmanship, but it should not be misconstrued as an excuse for timidly missing by a mile.

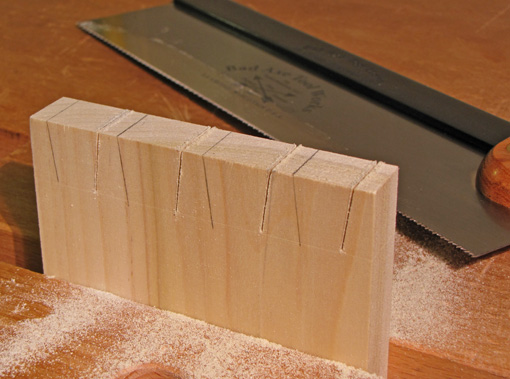
When sawing, the visual and physical senses continually inform each other. As you see success developing, your movements gain assurance. The physical sense takes precedence as the cut proceeds, and as assurance builds, speed can increase as an easy flow develops[In the cuts above, I did the one on the right first, not quite fully assertive, then went at it and split the line nicely on the other three, picking up speed.]

There is a solution to all of this: practice! And if you miss, get another piece of wood. I’ve had a lot of practice at that! Truly, we’re all students.

Happy sawing!

Category: Techniques  | Tags:  | 7 Comments
Author:
• Friday, May 11th, 2012

Tip #4: Since you can only watch one line at a time, see one line while you feel the other.

For most sawing, you are viewing a single line while using a physical registration for the other axis of the saw. I will explain.

In ripping with a handsaw, you follow the line with your eyes and the saw after establishing and then maintaining the saw at 90 degrees to the wood surface. When sawing a dovetail tail, most woodworkers start the saw along the end-grain line, establish that 90 degree relationship, and then view and follow the line down the wood.

In both cases your eyes track one line as you feel the angle you initially established with the saw by using an estimate of position (ripping with the handsaw) or another line (dovetailing). In dovetailing, you can use both lines to position the saw before you start. You can also use peripheral vision to sense the saw’s squareness to the length of the bench or a wall behind it. Yet when you are actually sawing, that initial line on the end grain is really only there to start you out. It is not necessary to continue to watch the remnant of it as you cut down the face-grain line, as long as you maintain a true stroke in one plane.

In any moment, the eyes can only watch one detail. Yes, there is peripheral vision, but even a small distance away from the spot you are “looking at” (technically, on which you are aligning the very tiny center of your retina, the foveal center), the vision is not very clear – not clear enough to follow a fine line. So if you attempt to follow two lines at once, the best you can do is to quickly jump your eyes back and forth from one line to another, and this must be done in the rhythm of your sawing stroke. The feeling one might have of actually accurately viewing two lines at the same time is an illusion.

Now, consider sawing a tenon. For some reason, it is often recommended to follow the end-grain line on top of the wood at the same time as you follow the line down the side of the wood. In other words, to saw a triangle into the wood in one motion.

In this method, the two contact points of the teeth biting into the wood grow further apart from each other as the cut proceeds. Yes, by aligning your eye, the two lines could be viewed as one, but the saw teeth are biting at two ends. Again, the best you can do is actually jump the eyes from one spot to the other.

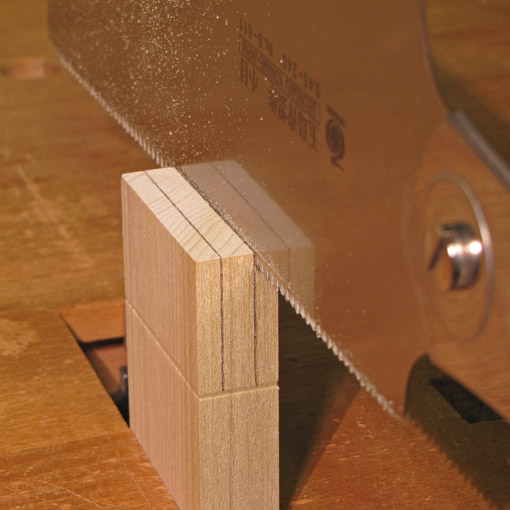
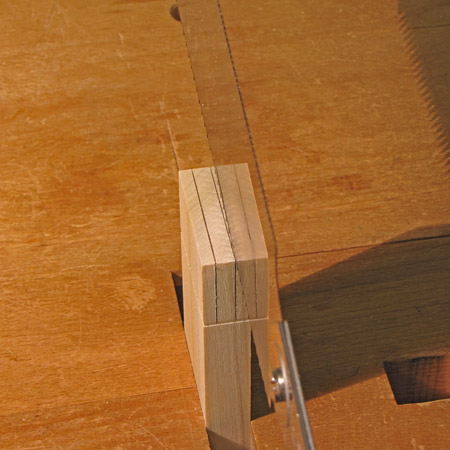
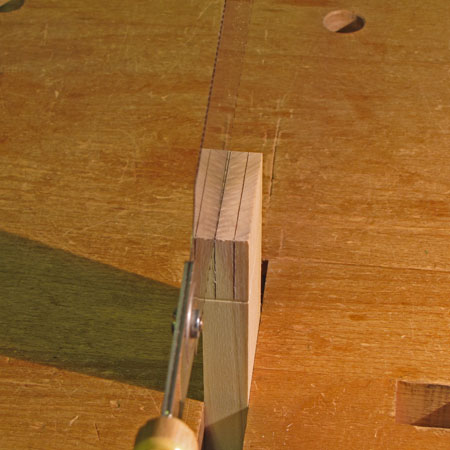
The better way, in my opinion, is to cut the single end grain line first. The eyes follow one line and the saw is held vertical by feel. I like to establish the cut first at the near end, then the far end, work each cut toward the middle, then cut the full width as the saw is established in a kerf. I advance just until the teeth are buried, as seen in the top photo.

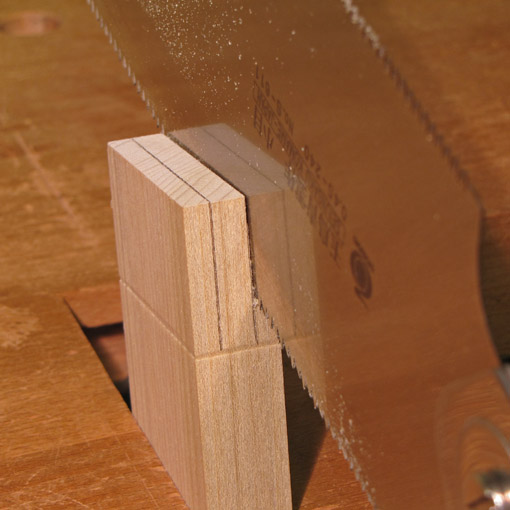
[By the way, if the saw blade is shiny, the vertical orientation of the saw can be checked before starting by observing the continuous straight line created by the top corner edge of the wood and its reflection in the blade. See the photos. I don’t find this necessary, but it is a neat trick to know.]

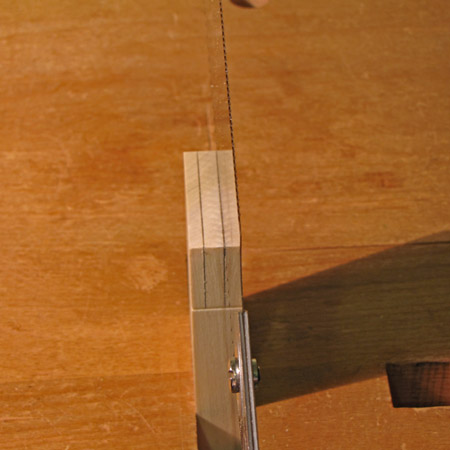
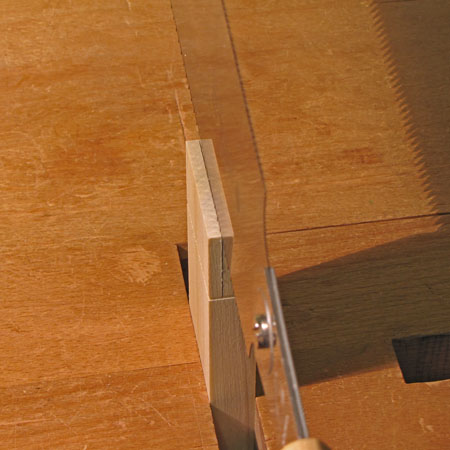
Then I saw the line down the side of the wood, only watching that line. The saw does not bite further in at the far end of the wood, only on the near side, going down the line. The initial kerf established on the end grain is the “line” I feel, as I watch the line down the side. See the photo below:

I proceed similarly on the opposite side. Next, the final remaining internal triangle of wood gets cut almost entirely by feel since there are kerfs all around it. At this point, I do not want to redirect the saw; I’m just going with the flow, by feel, with what has already been accurately established.

A similar sequence is useful in accurately crosscutting beams by hand, such as a 4×4.

Seeing and feeling work together to make accurate sawing.

Next: attitude matters.

Category: Techniques  | Tags:  | 2 Comments
Author:
• Monday, May 07th, 2012

Tip #3: See the line with both eyes if you can.

Most woodworkers feel more comfortable and work more accurately sawing with the line and the saw on a specific side, left or right. For right handers, the most efficient setup has the saw in the right hand and the line to the right side of the midline of the body. Both eyes view the line from the left and see the left edge of the kerf splitting the line and the remaining half-line trailing the kerf. The keeper wood in this case is on the left, the waste on the right. This arrangement is likely to be favored even in the minority of cases in which eye dominance does not match the side of hand dominance.

The photo at the top, demonstrating this setup, is the view with the right eye sawing a tenon. Below is the view with the left eye. The small disparity in vantage points permits stereoscopic (high level binocular) vision.

The key element is that both eyes view the line. If you are fortunate to have two good eyes that align properly, your binocular vision is an advantage over seeing the line with just one eye. The eyes also track better working together than alone. Try it.

Sometimes this desirable setup cannot be achieved. A right hander finds himself with the right eye viewing the line from the right side of the saw, as in the photo below.

Since it is usually very awkward to shift the head fully to the right of the saw, the left eye views from the left side of the saw, as seen below.

The brain cannot blend these two very different images. One image is functionally “turned off” and you are then effectively working in the less efficient one-eyed mode. Sometimes this cannot practically be avoided.

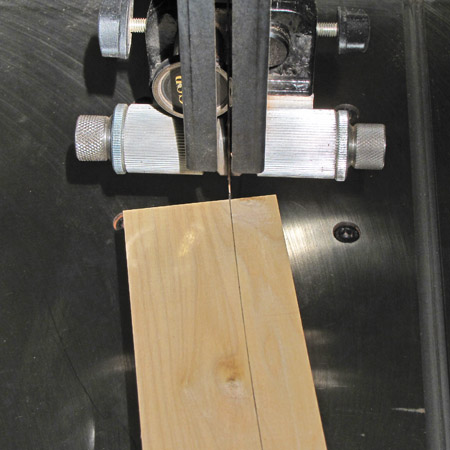
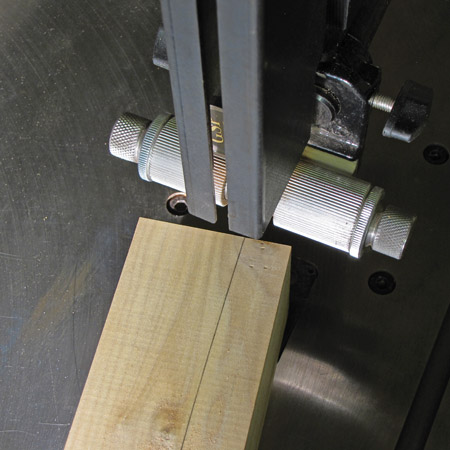
There is another situation to consider. This happens commonly at the bandsaw. One eye, usually the left, gets a good view of the line meeting the teeth, as in the photo below.

Oops, the other eye’s view is blocked by the blade guide/guard apparatus:

You may sense less visual precision without being immediately aware of the cause. The solution is to arrange your stance so that both eyes have a view of the line where it meets the teeth.

Because of the many sawing situations in the shop, there are exceptions to all of this. The basic principle is nonetheless helpful, and being aware of it can help your sawing.

Good lighting (angle and distance), a good quality line, and proper visual correction for the distance at which you are working, also contribute to seeing the line properly. And, yes, you do have to blow away the saw dust regularly, especially with Japanese pull-stroke saws.

Coming up: Do you need to see all of the lines? Can you? When does seeing them become less important?

Category: Techniques  | Tags:  | 4 Comments