Archive for ◊ October, 2011 ◊

Author:
• Tuesday, October 25th, 2011

Using a straightedge is easy, right? Yes, but it does pay to use a technique that is both practical and consistent with the tolerance to which want to work.

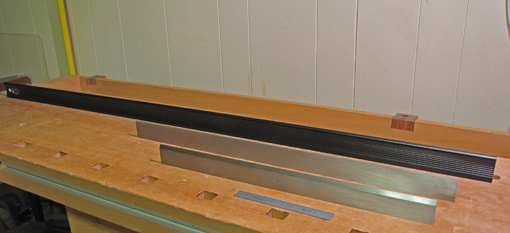
Pictured above are, from front to back, a 6″ Bridge City rule, the 18″ beveled Starrett #385, the 24″ unbeveled Starrett #380, and a Lee Valley 50″ aluminum straightedge. The photo below shows the thicknesses, from left to right, of the 6″ rule, a Starrett combination square blade, the #385, and the #380. The Lee Valley is about 7/16″ thick at its base. 
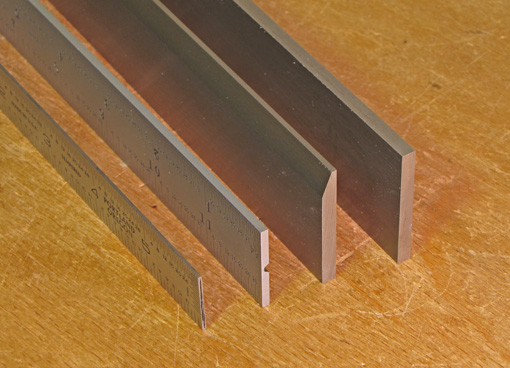
Let’s look at three techniques for using a straightedge and consider some of the related features of different straightedges.

1. Eyes won’t lie

This is the way a straightedge is usually thought to be used. You simply hold the tool against the surface and look for gaps against a light. Done properly, this allows the eye to easily detect gaps of 0.0005″ (half a thou) or less.

It is helpful to use a diffuse, linear background light, such as a fluorescent bulb, and a thin edge against the work, such as a beveled edge. If a wider edge is used, ensure that your line of sight is parallel to the surface. A false impression of accuracy will result if the light under a gap is blocked from view simply because there is an angle between your line of sight and the width of the tool’s edge.

This technique can be awkward and tiring because you have to hold the tool and the work up to the light, or bend and maneuver to view a stationary surface. It is good for testing a plane sole or other small, very precise work. The #385 or an accurate small rule are good choices. Avoid tipping the straightedge which can introduce errors caused by any slight bow of the tool along the length of its face.

2. Shim it, shim it again

Here you lay the straightedge on the surface and use feeler gauges to seek out gaps. Look for hollows near the middle of the tool, but also press down near an end to check for gaps at the opposite end created by a bump somewhere in the middle.

A good way to work to a specific tolerance, say 0.001″ for a plane sole that you are lapping, is to put a leaf gauge under a wide-edged straightedge, and then gently pull the leaf to see if it drags the straightedge or slips through freely. The former indicates you are within tolerance (as long as there was no previous rocking of the straightedge), the later indicates a gap. Decide how large and where you can tolerate errors.
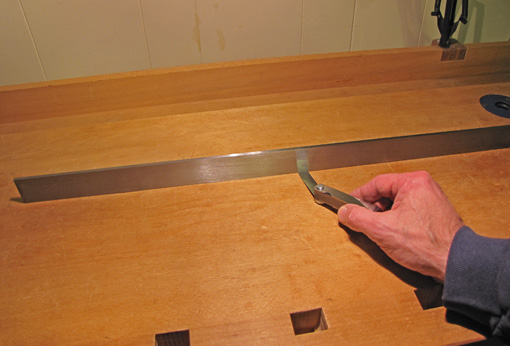
This technique is also handy to test a tablesaw top or jointer bed which you cannot lift and where bending is difficult or impossible to get your line of sight parallel to the surface.

The #380, or any tool with a similar wide edge, is a good choice for this technique.

3. Swing it easy

The first two techniques are slow and almost always overkill for wood preparation. So here’s the quick, easy, practical method that I suggest for dressing stock.

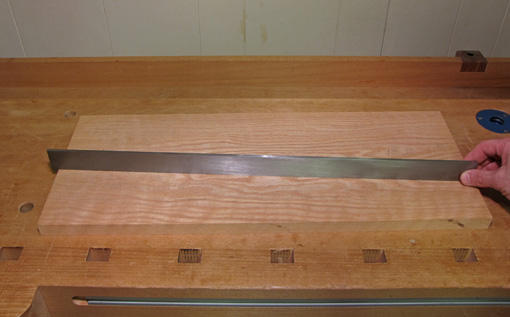
Set the straightedge on the wood, grasp and unweight one end, but do not lift it, and gently swing it along the surface. See where the tool “grips” or pivots. If it pivots just barely at the opposite end, the surface is slightly concave. If it pivots somewhere in the middle, you’ve got a bump. In woodworking, bumps are generally undesirable so you work with a one-sided tolerance, flat or a trace concave. You’ll quickly get the feel of this method.

Here is where a heavy, wide-edged, metal straightedge gives you a nice feel on the wood. The steel Starretts or the big Lee Valley aluminum work well.

This is convenient – no lifting or unclamping the work – and it quickly tells you what you want to know – that one-sided tolerance. It allows you to work in rhythm with your craftsman’s intuition.
In conclusion, the straightedge, while the simplest of tools, requires matching the technique to the task.

Category: Techniques, Tools and Shop  | Comments off
Author:
• Thursday, October 20th, 2011

It can be argued that a straightedge is unnecessary. When using a handplane, for example, a woodworker can sense the flatness of a board from the bite of the blade and the shavings produced as the work progresses. As another example, the ultimate test of an edge-to-edge glue joint is how the boards meet each other rather than an external standard. You would, however, mostly have to just trust that your planes’ soles, tablesaw top, jointer beds, and so forth are accurately flat.

As a practical matter, a high quality straightedge is a fundamental reference tool that is very useful in the shop and is easy to acquire. I prefer factory-made metal straightedges, but wooden straightedges can be made in the shop to a very high standard. 

Here’s a simple method:

Start with two pieces of a stable, fine-textured wood such as mahogany or cherry, quartersawn, flat, with straight grain, about 2″ wide, 18″ – 30″ long, and 3/8″ – 1/2″ thick. MDF will also do. Join the two pieces face to face by clamping, or by pinning with nails or dowels that are snug but removable. Bevel a pair of adjacent edges to make each 3/32″ – 1/8″ wide.

Now plane both the thick and the thin pairs of edges as flat as you can. I think the easiest way to accurately plane the edges is to shoot them. Put the plane on its side, clamp the pair of sticks on a flat board with a pair of edges overhanging, and plane away. Uncouple the pieces and check the edges against each other.

You can start off by simply ripping each piece on an accurately set up table saw and then go to the planing steps.

Because two edges are being planed together, they will have the same type of inaccuracy – concave or convex – at the same places. The inaccuracy will be effectively doubled when you place the edges against each other and compare them against a lighted background. [There is no realistic possibility of creating a falsely acceptable result by producing one concave edge which happens to mate with the other edge being symmetrically convex.] Work until you achieve whatever level of accuracy that you think is practical for your work.

You now have made two straightedges AND a pair of winding sticks!

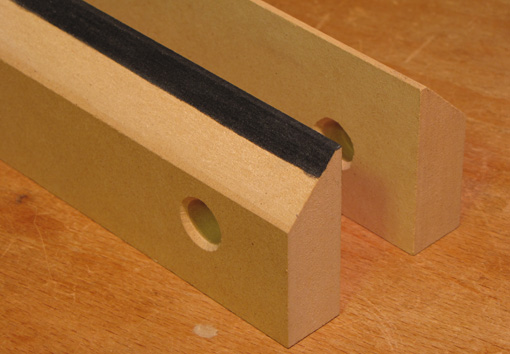
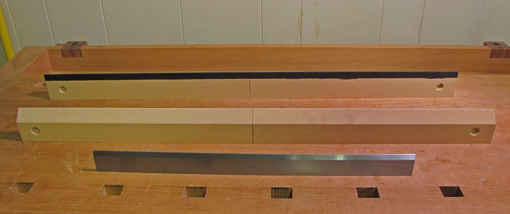
I made the 30″ winding sticks, pictured above, from 3/4″ MDF. Only minimal planing was required to refine tablesawn edges. They’re good to about 0.001″ over their lengths. I use them only as winding sticks, which is another topic for another time.

For straightedges, I like steel and, in some cases, aluminum. A quality metal straightedge, such as a Starrett, is accurate to an extremely high tolerance and has the advantage of durability. I like the weight, contact feel, and affordability of a steel straightedge in lengths up to 24″. For longer ones, aluminum keeps the weight and cost down. Properly cared for, these tools will last a lifetime.

Next: a selection of straightedges and techniques for using them.

Category: Tools and Shop  | 4 Comments
Author:
• Thursday, October 06th, 2011

First and foremost, a woodworker needs to know wood. No degree of prowess with tools and techniques can compensate for a lack of understanding of the material into which steel cuts. The guys at American Woodworker magazine have put together a sawdust-in-your-pockets practical collection of topics that I think would benefit any woodworker: Getting the Most From Your Wood-Buying Bucks, published last year. My recommendation is unsolicited and uncompensated; I just want to share good information.

The sections of the book are:

  • Finding Great Wood. This includes getting wood from locally cut trees, using salvaged wood, dealing with wood defects, and understanding lumber grading.
  • Sawing & Milling Great Wood. Topics include flitch-cut logs, resawing, milling rough boards, and the best explanation of reading grain direction that I’ve ever read.
  • Drying Your Own Wood. Even though you might not use the plans to build your own kiln, the explanations of drying wood and moisture meters are very helpful.
  • Very Special Wood. My favorite section. Five different authors share their intimate knowledge of eight different wood types and species, such as spalted wood and mahogany and its look-alikes.
  • Special Finishes. This is a sampling of finishing strategies and principles for woods including pine, walnut, cherry, and oak.
  • Projects for Special Wood. Here are some interesting furniture projects and techniques for managing large slabs.

Even in areas where I think I have a good amount of knowledge and experience, I was able to pick up useful tips and helpful clarifications. Typical of Fox Chapel books, the layout and photography are attractive and inviting.

What I do not like about this book is the title. The book does give information for you to achieve that goal but, as a title, it underestimates the scope and value of the contents. One of the reasons I wanted to write this review was my concern that the book might be overlooked because of its title.

I’ve tried to open the cover for you in this review, but I think if you take a look for yourself, you’ll like it. Its practical approach makes it a good addition to books I’ve previously recommendedUnderstanding Wood, by Bruce Hoadley, and the encyclopedic volumes, Wood, by Terry Porter, and Wood Handbook, from the US Forest Products Laboratory.

Don’t you just love wood?

Category: Resources  | 2 Comments