A curved-edge frame and panel, especially an asymmetric curve, adds a nice flair to a piece. The curve is typically along one or both rails which are tenoned at both ends.
In general, for a frame and panel in my style of work, the panel is the star and the frame is the supporting cast. The panel is a highly figured, special piece of wood or at least contrasts with the frame. I find that a simple square profile or a very small radius cove bordering the raised field is the most effective way to display the beauty of the wood. An ogee or wide cove or bevel is a visual distraction from the effect I am trying to create.
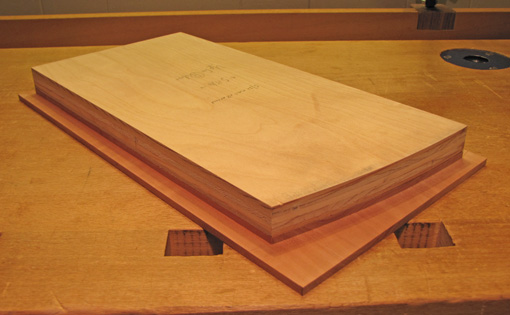
In making a curved-edge frame and panel, it can be challenging to match the curved edge of the raised field to the curve in the frame member. I will describe a simple, reliable method to create an even gap between the field and the frame. Basically, the frame is made first, then a template for the field is made using the dry-fit frame as a guide. The template is placed on the panel stock and a short pattern-routing bit creates the field. The photo above shows the template still on the panel stock after raising.
Start by making the curve in the rail according to your shop drawing. I do this by measuring the key points on the wood and drawing in the rest with an Acu-Arc adjustable curve, or by making a 1/8″ MDF template to transfer a layout line to the wood. [Tips for laying out curves.] Two parts can be made to match by clamping them together for the final fairing of their curves. For efficient production work, though not fundamentally necessary for this method, a plywood or MDF template can be made and used to guide a pattern or flush trim router bit.
Complete the mortise and tenon joinery for the frame. Dry assemble the frame and place it on top of a piece of 3/4″ MDF or plywood. Decide on a width from the inside edge of the frame to the edge of the field. Find a small washer with a rim width that matches that measurement. Trace onto the sheet stock with a pencil point held against the inner rim of the washer while pushing the outer edge of the washer along the contour of the frame.
Carefully cut to the curved line and fair the edge, keeping it square to the face. Use your eye to match its curve to that of the frame, creating an even width between the template edge and the edge of the rail; make minor alterations as necessary. Then cut the opposite end of the template. If you are building during either extreme of the annual range of humidity, alter the width of the template along the stile edges to anticipate the seasonal movement. For example, if you are building at a very dry time, slightly reduce the width (crossgrain) of the field because it will only be larger at other times of the year.
The template can be used to help in your selection of the panel wood. Draw around its edge onto the proposed wood to see exactly how the panel will look. The template can be used from both sides for two symmetrically oriented panels such as on a pair of doors.
All of this makes for a very direct way to control the fit and appearance of the panel.
The next post will discuss using the template to make the panel.


i like your method very much. This looks so much better than the indescribably awful way i tried to do it by making the panels first… I look forward to the next installment!