Archive for ◊ January, 2011 ◊

Author:
• Sunday, January 30th, 2011

A bench hook is a handy workbench accessory, mostly for crosscutting small parts. This version works well with both Western push saws and Japanese pull saws.

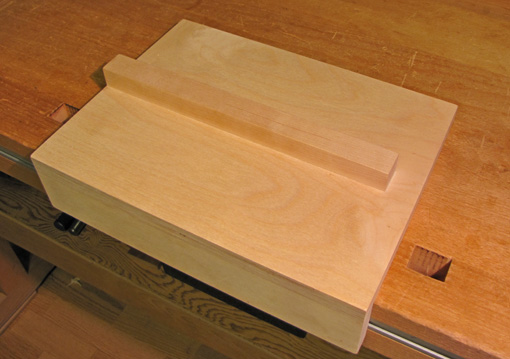
I try to keep workshop jigs and fixtures as simple as possible (“but no simpler,” per Einstein) and this one is no exception. It is constructed from plywood and maple, using simple glue and biscuit joints. The base is 12″ wide by 9″ deep with a 13/16″ high by 1″ wide maple fence at the middle and a 2″ wide cleat for hooking the bench. It could just as well be screwed together. The fence is shortened on the right side for a right-handed woodworker.

For use with push-stroke saws, the jig is simply placed on the bench top with the cleat catching the front edge of the bench. The work is held in place by hand with forward pressure against the front side of the fence. Aided by the sawing pressure, this also holds the bench hook itself in place.
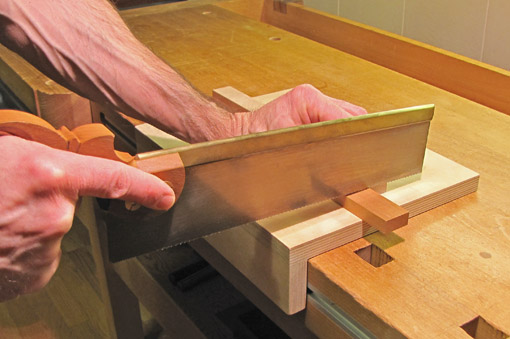
For use with pull-stroke saws, the work is placed against the back side of the fence. Since the sawing pressure is toward the user, it will pull the work against the fence but will also tend to displace the bench hook. This is not a problem for light work because I can lean forward the heel of my left hand against the fence to stabilize the bench hook while gripping the work piece against the far side of the fence with the rest of my hand. For more substantial pieces it is better to secure the bench hook in the front vise of the workbench.
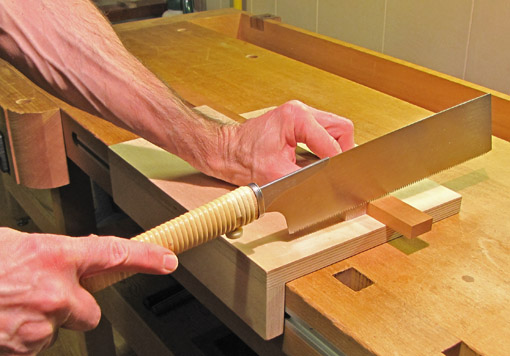
I do not generally use the end of the fence as a guide for the saw, and do not use a fence with 90̊ or 45̊ kerfs, though some may prefer these options. I work to a line marked on the wood and just eyeball noncritical cuts.

This bench hook is unscarred because it is new, replacing one of the same design that got too beat up. As with so many tools in woodworking, it takes a long time and many situations to get a real sense of the effectiveness and versatility of shop jigs. This design has served well over many years so I continued it for the new one, only making it slightly larger.

The bench hook comes in handy for more than sawing. All sorts of work on very small pieces, such as paring and chopping seems to get done on the front side, against the fence. I do not shoot on it; I use a shooting board for that.
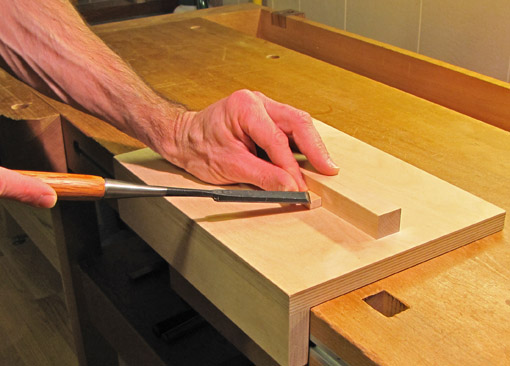
Once again, simple and proven effective.

Author:
• Sunday, January 30th, 2011

If you are looking for ideas for a project, an excellent source is Lark Books’ 500 Series. While this series covers many craft media, woodworkers will find the most inspiration from 500 Cabinets, 500 Tables, 500 Chairs, 400 Wood Boxes, and 500 Wood Bowls. Even if you are not looking for ideas, there is much in these books to appreciate and enjoy. You will probably do lots of nodding, plenty of eye widening, some jaw dropping, and, naturally, some wincing.

The books, all stout 8″ x 8″ paperbacks, sell for about $12-14 on Amazon.

Each book delivers a huge quantity of outstanding work. There are no artist’s statements or lengthy ruminations, just a quality photograph, occasionally two, of the piece, with the artist’s name, a title for the piece, and size, material, and finish information.

I like to look at lots of sources, in print, online, and best of all, in person. Aside from the sheer pleasure of it, this activity expands my creative thinking as the imagery mixes and reacts with my own design chemistry. The eventual product is, hopefully, something meaningfully personal.

When looking through these or similar collections, ideas come from all directions. A box may start a chain of thought for a cabinet, or a chair for a table, and so forth.

To be clear, I am not advocating lifting designs, a form of theft, and purporting them to be yours. Yet, there is unlikely anything completely original since we all absorb what came before even as we make our own discoveries.

By way of disclosure, my work is in one of these books, which gets me a single free copy, but this review is not compensated. I just like the books.

Category: Ideas  | 2 Comments
Author:
• Tuesday, January 18th, 2011

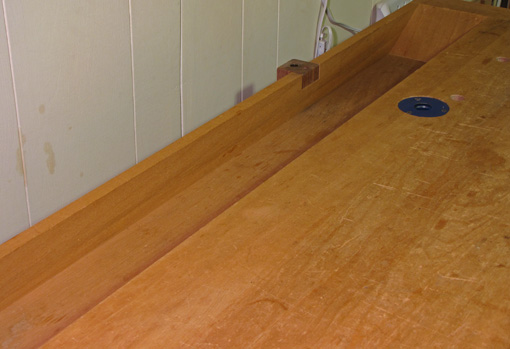
This is really a matter of opinion and personal work habits, but I would like to make a case for the humble workbench tool well. The bench that I have used for more than 25 years has one and I would feel awkward working without it. Here’s why.

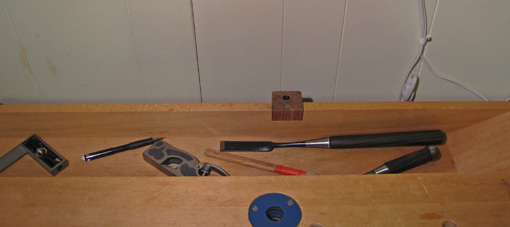
The tool well is a place for tools, small parts, and other sundry items not in immediate use while working at the bench. When placed there, the items are protected from bumps and dings because they lie below the level of the work surface. Think about vigorously jack planing a board, pushing the plane in various directions, and the possibility of the toe of the plane crashing a square, gauge, or straightedge. Ouch. Working a curve with a rasp, sawing joints, and paring with a chisel are other examples.

Of course, the tool in hand may also be damaged from such collisions.

Without a tool well, it will actually take up more space to place the unused tools on the work surface at a safe distance to create sufficient clearance from the work at hand to avoid feeling inhibited. Thus, the tool well saves, not wastes, space.

The work on the bench surface is likewise protected from the items in the well, such as chisels. Wood parts are rotated, pushed, and otherwise manipulated on the work surface and you want to avoid unintended meetings with tools.

The outer edge of a tool well at the end of the width of a bench should be flush with the work surface. Thus, for most purposes, the bench width effectively includes the width of the tool well. The same is true of a well in the middle of the bench width. The inside of the well on my bench is 5 1/4″ wide and 2 3/8″ deep.

Of course there are some disadvantages to the tool well. Tool wells at the end of the bench width prevent most clamping in that area. Also, there is less continuous flat area on the bench. (Though Bob Lang has a clever solution to this in a bench he designed and is detailed in Popular Woodworking.)

The disadvantage that seems to be stated most often, that the tool well collects dust and debris, is not a disadvantage at all. Yes this does happen, but I would rather the debris, such as chips from chopping joints that didn’t get swept to the floor, be out of the way in the well than sit on the work surface. Anyway, it’s no big deal to sweep out the well since there is a handy ramp at one or both ends.

So, for woodworkers who are buying, building, or upgrading their workbench, these are some considerations to keep in mind and which I hope will be helpful. There are many bench designs and many excellent sources to study. Decisions are ultimately personal, so go with what seems right for you and enjoy every minute at the bench.

Category: Tools and Shop  | 11 Comments
Author:
• Tuesday, January 04th, 2011

This wood has beauty, strength and variety. Its deep color, density, and figure impart a certain gravitas to a piece. In no sense is this wood a lightweight.

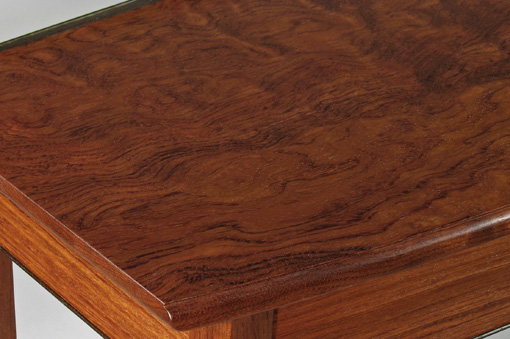
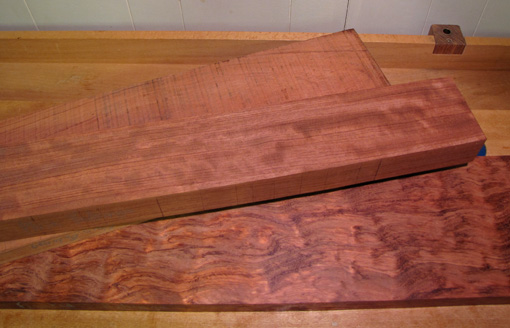
Plain (non-figured) bubinga’s brick red color is accented with darker annual ring lines. These are thinner and more subdued on the rift surface and more variable and bold on the flatsawn surface. Figured bubinga, well, wow! My favorite is the swirly “waterfall” figure, a variant of quilt, which is showiest on the flatsawn surface, becoming a slightly more modest ripple on the rift surface. This species can also produce fantastic broad, ropy curly patterns and pommele figures.

Bubinga (Guibourtia spp.) is available in clear, wide, long lumber. I suggest inspecting the boards for compression failures which seem more common in this species, perhaps occurring when these big trees are felled. These appear as jagged cracks running across the grain and are often very difficult to see on the roughsawn surface.

Giant highly-figured slabs, if you can pay for and haul them, can make fabulous table tops. An internet search will reveal some monster chunks of wood. Veneers are available, with the rotary-cut variety being known as kevazinga (variable spelling).

Below is a sampling from the shop. From top to bottom: rough flatsawn, machined-planed 8/4 rift leg stock, machine-planed rift waterfall with a coat of lacquer.

Bubinga works reasonably well, at least the non-figured boards, despite its high density, listed variably in the 0.75+ range (sugar maple is about 0.63). It can be hand planed and sawn well, although more muscle is required than for domestic hardwoods. Likewise, take only small bites when chiseling. Cutting on the table saw requires plenty of horsepower and a good sharp blade to move the stock with enough pace to avoid burning. To prepare leg blanks from 8/4 or thicker stock, I prefer using my bandsaw in conjunction with the jointer and planer instead of my 3HP cabinet saw.

Surprisingly, figured bubinga can often be hand planed reasonably well using a 55-60̊ cutting angle. If that doesn’t work, no worries, because the wood scrapes exceptionally well with card scrapers and scraper planes, even wildly figured stock. It responds well to using a scratch stock to create beading and other profiles. It sands to a high polish. The wood holds edges very well and end grain cuts particularly cleanly.

For finishing bubinga, I like wiping varnish, not too thick, as always. In some cases, preceding with an oil-varnish mix can enhance the look of highly figured pieces, but experiment because sometimes that can result in a muddy look.

I’ve read that bubinga can sometimes be troublesome to glue but I have not had any problems using PVA glues in edge-to-edge and other joinery. Two-part urea formaldehyde glue has worked well for laminations – URAC 185 dries to a dark maroon which blends with bubinga’s color.

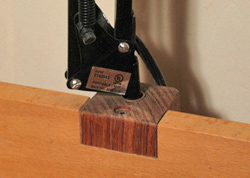
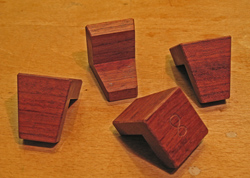
Shrinkage is listed by the Forest Products Laboratory as a decent 8.4 tangential, 5.8 radial, 14.2 volumetric with a very good T/R of 1.45. Most of its strength properties, including its freakish shear strength, are about 50% higher than domestic tough guys white oak and hard maple, while its side hardness is about double of those. It is an excellent choice for shop tools and fixtures such as the dovetail markers and lamp mount pictured below.

If there is a downside to bubinga, it is that it can be tiring to work with, sometimes producing a bit of a love-hate feeling on my part. This is a heavy, dense, and unyielding wood. Parts must mate well – there’s no helpful mush factor in fitting joints. After completing a project in bubinga, you might feel a longing for some friendly walnut, but after admiring the finished piece in bubinga, you’ll soon have ideas to use this wood again.

Category: Wood  | Tags:  | 4 Comments