Archive for ◊ October, 2010 ◊

Author:
• Sunday, October 31st, 2010

Over the coming weeks and months I would like to write some posts about my favorite woods from a personal, hands-on perspective. The internet woodworking world has an abundance of discussion about tools, ironically to the relative neglect of the magnificent gifts of nature on which we use them.

First up is big-leaf maple, Acer macrophyllum. The natural range of this species is the North American west coast from California to British Columbia. Synonyms include Oregon maple, Californian maple, and Pacific maple. To distinguish, “hard maple” is usually Acer saccharum (sugar maple) and “soft maple” is usually A. rubrum (red maple) or A. saccharinum (silver maple).

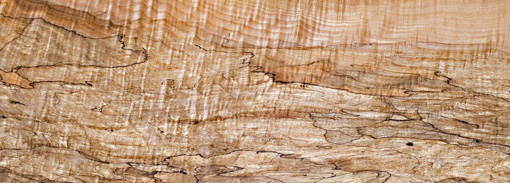
For this East coast woodworker, the magic of the internet is the source for big-leaf maple. The first place I turn to is Northwest Timber, run by Lewis Judy, the source for the wood pictured in this post. Their wood is properly processed and cared for, and I can confidently expect that what I see is what I will get.

I can’t wait to get this panel into a project:
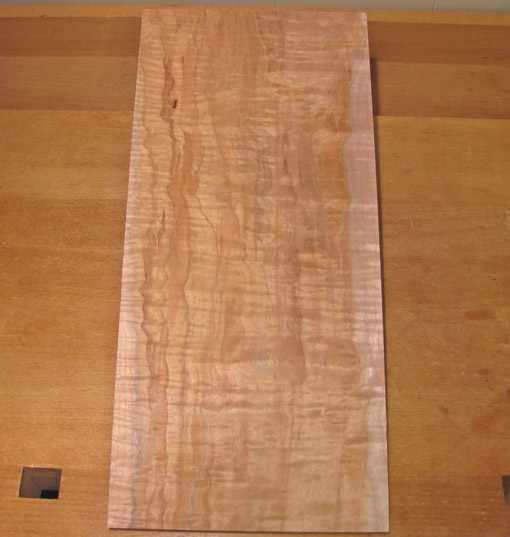
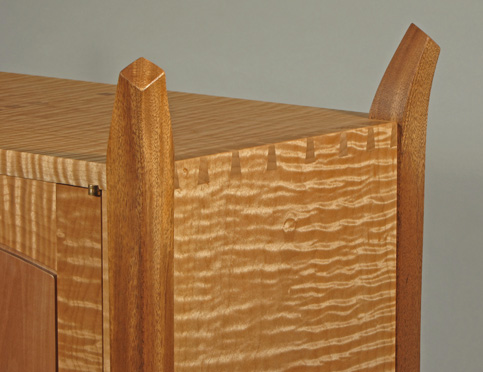
Why source big-leaf from 3000 miles away when I can easily find hard and soft maple locally? Well, for starters, I like its looks – and it has lots of different looks. Curly big-leaf is my favorite. I prefer it with an inviting soft, ropy curl, with wavy annual ring lines, as distinct from the tight, regimented fiddleback curl seen in the “best” hard maple boards, which seem somewhat aloof to me. I also like the warm golden-tan color of big-leaf which is enhanced with a wiping varnish finish – I usually prefer gel varnish. It also never seems to have the gray tinge that often plagues soft maples.
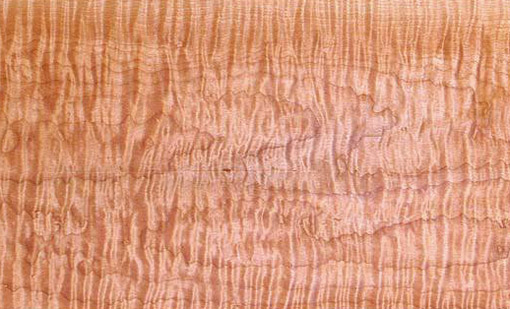
Oh, but there are so many more faces to big leaf! Unfigured, it still looks good, often with just a little wiggle to the annual ring lines to give it subtle character. Quilted figure can be mild to knockout, and some may like the extreme bubbly-looking “popcorn” figure. Big-leaf heartwood, “redheart,” can have a beautiful variety of subtle colorations. Like other maples, it produces a variety of interesting spalted appearances.
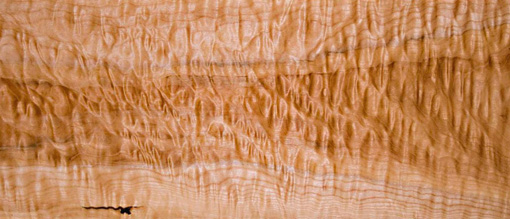
Big-leaf maple is softer and easier to work than sugar maple, about the same as soft maple in that regard. Still, it is plenty strong and dense enough for tables or any other furniture. It saws easily by hand and generally without burning on the table saw. Planing, not withstanding heavily figured boards, and gluing are not problematic. Heavily curly boards can be properly sanded to produce a final surface which, under wiping varnish, is indistinguishable from hand-planed. (Really, it’s OK, I tested.)
Forest Products Laboratory data show the density and hardness of big-leaf are similar to those of soft maple and significantly less than hard maple. Its volumetric shrinkage and tangential/radial ratio are more favorable than those of soft and hard maples. This is definitely appreciable and significant in the shop in comparison to hard maple. All in all, big-leaf maple is a friendly wood to work.

And a lot of fun to choose!

[My endorsement of NW Timber is unsolicited and unpaid. I just like their wood.]

Category: Wood  | Tags:  | 6 Comments
Author:
• Tuesday, October 19th, 2010

Gimlets can be handy tools especially when you need to bore a small hole and the usual drilling tools cannot fit in a tight space. I usually find myself using them if I’m in a jam, meaning that I need to drill a hole that I should have made at an earlier stage in construction. I find gimlets useful in small diameters, from 5/64″ to 5/32″, and mostly use them to pre-bore for screws.

The problem is that gimlets do not work very well – they tend to split the wood. I am referring to the commonly available gimlet with a screw point followed by drill flutes further up the shaft. Lee Valley, Highland Hardware, Garrett Wade, and others sell what appears to be the same set of seven for about $14-$15.

For the record and to distinguish, there are other, fussier-looking, more expensive types of gimlets that more resemble a tapered drill bit, some meant to be used in a brace, that are less widely available and not dealt with here. There is also a Japanese gimlet, the kiri, that resembles a miniature sharply angled spade bit on a tapered dowel handle that is rotated between the palms to bore a hole. Still another tool altogether is the very useful brad awl or bird cage awl.

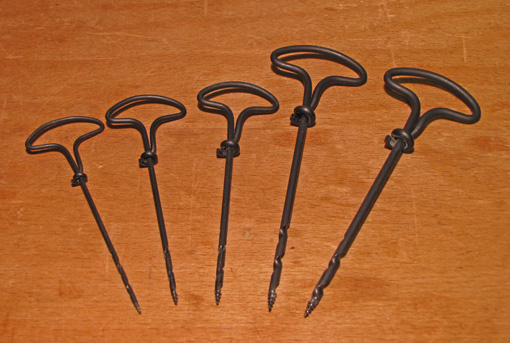
The design of the common gimlet, pictured above, causes the screw threads to feed aggressively into the wood and squeeze past the wood fibers while doing little, if any, actual severing of the fibers. It’s not really much improvement over just pounding a round nail into the wood.

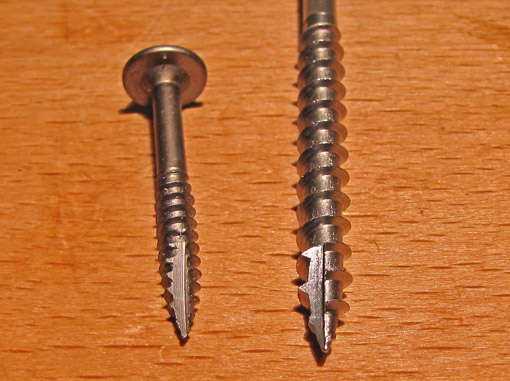
However, consider the design of auger point screws, shown below, such as the type used for pocket-screwed joints. These break some wood fibers as they are driven and so reduce splitting. They do not, however, appreciably clear chips from the hole because the screw threads are not designed to do that. What if the gimlet screw point was altered to mimic an auger screw point so it could cut fibers, and pass the chips onto the drill flutes so they could be cleared?

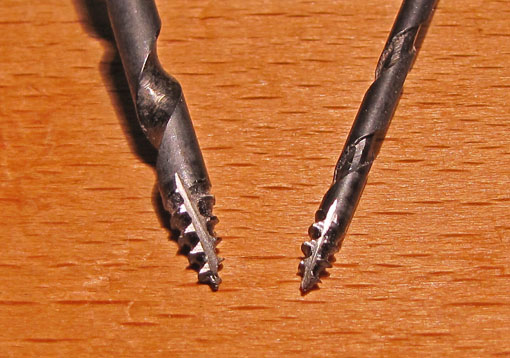
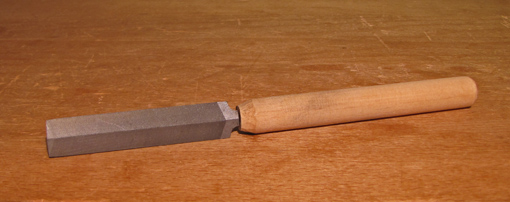
I made this alteration to the points on my set of gimlets. I found that the edge of a Japanese feather saw file (hatsuke-yasuri) did the job quickly and well, even on the 5/64″ gimlet, and better than a diamond paddle or a triangular Western saw file. I cut two slots on each gimlet, 180̊ apart.

The 75 mm “full cut” Japanese file that I used:

Does it work? Yes, fairly well and certainly a big improvement over the unaltered gimlets! The modified screw point cuts some fibers, makes boring easier, and produces some chips, although the chips don’t get cleared very well by the drill flutes. To compensate, I simply periodically pull out the gimlet to clear chips. Splitting is virtually eliminated. 

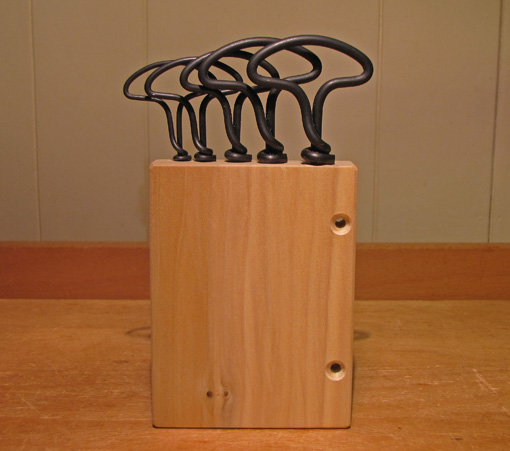
This simple modification turns a frustrating tool into a life-saver in a bind. In fact, I’ve gone from almost having given up on these tools to valuing them enough to make a nice little holder for them which attaches to the inside of a door of my hand tool cabinet.

Addendum: (10/21/10)

By “fairly well” I mean that gimlets still have their drawbacks. They are, after all, very simple tools that are substitutes for more mechanically sophisticated tools that are preferable – like a drill. So, in the context of a gimlet, I think I can say that this modification makes them work, here goes, “well!”

It helps to use the Japanese file to create a clean slot with an approximately 90° attacking edge, as pictured. This edge meets the wood aggressively and breaks the fibers. A sloppy “V” groove would have, in effect, a relaxed “rake” angle to meet the wood and thus be less effective.

Category: Tools and Shop  | 15 Comments
Author:
• Tuesday, October 12th, 2010

Following up on the problem posed in the previous post, here is how I managed this board. Most important, I proceeded step by step, watching the wood. The procedure below may seem complicated, but it really is simply a matter of understanding wood and using good sense.

Before doing anything else, it pays to perform the casehardening test. This will require cutting an inch of length off the end of the board and sawing out the core of the offcut to create a long “U” shape. Please refer to the method described in an earlier post. This board, like most thick stock, had some casehardening stress in it.

Starting with rough stock nearly 1 ½” thick and about 9″ wide, the final thickness at the center of the 25″ length will be just under 11/16″ and, at the outer ends, just under 1 3/16″, for a curve depth of ½”.

The diagram is only roughly to scale. It really is intended to give a qualitative sense of how the board was managed. The numbers in the diagram refer to the steps discussed below.

1. I investigated the board by skimming the faces on the jointer just enough to decide if the board will look nice and to choose the show face which will be the curved face on the outside of the cabinet.

2. The opposite (inside) face was hit-or-miss jointed enough to establish flatness. This leaves some rough areas remaining, but enough of the face is smooth and flat to serve as a reference for marking out the curve. At this point, there is less than 1 3/8″ of thickness remaining. I also did a light pass through the thickness planer (with the flat side down, of course) to get a better look at the show side and to estimate how much thickness would be surviving.

3. I sawed the curve with the bandsaw. The layout line was drawn almost up to the surface of the board at the ends. (I had left an inch or so of extra length at each end.) I sawed away from the line, guided by a second line drawn less than 1/16″ away from the original line. This allows for clean up later.

Because substantial thickness was now removed from one side of the board, it promptly distorted so the flat side wasn’t flat anymore.

4. I then removed wood from the inside face which neutralized some of the distortion and re-established the flatness of this face. I did this mostly by hand planing which gave me a chance to keep an eye on things as I went along.

I then cleaned up and refined the curved face, rechecking the flat face as I went along and making minor corrections as needed. At this stage only small quantities of wood were being removed so only minimal correction was required.

The board now sits on stickers as it awaits its role in the construction of the cabinet.

Despite all of this forethought and care, it still helps to have some luck with wood, but it’s not so wicked after all.

Category: Wood  | 2 Comments