Archive for ◊ May, 2010 ◊

Author:
• Sunday, May 30th, 2010

Sometimes an inexpensive tool can be designed and made perfectly well enough to do its job.

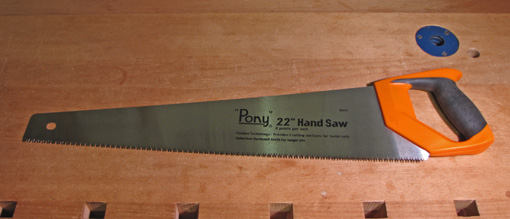
I wanted a new crosscut saw for breaking down stock, something faster than what I had been using. I found it at my local Woodcraft store: a Pony brand 22″ handsaw, manufacturer’s model #66221, for $15.99. For the inelegant task of rough crosscutting, this tool vastly exceeded my expectations. It cuts like a Tasmanian devil and tracks surprisingly well.

The diamond ground teeth, 8 ppi, each have 3 bevels which make them essentially Japanese cross cut teeth with a negative rake. The induction hardening makes them unable to be sharpened in the shop, so when they dull, no doubt after a very long time, the saw will go to the metal recycling pile. The manufacturer states that the saw cuts on both the push and pull stroke, though the push stroke does most of the work. Not surprisingly, the saw does not rip very well.
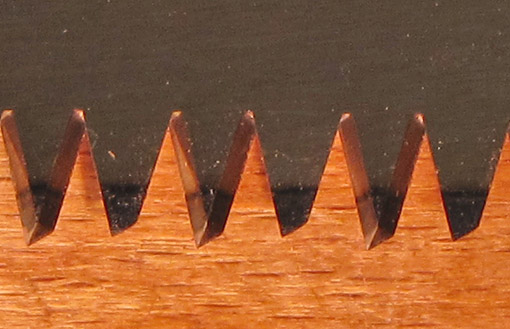
I measured the saw plate, which is straight enough, at 0.040″ with 0.004″ set, each side. The plate is not taper ground (of course, it’s $15.99!) so it is helpful to keep it waxed to avoid pitch build up from some woods and thus slower sawing. The soft-grip handle is adequate, though it tends to lure my hand into a hammer grip rather than a better grip with the index finger extended. The handle acts as a 45/90 square, quick and handy for stock breakdown.

Several times in this blog, I’ve made the case for buying the best quality tools one can afford, going beyond tools that are just “OK.” Yet, I really like this saw because it does its job, which requires more power than finesse, very well and with ease. I think that makes it a good saw even though it lacks certain refinements that I can do without. That leaves more of my woodworking budget to devote elsewhere. Where? Take your pick of great saw makers – Lie-Nielsen, Bad Axe, Wenzloff, Lunn, etc., or what I own several of: Gramercy.

[As with other tool reviews on this blog, this is unsolicited and unpaid.]

Author:
• Tuesday, May 25th, 2010

Thoughtfully managing the wood right from the start is one of the most critical elements in the success of a project. I find it to be also one of the most exciting aspects of woodworking. Here I show how I managed a board of 8/4 lacewood to get the desired figure and sizes of wood needed for a project.

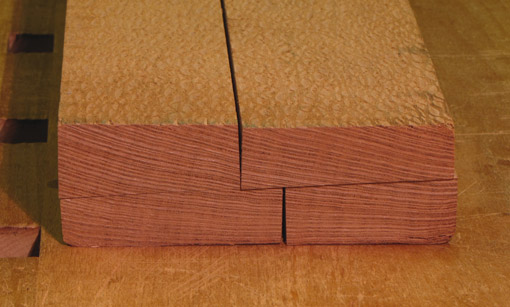
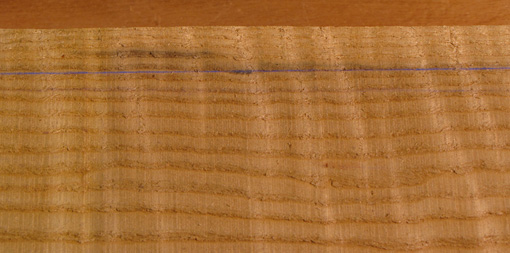
I pieced back together the sawn board to recreate the decision process. Below is an end-grain view. The more prominent lines in lacewood, here running across the board’s width, are rays. The faint annual rings are nearly vertical and approximately perpendicular to the rays. At the top of the board, the rays meet the edge at an angle and so produce a rather fine figure on the surface. This is not quite what I wanted.

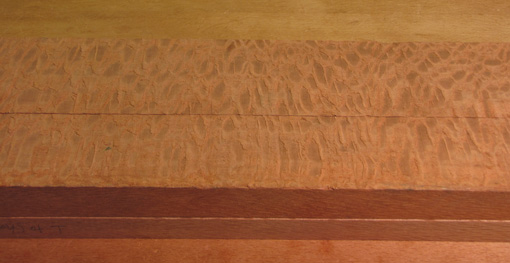
The two photos below shows the board flipped over. Now, at the top of board, the rays are nearly parallel with the edge and so produce a broad flake figure on the surface. To my eye, this is not the most attractive look for lacewood.

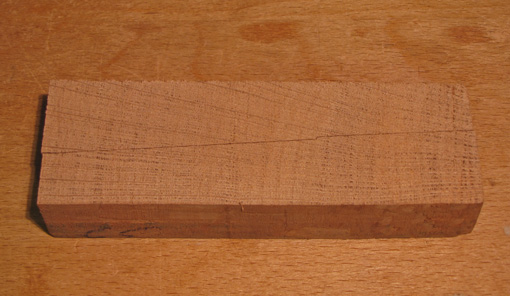
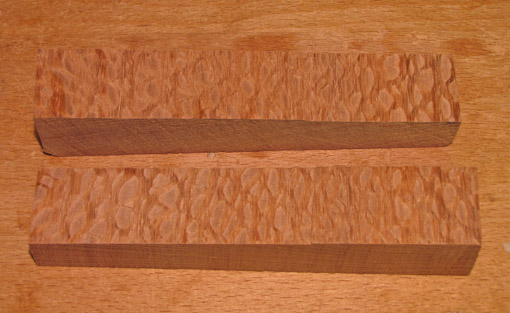
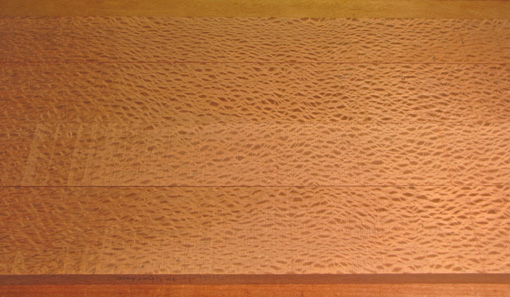
To get the desired figure and have all the surfaces consistent, I resawed the board at an angle such that the rays, as they traverse the core of the board, meet the cut line at an angle, but at a lower angle than at the top surface in the first photo (at top). To give this a test, I made a 1 ½” end cut, marked a resaw line and cut it to reveal the new surfaces. They looked good so I went ahead, set my bandsaw table, and resawed the board at that angle.

The photo below shows the resawn surfaces. I also ripped the resawn boards to produce pieces from which I can get 1″ and 3/4″ thicknesses, which will fit the needs of the planned project. Of course, since the resawn surfaces were all originally adjacent to each other, there is excellent consistency in the figure. (The surfaces have been hit-or-miss jointed.)

Some of these pieces will be gently shaped, primarily along their lengths. Because this will not appreciably change the angle at which the rays meet the surface, there should be no noticeable change in the figure pattern. There will be a bit of shaping across the width of some of the pieces, but I will keep this to a bare minimum because that will change the angle at which the rays meet the surface and thus change the figure.

This was fun – especially since the wood came out the way I had hoped. Sure, sometimes things won’t work out because, as Dr. Hoadley reminds us in the first sentence of chapter one in his seminal book, Understanding Wood, “wood comes from trees.” Careful strategy in breaking down stock is essential to the success of a woodworking project. This thinking should start even as you are selecting the wood from the supplier.

Category: Wood  | 5 Comments
Author:
• Friday, May 21st, 2010

The chalk line, a tool usually found on a job site, can also be very useful in the woodshop. When breaking down stock, it is good practice to not automatically accept the long edges as they come from the mill. Ripping a new edge may improve the figure pattern or location, and maximize the yield of quality pieces from a board.

A few examples: you can eliminate some “runout” of the annual ring pattern off the edge of a board that will be part of a glued-up table top by relocating the long edge to be closer to parallel with the figure lines and to match the mating board’s edge. A waney edge may be removed to produce a maximum of clear wood and prepare the board for the jointer. A new edge can adjust figure patterns in the wood to coordinate with how the wood will later be shaped.

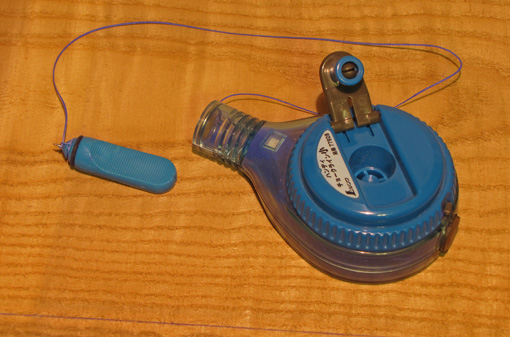
Snapping a chalk line quickly and easily marks a new edge to be ripped. The chalk line produces a much more visible line than does a pencil on rough-surfaced wood as it comes from the mill. It is far easier to handle and has more capacity than a long straightedge. Blue chalk shows up well on light or dark woods.

Though most any chalk line from a hardware store would probably be adequate, I prefer a Shinwa brand tool which uses a thin string and very fine chalk to produce a distinct, fine line. (Tajima also makes what appear to be similar chalk lines.) I insert the push pin at the end of the line into the desired spot on the end grain and then draw out line to the opposite end of the board, adjust the location of the line, hold down the line, reach out, lift the string straight up, and let it snap to produce the line.

I usually use the bandsaw to rip rough lumber, never the table saw where uneven surfaces and unpredictable wood create safety hazards. Sometimes a hand saw or jig saw are more practical for this cut.

Strategically managing the wood in the early breakdown stages is one of the most important factors to producing quality woodwork. The simple chalk line can help.

Category: Tools and Shop  | 3 Comments
Author:
• Tuesday, May 18th, 2010

At this point you very much want the piece to exist, to stand on its own, and so you are driven to build. You want it to “turn out” to be what you envision and hope for. Yet in between the compelling vision and the fulfilling object is the potential chasm of disappointment. This, frankly, evokes some fear.

To your rescue comes the teacher, and ultimately, the teacher is you. Let us consider what the teacher does, followed by an example for each:

  • He charts an effective course. This is the strategic order of the steps of construction. Will you glue up the wall cabinet case before or after building the doors?
  • He points out the critical junctures where you must bear down and get things right. Those last few plane shavings off the drawer sides greatly affect the fit and feel of the drawer.
  • He alerts you to possible pitfalls, many of them sneaky. How will the figure change when a piece is shaped into a convex curve?
  • He keeps a steady perspective on the big picture of the project, maintaining your faith. Are the little errors you’ve made so far going to significantly affect the final piece or should you not worry about them?

The teacher may be another person whose experience you borrow, but in due time (meaning after making your quota of mistakes) you must be your own teacher even as you remain a student. The important thing is to think through the four points listed above. Further exploration of how exactly to avoid that chasm of disappointment in creating a work in wood is a larger topic for another time, but the steps discussed in this series will go a long way to helping your project “turn out” the way you want it to.

As you build, there are still small but important decisions to be made because, as noted in the previous post in this series, drawings cannot fully represent the piece. This is much as a musician uses tools such as phrasing, articulation, and tone color to produce his personal interpretation of written music, staying within the fundamental conception of the composer.

Thus the music, or the woodworking creation, comes alive. You’ve done it, now it is there.

And yes, that is . . . happy woodworking. Best wishes to you as you pursue your ideas!