Archive for ◊ February, 2010 ◊

Author:
• Tuesday, February 23rd, 2010

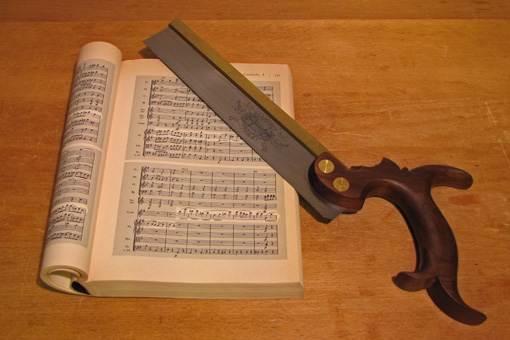
Remember the old joke about the lost tourist in New York City who asks a local, “How do I get to Carnegie Hall?” The reply: “practice, practice . . .”

I am sometimes asked by novice woodworkers how best to acquire and practice skills. Well, aside from exploiting the myriad sources in media and in person, one must get into the shop, practice, and make sawdust. The inquiry truly applies to woodworkers at all general skill levels who are broadening or deepening their involvement in the craft. Woodworking is a vast field and no one is an expert at all phases, so skill acquisition is an ongoing issue for all of us. 

Here is my suggested approach. Let’s say one wants to learn hand cut dovetailing. I would start with isolating the process. Prepare some short pieces of easy-going poplar and cut joints. Ponder and practice layout, sawing to lines, chopping, and so forth. Think about what went wrong, tune your tools, test the limits of accuracy, and experiment. This is like practicing scales in learning a musical instrument. I would not start with a drawer, or even a box, because that creates too many distractions from the core technique.

However, I would soon, very soon, make something with dovetails. It should be a simple, manageable project that might generate some discomfort but not beyond what you feel you can reasonably handle. I would not await perfection in “practicing scales” because there is no such thing, it will be boring, and sooner or later, you have to integrate that core skill into making a bit of music. The music makes the skill meaningful.

So make a little etude piece of woodwork. Simple can be interesting. It will not end up on the back cover of Fine Woodworking. So what. It will contain some mistakes and you won’t be able to correct all of them. So what. It will, however, be yours and will bring you some quiet joy.

Forging ahead, try a small drawer. Now your dovetail “scales” and “etude” experiences will be used to make another box, but this time it will have to fit neatly into a case, which itself will have to be properly constructed if there is to be any chance at all of a good fit. You are integrating skills and they are thus becoming more meaningful.

You will be subtly adapting your dovetail skills to suit a more complex construction. Your designs, aesthetic desires, and the functional requirements of the piece beckon for further refinement of the core skill. Thus you are developing beyond a technician to a craftsman. The music’s beauty is the ultimate impetus to the dance of the fingers on the strings. This is fine woodworking that embraces technique but with a purpose beyond technique: to create a fulfilling piece of personal woodwork.

I think I am a good self-teacher, but at various times I’ve made mistakes at all of these stages. I’ve dwelled too long on isolated technique, overreached in attempting projects I wasn’t ready for, and inhibited my design ideas from fear of breaking new technical ground. That’s the other thing about practicing and getting good at woodworking, you will never stop making mistakes. You will, however, understand them and know what to do despite them.

Happy woodworking indeed!

Category: Ideas  | 9 Comments
Author:
• Thursday, February 18th, 2010

Here’s more. Looking over my shoulder . . .

Three for the brain:

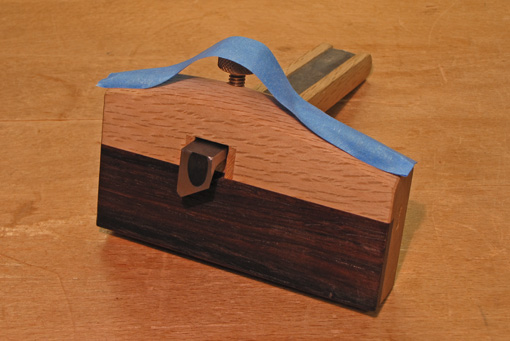
1. Blue tape reminder not to move a gauge setting. I often like to preserve the setting on a layout gauge until I must change it for another purpose, or at least until I’m positive I won’t need it again. This avoids clearing the setting, only to later find that it is needed for one more piece, such as a remake of a part that I goofed up.

2. Sharpening “recipe” written for each tool. Each tool has its own characteristics and purposes from which evolve the best grinding and honing angles. Experience with a tool may indicate changes in the optimal angles. I keep a recipe sheet of angles for my tools at my sharpening station to save time and confusion.

3. Date glues and finishes when they arrive in the shop. I do this routinely, with a Sharpie marker, to avoid guessing the age of a product when I later go to use it and wonder if its shelf life is over.

Three for the body:

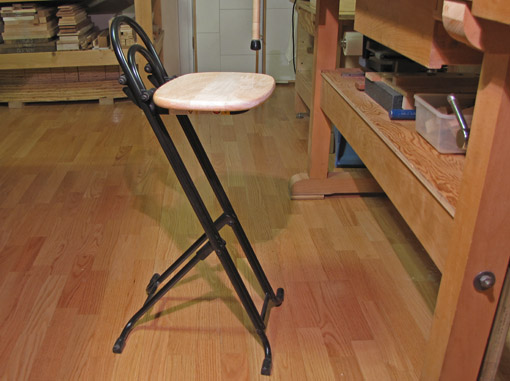
4. Adjustable-height chair/stool. I’m fine being upright if my feet are moving but I don’t like standing for long periods. This compact folding chair gives me relief. I don’t do most woodworking sitting down but there is no need to use my standing endurance for things like chopping dovetails or cleaning pitch from a router bit. The adjustable height comes in handy more often than I would have guessed.

5. Shoes for the shop. Sturdy shoes, such as my low-cut hiking shoes, give me more standing stamina and a better grip on the floor for tasks such as planing, especially as the floor accumulates sawdust and shavings. I run in running shoes but avoid woodworking in them.

6. Wood floor! Many years in my old shop with a concrete floor made me hunger for a wood floor when I set up my current shop seven years ago. The concrete was tiring and not kind to dropped tools. I installed this “floating” wood floor over a concrete slab. After ensuring there was no moisture problem, I leveled the concrete with compound, laid a polyethylene moisture barrier, a thin foam pad, and then the wide-strip, pre-finished red oak flooring. It is not nailed or glued down. There have been no problems rolling a 600 pound table saw and other heavy machinery. A less glossy finish would have been better, so I am considering dulling this floor a bit by sanding it.

Three for the wood:

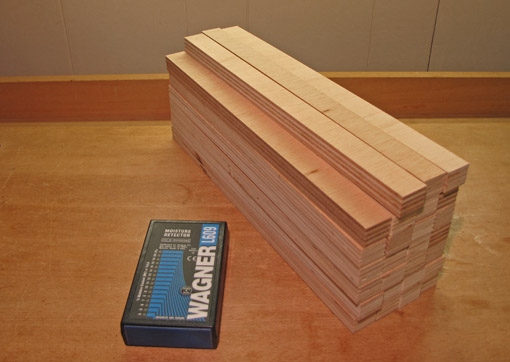
7. Supply of sticks readily available for storing boards. Newly purchased wood is stickered to allow good air flow so its moisture content can equilibrate to the shop environment. It is also important is to similarly store a part that has been dressed for a project rather than sitting it on a pile or bench leaving only one side exposed.

8. Date and note the moisture content of wood as soon as it arrives in the shop. This allows me to monitor changes and avoid guessing when the wood has equilibrated.

9. Consider end coating new wood. If the moisture content of the newly arrived wood is very different from the anticipated equilibrium MC, I coat the end grain with a wax emulsion. This prevents a too-rapid change in MC at the ends of the boards via the end grain pores, and thus possible checking.

Good luck with your current or future projects!

Category: Tools and Shop  | Tags:  | One Comment
Author:
• Monday, February 15th, 2010

These are simple shop set ups and work habits that, while not original or profound, nevertheless make a real difference in helping me get things done in the shop. If a fellow woodworker was observing my shop and work habits, he might remark, “I notice that your shop has . . .” or “I notice that you . . .” So, I’m passing along these little helpers with the hope that they will be helpful to you too.

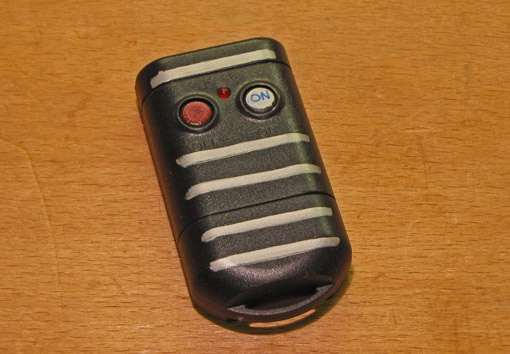
1. Remote switch for the dust collector. I can operate the dust collector without leaving whatever machine I’m using. In my small shop, the low-budget 610 CFM dust collector’s hose goes to each machine as it is used. The remote switch, purchased at a local Ace Hardware, just plugs into the wall outlet and easily handles the 120V/8.0A motor.

2. Autostart shop vac. I would not want to use the random orbit sander and the oscillating spindle/belt sander without this type of vacuum. The tool plugs into an outlet on the vacuum which cycles on and off when operating the tool’s power switch. There are many brands and models of shop vacs with this feature. I find my old model Fein Turbo II to be quiet and efficient.

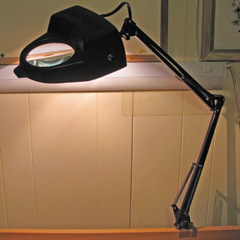
3. Magnifier on workbench lamp. This is handy to have readily available for checking for a nick in a router bit, or a million other tiny things. Various models are available in art supply stores, at Rockler, and other sources.

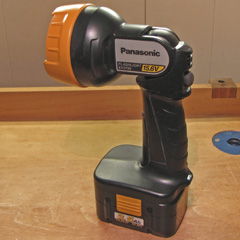
4. Rechargeable light. I use this all over the shop for many jobs where I want a more directed light, such as at the bandsaw, or to create a low, glancing light, such as for evaluating the surface quality of wood while using a smoothing plane.


5. My large hand tool cabinet is two steps to the right of my workbench. I reach for tools quickly, without breaking the flow of working. Since I am right handed, the cabinet feels naturally accessible off to my right.

6. One-reach tool storage. As much as possible, I like to store tools that are directly accessible. I don’t like the feeling of hesitation or inhibition that seems to arise when a tool must be unearthed by moving other gear.

7. Wear an apron. Somehow, putting on my apron gets me oriented for work. It seems to tell me that now it’s time to get serious and get work done. I feel more free about wiping my hands on the apron than I would on my clothes, and I freely lean into dusty work. I’ve found the Lee Valley canvas apron to be just right.

8. Separate planing from sanding, and metal working from woodworking. Sharp tool edges are vulnerable to sanding grit. I also don’t like the idea of hacksaw “dust” and metal filings getting into the grain of my workbench or work pieces. So I separate these processes with a good clean up with the shop vac.

Simple stuff that helps. Happy woodworking.

Category: Tools and Shop  | Tags:  | 7 Comments
Author:
• Sunday, February 07th, 2010

Rasps seem to be under-appreciated in the woodworking world. They have a somewhat medieval appearance, lacking the outward elegance of a fine spokeshave. Some of us have had unpleasant experiences with cheap rasps that may have lead to the erroneous conclusion that this genre of tool is good for nothing more than hacking at the corners of a home DIY plywood project.

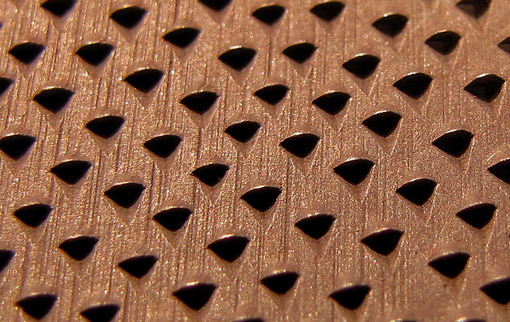
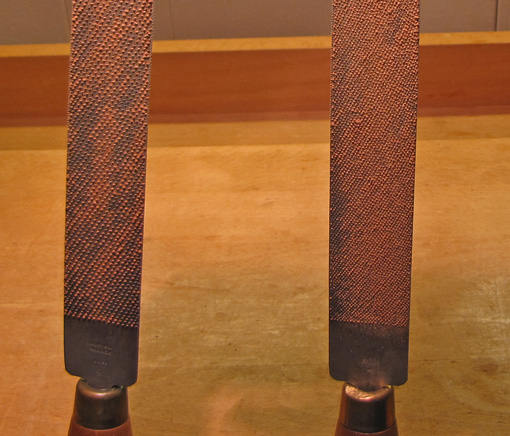
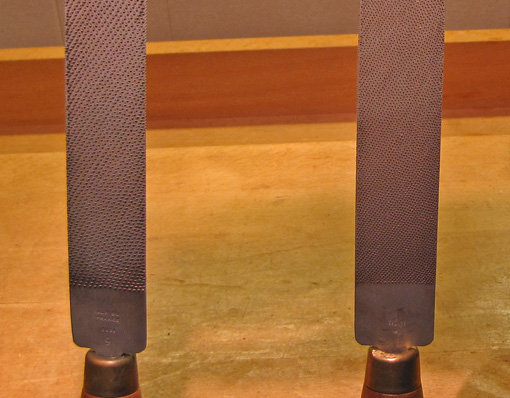
Au contraire, the hand cut rasps made in France by Michel Auriou and his small group of highly skilled craftsmen are magnificent tools capable of bringing the finest sensitivity to shaping wood. They must, of course, be well cared for, and this includes cleaning. The cove-like teeth will naturally clog as have the #9 and #13 grain rasps (left and right, below) while shaping mahogany. There are two stages to cleaning them. 

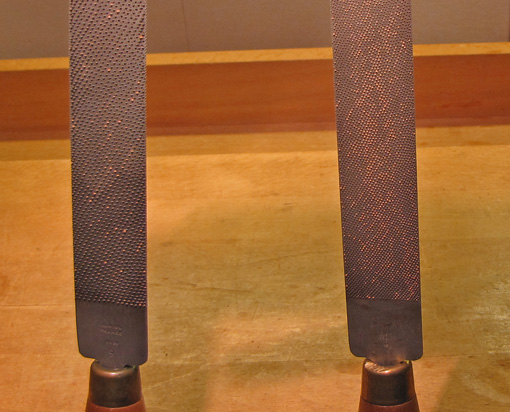
The Tools for Working Wood catalog transmits Michel’s advice to clean the rasps with a natural bristle brush since any metal brush, even brass, will eventually dull the teeth. I use and like the small natural hog brush sold by TFWW. I angle the bristles of this little brush toward the coves of the teeth and use vigorous circular and side-to-side motions to get the rasps adequately clean during a work session, as seen below. However, this does not completely remove the embedded wood, especially in the finer rasps. I do not want to repeatedly store them in this condition since eventually more teeth will become clogged, reducing the effectiveness of the tool. 

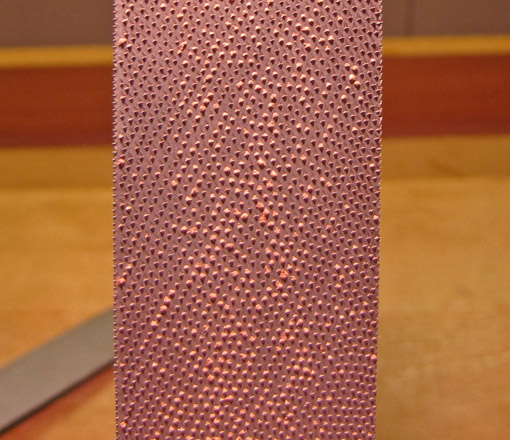
 A close up view of the #13: 

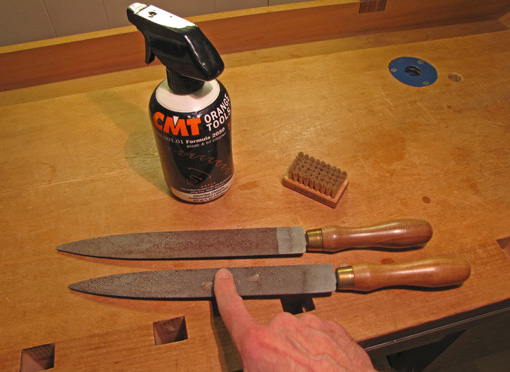
Here’s my solution. I get several drops of CMT 2050 (widely available at woodworking suppliers) on the rasp, spread it with my finger, and half a minute later brush it with the hog bristle brush. Voila! The previously stubborn embedded wood easily disappears and, after patting them dry as necessary, the clean rasps (bottom photo) are ready to be put away and await their next duties in perfectly ready shape.


CMT 2050 is a non-toxic solution with a pH of 9.5-10.5 (MSDS) and rust preventive properties. No rinsing is required. After using this method on Auriou and Nicholson rasps for at least a year, I have not found any rusting or undue dulling. Since I would not want to suggest to my readers a method that might do any harm to these valuable tools, I checked with Michel Auriou to see if this method was safe for his rasps. He graciously answered my inquiry and stated “I think there is no risk to the use of that product.” Knowing the excellence of his tools and having had the awe-inspiring experience of watching Michel stitch (cut) the teeth on a rasp at a Lie-Nielsen Hand Tool Event a few years ago, I will take the advice of this superb craftsman.

Category: Tools and Shop  | 7 Comments