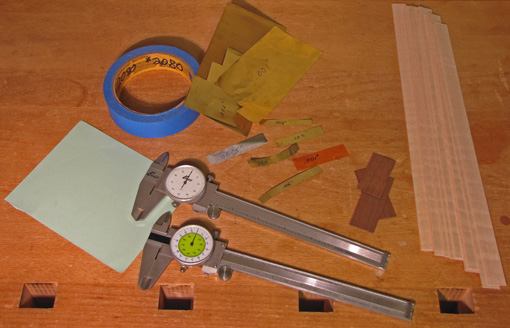
What if there was a way to adjust your work setups in controlled increments of a few thousandths of a inch? And what if this technology would cost next to nothing? Consider the underappreciated shim.
There has been a proliferation of adjusting gadgetry in the woodworking market over the past decade or so. Rip fences, miter gauges, router lifts, thickness planers, and so forth, can be souped up with micrometer adjusters and digital readouts that seem to promise precision in the end product. These devices might add convenience and accuracy to woodworking but only if they are used thoughtfully. The craftsman must be cognizant of the different levels of accuracy required for various tasks and, just as important, of the consequences of inaccuracy on each side of a target. If used mindlessly, these gadgets can easily make a woodworker lose sight of the logic of the construction process.
I usually prefer simpler, more intuitive methods that often involve using shims. For example, if a groove cut on the router table needs to be bit wider, a strip of tape applied to the edge of the workpiece or the fence will widen the groove on a second pass by .004″. When I made the fence for the router table, despite doing “everything right,” it required a piece of .002″ plastic shim at each end to make it straight against the Starrett, and some blue tape on the bottom to make it square to the table. It’s just as good as if it came out perfect on the first try.
This is not cheating! This is “microadjusting”.
Shims can also be used to “measure” intentional gaps, such as in fitting a door or drawer. Wood shims are non-marring and can be made to whatever thicknesses you want, which allows you to make and confirm these small measurements according to your artful eye’s desire.
So maybe you made the hinge mortise a bit too deep; you know what to do. Sure, we try to be accurate but we work in the real world and it helps to have a Plan B.
I keep on hand in the shop all sorts of shims, including brass sheets, a book of plastic shim stock, a leaf gauge set, blue tape, paper, and, of course, slices of wood. When, by chance, some good candidates for shims come off the table saw or bandsaw, I toss them in my box o’ blocks. Sometimes I take out dial calipers and measure and mark them.
Remember: it’s OK, it’s microadjusting.


Hi Rob,
Thanks for the link to shim stock. I have looked in a few places locally and couldn’t locate what I wanted. This is great.
Also, compliments to your fine exhibit in Northampton. It was a pleasure talking with you.
Tico
Hey thanks Tico. That was fun to meet and talk, and also to see your excellent portfolio.
Rob
Rob,
Absolutely! I find many uses for both tape and post-it notes in my shop that don’t involve using them for either their adhesive or note taking qualities!
Depending on the application Aluminum foil can be another source of shim material, especially for machinery. In fact, I know I have some in between my cast iron table saw wings and the main table in order to better align the wings.
–Mark
The Craftsman’s Path
Hi Rob,
Thanks for sharing some of the methods that people can use to get to there from here. Feeler gages and gage blocks are other methods for precision adjustments. I find that when working with joinery, the ability to be on target is important, and leaving room for glue is too.
Dial Calipers are super handy for measuring all sorts of things. I have block of MDF and baltic birch as well as some other materials I commonly use for gaging set ups. I have a 6mm flat washer laying in my magnetic parts tray on my drill press that serves as a 0.030 gage when I need it to. 1-2-3 blocks are commonly in use around my shop as well. These methods offer no bump and fudge. This is total repeatability.
I have written about accuracy quite extensively. Using these methods work for me and have for years. I am glad to see that you advocate the use of them also. Thanks for sharing!
Bests,
Rob
Mark and Rob,
Thanks for the tips. And for the many more on your sites.
Rob