Archive for ◊ August, 2009 ◊

Author:
• Wednesday, August 26th, 2009

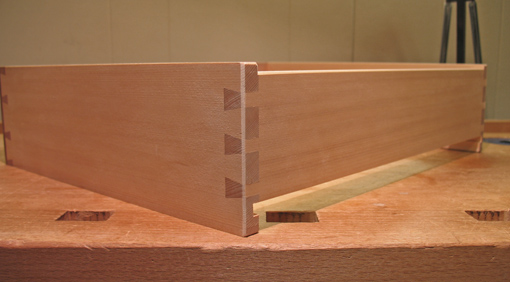
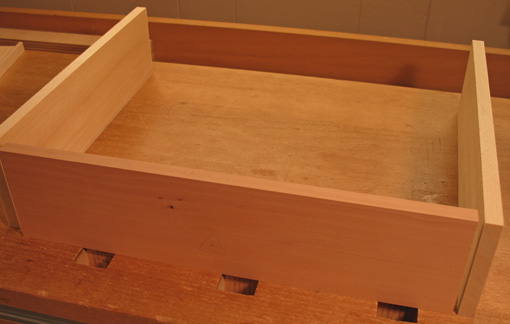
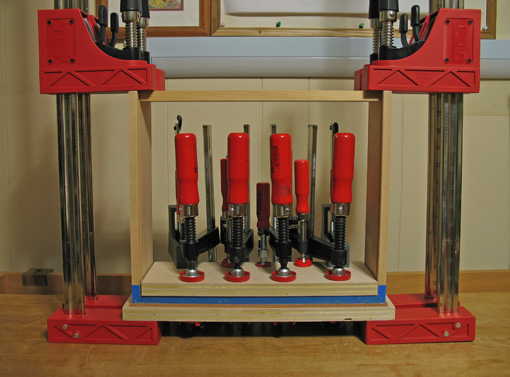
Glue up in this method goes easily. No special clamping blocks are required; pressure can be applied directly to the sides with parallel jaw clamps because the surfaces of the tails are proud of the end grain of the pins. Blue masking tape applied to the inside surfaces will eliminate the unpleasant job of cleaning up glue squeeze out in confined areas. Use pinch rods to check the diagonals to ensure the drawer will be square.

After the glued assembly has cured, it’s time for the cool part. Plane the sides just down to the end grain of the front and back pins. This will allow the drawer to barely enter the housing, since the original fits of the front and, secondarily, the back, have remained unaltered during subsequent construction. A jig that is described in a previous post will greatly facilitate this planing.
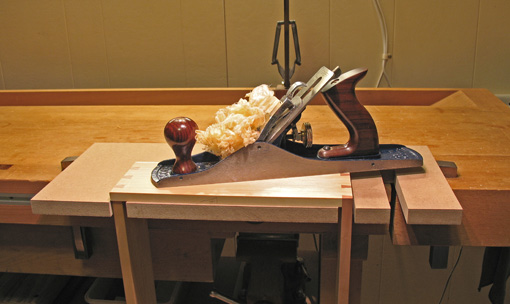
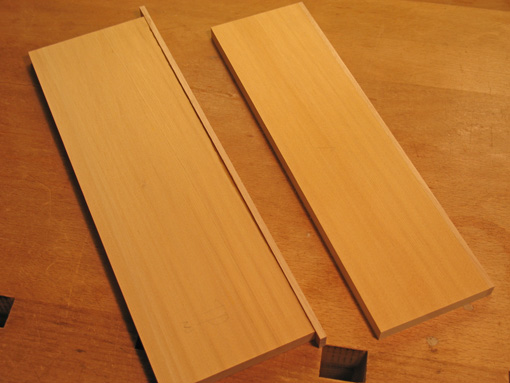
At this point, I laminated the slightly oversized, slip-matched false fronts using plywood cauls, Unibond 800 glue, and more clamps than I probably needed. After drying, I sawed and planed them flush to the original fronts. Note again that the drawer making method described here will work equally well with regular fronts with lapped or through dovetails.
Check, and trim as needed, to ensure that the drawer lies flat, without twist. Now test the drawer to its opening, conservatively taking light shavings from the sides to get a sweet fit. Swish. It should fit neither like the glove on OJ, nor like your big brother’s boots. Consider the season in which you’re working, and remember that a few thin shavings make a difference. Experience has taught me that the sides do expand ever so slightly in humid weather, enough to bind a drawer that fit like a Ferrari piston in the dry season.

Trim the tops of the front and sides to create adequate clearance for seasonal change, allowing for the most humid time of the year. Keep the top of the front parallel with the top of the housing. Remember that, all else being equal, the gap at the top of a 6 inch high drawer will need to be about twice that of one 3 inches high. I use the Lee Valley Wood Movement Reference Guide, tempered with experience, to avoid stuck drawers during the dog days of summer.

Up next: down to the bottoms.

Category: Techniques  | Tags:  | 5 Comments
Author:
• Friday, August 21st, 2009

A full discussion of dovetailing is beyond the scope of this series, but here are several tips pertaining to drawer making.

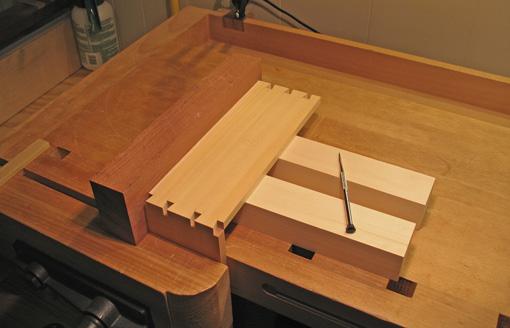
Much of the success of dovetailing depends on accurately transferring the outline of the tails to the pin board (or vice-versa, if that is your preference). The bottom edges served as references when fitting the front and shooting the sides square, and continue that role as a heavy, flat board, squared to the front piece, aligns the sides to the front while marking for the pins.

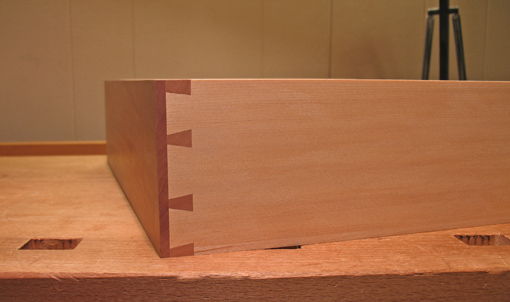
Angles for short dovetails should be steeper than usual to improve their appearance and possibly their strength. The tails for these drawers are approximately 5:1 slopes. My usual ratio for medium to larger joints in hardwoods is 7:1.

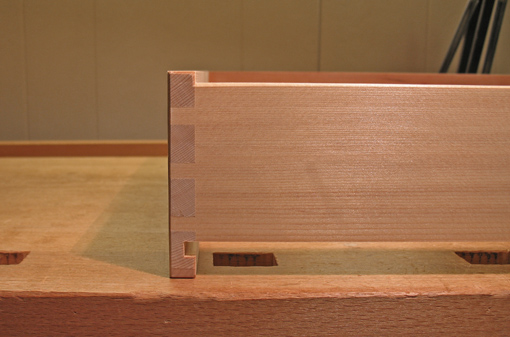
Layout the joints so the groove for the bottom will be fully within the lowest tail at the front. At the back end, there is a large tail at the bottom which also fully contains the groove, while a tail at the top allows for a neat chamfer.

The grooves to fit the drawer bottom are cut after dry fitting the front and sides and ensuring that the reference edges (the bottom edges) are aligned. For these drawers, I made the grooves 1/4″ wide, barely 3/16″ deep, and 3/8″ away from the edges. Keep the grooves sufficiently shallow and away from the edges to avoid weakening the sides, though not so shallow as to allow the bottom to slip out if it distorts a bit.

Note that the bottom edge of the back piece does not end with a customary squared pin. The little shoulder below the lowest pin allows the bottom of that pin to have an angled surface which has contact through the full depth of the side piece. A squared pin lacks the added strength of the angle, and contacts the side piece only in the thickness remaining lateral to the groove depth.

I prepare the back piece slightly wide at its bottom, cut the joints, loosely dry-assemble the joints, then mark the back piece so I can plane it, after disassembly, to align with the top of the grooves. This method separates the process of dovetailing from aligning the bottom edge of the back with the groove, affording more control in workmanship, as well as making stronger joints.

Next: adding the false front and fitting the drawer. Stay with me, we’re getting to the cool part.

Author:
• Saturday, August 15th, 2009

For the sides and back, it is best to use straight-grained quartersawn stock for the sake of dimensional stability. This wood will usually have a plain appearance and offer a contrast to the drawer front. Light-colored species are typical, such as hard maple or yellow poplar.

The thickness of the sides varies according to the size of the drawer and the load it is expected to carry. I prefer sides to be a bit chunkier than those favored by many craftsmen. For the small drawers in this project, I made the sides 7/16 inch thick. The backs are a fat 9/16 inch, not much less than the front, to allow for stronger joints at the back corners and to create a more balanced drawer as it is withdrawn.

It is helpful to select parts so the outer surfaces of the sides can be planed front to back after assembly. The height of each side is ripped to that of the drawer front where it will be joined. I set the table saw fence using the front as a gauge. The length of the drawer should allow for safe clearance at the back of the case, considering any anticipated shrinkage of the case during the dry season, as well as for a small projection of the bottom past the back of the drawer. The length of the back piece exactly equals that of the precisely-made front, maybe plus a hair, but never shorter.

Triangle marks are invaluable to keep parts organized. A number inside the triangle section is helpful when constructing multiple drawers.

Because I used Port Orford cedar, a rather soft wood, in this project, I was concerned that the bearing surfaces would wear over time. If the sides of a drawer are too thin or too soft, drawer slips, a traditional solution, effectively widen the bearing surface as well as prevent the groove for the bottom from weakening a thin side.

In this project, I wanted to try a different, perhaps cleaner-looking solution, so I glued 3/16 thick strips of hard maple to the bottom edges of the drawer sides and planed them flush. In retrospect, I can’t say this was any easier than making drawer slips, but it worked out well.

Join the sides to the front and back using whatever dovetailing method you prefer. The bottom edges are the references. Here’s a key point: set your cutting gauge to produce a pin depth that is slightly less than the thickness of the sides. Don’t go crazy measuring these tiny amounts; they’re not critical. Call it less than a 32nd. Later, after assembly, the sides therefore will be proud of the front and back. They will be planed flush to the end grain of the pins as you reap your reward for the care you invested in fitting the front to the case. Beyond that, only minimal, judicious planing, if any, may be required to achieve the sweet fit that you seek.

Next: several pointers on dovetailing as it pertains to drawers, and a different method for dovetailing the back to the sides.

Category: Techniques  | Tags:  | 5 Comments
Author:
• Monday, August 10th, 2009

The first, most critical step in making this type of drawer is sizing the front. The drawers in this project are about 14 inches wide, 3-4 inches high, and 12 inches deep. For the fronts, stock is face jointed and thicknessed to about ½ inch. “False fronts” will be applied later to bring the final thickness to about 11/16 inch. (The methods described here are applicable whether false fronts or customary half-blind dovetails are used.) Each piece is ripped to a hair less than the height of its housing and crosscut to slightly larger, about 1/32 inch, than the housing width.

Unplug the machinery. The following hand planing is best done with a shooting board. [Here is my shooting board and how I use it for end grain on any size board and for long grain edges on small boards.]

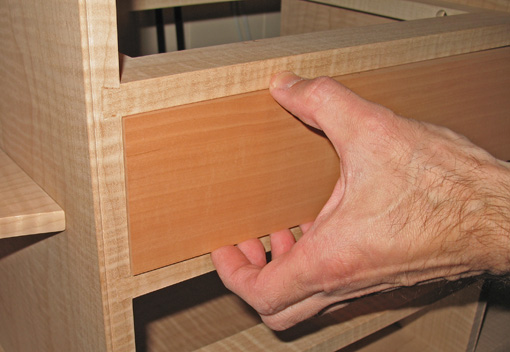
First, the bottom reference edge of the drawer front is planed straight and square and identified with a mark. Then the left end is shot to match the left side of the opening. Progress is tested by offering up the piece to the housing, resting it on its bottom, and checking the left edge. (Photo, above.)

Now it’s time to get very careful. This step is probably the most important point in your drawer’s success. Bit by bit, the right end of the drawer front is shot so it just barely makes it into the width of the housing. It should be snug! 

Finally, the top edge is planed so it comfortably fits in the height of the opening and is parallel to the upper edge of the opening. By keeping this gap small, 1/32-1/64 inch, it is easy to detect any deviation from parallel by eye. Note that the top and bottom edges of the drawer front are not necessarily exactly parallel to each other at this point because the piece has been fit directly to its opening.

This is incremental work. It is nice if the drawer opening is a perfect rectangle but this is not assumed. Any deviations are accounted for by fitting each drawer front to match its opening. With this method, errors do not compound as the project progresses. The drawer front prepared in this way is now the reference for constructing the entire drawer.

I do not make the height a snug fit as is sometimes taught. I believe that is a waste of effort since the finished solid wood drawer must not fit tight in height because it will bind when the humidity rises. The “air tight” drawer, in my opinion, makes no sense; it won’t work. I also do not shoot the front to produce tapered edges for fitting in its opening, because I want to work with square reference edges when I cut the joinery.

Once you have thoughtfully prepared the case and fit the drawer front accurately, there is not much left from here on that is at high risk of going wrong, as long as you are patient.

Next: making and joining the sides and back.

Category: Techniques  | Tags:  | 6 Comments
Author:
• Sunday, August 02nd, 2009

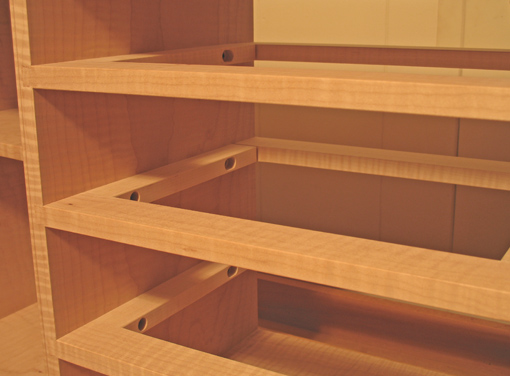
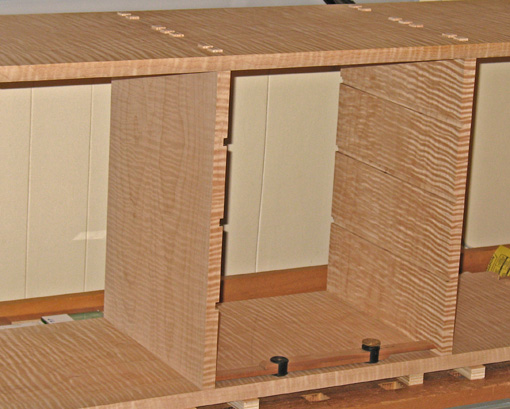
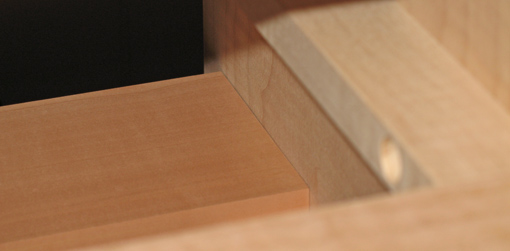
Thoughtful planning and careful workmanship in constructing the case that will house the drawers will pay off later. The web frame construction in this solid wood design, only one of many ways to create a drawer case, will serve to illustrate some key principles. In this project, each runner is set in a dado in the vertical partition which forms the side of the drawer housing. A tenon at the front of each runner is glued into a mortise in the front divider. The runner is screwed to the partition near the front and is slot-screwed near its back end. The rear end of the runner has a tenon which is fitted without glue into a mortise in the back divider. This arrangement allows the case sides to move unrestrictedly with seasonal moisture content changes.

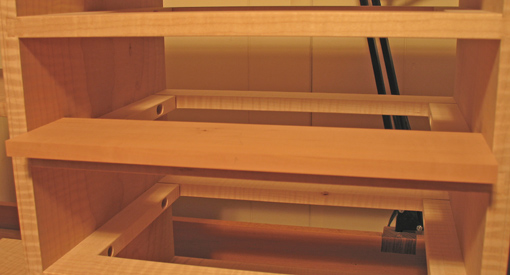
Whatever the form of case construction there are some important points to monitor. The width of the drawer housing should slightly widen toward the back of the case. This allows the drawer to be pushed in and pulled out smoothly without binding. Ideally, as the drawer is pulled out almost to its limit, the sides will gently tighten against the housing. It is futile to measure this tiny widening with a tape or rule. Instead, cut a piece of scrap or use a pinch rod setting so it just fits the width (or gently binds) at the front of the housing. Then slide it toward the back where you want it to “release” and slide freely. The clearance is perhaps 1/64 inch; I don’t measure it. At least ensure that the housing does not narrow toward the back.

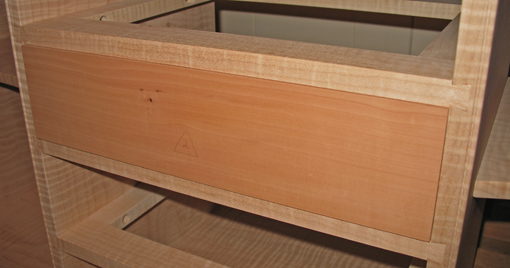
In the photos below, getting a bit ahead of ourselves here, I’m showing how a fitted drawer front laid flat is snug against the sides at the front but has clearance at the rear of the case. (Fitting the front is covered later in the series.)

It is easier than it might seem to achieve this sort of tolerance. For this project, I cut the joints, then dry fitted the vertical partitions and performed the testing process as described above. Then I disassembled the case and simply hand planed away some thickness on the inside surfaces of the partitions according to the indications of the testing. I reassembled the case and retested. After the case refinement was completed, I ran the dadoes and constructed the web frames.

A few more things require attention. The surface on which the drawer rides should be free of twist. This is mainly controlled by cutting the dadoes for the runners symmetrically in each partition. The front to back consistency of the height of the housing is less important but the height should not decrease toward the back. The front opening ideally should have four 90 degree corners, but don’t worry, small errors can be compensated when sizing the drawer front.

These same general principles can be applied to fitting solid wood drawers into other case designs, such as frame and panel, plywood, and veneered constructions, though the planning steps required to implement them will be different. For this series, I will stay focused on one example of a solid wood project.

Next: how fitting the drawer front is the key step.

Category: Techniques  | Tags:  | 8 Comments