Archive for ◊ February, 2009 ◊

Author:
• Tuesday, February 24th, 2009

Some readers of this blog may be relatively new to woodworking, are thinking of getting started in the craft, or perhaps are seasoned craftsmen temporarily stalled in their work. In particular, I have in mind those people who have a nagging urge to create something but have not gotten the ball rolling quite yet. One or another thing gets in the way (I understand!), yet there is a real sense that pursuing this wonderful art would bring enjoyment and fulfillment. You hear the promise of meaningfulness.

Some of the most common impediments thwarting otherwise eager woodworkers are the complexity of what seems an arcane science, aiming for perfection, and the feeling that the work is not important, especially if grandeur is lacking. Yet all these are surmountable. 

Recently, I had the pleasure to talk and share ideas with many woodworkers, some trying to establish traction in their woodworking. About the same time, a relative had one of those unforseen medical experiences that remind us all that life is fragile and there are no guarantees. From this springs my simple suggestion: get the wood, get the tools, and build it. Just build it! Build it so it has meaning for you. Drop me a comment or email if I can take a minute to help clear the way for you.

It’s only the wood that grows on trees. Happy woodworking.

Category: Ideas  | 5 Comments
Author:
• Sunday, February 15th, 2009

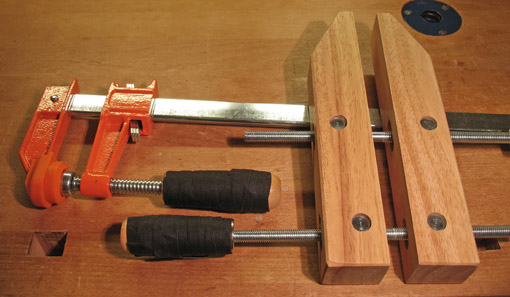
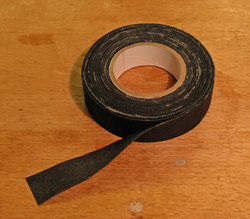
The handles on most clamps are round in cross section and quite smooth. Shiny things may sell well, but when it comes time to bear down on clamp screws, slippery handles make it difficult to transmit strength. Wrapping the handles with cloth friction tape is an easy and effective solution.

The tape is made of cotton cloth impregnated with butyl rubber making it tacky on both sides, though it does not tend to leave adhesive residue on tools or hands. It is quick work to wrap the handles in a simple spiral pattern as the tape adheres to itself and to the handle. The enhanced grip will make you feel like you’re Popeye after he downs a can of spinach. (For younger readers, that means like a ball player on ‘roids.)

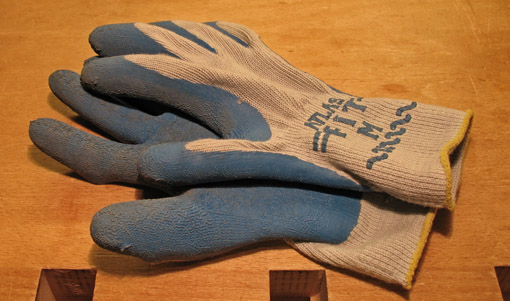
Some handles are impractical or unnecessary to wrap, such as those on my Jet parallel bar clamps. When I want to torque up those, I use rubber palm gloves to make the job faster and easier. These gloves are also a big help when pulling horizontally stored boards at the wood dealer.

I bought the friction tape, $2.50 for a 30 foot roll, and the gloves, about $7.50, at my local Ace Hardware, though both are widely available.

Category: Tools and Shop  | Comments off
Author:
• Thursday, February 12th, 2009
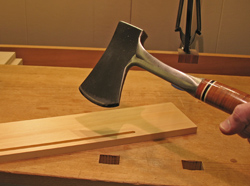
I make ‘em. You make ‘em. Some people say we don’t learn much unless we make mistakes. Whether thus a necessary evil or simply an omnipresent nuisance, I feel mistakes do not get enough attention. We generally try to correct and forget them. Here I would like to give them some thought. After all, it surely won’t be long before I’m again dealing with a live one on the line.

So how do they happen? Sometimes it is simply having the wrong plan for the intended result. A poorly designed joint, though accurately cut, produces a weak structure. In making a bent lamination, maybe the plies are too thick, the wrong type of glue is applied, and the resulting curved rail is not what you had hoped for. Study and practice.

Sometimes it’s just a slip up. Perhaps I lost concentration and sawed past an end line despite obviously being fully capable of stopping at the correct spot. Pay attention and be patient.

There is, however, a sneakier type of mistake that accounts for my most frustrating experiences in the shop. These develop from a subtle loss of control of the process, an insidious evolution.

For example, I’m planing a surface and gradually feel slightly more resistance in the cut signaling early dullness of the blade. The task is almost done but I wonder a little too long if I can get by without resharpening, then hit a grain reversal, and #*@&!, a tearout. I plane further to erase the tearout, then plane surrounding areas to compensate, and now I’ve gone a bit too far and lost an accurate fit for this piece, which mates with another part, which houses another assembly, and so forth. I am no longer working in peace.

What happened? A barrier developed between intention and execution. There was a loss of the working rhythm and flow that is so important to success. When a craftsman senses that subtle break in rhythm, a true mistake may be around the corner.

However, the first little error is usually not as important as it may first seem. (“Put the ax down and move away from the bench.”) For example, maybe that tearout is in a place where it will be unnoticed and is best left alone. I must remind myself to stop and think before engineering a correction. It is usually the loss of flow, less than the error itself, that raises the unnerving feeling. Then I know it is time to step back, look at the big picture, refocus, then get back in the game. This approach should prevent a major Mistake.

I believe this is more of an issue with one of a kind projects or innovative designs, especially when using unfamiliar or innovative techniques. Since you’ve not been down the road before, you’re skeptical of the map to success.

It is not easy to craft a project that turns out to fulfill your hope. The creative vision must be carried through with a controlled flow of work that takes place in many interdependent steps. (By the way, don’t fall prey to “perfection”, discussed in an earlier post.)

One thing is for sure, when the work is flowing, you know it. Life is good in the shop and real mistakes seem to be miles away. Be careful, but enjoy the ride. 

Happy woodworking!

Category: Ideas  | 4 Comments
Author:
• Wednesday, February 04th, 2009

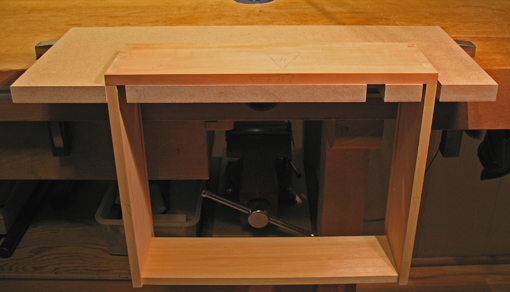
It is almost impossible to do good woodworking if the work piece is not properly held. Securing partly assembled work poses more challenges; drawers are a good example. After the drawer is glued up but before the bottom is installed, the joints must be cleaned up and the assembly incrementally fitted to its opening in the case.

Some drawers can be maneuvered into some workbench front vises, perhaps gaining additional support with a board. However, I find it is awkward to get the drawer in and out of the vise. Furthermore, to grip the back piece in the vise, as when planing the sides toward the rear of the drawer, a shim is required since the back is shorter than the front

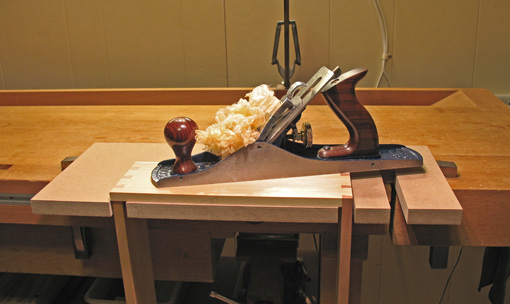
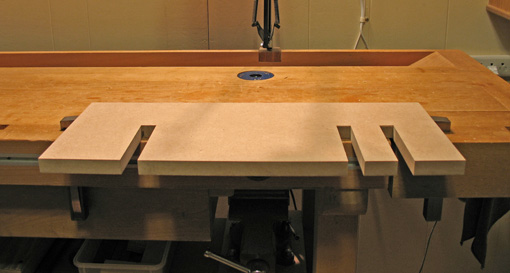
I use the drawer board pictured here, hardly original, made in a few minutes. The notches allow the drawer to slip in and rest on its front, back, or side with nearly 100% support of the surface being planed. The leading face of the drawer butts against the stop while the front edge of the bench provides lateral control. The work is repositioned quickly and easily, an important feature for me. A drawer board without notches would catch the drawer on a trailing surface which doesn’t give me a good feel for planing, and the front and back are not afforded the same length of support as the sides.

If I had a bigger piece of MDF handy, I might have made the board wide enough to be clamped at the back of the bench, but the metal bench dogs adequately hold this version. In this situation, I wish I had a Bob Lang style bench with a space in the middle of the top.

By the way, planing a drawer to fit the case rates, for me, as one of the fine quality experiences in woodworking. A simple jig like this makes the work even more of a pleasure.

I like Einstein’s saying, “Everything should be made as simple as possible, but no simpler.”